Harbor Freight Tools 96167 Parts list manual

AUTOMATIC BREAD MAKER
Model
96167
ASSEMBLY AND OPERATION INSTRUCTIONS
Due to continuing improvements, actual product may differ slightly from the product described herein.
®
3491 Mission Oaks Blvd., Camarillo, CA 93011
Visit our website at: http://www.harborfreight.com
TO PREVENT SERIOUS INJURY, READ AND UNDERSTAND
ALL WARNINGS AND INSTRUCTIONS BEFORE USE.
Copyright©2007 by Harbor Freight Tools®. All rights reserved. No portion of this
manual or any artwork contained herein may be reproduced in any shape or form
without the express written consent of Harbor Freight Tools.
For technical questions or replacement parts, please call 1-800-444-3353.

SKU 96167 For technical questions, please call 1-800-444-3353. Page 2
PRODUCT SPECIFICATIONS
Electrical Requirements 120 V~, 60 Hz
Construction Housing: Cream colored injection molded thermoplastic.
Cavity lip: Black injection molded thermoplastic.
Internal walls and external face plates: Stamped and
formed stainless sheet steel with natural finish.
Viewing window: Clear glass.
Indicator lights: Green and red L.E.D.s
Bread pan: Stamped and formed sheet aluminum with
black nonstick coating, formed stainless steel rod handle,
and blade shaft, and cast aluminum kneading blade with
black nonstick coating.
Feet: Black rubber feet with textured finish.
Features Automatic bread making with five settings.
Large viewing window.
Removable lid.
Power/function indicator lights.
1 lb. capacity.
Recessed side handles.
Measuring cup included
Baking temperature range 225°F max. 190°F ~ 225°F cycle. (Not adjustable).
Overall Dimensions 10-13/16” L x 9-5/8” W x 11-7/16” H
Weight 8.8 Pounds
HOUSEHOLD USE ONLY
SAVE THIS MANUAL
You will need this manual for the safety warnings and precautions, assembly, oper-
ating, inspection, maintenance and cleaning procedures, parts list and assembly diagram.
Keep your invoice with this manual. Write the invoice number on the inside of the front
cover. Write the product’s serial number in the back of the manual near the assembly dia-
gram, or write month and year of purchase if product has no number. Keep this manual
and invoice in a safe and dry place for future reference.
IMPORTANT SAFEGUARDS
READ AND UNDERSTAND ALL INSTRUCTIONS
Do not touch hot surfaces. Use handles, knobs or oven mittens.
To protect against electrical shock do not immerse cord, plugs, or the main
unit in water or other liquid. Only the Bread Pan, Kneading Blade, and Measur-
ing Cup should be immersed for cleaning.
Thoroughly clean and dry the Bread Pan, Kneading Blade and Measuring Cup
prior to first use and before every subsequent use.
1.
2.
3.

SKU 96167 For technical questions, please call 1-800-444-3353. Page 3
Close supervision is necessary when any appliance is used by or near chil-
dren. Never allow children to play with the Bread Maker.
Do not operate this appliance with a damaged cord or plug, or if it has been
dropped or damaged. Return appliance to the nearest authorized service facility
for examination, repair, or adjustment.
Do not use outdoors.
Do not let cord hang over edge of table or counter, or touch hot surfaces.
Do not place on or near a hot gas or electric burner, or in a heated oven.
Do not use appliance for other than intended use.
Maintain labels and nameplates on the appliance. These carry important infor-
mation. If unreadable or missing, contact Harbor Freight Tools for a replacement.
Use personal safety devices, they reduce the risk for injury. Always wear oven
mittens when handling hot cookware.
Maintain a safe working environment. Keep the work area well lit and uncluttered.
Make sure there is adequate surrounding workspace.
Do not use metal utensils or metal scouring pads on the appliance. They may
cause fire and increase the risk of electric shock.
Do not operate the appliance near draperies, curtains, or walls. These flam-
mable materials may catch fire from this electric appliance. Make sure there is at
least 2 inches of clearance between the Bread Maker and surrounding objects.
Always unplug the appliance from the electrical outlet and allow the product
to cool completely before performing any inspection, maintenance, or clean-
ing procedures.
Do not store anything in this unit when not in use.
The warnings, precautions, and instructions discussed in this instruction
manual cannot cover all possible conditions and situations that may occur.
It must be understood by the operator that common sense and caution are
factors which cannot be built into this product, but must be supplied by the
operator.
4.
5.
6.
7.
8.
9.
10.
11.
12.
13.
14.
15.
16.
17.

SKU 96167 For technical questions, please call 1-800-444-3353. Page 4
GROUNDING
WARNING!
Improperly connecting the grounding wire can result in the risk of electric shock.
Check with a qualified electrician if you are in doubt as to whether the outlet is
properly grounded. Do not modify the power cord plug provided with the tool.
Never remove the grounding prong from the plug. Do not use the tool if the
power cord or plug is damaged. If damaged, have it repaired by a service facil-
ity before use. If the plug will not fit the outlet, have a proper outlet installed by
a qualified electrician.
Appliances With Three Prong Plugs
Appliances marked with “Grounding Required” have a three wire cord and three
prong grounding plug. The plug must be connected to a properly grounded outlet. If the
tool should electrically malfunction or break down, grounding provides a low resistance
path to carry electricity away from the user, reducing the risk of electric shock. (See 3-
Prong Plug and Outlet.)
The grounding prong in the plug is connected through the green wire inside the
cord to the grounding system in the tool. The green wire in the cord must be the only wire
connected to the tool’s grounding system and must never be attached to an electrically
“live” terminal. (See 3-Prong Plug and Outlet.)
Your appliance must be plugged into an appropriate outlet, properly installed and
grounded in accordance with all codes and ordinances. The plug and outlet should look
like those in the following illustration. (See 3-Prong Plug and Outlet.)
3-Prong Plug and Outlet
Extension Cords
Grounded appliances require a three wire extension cord. Double Insulated tools
can use either a two or three wire extension cord.
1.

SKU 96167 For technical questions, please call 1-800-444-3353. Page 5
As the distance from the supply outlet increases, you must use a heavier gauge
extension cord. Using extension cords with inadequately sized wire causes a seri-
ous drop in voltage, resulting in loss of power and possible tool damage.
(See Table A.)
The smaller the gauge number of the wire, the greater the capacity of the cord. For
example, a 14 gauge cord can carry a higher current than a 16 gauge cord.
(See Table A.)
When using more than one extension cord to make up the total length, make sure
each cord contains at least the minimum wire size required. (See Table A.)
If you are using one extension cord for more than one appliance, add the nameplate
amperes and use the sum to determine the required minimum cord size.
(See Table A.)
Make sure your extension cord is properly wired and in good electrical condition.
Always replace a damaged extension cord or have it repaired by a qualified electri-
cian before using it.
Protect your extension cords from sharp objects, excessive heat, and damp or wet
areas.
RECOMMENDED MINIMUM WIRE GAUGE FOR EXTENSION CORDS*
(120 OR 240 VOLT)
NAMEPLATE
AMPERES
(at full load)
EXTENSION CORD LENGTH
25 Feet 50 Feet 75 Feet 100 Feet 150 Feet
0 – 2.0 18 18 18 18 16
2.1 – 3.4 18 18 18 16 14
3.5 – 5.0 18 18 16 14 12
5.1 – 7.0 18 16 14 12 12
7.1 – 12.0 18 14 12 10 -
12.1 – 16.0 14 12 10 - -
16.1 – 20.0 12 10 - - -
TABLE A * Based on limiting the line voltage drop to five volts at 150% of the rated amperes.
UNPACKING
When unpacking, check to make sure that the item is intact and undamaged. If any
parts are missing or broken, please call Harbor Freight Tools at the number shown on the
cover of this manual as soon as possible.
2.
3.
4.
5.
6.
7.

SKU 96167 For technical questions, please call 1-800-444-3353. Page 6
OPERATION
For additional information regarding the parts listed in the following pages, refer to
the Assembly Diagram at the end of this manual.
Note: Before first use, wash the Bread Pan, Kneading Blade, and Measuring Cup in
hot, soapy water, taking care to rinse completely. Dry with a soft cloth. Wipe
the motor/heating element housing with a soft clean cloth or sponge. NEVER
IMMERSE MOTOR, HEATING ELEMENT, CORD, OR PLUG IN WATER OR ANY
OTHER LIQUID.
Place the Bread Maker on a flat, smooth surface near an electrical outlet.
Place the Bread Pan (8) into the Bread Maker and push it down firmly to secure it
in place.
Fix the Kneading Blade (13) onto the Peg (39) on the bottom of the Bread Pan.
Mix bread ingredients in a mixing bowl (not included) thoroughly, before adding the
dough to the Bread Pan. Close the Cover (51) of the Bread Maker.
The Bread Maker will now complete the kneading, rising and baking cycles auto-
matically, depending on what setting is chosen.
Buttons
Push Button 1 to bake White Bread mixes.
Push Button 2 to bake Yellow Bread mix-
es.
Push Button 3 to bake Dark Bread mixes.
Push Button 1 and 2 together for the knead
only function.
Push Button 2 and 3 together for the bake
only function.
Bread Kneading & Baking Times:
First knead: 3 minutes.
Second knead: 22 minutes.
Rising: 105 minutes, 10 seconds.
Bake times:
White/light bread: 30 minutes.
Yellow bread: 40 minutes.
Dark bread: 50 minutes.
1.
2.
3.
4.
5.
•
•
•
•
•
•
•
•
•
Button 1 Button 3Button 2Button 1 Button 3Button 2

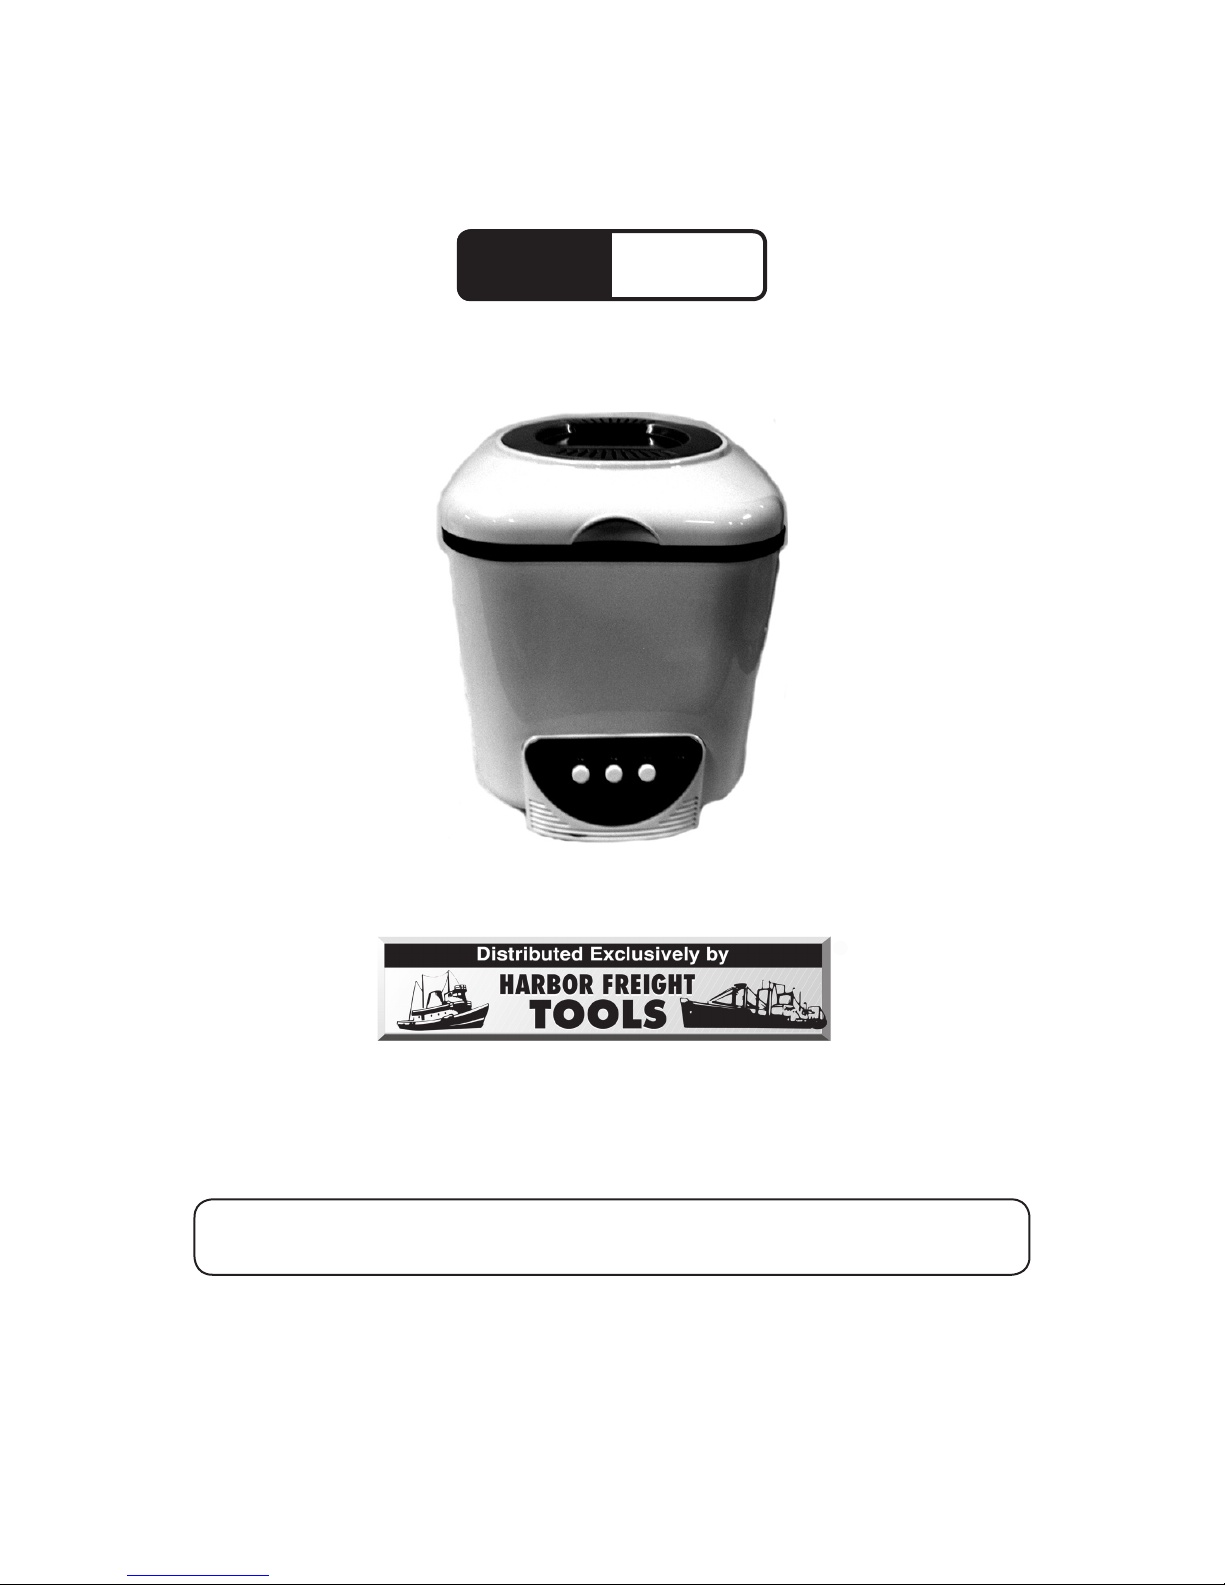
SKU 96167 For technical questions, please call 1-800-444-3353. Page 7
Warming time: The Bread Maker will keep Bread warm for up to 60 minutes before
shutting down.
Other Settings:
Kneading time for knead only setting: 25 minutes.
Bake time for bake only setting: 50 minutes.
After the correct amount of time, the Bread Maker will turn off automatically and
the buzzer will sound.
Lift the top of the Bread Maker carefully. Using heat protective gloves or oven mit-
tens remove the finished bread. Tip the finished bread out of Bread Pan onto an
appropriate cooling surface. Use a wooden utensil, if necessary, to gently loosen
the bread from the pan. Allow the bread to cool before cutting or consuming.
INSPECTION, MAINTENANCE, AND CLEANING
WARNING! Make sure that the appliance is unplugged from the electrical outlet
and allowed to cool before performing any inspection, maintenance, or cleaning
procedures.
BEFORE EACH USE, inspect the general condition of the appliance. Check for
loose screws, misalignment or binding of moving parts, cracked or broken parts,
damaged electrical wiring, and any other condition that may affect its safe operation.
If abnormal noise or vibration occurs, have the problem corrected before further
use. Do not use damaged equipment.
After each use, wash the non-electrical parts of the appliance in hot, soapy water,
taking care to rinse completely. Dry with a soft cloth.
Clean the outside of the appliance with a clean, damp cloth. Never use abrasive
cleaners, as they will damage the unit. You may use a mild detergent. Never sub-
merge the main unit, or any other part, in water or any other liquid.
PLEASE READ THE FOLLOWING CAREFULLY
THE MANUFACTURER AND/OR DISTRIBUTOR HAS PROVIDED THE PARTS LIST AND ASSEM-
BLY DIAGRAM IN THIS MANUAL AS A REFERENCE TOOL ONLY. NEITHER THE MANUFACTUR-
ER OR DISTRIBUTOR MAKES ANY REPRESENTATION OR WARRANTY OF ANY KIND TO THE
BUYER THAT HE OR SHE IS QUALIFIED TO MAKE ANY REPAIRS TO THE PRODUCT, OR THAT
HE OR SHE IS QUALIFIED TO REPLACE ANY PARTS OF THE PRODUCT. IN FACT, THE MANU-
FACTURER AND/OR DISTRIBUTOR EXPRESSLY STATES THAT ALL REPAIRS AND PARTS RE-
PLACEMENTS SHOULD BE UNDERTAKEN BY CERTIFIED AND LICENSED TECHNICIANS, AND
NOT BY THE BUYER. THE BUYER ASSUMES ALL RISK AND LIABILITY ARISING OUT OF HIS OR
HER REPAIRS TO THE ORIGINAL PRODUCT OR REPLACEMENT PARTS THERETO, OR ARISING
OUT OF HIS OR HER INSTALLATION OF REPLACEMENT PARTS THERETO.
•
•
•
6.
7.
1.
2.
3.
4.

SKU 96167 For technical questions, please call 1-800-444-3353. Page 8
PARTS LIST
Part Description Qty
1 Louver 1
2 Glass 1
3 Heating Insulation Plate 1
4 Screw KA3*10 4
5 Screw KA4*20 6
6 Heat Insulation 1
7 Oven Handle Holder 2
8 Bread Pan 1
9 Ceramic 1
10 Heater Holder 1
11 Heater 1
12 Heater Cavity 1
13 Kneading Blade 1
14 Rivet 5.4*8 3
15 E-Spring 1
16 Circular Spring 1
17 Oven Spring Washer 2
18 Bottom of Cavity 1
19 Screw PM4*6 7
20 Screw PA4*6 4
21 Transformer 1
22 Body 1
23 Power Cord Cover 1
24 Rubber Underlay 4
25 Power Cord 1
26 Screw PA3*10 14
Part Description Qty
27 Control Plate 1
28 Buttons 3
29 Control Box 1
30 Lampshade 1
31 PCB 1
32 Screw PA4*14 1
33 Capacitor 1
34 Spring Washer 4 1
35 Motor 1
36 Silicon Washer 1
37 Axle Cover 1
38 Anti-Attrition Washer 1
39 Peg 1
40 Sleeve 1
41 Fuse 1
42 Side Fuse Holder 1
43 Screw PM3*6 3
44 Nut M3 5
45 Spring Washer 3 5
46 Screw PM3*12 2
47 Oven Handle 1
48 Screw PA2.6*10 4
49 Rivet 3*5 4
50 Screw KA3*8 2
51 Cover 1
ASSEMBLY DIAGRAM NEXT PAGE
Record Product’s Serial Number Here:
Note: If product has no serial number, record month and year of purchase instead.
Note: Some parts are listed and shown for illustration purposes only, and are not available
individually as replacement parts.

SKU 96167 For technical questions, please call 1-800-444-3353. Page 9
Table of contents