Harbor Freight Tools 43149 User manual

Metal Detector
Model 43149
Assembly and Operating Instructions
3491 Mission Oaks Blvd., Camarillo, CA 93011
Copyright 2000 by Harbor Freight Tools. All rights reserved.
No portion of this manual or any artwork contained herein may be reproduced in any shape
or form without the express written consent of Harbor FreightTools.
For technical questions and replacement parts, please call 1-800-444-3353.

Specifications
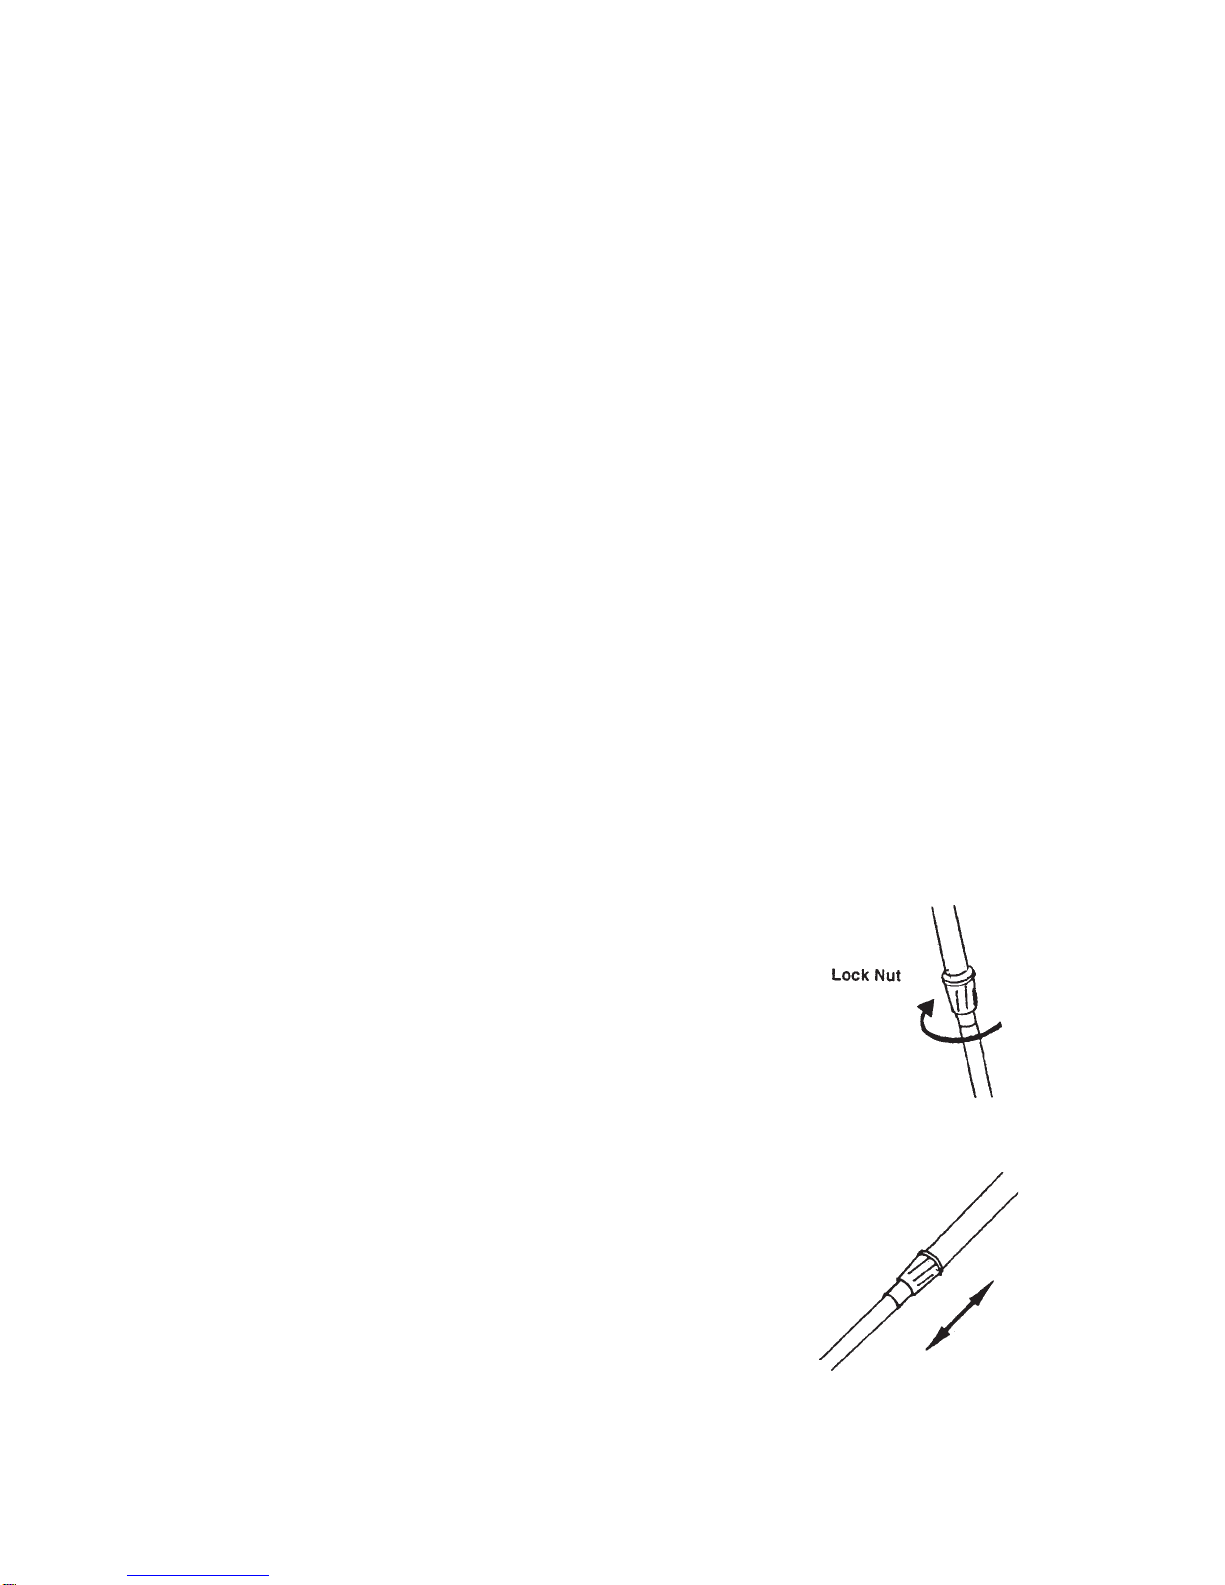
Stem Length: 15” - 27-1/2”
Coil: 8” Diameter
Power Supply: Qty 3, 9 Volt Batteries
Battery Tester: Yes, built-in
Audio: 3 distinctive sounds for different metals
Weight: 3.25 Lbs.
Save This Manual
You will need the manual for the safety warnings and precautions, assembly instructions, operating
and maintenance procedures, parts list and diagram. Keep your invoice with this manual. Write the
invoice number on the inside of the front cover. Keep the manual and invoice in a safe and dry place for
futurereference.
Safety Warnings and Precautions
WARNING:Whenusingtool,basicsafetyprecautionsshouldalwaysbefollowedtoreducetheriskofpersonalinjuryand
damagetoequipment.
Read all instructions before using this product!
1. Handle the Metal Detector carefully at all times. Dropping the Metal Detector can cause damage to circuit
boards and the case, which can cause the product to work improperly.
2. Only use and store the Metal Detectorin normal temperature environments. Extremes in temperature can
shorten the effectiveness of electronic devices and melt or damage plastic parts.
3. Avoid electrical shock. Any metal detector may discover underground power lines, explosives or other items which
when struck could cause personal injury. Do not use this product in areas where there might be underground
electric lines or pipes buried at shallow depths. Never search in military zones where bombs or other explosives
may be buried. Avoid striking any line known or suspected to be carrying electric power. Do not search any
pipeline, particularly if it could contain a flammable gas or liquid. In areas of uncertain conditions, use reasonable
caution before using the Metal Detector. If there is any question about a condition being safe of unsafe, do not
operate the Metal Detector.
4. Keep the Metal Detector clean. Wipe the housing after each use. The search coil is washable and can be fully
submerged. Never submerge the control housing. Protect the control housing from rain, blowing surf and heavy
mist. Disassemble the stem and wipe it clean after use in sandy areas.
5. Dress properly. Do not wear loose clothing or jewelry as they can be caught in moving parts. Protective, electri-
cally nonconductive clothes and nonskid footwear are recommended when working. Wear restrictive hair covering
to contain long hair.
6. Use the right tool for the job. Do not attempt to force a small tool or attachment to do the work of a larger
industrial tool. There are certain applications for which this tool was designed. Do not modify this tool and do not
use this tool for a purpose for which it was not intended.
7. Stay alert. Watch what you are doing, use common sense. Do not operate any tool when you are tired.
#43149 Page 2

Safety Warnings and Precautions (continued)
8. Check for damaged parts. Before using any tool, any part that appears damaged should be carefully checked to
determine that it will operate properly and perform its intended function. Check for alignment and binding of
moving parts; any broken parts or mounting fixtures; and any other condition that may affect proper operation.Any
part that is damaged should be properly repaired or replaced by a qualified technician. Do not use the tool if any
switch does not turn On and Off properly.
9. Replacement parts and accessories. When servicing, use only identical replacement parts. Use of any other parts
will void the warranty. Only use accessories intended for use with this tool.Approved accessories are available from
Harbor Freight Tools.
10. Do not operate tool if under the influence of alcohol or drugs. Read warning labels on prescriptions to deter-
mine if your judgment or reflexes are impaired while taking drugs. If there is any doubt, do not operate the tool.
11. Maintenance. For your safety, maintenance should be performed regularly by a qualified technician.
WARNING: People with pacemakers should consult their physician(s) before using this product. Electromagnetic fields
in close proximity to a heart pacemaker could cause interference to, or failure of, the pacemaker.
Warning:The warnings,cautions,andinstructionsdiscussedinthis instructionmanualcannot coverallpossible condi-
tionsandsituationsthatmayoccur.Itmustbeunderstoodbytheoperatorthatcommonsenseandcautionarefactorswhich
cannotbebuiltintothisproduct,butmustbesuppliedby theoperator.
Unpacking
When unpacking, check to make sure all parts shown on the Parts Diagram and Parts Lists are
present. If any parts are missing or broken, please call Harbor Freight Tools at the number on the cover
of this manual.
Preparing to Operate
#43149 Page 3
ToAssemble the Metal Detector:
1. Turn the lock nut on the stem clockwise to loosen (see Figure 1).
2. Adjust the length of the stem so that when you stand upright with
the metal detector held in your hand, the search coil is level with and
about 1/2 to 2 inches above the ground (see Figure 2).
3. Turn the stem’s lock nut counterclockwise to lock it in place.
4. Unscrew the knob on the search coil and take off the knobs and
connector. Insert the stem and align the holes on the search coil
bracket and the stem. Push the connector through the holes and
tightenthe knob.
Figure 1
Figure 2
REV07f

#43149 Page 4
5. Wind the search coil cable around the stem. Make sure you leave
enough slack in the cable to allow for adjustment when you are using
the Metal Detector on uneven ground (see Figure 3).
6. Plug in the search coil’s plug into the search coil jack on the
Metal Detector’s control panel. Make sure that the pins on the
plug align with the holes in the jack (see Figure 4).
Note: The search coil’s plug fits into the connector only one way.
Never force the plug; the plug could become damaged.
To disconnect the plug, never pull on the cable; always take hold
of the plug and pull it out of the connector.
7. Loosen the knob at the search coil’s end, then adjust the
search coil’s end, then adjust the search coil to the desired angle.
The search coil should be parallel with the ground. Tighten the
knob enough to keep the search coil from rotating or wobbling.
8. To insert the arm support (see Figure 5), loosen the knob at
the base of the handle. Insert the arm support and tighten the
knob to hold the arm support in place.
Figure 3
Figure 4
Figure 5
To Install Batteries:
The Metal Detector is powered by a quantity of three, 9 Volt batteries. Battery installation is described
below:
1. If the Metal Detector is on, turn MODE to OFF
(see Figure 6).
2. Press the right battery compartment cover’s tab and slide
the cover in the direction of the arrow (see Figure 7).
3. Place one 9 Volt battery into the battery compartment
on top of the ribbon. Make sure the battery is placed so
that it matches the polarity symbols (+ and -) that are
markedinsidethe compartment.
4. Replace the right battery compartment cover.
5. Press the left battery compartment cover’s tab
and slide the cover off in the direction of the arrow
(see Figure 8).
6. Place two 9 Volt batteries into the battery compartment
ontop of the ribbons, matchingthe polarity symbols
(+ and -) marked. Replace the left battery compartment cover.
Figure 6
Figure 7 Figure 8

#43149 Page 5
InstallingBatteries (continued).
The life of the batteries can be extended by using headphones (not included), which require less power
than the built-in speaker. See the section on headphones below.
Caution: Always remove old or weak batteries; old batteries can leak chemicals that can damage
electronic parts. If you do not plan to use the Metal Detector for a week or more, always remove the
batteries. Use only fresh batteries of the required size. Never mix old and new batteries or different
typesofbatteries.
Testing Batteries:
Test the battery power when the Metal Detector does not turn on, or has weak volume, or will not tune
properlyor operates erratically.
Set the MODEto VLF (very low frequency). To test the batteries in the left battery compartment, set
BATTTEST to B1. To test the battery in the right battery compartment, set BATT TEST to B2 (see
Figure 9).
If the pointer on the viewmeter is within the BATT scale’s green area, the
batteries have enough power. If the pointer is not within the green area,
the batteries need to be replaced (see Figure 10).
Figure 9
Figure 10
To Adjust the Meter:
Set MODEto OFF. Using a screwdriver, adjust the alignment control until the
pointer lines up with O on the scale (see Figure 11).
Figure 11
UsingEarphones:
Stereoearphones (not included) can be connectedto
theMetal Detector. Using earphones saves battery
power and makes it easier to identify changes in the
sound patterns. Earphones are connected to the ear
jack on the side of the Control Housing (see Figure 12).
Whenusing earphones, protect your hearingby:
a. Set the volume to the lowest setting before you begin listening.
Adjust the volume to a comfortable level.
b. Never listen at extremely high volume levels;
permanenthearing loss can result.
c. Once the volume is set, do not increase it. Over time,
your ears adapt to the volume level, so a volume level that
doesnot cause discomfort might still damage your hearing.
Figure 12
Other manuals for 43149
1
Table of contents
Other Harbor Freight Tools Metal Detector manuals

Harbor Freight Tools
Harbor Freight Tools 43150 User manual

Harbor Freight Tools
Harbor Freight Tools 67378 Assembly instructions

Harbor Freight Tools
Harbor Freight Tools 67378 Installation manual

Harbor Freight Tools
Harbor Freight Tools 43149 Installation manual

Harbor Freight Tools
Harbor Freight Tools 98760 Installation manual

Harbor Freight Tools
Harbor Freight Tools 62307 Original instruction manual