Harbor Freight Tools 67596 User manual

Gasoline Powered Pressure Washer
Read this material before using this product. Failure to do so can result in serious injury.
SAVE THIS MANUAL.
When unpacking, make sure that the product is intact and undamaged.
If any Pressure Washer parts are missing or broken, please call 1-800-444-3353 as soon as possible.
If any Engine parts are missing or broken, please call 1-800-520-0882 as soon as possible.
Visit our website at: http://www.harborfreight.com
Copyright©2009 by Harbor Freight Tools®. All rights reserved. No portion of this manual or any artwork contained herein may be reproduced in any shape
or form without the express written consent of Harbor Freight Tools. Diagrams within this manual may not be drawn proportionally. Due to continuing
improvements, actual product may differ slightly from the product described herein. Tools required for assembly and service may not be included.
Manual Revised 11g
ENGINES
POWERED BY
DANGER
Using an engine indoors CAN KILL YOU IN
MINUTES.
Engine exhaust contains carbon monoxide. This
is a poison you cannot see or smell.
NEVER use inside a
home or garage, EVEN
IF doors and windows
are open.
Only use OUTSIDE
and far away from
windows, doors, and
vents.
Item 67546
(EPA version) 212cc engine
Item 67596
(EPA/CARB version) 212cc engine

Page 2 For Pressure Washer technical questions, please call 1-800-444-3353. SKU 67546/67596
For Engine technical questions, please call 1-800-520-0882.
Contents
3 Specications
3 Safety Warnings
4 Set up Precautions
4 Operating Precautions
5 Service Precautions
7 Set Up Instructions
7 Assembly
8 Engine Controls
8 Item 67546 (EPA version)
8 Item 67596 (EPA/CARB version)
9 Operating Instructions
9 Starting the Engine
11 Equipment Operation
13 Service
13 Maintenance Procedures
13 Cleaning, Maintenance, and Lubrication Schedule
15 Storage
16 Troubleshooting
18 Parts Lists and Diagrams
18 General Parts List
19 General Assembly Diagram
20 Parts List A - Pump
21 Assembly Diagram A - Pump
22 Parts List B - Engine - Item # 67546 (EPA version)
23 Assembly Diagram B - Engine - Item # 67546 (EPA version)
24 Parts List B - Engine - Item # 67596 (EPA/CARB version)
25 Assembly Diagram B - Engine - Item # 67596 (EPA/CARB version)
26 Warranties
26 Limited 90 Day Warranty
26 Emission Control System Warranty
REV 11c

Page 3
For Pressure Washer technical questions, please call 1-800-444-3353.
SKU 67546/67596
For Engine technical questions, please call 1-800-520-0882.
Specications
Displacement 212cc
Engine Type Predator OHV
Pump Brass Axial
Drive Direct
Gun 22 IN. Wand / 20 IN. Lance
Nozzles Quick Connect 0º, 15º, 25º, 40º
+ Soap Nozzle
Hose Length 26 FT. 7 IN.
Cart Push type with 10 IN.
Pneumatic tires
Fuel Type 87+ octane unleaded gasoline
Capacity 1 Gallon / 3.6L
Engine
Oil
(not
included)
Type
(SAE)
10W-30 above 32° F
5W-30 at 32° F or below
Capacity 0.5 Quart / 0.5L
Low Oil
Shutdown Yes
Pump Oil
(included)
3.75 -oz SAE 10W-30
Non-detergent
Engine Speed 3,600 RPM
Water Flow 3 GPM Maximum
Maximum Pressure 2,500 PSI
Bore x Stroke 70 mm x 55 mm
Compression Ratio 8.5:1
Rotation viewed from
PTO (power takeoff
- the output shaft)
Counterclockwise
Spark Plug Type NGK®BP-6ES
NHSP® / Torch®F6TC
Gap 0.7 - 0.8 mm
Valve Clearance Intake 0.10 - 0.15 mm
Exhaust 0.15 - 0.20 mm
Item 67546: The emission control system
for this Pressure Washer’s engine is warranted
for standards set by the U.S. Environmental
Protection Agency. For warranty information,
refer to the last pages of this manual.
Item 67596: The emission control system
for this Pressure Washer’s Engine is warranted for
standards set by the U.S. Environmental Protection
Agency and by the California Air Resources Board
(also known as CARB). For warranty information,
refer to the last pages of this manual.
At high altitudes, the engine’s carburetor,
governor (if so equipped), and any other parts that
control the fuel-air ratio will need to be adjusted
by a qualied mechanic to allow efcient high-
altitude use and to prevent damage to the engine
and any other devices used with this product.
Save This Manual
Keep this manual for the safety warnings and
precautions, assembly, operating, inspection, maintenance
and cleaning procedures. Write the product’s serial number
in the back of the manual near the assembly diagram (or
month and year of purchase if product has no number).
Keep this manual and the receipt in a safe and dry place
for future reference.
Safety Warnings
In this manual, on the labeling, and all other
information provided with this product:
This is the safety alert symbol. It is
used to alert you to potential personal
injury hazards. Obey all safety
messages that follow this symbol
to avoid possible injury or death.
DANGER
DANGER indicates a hazardous situation which, if
not avoided, will result in death or serious injury.
WARNING
WARNING indicates a hazardous situation which, if
not avoided, could result in death or serious injury.
CAUTION
CAUTION, used with the safety alert symbol,
indicates a hazardous situation which, if not
avoided, could result in minor or moderate injury.
Notice
NOTICE is used to address practices
not related to personal injury.
CAUTION
CAUTION, without the safety alert symbol, is used
to address practices not related to personal injury.
WARNING! Read all instructions.
Failure to follow all instructions listed below
may result in re, serious injury and/or
DEATH.
The warnings and precautions discussed in this
manual cannot cover all possible conditions and
situations that may occur. It must be understood
by the operator that common sense and caution
are factors which cannot be built into this
product, but must be supplied by the operator.
SAVE THESE INSTRUCTIONS.
REV 11c

Page 4 For Pressure Washer technical questions, please call 1-800-444-3353. SKU 67546/67596
For Engine technical questions, please call 1-800-520-0882.
Set up Precautions
1. Gasoline fuel and fumes are ammable, and
potentially explosive. Use proper fuel storage
and handling procedures. Do not store fuel
or other ammable materials nearby.
2. Have multiple ABC class re extinguishers nearby.
3. Operation of this equipment may create sparks
that can start res around dry vegetation. A spark
arrestor may be required. The operator should
contact local re agencies for laws or regulations
relating to re prevention requirements.
4. Set up and use only on a at, level,
well-ventilated surface.
5. The work area should have adequate
drainage to reduce the possibility of
a fall due to slippery surfaces.
6. Wear ANSI-approved safety goggles,
heavy-duty work gloves, and dust mask/
respirator during set up and use.
7. Use only oil and fuel recommended in the
“Specications” section of this manual.
8. Only use cold Water or pressure washer
detergent in this tool. Do not use caustic
materials, solvents, ammable materials, or
detergents not designed for pressure washers.
Use of any such material can cause injury,
or damage this tool or personal property.
9. Do not dry run this product. Dry running
will cause serious damage to the seals.
Make sure the water supply used for the
Pressure Washer is not dirty or sandy.
10. Prior to starting the Pressure Washer in
cold weather, check all of the parts of the
unit to make sure ice has not formed. Do
not store the unit anywhere that the
temperature will fall below 32° F (0° C).
Operating Precautions
1. CARBON MONOXIDE HAZARD
Using an engine indoors CAN KILL
YOU IN MINUTES.
Engine exhaust contains carbon
monoxide. This is a poison you
cannot see or smell.
NEVER use inside a home or garage, EVEN IF
doors and windows are open.
Only use OUTSIDE and far away from windows,
doors, and vents.
2. Keep children away from the equipment,
especially while it is operating.
3. Do not leave the equipment unattended
when it is running. Turn off the equipment
(and remove safety keys, if available)
before leaving the work area.
4. Wear ANSI-approved safety goggles
and hearing protection during use.
5. People with pacemakers should consult their
physician(s) before use. Electromagnetic
elds in close proximity to a heart pacemaker
could cause pacemaker interference or
pacemaker failure. Caution is necessary when
near the engine’s magneto or recoil starter.
6. Use only accessories that are recommended
by Harbor Freight Tools for your model.
Accessories that may be suitable for
one piece of equipment may become
hazardous when used on another one.
7. Do not operate in explosive atmospheres,
such as in the presence of ammable
liquids, gases, or dust. Gasoline-powered
engines may ignite the dust or fumes.
8. Stay alert, watch what you are doing and
use common sense when operating a
piece of equipment. Do not use a piece of
equipment while tired or under the inuence
of drugs, alcohol or medication.
9. Do not overreach. Keep proper footing and
balance at all times. This enables better control
of the equipment in unexpected situations.
10. Do not carry the spray handle with your nger on
the trigger, whether engine is operating or not.
11. Use this equipment with both hands
only. Using equipment with only one hand
can easily result in loss of control.
12. Dress properly. Do not wear loose clothing or
jewelry. Keep hair, clothing and gloves away
from moving parts. Loose clothes, jewelry or
long hair can be caught in moving parts.
13. Parts of the Pressure Washer, especially
exhaust system components, get very hot
during use. Stay clear of hot parts.
REV 11c

Page 5
For Pressure Washer technical questions, please call 1-800-444-3353.
SKU 67546/67596
For Engine technical questions, please call 1-800-520-0882.
14. Do not cover the engine or
equipment during operation.
15. Keep the equipment, engine, and
surrounding area clean at all times.
16. Use the equipment, accessories, etc., in
accordance with these instructions and in the
manner intended for the particular type of
equipment, taking into account the working
conditions and the work to be performed. Use of
the equipment for operations different from those
intended could result in a hazardous situation.
17. Do not operate the equipment with known
leaks in the engine’s fuel system.
18. This product contains or, when used,
produces a chemical known to the State of
California to cause cancer and birth defects
or other reproductive harm. (California
Health & Safety Code § 25249.5, et seq.)
19. WARNING: The brass components of this
product contain lead, a chemical known to
the State of California to cause birth defects
(or other reproductive harm). (California
Health & Safety code § 25249.5, et seq.)
20. When spills of fuel or oil occur, they must be
cleaned up immediately. Dispose of uids and
cleaning materials as per any local, state, or
federal codes and regulations. Store oil rags in
a bottom-ventilated, covered, metal container.
21. Keep hands and feet away from moving
parts. Do not reach over or across
equipment while operating.
22. Before use, check for misalignment or binding
of moving parts, breakage of parts, and any
other condition that may affect the equipment’s
operation. If damaged, have the equipment
serviced before use. Many accidents are
caused by poorly maintained equipment.
23. Use the correct equipment for the application.
Do not modify the equipment and do not use the
equipment for a purpose for which it is not intended.
24. The high pressure water ow can damage
the work surface if not used properly. Always
test the spray in an open area rst.
25. When dispensing detergent, apply the detergent
to the cleaning area at low pressure only.
Detergent dispensing only works when the
spray wand is in the low-pressure position.
26. Injection Hazard. The high pressure
water jet produced by this tool can cut
skin or cause injury to hands or eyes.
Do not allow spray to strike you and
do not spray toward people or
animals. Do not spray the tool itself or any
electrical wiring/receptacle.
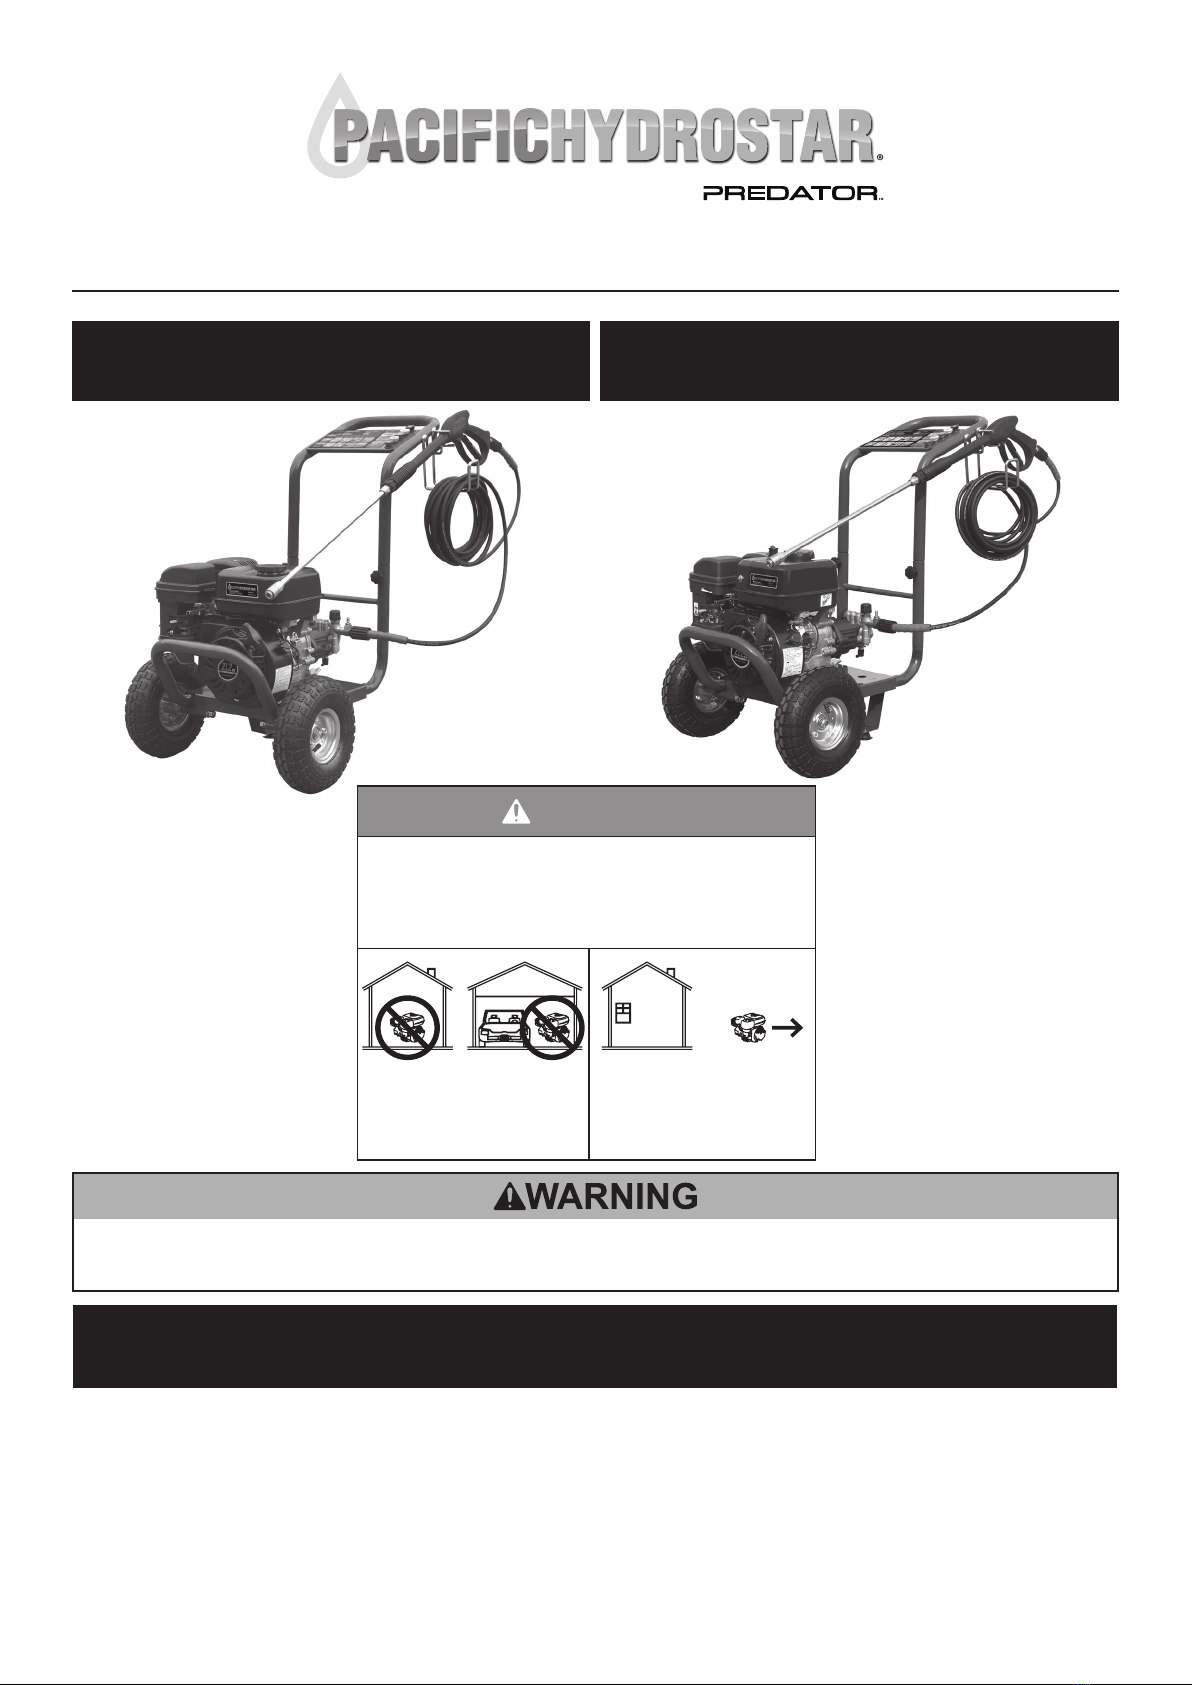
27. This Pressure Washer is intended for
outdoor residential use only.
28. In case of an emergency during use,
immediately release the trigger on the spray
handle, turn the engine off and then shut off
gas supply to the engine. Do not set the spray
handle down without turning off the engine.
Vibration Hazard:
This tool vibrates during use. Repeated or
long-term exposure to vibration may cause
temporary or permanent physical injury,
particularly to the hands, arms and shoulders.
To reduce the risk of vibration-related injury:
1. Anyone using vibrating tools regularly or for an
extended period should rst be examined by a
doctor and then have regular medical check-
ups to ensure medical problems are not being
caused or worsened from use. Pregnant women
or people who have impaired blood circulation
to the hand, past hand injuries, nervous system
disorders, diabetes, or Raynaud’s Disease should
not use this tool. If you feel any medical or
physical symptoms related to vibration (such as
tingling, numbness, and white or blue ngers),
seek medical advice as soon as possible.
2. Do not smoke during use. Nicotine reduces
the blood supply to the hands and ngers,
increasing the risk of vibration-related injury.
3. Wear suitable gloves to reduce the
vibration effects on the user.
4. Use tools with the lowest vibration when there
is a choice between different processes.
5. Include vibration-free periods each day of work.
6. Grip tool as lightly as possible (while still keeping
safe control of it). Let the tool do the work.
7. To reduce vibration, maintain the tool as
explained in this manual. If any abnormal
vibration occurs, stop use immediately.
Service Precautions
1. Before service, maintenance, or cleaning:
a. Turn the engine switch to its “OFF” position.
b. Allow the engine to completely cool.
c. Then, remove the spark plug
wire(s) from the spark plug(s).
2. Keep all safety guards in place and in
proper working order. Safety guards include
mufer, air cleaner, mechanical guards,
and heat shields, among other guards.
REV 11c

Page 6 For Pressure Washer technical questions, please call 1-800-444-3353. SKU 67546/67596
For Engine technical questions, please call 1-800-520-0882.
3. Do not alter or adjust any part of the
equipment or its engine that is sealed by the
manufacturer or distributor. Only a qualied
service technician may adjust parts that may
increase or decrease governed engine speed.
4. Wear ANSI-approved safety goggles,
heavy-duty work gloves, and dust mask/
respirator during use and service.
5. Keep the high pressure hose connected to
the pressure washer and spray gun while the
system is pressurized. Disconnecting the
pressure hose while the unit is pressurized
is dangerous, and may cause injury.
6. Do not allow the high pressure hose to come
in contact with any hot part of the unit. The
hose might be damaged, possibly causing
it to burst or leak under high pressure.
7. Maintain labels and nameplates on
the equipment. These carry important
information. If unreadable or missing, contact
Harbor Freight Tools for a replacement.
8. If water is leaking out of the Pressure Washer
immediately turn off the unit. Unplug the
Pressure Washer, and discharge all pressure
before tightening ttings or having repair
work done by a qualied technician.
9. When the engine is running, do not allow
the Pressure Washer to remain idle for more
than two minutes. If allowed to remain idle,
the water in the unit will heat up, possibly
causing damage to the Pressure Washer.
10. Have the equipment serviced by a qualied repair
person using only identical replacement parts.
This will ensure that the safety of the equipment
is maintained. Do not attempt any service or
maintenance procedures not explained in this
manual or any procedures that you are uncertain
about your ability to perform safely or correctly.
11. Store equipment out of the reach of children.
12. Follow scheduled engine and
equipment maintenance.
Refueling:
1. Do not smoke, or allow sparks, ames,
or other sources of ignition around the
equipment, especially when refuelling.
2. Do not rell the fuel tank while the
engine is running or hot.
3. Do not ll fuel tank to the top. Leave a little
room for the fuel to expand as needed.
4. Refuel in a well-ventilated area only.
SAVE THESE INSTRUCTIONS.
REV 11c

Page 7
For Pressure Washer technical questions, please call 1-800-444-3353.
SKU 67546/67596
For Engine technical questions, please call 1-800-520-0882.
Set Up Instructions
Read the ENTIRE IMPORTANT
SAFETY INFORMATION section at the
beginning of this manual including
all text under subheadings therein
before set up or use of this product.
Risk of accidental starting;
resulting in serious personal
injury. Turn the Power
Switch of the equipment to its “OFF” position, wait
for the engine to cool, and unplug the spark plug
wire(s) before assembling or making any adjustments
to the equipment.
Note: For additional information regarding the parts
listed in the following pages, refer to the
Assembly Diagram near the end of this manual.
Assembly
1. Operation of this equipment may create sparks
that can start res around dry vegetation. A spark
arrestor may be required. The operator should
contact local re agencies for laws or regulations
relating to re prevention requirements.
2.
Brass Pump
Plug (14A)
Aluminum Pump
Breather Plug
(59A)
Dipstick (60A)
Figure 1
Replace the Brass Pump Plug (14A) with the
aluminum Pump Breather Plug (59A) and Dipstick
(60A) before rst use. The Pump Breather Plug
must be used whenever the pressure washer is
used. The Brass Pump Plug (without the breather
hole) should be used for transporting only.
3. Attach the Handle (14) onto the Frame (17)
with the Handle Bolts (15) and Nuts (16).
4.
Outlet
Connector
(35A)
Water Inlet
Connection
Detergent Inlet
Connection
(26A)
Pressure Regulator Knob (44A)
Figure 2
Attach the Hose (18) to the Outlet Connector
(35A) on the unit (See Figure 2).
5. Pull the Collar at the end of the hose back
and attach the Gun (19) to the hose.
6. Screw the Wand (20) onto the Gun (19)
and secure with the grommet.
7. Choose the right Nozzle (5) for the job. Pull back
the quick connect collar and push the Nozzle
onto the end of the Wand. Make sure the quick
connect collar locks the Nozzle in place.
• Black Nozzle -
Low Pressure
Used with pressure washer detergent.
• White Nozzle -
Wide Spray
Used to clean very large areas.
• Green Nozzle -
Medium Spray
Used to clean larger areas.
• Yellow Nozzle -
Narrow Spray
Used to clean small areas.
• Red Nozzle -
Pencil Spray
Only use on hard surfaces such as
concrete or metal. Can damage wood.
8. Connect the water supply to the Water Inlet
Connection on the Water Inlet Body (42A). The
water source must be able to provide a minimum
of ve gallons of clean, cold water per minute
at 20 PSI. Only use a 5/8” inner diameter (or
larger) hose that is rated to meet this capacity.
If using detergent:
Read detergent directions. Connect one
end of the Detergent Inlet Hose (8) to the
Detergent Inlet Connection, and the other
end into the container holding the detergent.
Only use detergents specied for use with
Pressure Washers. The Pressure Washer will
draw one gallon of detergent for every seven
gallons of water. Only use the Black (low
pressure) Nozzle when spraying detergents.
WARNING
REV 11c

Page 8 For Pressure Washer technical questions, please call 1-800-444-3353. SKU 67546/67596
For Engine technical questions, please call 1-800-520-0882.
REV 11c
Engine Controls
Throttle Lever
Air Filter
Ignition Switch
Recoil Starter
Fuel Filler Cap
Starter Handle
Choke Lever
Fuel Tank
Mufer
Fuel Valve Lever
Oil Drain Plug
Spark Plug
Oil Filler Cap/Dipstick
Item 67596 (EPA/CARB version)
Throttle Lever
Air Filter
Ignition Switch
Recoil Starter
Fuel Filler Cap
Starter Handle
Choke Lever
Fuel Tank
Mufer
Fuel Valve Lever
Oil Drain Plug
Spark Plug
Oil Filler Cap/Dipstick
Item 67546 (EPA version)

Page 9
For Pressure Washer technical questions, please call 1-800-444-3353.
SKU 67546/67596
For Engine technical questions, please call 1-800-520-0882.
Operating Instructions
Read the ENTIRE IMPORTANT
SAFETY INFORMATION section at the
beginning of this manual including
all text under subheadings therein
before set up or use of this product.
Starting the Engine
Inspect engine and equipment looking
for damaged, loose, and missing
parts before set up and starting. If
any problems are found, do not use
equipment until xed properly.
Checking Engine Oil Level
CAUTION Your Warranty is VOID if the engine’s
crankcase is not properly lled with oil before
each use. Before each use, check the oil level.
Do not run the engine with low or no engine
oil. Running the engine with no or low engine
oil WILL permanently damage the engine.
1. Make sure engine is level, then turn off engine,
close the fuel valve, and allow engine to cool.
2. Clean the Oil Filler Cap and the area
around it. Remove the Oil Filler Cap.
3.
Full level
Full level
Figure 3
Remove dipstick and wipe away the oil with dry
cloth. Reinsert the dipstick into the oil ller neck,
but do not screw in, then remove it to check the oil
level. The oil level should be up to the full level as
shown above. Low oil level can trigger the low oil
sensor to shutdown the engine and prevent restart.
4. If the oil level is low, add the appropriate type of
oil until the oil level is at the bottom lip of the oil ll
hole.
Oil type:
32° F or above = SAE 10W-30
Below 32° F = SAE 5W-30.
5. Replace the Oil Filler Cap.
CAUTION Do not run the engine with too little or too
much oil. The engine will be
permanently damaged.
Checking Pump Oil Level
1. The Oil pump is lled with 3.75 -oz of
SAE 10W-30 NON DETERGENT oil at the
factory. Under normal conditions there is no
reason to add any oil or change the oil.
2. Turn off engine, allow it to cool and
disconnect the spark plug wire.
3. Twist the Dipstick on the Pump Breather Plug
until the arrow on it lines up with the arrow
on the Plug and remove the Dipstick.
4. Remove the Pump Breather Plug from the Pump.
5.
Clear oil
ll hole
Figure 4
Look into the hole in the pump housing. If a metal
wheel can be seen extending into the hole,
SLOWLY pull the starter rope until the
hole appears clear, as shown above.
6.
Fill with oil
to here TOO LOW
TOO HIGH
Figure 5
Wipe the Dipstick off with a clean, dry cloth.
Insert the Dipstick into the pump housing and
remove it. The oil level should be at least to
the lower (L) notch on the dipstick, but not
above the upper (H) notch. Add SAE 10W-
30 NON-DETERGENT oil as needed.
7. Thread the Pump Breather Plug
back into the pump.
8. Align the arrow on the Dipstick with the arrow
on the Plug, insert it, and twist it to secure.
9. Reconnect the spark plug wire.
REV 11c

Page 10 For Pressure Washer technical questions, please call 1-800-444-3353. SKU 67546/67596
For Engine technical questions, please call 1-800-520-0882.
Checking and Filling Fuel
WARNING! TO PREVENT SERIOUS
INJURY FROM FIRE:
Fill the fuel tank in a well-ventilated area
away from ignition sources. If the engine is
hot from use, shut it off and wait for it to cool
before adding fuel. Do not smoke.
1. Clean the Fuel Cap and the area around it.
2. Unscrew and remove the Fuel Cap.
3. Fill the fuel tank with 87 octane or higher unleaded
gasoline to the top of the Fuel Level marker on the
fuel strainer.
Max Fuel
DO NOT OVERFILL!
WARNING! TO PREVENT FUEL LEAKAGE
AND FIRE HAZARD, DO NOT OVERFILL.
Note: Do not use gasoline containing more than
10% ethanol (E10). Do not use E85 ethanol.
Note: Do not use gasoline that has been
stored in a metal fuel container or a dirty
fuel container. It can cause particles to
enter the carburetor, affecting engine
performance and/or causing damage.
4. Then replace the Fuel Cap.
5. Wipe up any spilled fuel and allow excess
to evaporate before starting engine.
To prevent FIRE, do not start the engine
while the smell of fuel hangs in the air.
Start Procedure
Before starting the engine:
a. Follow the Set Up Instructions to prepare
the equipment, including installing the
Breather, connecting then turning on
the hose, and attaching the Nozzle.
b. Fill the engine with the proper amount
and type of both fuel and oil.
c. Read the Equipment Operation
section that follows.
1. Point Nozzle in safe direction and squeeze
trigger to release all pressure from the pump.
2. To start the engine:
a. To start a cold engine, move the Choke to the
CHOKE position.
To restart a warm
engine, leave the
Choke in the
RUN position.
b. Open the Fuel Valve.
c. Slide the Throttle or Speed Control Lever to 1/3
away from the SLOW position (the “turtle”).
d. Turn the Engine Switch on.
e. Grip the Starter Handle of the Engine loosely and
pull it slowly several times to allow the gasoline to
ow into the Engine’s carburetor. Then pull the
Starter Handle gently until resistance is felt. Allow
Cable to retract fully and then pull it quickly.
Repeat until the
engine starts.
Note: Do not let the
Starter Handle snap
back against the
engine. Hold it as it
recoils so it doesn’t
hit the engine.
OI
ON
ON
OFF
REV 11c

Page 11
For Pressure Washer technical questions, please call 1-800-444-3353.
SKU 67546/67596
For Engine technical questions, please call 1-800-520-0882.
f. Allow the Engine to run for several seconds. Then,
if the Choke lever is
in the CHOKE
position, move the
Choke Lever very
slowly to its
RUN position.
Note: Moving the Choke
Lever too fast could
stall the engine.
IMPORTANT: Allow the engine to run at no load
for ve minutes with no load after each start-
up so that the engine can stabilize.
3. Move the throttle up to operating speed.
Operating speed is maximum speed (fast or rabbit),
except during operational break-in period.
Break-in Period
1. Breaking-in the engine will help to ensure
proper equipment and engine operation.
2. The operational break-in period will last
about 3 hours of use. During this period:
• Do not apply a heavy load to the equipment.
• Do not operate the engine at its maximum speed.
3. The maintenance break-in period will last
about 20 hours of use. After this period:
• Change the engine oil.
Under normal operating conditions subsequent
maintenance follows the schedule in the
MAINTENANCE AND SERVICING section.
Equipment Operation
WARNING
Do not direct spray from the pressure
washer at a person or an animal. The water
stream could cause serious injury.
CAUTION
Use the pressure washer only on surfaces
able to withstand the force of the spray.
1. Replace the non-vented brass oil plug with
the aluminum Pump Breather Plug before
rst use. The Pump Breather Plug must be
used whenever the pressure washer is used.
The brass oil plug (without the breather hole)
should be used for transporting only.
2. Choose the Nozzle that best meets the needs
of the job. Only use the Nozzles on surfaces
capable of withstanding the force of the spray.
Only use the Black Nozzle when using pressure
washer detergent. The power of the other
Nozzles will propel mist back at the operator
and can embed detergent into the surface.
3. Pull back the quick connect collar and push the
Nozzle onto the end of the Wand. Make sure the
quick connect collar locks the Nozzle in place.
4. Turn the water supply on and hold down the
Trigger to start the stream. Be aware that
when it is rst started, the gun will kick.
5. It is best to start at a low pressure setting, and
adjust the pressure upwards. Test spray the
edge of the surface to be cleaned rst to make
sure that the stream is not too strong for the
surface. If the stream damages the surface, turn
the Pressure Regulator Knob counterclockwise
to reduce the pressure. Moving further away
from the surface being cleaned will also reduce
the pressure being applied to the surface. If
the stream is still too strong, turn the engine off,
turn the water supply off, discharge the excess
pressure from the gun by squeezing the Trigger,
and change to a lower pressure Nozzle.
6. To increase the pressure, turn the
Pressure Regulator Knob clockwise.
7. Hold the Wand at about a 45° angle when
cleaning; spraying the surface directly could
embed dirt into the surface (especially
with the high pressure Nozzles). Spray at
a distance of about three to ve feet.
• Clean vertical and sloped surfaces
from the top down.
• When cleaning horizontal surfaces, occasionally
use the stream to clear the area of excess water.
CAUTION Do not allow the Pressure Washer
to idle without the Trigger held down, for
more than two minutes. The water will
heat up and damage the Pressure Washer.
RISK OF BURNS! The pump will also expel
very hot water if allowed to idle too long.
8. Hold the Trigger down and move the Wand back
and forth slowly and steadily to pressure wash the
surface. Take special care when spraying surfaces
made of two different materials (brick and mortar,
for example), so as to not damage the softer of
the two materials during pressure washing.
9. If the surface is streaked or uneven at the end
of a job, switch to a Nozzle that has a wider
spray pattern to blend the affected area.
10. When nished; release the Trigger on the
spray handle, turn the engine power switch
to “OFF”, turn the water supply off and
then shut off gas supply to the engine.
11. Squeeze the Trigger to release excess pressure.
12. If Pressure Washer detergent has been
used for the job, run clean water through the
system to eliminate detergent residue.
13. To prevent accidents, turn off the engine and after
the engine has cooled, disconnect its spark plug
wire after use. Drain all water out of the unit.
Clean external parts with clean cloth, then
store the equipment out of children’s reach.
REV 10c, 11c

Page 12 For Pressure Washer technical questions, please call 1-800-444-3353. SKU 67546/67596
For Engine technical questions, please call 1-800-520-0882.
Stopping the Engine
To stop the engine in an emergency,
turn the engine switch off.
Under normal conditions, use
the following procedure:
1. Slide the Throttle Lever to SLOW (the “turtle”).
2. Turn the Engine Switch off.
3. Close the Fuel Valve.
OI
OFF
OI
OFF
REV 11c

Page 13
For Pressure Washer technical questions, please call 1-800-444-3353.
SKU 67546/67596
For Engine technical questions, please call 1-800-520-0882.
Service
WARNING
TO PREVENT SERIOUS INJURY FROM ACCIDENTAL STARTING:
Turn the Power Switch of the equipment to its “OFF” position, wait for the engine to cool, and disconnect
the spark plug cap before performing any inspection, maintenance, or cleaning procedures.
TO PREVENT SERIOUS INJURY FROM EQUIPMENT FAILURE:
Do not use damaged equipment. If abnormal noise, vibration, or excess
smoking occurs, have the problem corrected before further use.
Follow all service instructions in this manual. The engine may fail critically if not serviced properly.
Maintenance Procedures
Many maintenance procedures, including any not detailed in this manual, will need to be
performed by a qualied technician for safety. If you have any doubts about your ability to safely
service the equipment or engine, have a qualied technician service the equipment instead.
Cleaning, Maintenance, and Lubrication Schedule
Note: This maintenance schedule is intended solely as a general guide. If performance decreases or if equipment
operates unusually, check systems immediately. The maintenance needs of each piece of equipment will
differ depending on factors such as duty cycle, temperature, air quality, fuel quality, and other factors.
Note: The following procedures are in addition to the regular checks and maintenance
explained as part of the regular operation of the engine and equipment.
Procedure Before
Each Use
Monthly or
every 20
hr. of use
Every 3 mo. or
50 hr. of use
Every 6 mo. or
100 hr. of use
Yearly or
every 300
hr. of use
Every
2 Years
Brush off outside of engine
Check engine oil level
Check air cleaner
Check deposit cup
Change engine oil
Clean/replace air cleaner *
Check and clean spark plug
1. Check/adjust idle speed
2. Check/adjust valve clearance
3. Clean fuel tank, strainer
and carburetor
4. Clean carbon build-up from
combustion chamber
** **
Replace fuel line if necessary **
*Service more frequently when used in dusty areas.
**These items should be serviced by a qualied technician.
REV 11c

Page 14 For Pressure Washer technical questions, please call 1-800-444-3353. SKU 67546/67596
For Engine technical questions, please call 1-800-520-0882.
Checking and Filling Fuel
WARNING! TO PREVENT SERIOUS
INJURY FROM FIRE:
Fill the fuel tank in a well-ventilated area
away from ignition sources. If the engine is
hot from use, shut it off and wait for it to cool
before adding fuel. Do not smoke.
1. Clean the Fuel Cap and the area around it.
2. Unscrew and remove the Fuel Cap.
3. Fill the fuel tank with 87 octane or higher unleaded
gasoline to the top of the Fuel Level marker on the
fuel strainer.
Max Fuel
DO NOT OVERFILL!
WARNING! TO PREVENT FUEL LEAKAGE
AND FIRE HAZARD, DO NOT OVERFILL.
Note: Do not use gasoline containing more than
10% ethanol (E10). Do not use E85 ethanol.
Note: Do not use gasoline that has been
stored in a metal fuel container or a dirty
fuel container. It can cause particles to
enter the carburetor, affecting engine
performance and/or causing damage.
4. Then replace the Fuel Cap.
5. Wipe up any spilled fuel and allow excess
to evaporate before starting engine. To
prevent FIRE, do not start the engine
while the smell of fuel hangs in the air.
Engine Oil Change
CAUTION Oil is very hot during operation
and can cause burns. Wait for engine
to cool before changing oil.
1. Make sure the engine is stopped and is level.
2. Close the Fuel Valve.
3. Place a drain pan (not included) underneath
the crankcase’s drain plug.
4. Remove the drain plug and, if possible,
tilt the crankcase slightly to help drain
the oil out. Recycle used oil.
5. Replace the drain plug and tighten it.
6. Clean the top of the Dipstick and the
area around it. Remove the Dipstick
by threading it counterclockwise, and
wipe it off with a clean lint free rag.
7.
Full level
Full level
Add the appropriate type of oil until the oil
level is at the full level. SAE 10W-30 oil is
recommended for general use. The SAE
Viscosity Grade chart shows other viscosities
to use in different average temperatures.
10W-30
30
5W-30
-20 0 20 40 60 80 100°F
SAE Viscosity Grades
Average outdoor temperature
8. Thread the dipstick back in clockwise.
CAUTION Do not run the engine with too little oil.
The engine will be permanently damaged.
Air Filter Element Maintenance
1. Remove the air lter cover and the air
lter elements and check for dirt. Clean
or replace as described below.
2. Cleaning:
• For “paper” lter elements:
To prevent injury from dust and debris, wear
ANSI-approved safety goggles, NIOSH-
approved dust mask/respirator, and heavy-
duty work gloves. In a well-ventilated area
away from bystanders, use pressurized
air to blow dust out of the air lter. If this
does not get the lter clean, replace it.
• For foam lter elements:
Wash the element in warm water and mild
detergent several times. Rinse. Squeeze
out excess water and allow it to dry
completely. Soak the lter in lightweight oil
briey, then squeeze out the excess oil.
3. Install the new lter or the cleaned lter.
Secure the Air Cleaner Cover before use.
REV 11c

Page 15
For Pressure Washer technical questions, please call 1-800-444-3353.
SKU 67546/67596
For Engine technical questions, please call 1-800-520-0882.
Spark Plug Maintenance
1.
Spark
Plug
Cap
Disconnect spark plug cap from end of plug.
Clean out debris from around spark plug.
2. Using a spark plug wrench, remove the spark plug.
3. Inspect the spark plug:
If the electrode is oily, clean it using a clean,
dry rag. If the electrode has deposits on it, polish it
using emery paper. If the white insulator is cracked
or chipped, the spark plug needs to be replaced.
Recommended
Spark Plugs
Brand Item Number
NGK®BP-6ES
NHSP® / TORCH®F6TC
NOTICE: Using an incorrect spark plug
may damage the engine.
4. When installing a new spark plug, adjust the
plug’s gap to the specication on the Technical
Specications chart. Do not pry against the
electrode, the spark plug can be damaged.
5. Install the new spark plug or the cleaned spark plug
into the engine.
Gasket-style: Finger-tighten until the gasket
contacts the cylinder head, then about 1/2-2/3
turn more.
Non-gasket-style: Finger-tighten until the plug
contacts the head, then about 1/16 turn more.
NOTICE: Tighten the spark plug properly. If loose,
the spark plug will cause the engine to
overheat. If overtightened, the threads
in the engine block will be damaged.
6. Apply dielectric spark plug boot protector
(not included) to the end of the spark
plug and reattach the wire securely.
Storage
When the equipment is to remain idle for longer
than 20 days, prepare the engine for storage as follows:
1. CLEANING:
Wait for engine to cool, then clean with dry cloth.
NOTICE: Do not clean engine using water. The water
will gradually enter the engine and cause rust damage.
Apply a thin coat of rust preventive oil to all metal parts.
2. FUEL:
WARNING! TO PREVENT SERIOUS
INJURY FROM FIRE:
Drain the fuel tank in a well-ventilated area
away from ignition sources. If the engine is
hot from use, shut it off and wait for it to cool
before draining fuel. Do not smoke.
a. Place a funnel leading to a proper gasoline
container below the carburetor.
b.
Drain Plug
Sediment Cup
(some engines)
Remove the drain bolt from the bottom of the
carburetor bowl and allow the fuel to drain.
c. Remove the small sediment cup next to the bowl
and allow the fuel to drain from there as well.
d. Open the fuel valve. After all fuel has
drained, reinstall the drain bolt and sediment
cup (if equipped). Tighten securely.
3. LUBRICATION:
a. Change engine oil.
b. Clean out area around spark plug. Remove
spark plug and pour one tablespoon of engine
oil into cylinder through spark plug hole.
c. Replace spark plug, but leave spark
plug cap disconnected.
d. Pull Starter Handle to distribute oil in cylinder.
Stop after one or two revolutions when you
feel the piston start the compression stroke
(when you start to feel resistance).
4. BATTERY:
Disconnect battery cables (if equipped).
Recharge batteries monthly while in storage.
5. STORAGE AREA:
Cover and store in a dry, level, well-ventilated
area out of reach of children. Storage area
should also be away from ignition sources, such
as water heaters, clothes dryers, and furnaces.
6. AFTER STORAGE:
Before starting the engine after storage, keep
in mind that untreated gasoline will deteriorate
quickly. Drain the fuel tank and change to fresh
fuel if untreated gasoline has been sitting for
a month, if treated gasoline has been sitting
beyond the fuel stabilizer’s recommended
time period, or if the engine does not start.
REV 11c

Page 16 For Pressure Washer technical questions, please call 1-800-444-3353. SKU 67546/67596
For Engine technical questions, please call 1-800-520-0882.
Problem Possible Causes Probable Solutions
Engine will
not start
Starting instructions not
followed completely.
Refer to starting instructions and
follow them step-by-step.
FUEL RELATED:
1. No fuel in tank or fuel valve closed.
2. Choke not in start position,
especially with cold engine.
3. Low quality or deteriorated, old gasoline.
4. Dirty fuel passageways blocking fuel ow.
5. Carburetor needle stuck. Fuel
can be smelled in the air.
6. Too much fuel in chamber. This can be
caused by the carburetor needle sticking.
FUEL RELATED:
1. Fill fuel tank and open fuel valve.
2. Move choke to start position if engine is cold.
3. Use only fresh 87+ octane
unleaded gasoline.
4. Clean out passageways using fuel additive.
Heavy deposits may require further cleaning.
5. Gently tap side of carburetor oat
chamber with screwdriver handle.
6. Turn choke to run position. Remove spark
plug and pull the start handle several times
to air out the chamber. Reinstall spark
plug and set choke to start position.
IGNITION (SPARK) RELATED:
1. Spark plug wire not connected securely.
2. Spark plug electrode wet or dirty.
3. Incorrect spark plug gap.
4. Spark plug wire broken.
5. Incorrect spark timing or
faulty ignition system.
IGNITION (SPARK) RELATED:
1. Connect spark plug wire properly.
2. Clean spark plug.
3. Correct the spark plug gap.
4. Replace spark plug wire.
5. Have qualied technician diagnose/
repair ignition system.
COMPRESSION RELATED:
1. Cylinder not lubricated. Problem after long
storage periods.
2. Loose or broken spark plug. (Hissing noise
will occur when trying to start.)
3. Loose cylinder head or damaged
head gasket. (Hissing noise will
occur when trying to start.)
4. Engine valves or tappets
misadjusted or stuck.
COMPRESSION RELATED:
1. Pour tablespoon of oil into spark
plug hole. Crank engine a few
times and try to start again.
2. Tighten spark plug. If that does not work,
replace spark plug. If problem persists,
may have head gasket problem, see #3.
3. Tighten head. If that does not remedy
problem, replace head gasket.
4. Adjust valve clearance. If that does not
work, clean or replace valves/tappets.
Engine misres 1. Spark plug wire loose.
2. Incorrect spark plug gap or
damaged spark plug.
3. Defective spark plug wire.
4. Old or low quality gasoline.
5. Incorrect compression.
1. Check wire connections.
2. Re-gap or replace spark plug.
3. Replace spark plug wire.
4. Use only fresh 87+ octane
unleaded gasoline.
5. Diagnose and repair compression.
(Use Engine will not start:
COMPRESSION RELATED section.)
Follow all safety precautions whenever diagnosing or servicing the equipment or engine.
Troubleshooting
REV 11c

Page 17
For Pressure Washer technical questions, please call 1-800-444-3353.
SKU 67546/67596
For Engine technical questions, please call 1-800-520-0882.
Problem Possible Causes Probable Solutions
Engine stops
suddenly
1. Low oil shutdown.
2. Fuel tank empty or full of impure
or low quality gasoline.
3. Defective fuel tank cap creating
vacuum, preventing proper fuel ow.
4. Faulty magneto.
1. Fill engine oil to proper level. Check
engine oil before EVERY use.
2. Fill fuel tank with fresh 87+
octane unleaded gasoline.
3. Test/replace fuel tank cap.
4. Have qualied technician service magneto.
Engine knocks 1. Old or low quality gasoline.
2. Engine overloaded.
3. Incorrect spark timing, deposit
buildup, worn engine, or other
mechanical problems.
1. Fill fuel tank with fresh 87+
octane unleaded gasoline.
2. Do not exceed equipment’s load rating.
3. Have qualied technician diagnose
and service engine.
Engine backres 1. Impure or low quality gasoline.
2. Engine too cold.
3. Intake valve stuck or overheated engine.
1. Fill fuel tank with fresh 87+
octane unleaded gasoline.
2. Use cold weather fuel and oil
additives to prevent backring.
3. Have qualied technician diagnose
and service engine.
Does not
produce high
pressure
1. Diameter of water supply hose too small
2. Water supply is restricted.
3. Not enough water supply.
1. Replace hose with a ¾ inch hose.
2. Check water supply hose for
kinks, leaks, or blockage.
3. Open water faucet all the way.
Output pressure
varies
1. Not enough water supply.
2. Water inlet screen is clogged.
3. Nozzle is clogged.
4. Nozzle has mineral build up.
1. Check water supply hose for kinks, leaks,
or blockage. Open faucet all the way.
2. Remove inlet screen and rinse out.
3. Remove Nozzle and clean.
4. Remove Nozzle and clean with vinegar.
No intake of
chemicals.
1. Chemical hose not properly
inserted into unit.
2. Tube cracked or split.
3. Wrong Nozzle.
4. Injector turned off.
5. Injection tube strainer clogged.
6. Nozzle blocked.
7. Dried chemicals in injector.
1. Push rmly into injector. Replace tube.
2. Switch to black Nozzle.
3. Turn collar counterclockwise.
4. Clean strainer.
5. Clean Nozzle.
6. Dissolve by running warm water
through the injection tube.
7. Run clean water through injector until clear.
Follow all safety precautions whenever diagnosing or servicing the equipment or engine.
REV 11c

Page 18 For Pressure Washer technical questions, please call 1-800-444-3353. SKU 67546/67596
For Engine technical questions, please call 1-800-520-0882.
Part Description Qty
1 Gun & Hose Holder 1
2 Washer 1
3 Nut 1
4 Grommet 5
5 Nozzle 5
6 Label 1
7 Filter 1
8 Detergent Inlet Hose 1
9 Bolt 4
10 Lock Washer 4
11 Pump Assembly 1
12 Engine
Item 67546 (EPA version)
Item 67596 (EPA/CARB version)
1
13 Key 1
14 Handle 1
15 Handle Bolt 2
16 Swivel Nut 2
17 Frame 1
18 Hose 1
19 Gun 1
Part Description Qty
20 Wand 1
21 Pad 2
22 Washer 2
23 Nut 2
24 Engine Bolt 4
25 Lock Washer 2
26 Washer 2
27 Nut 2
28 Lock Washer 2
29 Axle Nut 2
30 Lock Washer 2
31 Washer 2
32 Axle 2
33 Clip 2
34 Wheel 2
35 Washer 2
36 Wheel Nut 2
37 Dipstick 1
38 Breather Plug 1
39 O-ring 1
40 Shock Pad 4
Parts Lists and Diagrams
General Parts List
PLEASE READ THE FOLLOWING CAREFULLY
THE MANUFACTURER AND/OR DISTRIBUTOR HAS PROVIDED THE PARTS LIST AND ASSEMBLY DIAGRAM IN
THIS MANUAL AS A REFERENCE TOOL ONLY. NEITHER THE MANUFACTURER OR DISTRIBUTOR MAKES ANY
REPRESENTATION OR WARRANTY OF ANY KIND TO THE BUYER THAT HE OR SHE IS QUALIFIED TO MAKE ANY
REPAIRS TO THE PRODUCT, OR THAT HE OR SHE IS QUALIFIED TO REPLACE ANY PARTS OF THE PRODUCT.
IN FACT, THE MANUFACTURER AND/OR DISTRIBUTOR EXPRESSLY STATES THAT ALL REPAIRS AND PARTS
REPLACEMENTS SHOULD BE UNDERTAKEN BY CERTIFIED AND LICENSED TECHNICIANS, AND NOT BY THE
BUYER. THE BUYER ASSUMES ALL RISK AND LIABILITY ARISING OUT OF HIS OR HER REPAIRS TO THE
ORIGINAL PRODUCT OR REPLACEMENT PARTS THERETO, OR ARISING OUT OF HIS OR HER INSTALLATION
OF REPLACEMENT PARTS THERETO.
Record Product’s Serial Number Here:
Note: If product has no serial number, record month and year of purchase instead.
Note: Some parts are listed and shown for illustration purposes only, and
are not available individually as replacement parts.
REV 11c

Page 19
For Pressure Washer technical questions, please call 1-800-444-3353.
SKU 67546/67596
For Engine technical questions, please call 1-800-520-0882.
General Assembly Diagram
REV 11c
9
10
37
38
39
11
12
12
13
1
3
14
15
16
17
18
19
20
27
28
27
28
29
30
31
32
33
34
35
36
21
40
26
25
24
23
22
12345678
Item #
67546
(EPA version) Item #
67596
(EPA/CARB version)

Page 20 For Pressure Washer technical questions, please call 1-800-444-3353. SKU 67546/67596
For Engine technical questions, please call 1-800-520-0882.
When ordering replacement parts from this list, the “A” sufx must be included in order to get the correct part.
Parts List A - Pump
Part Description
1A Screw M8x16
2A Flange
3A O-Ring 80x2,4
4A Radial Shaft Seal
5A Real Bearing
6A Sheath
7A Wobble Plate
8A Front Bearing
9A Spring Disk
10A 15mm Plunger
11A Plunger Spring
12A Crankcase
13A O-Ring 14.2x1.9
14A Pump Breather Plug
15A Dipstick
16A Oil Seal
17A O-ring 15x2.2
18A Spacer
19A O-Ring 22x2
20A Pressure Ring
Part Description
21A Water Seal
22A Inlet Valve Plug
23A Backup Ring
24A O-Ring
25A Check Valve
26A Detergent Inlet
27A O-Ring 4.47x1.78
28A Ball
29A Cone Spring
30A O-Ring
31A Outlet Valve
32A Valve Spring
33A O-Ring
34A Siphon Body
35A Outlet Connector
36A Backup Ring
37A O-Ring
38A Valve Core
39A Plug
40A Pump Manifold
Part Description
41A Seal Gasket
42A Water Inlet Body
43A Thermal Relief Valve
44A Inlet Swivel Nut
45A Clip Ring
46A Water Filter
47A Manifold Bolt
48A Pressure Regulator Knob
49A Screw Plug
50A O-Ring
51A Backup Ring
53A O-Ring
52A Spring Holder
54A Large Pressure Spring
55A Small Pressure Spring
56A Ball Holder
57A Ball
58A Valve Port
59A O-Ring
60A Shipping Oil Plug
REV 11c
Table of contents
Popular Pressure Washer manuals by other brands

Briggs & Stratton
Briggs & Stratton 020681 Operator's manual

Sears
Sears CRAFTSMAN 580.747100 owner's manual

Generac Power Systems
Generac Power Systems 1195-0 owner's manual

VARO
VARO Powerplus GardenPro POWXG90410 manual

Hotsy
Hotsy 981SS Operating instructions and parts manual

Clarke
Clarke POWER WASH JET 7000 Operation & maintenance instructions