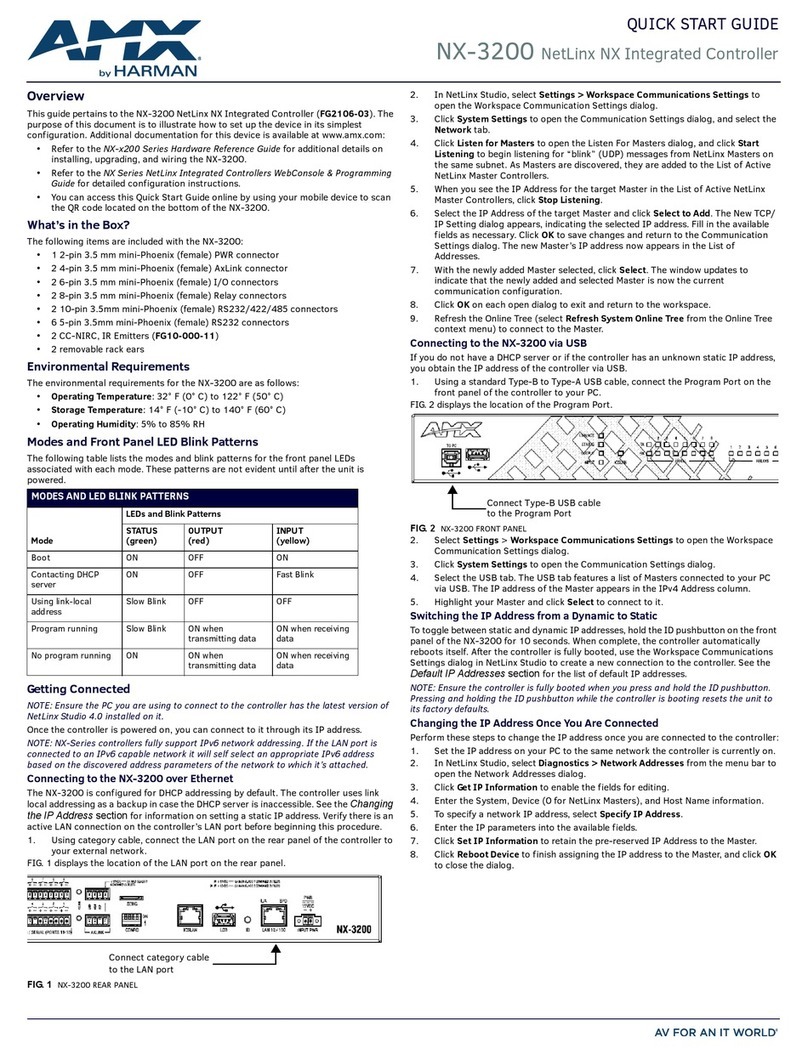
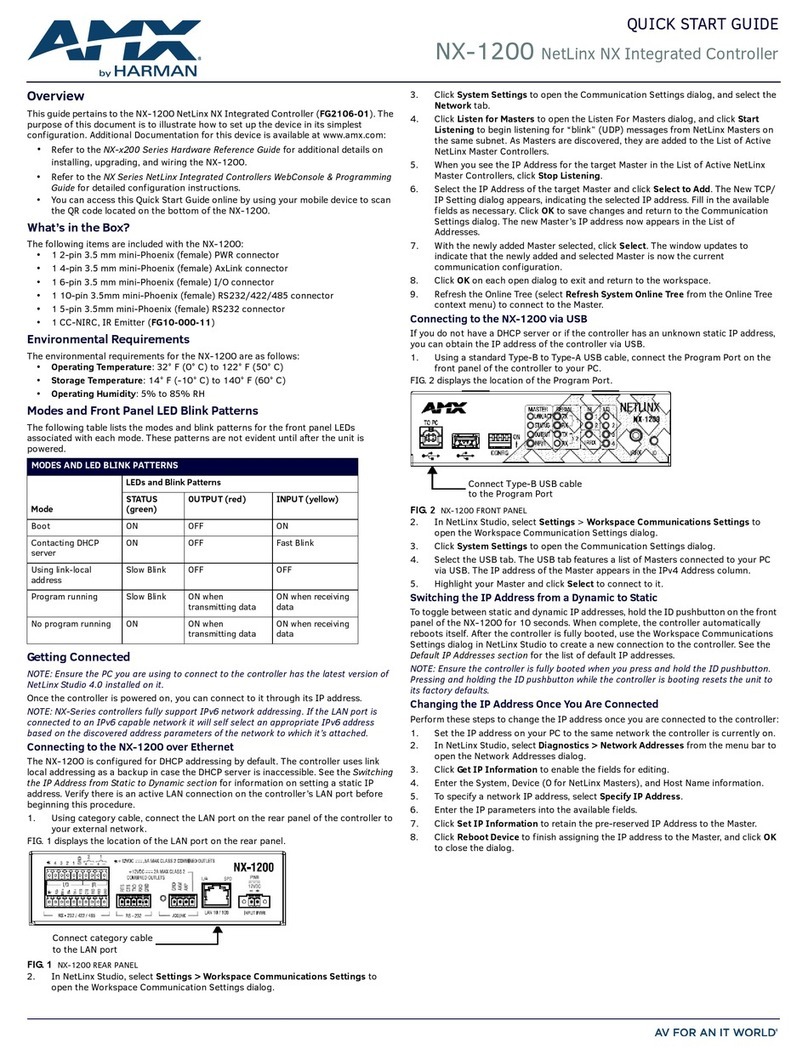
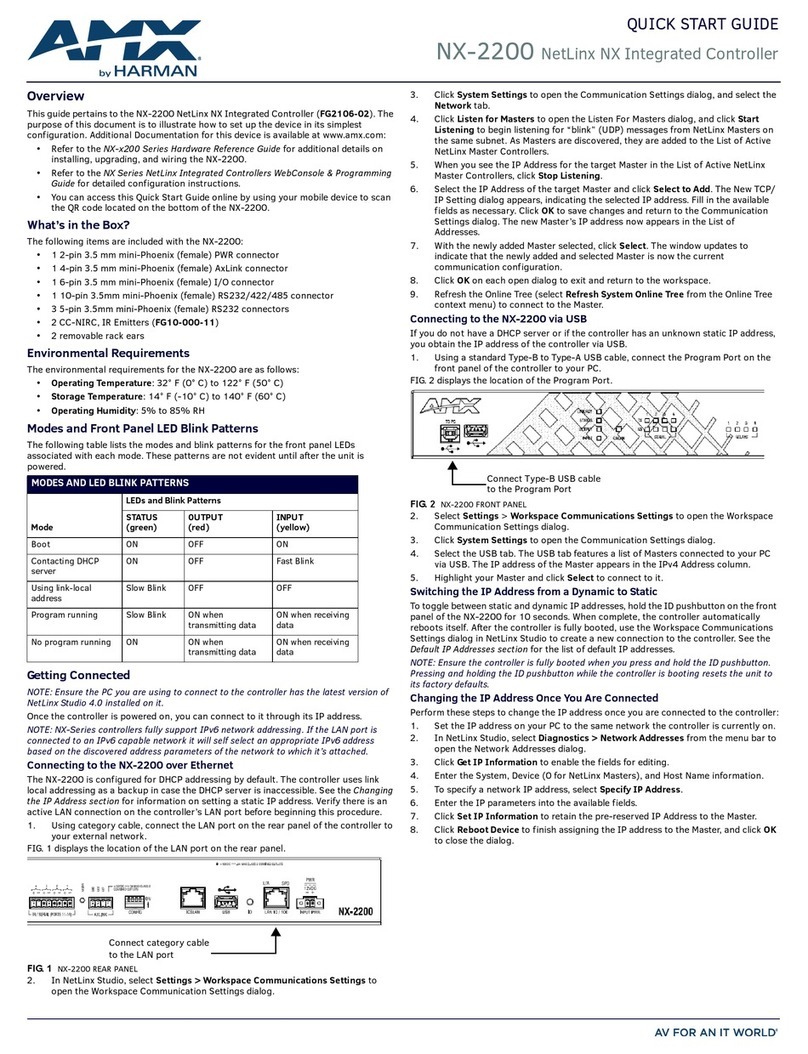
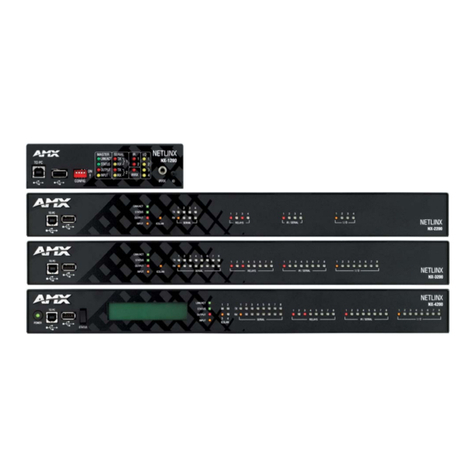
Harman AMX MU Series User manual

pg. 1
Instruction Manual
MU-Series Automation Controllers

pg. 2
IMPORTANT SAFETY INSTRUCTIONS
ESD Warning
To avoid ESD (Electrostatic Discharge) damage to sensitive components, make sure you are properly grounded before
touching any internal materials.
When working with any equipment manufactured with electronic devices, proper ESD grounding procedures must be
followed to make sure people, products, and tools are as free of static charges as possible. Grounding straps, conductive
smocks, and conductive work mats are specifically designed for this purpose. These items should not be manufactured
locally, since they are generally composed of highly resistive conductive materials to safely drain static discharges,
without increasing an electrocution risk in the event of an accident.
Anyone performing field maintenance should use an appropriate ESD field service kit complete with at least a dissipative
work mat with a ground cord and a UL listed adjustable wrist strap with another ground cord.

pg. 3
IMPORTANT SAFETY INSTRUCTIONS
1. READ these instructions.
2. KEEP these instructions.
3. HEED all warnings.
4. FOLLOW all instructions.
5. DO NOT use this apparatus near water.
6. CLEAN ONLY with dry cloth.
7. DO NOT block any ventilation openings. Install in accordance with the manufacturer's instructions.
8. DO NOT install near any heat sources such as radiators, heat registers, stoves, or other apparatus (including
amplifiers) that produce heat.
9. DO NOT defeat the safety purpose of the polarized or grounding type plug. A polarized plug has two blades with one
wider than the other. A grounding type plug has two blades and a third grounding prong. The wider blade or the third
prong are provided for your safety. If the provided plug does not fit into your outlet, consult an electrician for
replacement of the obsolete outlet.
10. PROTECT the power cord from being walked on or pinched, particularly at plugs, convenience receptacles, and the
point where they exit from the apparatus.
11. ONLY USE attachments/accessories specified by the manufacturer.
12. USE ONLY with a cart, stand, tripod, bracket, or table specified by the manufacturer, or sold with the apparatus. When
a cart is used, use caution when moving the cart/apparatus combination to avoid injury from tip-
over.
13. UNPLUG this apparatus during lightning storms or when unused for long periods of time.
14. REFER all servicing to qualified service personnel. Servicing is required when the apparatus has been damaged in
any way, such as power-supply cord or plug is damaged, liquid has been spilled or objects have fallen into the
apparatus, the apparatus has been exposed to rain or moisture, does not operate normally, or has been dropped.
15. DO NOT expose this apparatus to dripping or splashing and ensure that no objects filled with liquids, such as vases,
are placed on the apparatus.
16. To completely disconnect this apparatus from the AC Mains, disconnect the power supply cord plug from the AC
receptacle.
17. Where the mains plug or an appliance coupler is used as the disconnect device, the disconnect device shall remain
readily operable.
18. DO NOT overload wall outlets or extension cords beyond their rated capacity as this can cause electric shock or fire.
WATCH FOR THESE SYMBOLS:
The exclamation point, within an equilateral triangle, is intended to alert the user to the presence of
important operating and maintenance (servicing) instructions in the literature accompanying the product.
The lightning flash with arrowhead symbol within an equilateral triangle is intended to alert the user to
the presence of uninsulated “dangerous voltage” within the product’s enclosure that may be of
sufficient magnitude to constitute a risk of electrical shock to persons.
ESD Warning: The icon to the left indicates text regarding potential danger associated with the
discharge of static electricity from an outside source (such as human hands) into an integrated circuit,
often resulting in damage to the circuit.

pg. 4
WARNING: To reduce the risk of fire or electrical shock, do not expose this apparatus to rain or moisture.
WARNING: No naked flame sources – such as lighted candles – should be placed on the product.
CAUTION: To be installed by instructed, or skilled, persons only.
WARNING: This product is intended to be operated ONLY from the voltages listed on the back panel or the
recommended, or included power supply of the product. Operation from other voltages other than those
indicated may cause irreversible damage to the product and void the product’s warranty. The use of AC Plug
Adapters is cautioned because it can allow the product to be plugged into voltages in which the product was
not designed to operate. If you are unsure of the correct operational voltage, please contact your local
distributor and/or retailer. If the product is equipped with a detachable power cord, use only the type
provided, or specified, by the manufacturer or your local distributor.
WARNING: Do Not Open! Risk of Electrical Shock. Voltages in this equipment are hazardous to life. No user-serviceable
parts inside. Refer all servicing to qualified service personnel.
Place the equipment near a main power supply outlet and make sure that you can easily access the power breaker
switch.
CAUTION: This product contains batteries that are covered under the 2006/66/EC European Directive, which
cannot be disposed of with normal household waste. Please dispose of any used batteries properly, following
any local regulations. Do not incinerate.
WARNING: 45°C (113 °F) is maximum ambient operating temperature. Avoid exposure to extreme heat or cold.
RACK MOUNTING:
A) Elevated Operating Ambient - If installed in a closed or multi-unit rack assembly, the operating ambient temperature of
the rack environment may be greater than room ambient. Therefore, consideration should be given to installing the
equipment in an environment compatible with the maximum ambient temperature (Tma) specified by the manufacturer.
B) Reduced Air Flow - Installation of the equipment in a rack should be such that the amount of air flow required for safe
operation of the equipment is not compromised.
C) Mechanical Loading - Mounting of the equipment in the rack should be such that a hazardous condition is not achieved
due to uneven mechanical loading.
D) Circuit Overloading - Consideration should be given to the connection of the equipment to the supply circuit and the
effect that overloading of the circuits might have on overcurrent protection and supply wiring. Appropriate consideration of
equipment nameplate ratings should be used when addressing this concern.
E) Reliable Earthing - Reliable earthing of rack-mounted equipment should be maintained. Particular attention should be
given to supply connections other than direct connections to the branch circuit (e.g. use of power strips)."

pg. 5
FCC AND CANADA EMC COMPLIANCE INFORMATION:
This device complies with part 15 of the FCC Rules. Operation is subject to the following two conditions:
(1) This device may not cause harmful interference, and (2) this device must accept any interference received,
including interference that may cause undesired operation.
CAN ICES 003 (B)/NMB-3(B)
FCC SDOC SUPPLIER’S DECLARATION OF CONFORMITY:
HARMAN Professional, Inc. hereby declares that this equipment is in compliance with the FCC part 15 Subpart B.
NOTE: This equipment has been tested and found to comply with the limits for a Class B digital device, pursuant to part 15
of the FCC Rules. These limits are designed to provide reasonable protection against harmful interference in a residential
installation. This equipment generates, uses and can radiate radio frequency energy and, if not installed and used in
accordance with the instructions, may cause harmful interference to radio communications. However, there is no guarantee
that interference will not occur in a particular installation. If this equipment does cause harmful interference to radio or
television reception, which can be determined by turning the equipment off and on, the user is encouraged to try to correct
the interference by one or more of the following measures:
•Reorient or relocate the receiving antenna.
•Increase the separation between the equipment and receiver.
•Connect the equipment into an outlet on a circuit different from that to which the receiver is connected.
•Consult the dealer or an experienced radio/TV technician for help.
Approved under the verification provision of FCC CFR Title 47 Part 15 Sub Part B.
Caution: Changes or modifications not expressly approved by the manufacturer could void the user’s authority to
operate this device.

pg. 6
ENVIRONMENTAL:
该设备的设计和测试是在海拔 2000 米高度以下进行的, 它只适用在海拔2000 米以下的地区. 在海拔2000 米以
上使用可能会导致潜在的安全隐患.
This device is designed and evaluated under the condition of altitude below 2000 meters above sea level;
it can only be used in locations below 2000 meters above sea level. Using the device above 2000 meters
could result in a potential safety hazard.
此标识适用于在中华人民共和国销售的电子信息产品. 标识中间的数字为环保实用期限的年数.
This logo applies to electronic information products sold in the People's Republic of China. The number in the middle of
the logo is the number of years of environmental utility.

pg. 7
EU COMPLIANCE INFORMATION:
Hereby, Harman Professional, Inc. declares that the equipment type MU-1000/1300/2300/3300 is in compliance with the
following: European Union Low Voltage Directive 2014/35/EU; European Union EMC Directive 2014/30/EU; European
Union Restriction of Hazardous Substances Recast (RoHS2) Directive 2011/65/EU and as amended by 2015/863;
The full text of the EU declaration of conformity is available at the following internet address:
https://www.amx.com/en/support_downloads/download_types/certification
WEEE NOTICE:
The WEEE Directive 2012/19/EU on Waste Electrical and Electronic Equipment (WEEE), which entered into force as
European law on 14/02/2014, resulted in a major change in the treatment of electrical equipment at end-of-life.
The purpose of this Directive is, as a first priority, the prevention of WEEE, and in addition, to promote the reuse, recycling
and other forms of recovery of such wastes so as to reduce disposal. The WEEE logo on the product or on its box
indicating collection for electrical and electronic equipment consists of the crossed-out wheeled bin, as shown below.
This product must not be disposed of or dumped with your other household waste. You are liable of dispose of all your
electronic or electrical waste equipment by relocating over to the specified collection point for recycling of such hazardous
waste. Isolated collection and proper recovery of your electronic and electrical waste equipment at the time of disposal will
allow us to help conserving natural resources. Moreover, proper recycling of the electronic and electrical waste equipment
will ensure safety of human health and environment. For more information about electronica and electrical waste
equipment disposal, recovery, and collection points, please contact your local city center, household waste disposal
service, shop from where you purchased the equipment, or manufacturer of the equipment.
Manufacturer Information:
HARMAN Professional, Inc.
Address: 8500 Balboa Blvd. Northridge, CA 91329 USA
EU Regulatory Contact:
Harman Professional Denmark ApS
Olof Palmes Allé 44, 8200 Aarhus N, Denmark
UK Regulatory Contact:
Harman Professional Solutions
2 Westside, London Road, Apsley, Hemel Hempstead, HP3 9TD, UK

pg. 8
Table of Contents
Contents
IMPORTANT SAFETY INSTRUCTIONS...............................................................................................................................................2
TABLE OF CONTENTS .........................................................................................................................................................................8
WHAT’S NEW?.................................................................................................................................................................................10
SUPPORTS MULTIPLE HARMAN PROTOCOLS NATIVELY ................................................................................................................................10
HCONTROL .....................................................................................................................................................................................10
STANDARD LANGUAGE SCRIPTING SUPPORT ............................................................................................................................................10
DUET MODULE AND DRIVER DESIGN MODULE SUPPORT ............................................................................................................................10
USB HOST......................................................................................................................................................................................10
USB-C PROGRAM PORT ....................................................................................................................................................................10
ICSLAN IMPROVEMENTS ....................................................................................................................................................................10
FEATURES........................................................................................................................................................................................11
MU-SERIES CONTROLLER FEATURES .....................................................................................................................................................11
MU-1000 .........................................................................................................................................................................................12
MU-1000 SPECIFICATIONS ................................................................................................................................................................12
MU-1300 .........................................................................................................................................................................................14
MU-1300 SPECIFICATIONS ................................................................................................................................................................14
MU-2300 .........................................................................................................................................................................................16
MU-2300 SPECIFICATIONS ................................................................................................................................................................16
MU-3300 .........................................................................................................................................................................................18
MU-3300 SPECIFICATIONS ................................................................................................................................................................18
MOUNTING THE CONTROLLER.........................................................................................................................................................20
MOUNTING THE MU-2300 AND MU-3300 ..........................................................................................................................................20
INSTALLING THE CONTROLLER INTO AN EQUIPMENT ..................................................................................................................................20
RACK MOUNT SAFETY INSTRUCTIONS FOR MU-2300 AND MU-3300..........................................................................................................20
MOUNTING THE MU-1000 AND MU-1300 ..........................................................................................................................................20
FRONT PANEL COMPONENTS ..........................................................................................................................................................21
PROGRAM PORT ..............................................................................................................................................................................21
USB PORT......................................................................................................................................................................................21
LEDS.............................................................................................................................................................................................21
General Status LEDs.................................................................................................................................................................21
SERIAL LEDs .............................................................................................................................................................................22
RELAYS LEDs ............................................................................................................................................................................22
IR/SERIAL LEDs.........................................................................................................................................................................22
I/O LEDs...................................................................................................................................................................................22
WIRING AND CONNECTIONS ...........................................................................................................................................................23
OVERVIEW......................................................................................................................................................................................23
SERIAL PORTS ..................................................................................................................................................................................23
RS-232 Ports ............................................................................................................................................................................23
RS-232/422/485 Ports..............................................................................................................................................................23
RELAY PORTS...................................................................................................................................................................................24
I/O PORTS......................................................................................................................................................................................24

pg. 9
IR/SERIAL PORT .............................................................................................................................................................................24
ICSLAN PORTS................................................................................................................................................................................25
USING THE ICSLAN NETWORK ............................................................................................................................................................25
ICSLan Network Settings ..........................................................................................................................................................25
DHCP Server ............................................................................................................................................................................25
Opening LAN and ICSLAN Sockets from Code............................................................................................................................25
LAN 10/100 PORT ..........................................................................................................................................................................25
IPv4.........................................................................................................................................................................................25
IPv6.........................................................................................................................................................................................25
INPUT PWR CONNECTOR .................................................................................................................................................................26
PREPARING CAPTIVE WIRES ................................................................................................................................................................26
ID PUSHBUTTON..............................................................................................................................................................................26
LED PATTERNS.................................................................................................................................................................................27

pg. 10
What’s New?
Supports multiple Harman protocols natively
The MU-series controller speaks HControl, HiQnet, and ICSP right out of the box, allowing seamless integration with
existing Harman gear. AMX touch panels, Crown DCi Amplifiers, BSS Contrio keypads and Soundweb London devices are
all available to the controller from these communication buses. Future Harman gear that is HControl aware will all work
with the MU-series controllers.
HControl
Harman HControl is a new protocol that provides self-describing devices that share their capabilities to HControl aware
controllers. The readable and controllable parameters are furnished to the controller to allow dynamic updates of
control possibilities.
Standard Language Scripting Support
Instead of using the proprietary NetLinx language for the business logic of a controlled space, the MU-series employs
standard scripting languages. This currently includes:
•Python3
•JavaScript
•Java with Groovy
The use of standard languages opens the doors for the practically infinite resources available for learning and deploying
these scripts. The programmer no longer has to go through AMX certification process to learn our specific language.
They are free to take any course, read any book, or utilize any other resource they prefer to learn the available
languages. Reaching out for questions is no longer limited to the AMX Forums or Tech Support. Industry favorite sites
like Stack Overflow are there for reference and help.
Duet Module and Driver Design Module support
The MU-series platform still supports Duet modules. This gives you control of 1000s of devices from the AMX InConcert
library. Complex devices like video conferencers and media servers will share the same uniform control set as they did
in NetLinx, allowing you to integrate them without writing programs for their native API. Similar devices become
interchangeable, so swapping out one display for another becomes a matter of pointing to a different Duet module. The
controls the script sees are the same.
USB Host
The USB-A Host port is available for use with mass storage devices for convenient logging capabilities as well as to
connect other devices such as the FLIRC IR receiver to add IR Hand Controls as an input to the system.
USB-C Program Port
The controller’s CLI is available from the USB-C port allowing the programmer to connect directly to find and configure
properties like the IP address, known devices, running programs, and many more. The symmetrical USB-C connector can
be inserted in either orientation. Once plugged in, the MU Controller presents as a virtual COM port. Use your favorite
terminal program to communicate to the MU directly.
ICSLan improvements
For models with ICSLan (MU-1000, MU-2300, MU-3300) the network address and subnet mask are now selectable,
providing a more flexible control network. The ICSLan still provides an isolated network for controlled devices that
never touches the LAN connection. IT departments only see the one LAN address for a complete system.

pg. 11
Features
MU-Series Controller Features
Name (SKU)
Features
MU-1000 (AMX-CCC000)
PoE Powered (802.3af – standard power)
1 LAN Ethernet port
1 ICSLan Control Network port
Small form factor – 1” x 5” x 5”
DIN Rail mountable with DIN Rail Clip (AMX-CAC0001)
4 GB DDR3 RAM
8 GB eMMC Storage
2x USB 2.0 Type A Host port
1x USB Type C program port
MU-1300 (AMX-CCC013)
1 LAN Ethernet port
1 RS-232 / RS-422 / RS-485 serial port
1 RS-232-only serial port
2 IR / Serial ports
4 Digital I/O ports
Small form factor – 1 RU, 1/3 Rack Width
1 11/16” x 5 13/16” x 5 1/8”
(42.16 mm x 147.32 mm x 130.81 mm)
DIN Rail mountable with DIN Rail Clip (AMX-CAC0001)
4 GB DDR3 RAM
8 GB eMMC Storage
2x USB 2.0 Type A Host port
1x USB Type C program port
MU-2300 (AMX-CCC023)
1 LAN Ethernet port
1 RS-232 / RS-422 / RS-485 serial port
3 RS-232-only serial port
4 IR / Serial ports
4 Digital I/O ports
1 ICSLan Control Network Port
Rack Mounted – 1 RU
4 GB DDR3 RAM
8 GB eMMC Storage
3x USB 2.0 Type A Host port
1x USB Type C program port
MU-3300 (AMX-CCC033)
1 LAN Ethernet port
2 RS-232 / RS-422 / RS-485 serial port
6 RS-232-only serial port
8 IR / Serial ports
8 Digital I/O ports
1 ICSLan Control Network Port
Rack Mounted – 1 RU
4 GB DDR3 RAM
8 GB eMMC Storage
3x USB 2.0 Type A Host port
1x USB Type C program port

pg. 12
MU-1000
The MU-1000 (AMX-CCC000) has 4 GB of on-board DDR3 RAM, a commercial grade 8GB eMMC non-volatile memory
storage chip and an ICSLan control network.It is PoE powered and has a small form factor for easy installation. It
features the MUSE scripting engine which supports a variety of standard programming languages to create the business
logic for the control system. A complete list of device specifications is listed below.
MU-1000 Specifications
Dimensions
5.14" x 5.04" x 1.18" (130.5 x 128 x 30 mm)
Power Requirements
PoE 36-57V @ 350mA Max
Power Consumption
15.4W Maximum - PoE 802.3af Class 0
Mean Time Between Failure (MTBF)
100000 hours
Memory
4 GB DDR3 RAM
8 GB eMMC
Weight
1.26 lbs (572g)
Enclosure
Powder Coated Steel – Gray Pantone 10393C
Certifications
• ICES 003
• CE EN 55032
• AUS/NZ CISPR 32
• CE EN 55035
• CE EN 62368-1
• IEC 62368-1
• UL 62368-1
• VCCI CISPR 32
• RoHS / WEEE compliant
Front Panel Components
Status LED
RGB LED – see Status LED Detailed Description
ID button
ID pushbutton used during boot to revert to factory configuration or
factory firmware
USB-C Program Port
Connection to PC for virtual terminal for MU configuration
LAN Link/Activity LED
Lit when connected to a network. Blinks upon network activity
ICSLan Link/Activity LED
Lit when connected to a network. Blinks upon network activity
Rear Panel Components
LAN Port
RJ-45 10/100 BASE-T for Ethernet communication and PoE
Auto MDI/MDI-X
DHCP Client

pg. 13
…MU-1000 specifications continued
ICSLan Port
RJ-45 10/100 BASE-T for Ethernet communication
Auto MDI/MDI-X
DHCP server
Provides isolated control network
USB Host Port
2x Type-A USB host port
•USB Mass Storage – for external logging
•
FLIRC – IR Receiver for IR hand control input
General Specifications:
Operating Environment
•Operating Temperature: 32° F (0° C) to 122° F (50° C)
•Storage Temperature: 14° F (-10° C) to 140° F (60° C)
•Operating Humidity: 5% to 85% RH
•Heat Dissipation (On): 10.2 BTU/hr
Included Accessories
None

pg. 14
MU-1300
The MU-1300 (AMX-CCC013) has 4 GB of on-board DDR3 RAM, a commercial grade 8GB eMMC non-volatile memory
storage chip and an ICSLan control network. It is a small form factor for easy installation. It features the MUSE scripting
engine which provides a variety of standard programming languages to create the business logic for the control system.
A complete list of device specifications is listed below.
MU-1300 Specifications
Dimensions
5.8" x 5.16" x 1.66" (147.32mm x 131mm x 42.16 mm)
Power Requirements
• DC input voltage (typical): 12 VDC
• DC current draw: 2.17A Max
• DC range, voltage: 9-18 VDC
Power Consumption
26 Watts Max
Mean Time Between Failure (MTBF)
100000 hours
Memory
4 GB DDR3 RAM
8 GB eMMC
Weight
1.58 lb (718g)
Enclosure
Powder Coated Steel – Gray Pantone 10393C
Certifications
• ICES 003
• CE EN 55032
• AUS/NZ CISPR 32
• CE EN 55035
• CE EN 62368-1
• IEC 62368-1
• UL 62368-1
• VCCI CISPR 32
• RoHS / WEEE compliant
Front Panel Components
Status LED
RGB LED – see Status LED Detailed Description
ID button
ID pushbutton used during boot to revert to factory configuration or
factory firmware
USB-C Program Port
Connection to PC for virtual terminal for MU configuration
USB-A Host Port
Type-A USB host port
•USB Mass Storage – for external logging
•
FLIRC – IR Receiver for IR hand control input
LAN Link/Activity LED
Lit when connected to a network. Blinks upon network activity

pg. 15
…MU-1300 specifications continued
P1 / P2 LED
Programmable LEDs available to control scripts
Serial TX / RX LED
Activity LEDs for each port in each direction. Blinks on activity.
IR TX LED
Activity LEDs for the IR/Serial port. Blinks on transmission.
I/O LED
LED indication of I/O Status. On for digital input or output active
Rear Panel Components
Power
3.5mm Phoenix 2-pin connector with retention screws for 12vdc input
LAN Port
RJ-45 10/100 BASE-T for Ethernet communication
Auto MDI/MDI-X
DHCP Client
Serial Port 2
3.5mm Phoenix 5-pin connector. RS232 with hardware handshaking
20 pin double stack Phoenix connector
All remaining device control connections:
•Lower 10 pins – RS-232/422/485 plus hw handshaking + power
•Upper Left 6 pins – 4 Input/Output plus Ground and Power
•
Upper Right 4 pins – 2x IR/Serial output ports
USB Host Port
2x Type-A USB host port
•USB Mass Storage – for external logging
•
FLIRC – IR Receiver for IR hand control input
General Specifications:
Operating Environment
•Operating Temperature: 32° F (0° C) to 122° F (50° C)
•Storage Temperature: 14° F (-10° C) to 140° F (60° C)
•Operating Humidity: 5% to 85% RH
•
Heat Dissipation (On): 10.2 BTU/hr
Included Accessories
•1x 2-pin 3.5 mm mini-Phoenix PWR connector
•1x 6-pin 3.5 mm mini-Phoenix I/O connector
•1x 10-pin 3.5mm mini-Phoenix RS232/422/485 connector
•1x 5-pin 3.5mm mini-Phoenix RS232 connector
•
1x CC-NIRC, IR Emitters (FG10-000-11)

pg. 16
MU-2300
The MU-2300 (AMX-CCC023) has 4 GB of on-board DDR3 RAM, a commercial grade 8GB eMMC non-volatile memory
storage chip and an ICSLan control network. It is built for installing in an equipment rack. It features the MUSE scripting
engine which provides a variety of standard programming languages to create the business logic for the control system.
A complete list of device specifications is listed below.
MU-2300 Specifications
Dimensions
1 RU - 17.32" x 9.14" x 1.7" (440mm x 232.16mm x 43.3 mm)
Power Requirements
• DC input voltage (typical): 12 VDC
• DC current draw: 3A Max
• DC range, voltage: 9-18 VDC
Power Consumption
36 Watts Max
Mean Time Between Failure (MTBF)
100000 hours
Memory
4 GB DDR3 RAM
8 GB eMMC
Weight
6.05 lb (2.75kg)
Enclosure
Powder Coated Steel – Gray Pantone 10393C
Certifications
• ICES 003
• CE EN 55032
• AUS/NZ CISPR 32
• CE EN 55035
• CE EN 62368-1
• IEC 62368-1
• UL 62368-1
• VCCI CISPR 32
• RoHS / WEEE compliant
Front Panel Components
Status LED
RGB LED – see Status LED Detailed Description
ID button
ID pushbutton used during boot to revert to factory configuration or
factory firmware
USB-C Program Port
Connection to PC for virtual terminal for MU configuration
USB-A Host Port
Type-A USB host port
•USB Mass Storage – for external logging
•
FLIRC – IR Receiver for IR hand control input
LAN Link/Activity LED
Lit when connected to a network. Blinks upon network activity
P1 / P2 LED
Programmable LEDs available to control scripts
Serial TX / RX LED
Activity LEDs for each port in each direction. Blinks on activity.
IR TX LED
Activity LEDs for the IR/Serial port. Blinks on transmission.
I/O LED
LED indication of I/O Status: On for digital input or output active
Relay LED
LED indication of Relay state: On for engaged relay

pg. 17
…MU-2300 Specifications continued
Rear Panel Components
Power
3.5mm Phoenix 2-pin connector with retention screws for 12vdc input
LAN Port
RJ-45 10/100 BASE-T for Ethernet communication
Auto MDI/MDI-X
DHCP Client
ICSLan Port
RJ-45 10/100 BASE-T for Ethernet communication
Auto MDI/MDI-X
DHCP server
Provides isolated control network
RS-232/422/485 Port 1
3.5mm Phoenix 10-pin connector
•12VDC @0.5A
•RX-Balanced line input for RS-422/485
•RX+ Balanced line input for RS-422/485
•TX-Balanced line output for RS-422/485
•TX+ Balanced line output for RS-422/485
•RTS Ready to Send for Hardware Handshaking
•CTS Clear to Send for Hardware Handshaking
•TXD Unbalanced line output for RS-232
•RXD Unbalanced line input for RS-232
•GND – Signal ground for RS-232
RS-232 Ports 2-4
3.5mm Phoenix 5 pin connector
•RTS Ready to Send for Hardware Handshaking
•CTS Clear to Send for Hardware Handshaking
•TXD Unbalanced line output for RS-232
•RXD Unbalanced line input for RS-232
•GND – Signal ground for RS-232
Relays 1-4
3.5mm Phoenix 8 pin connector
4 pairs – Contact Closure output for Normally Open contact
IR 1-4
3.5mm Phoenix 8 pin connector
4 pairs – IR/Serial output + ground
I/O 1-4
3.5mm Phoenix 6 pin connector
•12VDC @0.5A
•4x I/0 pins configurable as Analog In, Digital In, or Digital Out
•Ground
USB Host Port
2x Type-A USB host port
•USB Mass Storage – for external logging
•
FLIRC – IR Receiver for IR hand control input
General Specifications:
Operating Environment
•Operating Temperature: 32° F (0° C) to 122° F (50° C)
•Storage Temperature: 14° F (-10° C) to 140° F (60° C)
•Operating Humidity: 5% to 85% RH
•Heat Dissipation (On): 10.2 BTU/hr
Included Accessories
•1x 2-pin 3.5 mm mini-Phoenix PWR connector
•1x 6-pin 3.5 mm mini-Phoenix I/O connector
•1x 10-pin 3.5mm mini-Phoenix RS232/422/485 connector
•3x 5-pin 3.5mm mini-Phoenix RS232 connectors
•2x CC-NIRC, IR Emitters (FG10-000-11)
•
2x removable rack ears

pg. 18
MU-3300
The MU-3300 (AMX-CCC033) has 4 GB of on-board DDR3 RAM, a commercial grade 8GB eMMC non-volatile memory
storage chip and an ICSLan control network. It is built for installation in an equipment rack. It features the MUSE
scripting engine which provides a variety of standard programming languages to create the business logic for the control
system. A complete list of device specifications is listed below.
MU-3300 Specifications
Dimensions
1 RU - 17.32" x 9.14" x 1.7" (440mm x 232.16mm x 43.3 mm)
Power Requirements
• DC input voltage (typical): 12 VDC
• DC current draw: 3A
• DC range, voltage: 9-18 VDC
Power Consumption
36 Watts Max
Mean Time Between Failure (MTBF)
100000 hours
Memory
4 GB DDR3 RAM
8 GB eMMC
Weight
6.26 lb (2.84kg)
Enclosure
Powder Coated Steel – Gray Pantone 10393C
Certifications
• ICES 003
• CE EN 55032
• AUS/NZ CISPR 32
• CE EN 55035
• CE EN 62368-1
• IEC 62368-1
• UL 62368-1
• VCCI CISPR 32
• RoHS / WEEE compliant
Front Panel Components
Status LED
RGB LED – see Status LED Detailed Description
ID button
ID pushbutton used during boot to revert to factory configuration or
factory firmware
USB-C Program Port
Connection to PC for virtual terminal for MU configuration
USB-A Host Port
Type-A USB host port
•USB Mass Storage – for external logging
•
FLIRC – IR Receiver for IR hand control input
LAN Link/Activity LED
Lit when connected to a network. Blinks upon network activity
P1 / P2 LED
Programmable LEDs available to control scripts
Serial TX / RX LED
Activity LEDs for each port in each direction. Blinks on activity.
IR TX LED
Activity LEDs for the IR/Serial port. Blinks on transmission.
I/O LED
LED indication of I/O Status: On for digital input or output active
Relay LED
LED indication of Relay state: On for engaged relay

pg. 19
…MU-3300 Specifications continued
Rear Panel Components
Power
3.5mm Phoenix 2-pin connector with retention screws for 12vdc input
LAN Port
RJ-45 10/100 BASE-T for Ethernet communication
Auto MDI/MDI-X
DHCP Client
ICSLan Port
RJ-45 10/100 BASE-T for Ethernet communication
Auto MDI/MDI-X
DHCP server
Provides isolated control network
RS-232/422/485 Port 1 & 5
3.5mm Phoenix 10-pin connector
•12VDC @0.5A
•RX-Balanced line input for RS-422/485
•RX+ Balanced line input for RS-422/485
•TX-Balanced line output for RS-422/485
•TX+ Balanced line output for RS-422/485
•RTS Ready to Send for Hardware Handshaking
•CTS Clear to Send for Hardware Handshaking
•TXD Unbalanced line output for RS-232
•RXD Unbalanced line input for RS-232
•
GND – Signal ground for RS-232
RS-232 Ports 2-4 & 6-8
3.5mm Phoenix 5 pin connector
•RTS Ready to Send for Hardware Handshaking
•CTS Clear to Send for Hardware Handshaking
•TXD Unbalanced line output for RS-232
•RXD Unbalanced line input for RS-232
•
GND – Signal ground for RS-232
Relays 1-8
3.5mm Phoenix 8 pin connector
4 pairs – Contact Closure output for Normally Open contact
IR 1-8
3.5mm Phoenix 8 pin connector
4 pairs – IR/Serial output + ground
I/O 1-8
3.5mm Phoenix 6 pin connector
•12VDC @0.5A
•4x I/0 pins configurable as Analog In, Digital In, or Digital Out
•
Ground
USB Host Port
2x Type-A USB host port
•USB Mass Storage – for external logging
•
FLIRC – IR Receiver for IR hand control input
General Specifications:
Operating Environment
•Operating Temperature: 32° F (0° C) to 122° F (50° C)
•Storage Temperature: 14° F (-10° C) to 140° F (60° C)
•Operating Humidity: 5% to 85% RH
•
Heat Dissipation (On): 10.2 BTU/hr
Included Accessories
•1x 2-pin 3.5 mm mini-Phoenix PWR connector
•2x 6-pin 3.5 mm mini-Phoenix I/O connectors
•2x 8-pin 3.5 mm mini-Phoenix Relay connectors
•2x 10-pin 3.5mm mini-Phoenix RS232/422/485 connectors
•6x 5-pin 3.5mm mini-Phoenix RS232 connectors
•2x CC-NIRC, IR Emitters (FG10-000-11)
•2x removable rack ears

pg. 20
Mounting the controller
Mounting the MU-2300 and MU-3300
Use the rack-mounting brackets (supplied with the MU-2300/3300) for equipment rack installations. Remove the
mounting brackets and apply the rubber feet to the bottom of the controller for flat surface installations.
Installing the Controller into an Equipment Rack
The MU-2300/3300 each ship with removable rack ears for installation into an equipment rack.
Rack Mount Safety Instructions for MU-2300 and MU-3300
Be sure to follow these important safety instructions when installing your central controller:
•If installed in a closed or multi-unit rack assembly, the operating ambient temperature of the rack environment
may be greater than room ambient. Therefore, consideration should be given to installing the equipment in an
environment compatible with the maximum ambient temperature 60°C (140°F).
•Installing the equipment in a rack should be such that the amount of air flow required for safe operation of the
equipment is not compromised.
•Mounting the equipment in the rack should be such that a hazardous condition is not achieved due to uneven
mechanical loading.
•Consideration should be given to the connection of the equipment to the supply circuit and the effect that
overloading of the circuits might have on over current protection and supply wiring. Appropriate consideration
of equipment nameplate ratings should be used when addressing this concern.
•Reliable earthing of rack-mounted equipment should be maintained. Particular attention should be given to
supply connections other than direct connections to the branch circuit (e.g. use of power strips).
NOTE: To avoid repeating the installation, test the incoming wiring by connecting the Controller’s connectors to their
terminal locations and applying power. Verify that the unit is receiving power and functioning properly. Disconnect the
terminal end of the power cable from the connected 12 VDC-compliant power supply.
1. Use the supplied #8-32 screws to secure the rack ears to the sides of the controller. You can attach the rack ears
toward the front or rear panel for either a front-facing or rear-facing installation.
2. Slide the unit into the rack until the attachment holes, along both sides, align to their corresponding locations on
the mounting brackets
3. Thread the cables through the opening in the equipment rack. Allow for enough slack in the cables to
accommodate for movement during the installation process.
4. Reconnect all cables to their appropriate source/terminal locations. Refer to the Wiring and Connections section
on page XXX for more detailed wiring and connection information. Verify that the terminal end of the power
cable is not connected to the power supply before plugging in the 2-pin power connector
5. Secure the controller to the rack by using the four #10-32 screws supplied in the kit.
6. Apply power to the unit to complete the installation.
Mounting the MU-1000 and MU-1300
Mounting options for the MU-1000 and MU-1300 are as follows:
•Rack mounting with an AVB-VSTYLE-RMK-1U, V Style Module Rack Mounting Tray (FG1010-720)
•Surface mounting with an AVB-VSTYLE-SURFACE-MNT, V Style Single Module Surface Mount (FG1010-722)
•DIN Rail mounting with a VSTYLE DIN Rail Clip (AMX-CAC0001)
Consult the Mounting Options for V Style Modules Quick Start Guide included with the respective mounting kit for
instructions on mounting the MU-1000 and MU-1300. The MU-1000 and MU-1300 also have rubber feet which you can
apply to the bottom of the unit for table-top mounting.
This manual suits for next models
4
Table of contents
Other Harman Controllers manuals

Harman
Harman FG2106-04 User manual

Harman
Harman AMX NI-2100 Operating and maintenance manual

Harman
Harman AMX NETLINX NX-1200 User manual

Harman
Harman AMX JPK-1300 Quick user guide

Harman
Harman AMX Modero X Series User manual

Harman
Harman AMX NX-3200 User manual

Harman
Harman AMX NX-2200 User manual

Harman
Harman AMX NX-3200 User manual

Harman
Harman JBL PROFESSIONAL INTONATO 24 User manual

Harman
Harman dbx ZC Series User manual