manuals.online logo
Brands
  1. Home
  2. •
  3. Brands
  4. •
  5. Harmony
  6. •
  7. Car Seat
  8. •
  9. Harmony Vybe Deluxe User manual

Harmony Vybe Deluxe User manual

®Harmony Juvenile Products HMYVYBHBB-UK1 20/04 UK
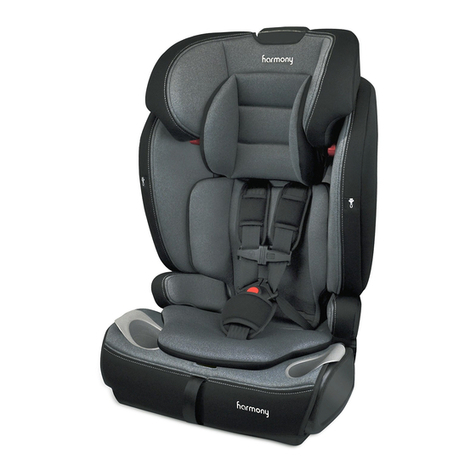
VYBE DELUXE
C A R S E AT
INSTRUCTION MANUAL
STOP
READ THIS MANUAL
Do not install or use this child restraint until you read and understand
the instructions in this manual and in your vehicle owner’s manual.
FAILURE TO PROPERLY USE THIS CHILD RESTRAINT INCREASES THE
RISK OF SERIOUS INJURY OR DEATH IN A SHARP TURN, SUDDEN
STOP OR CRASH.
IF YOU HAVE ANY PROBLEMS, PLEASE DO NOT RETURN
THIS PRODUCT TO THE PLACE OF PURCHASE. PLEASE
CONTACT CUSTOMER SERVICE AT +44 (0) 1704 549881
OR AT WWW.HARMONYJUVENILE.COM
This child restraint complies with ECE regulations for use by children:
• Group I / II / III
• Mass: 9 to 36 kg
Suitable for children from 9 to 18 kg (with built-in harness)
Suitable for children from 15 to 36 kg (as high-back booster)
For children approx. 9 months to 12 years
2
REGISTRATION INFORMATION
REGISTER YOUR CHILD RESTRAINT TODAY! Child restraints could be recalled for
safety reasons. You must register this restraint to be reached in a recall, and to be
eligible to receive replacement parts while under warranty.
The model number, serial number and manufacturing date can be found on a label
on the underside of the child restraint.
Visit www.harmonyjuvenile.com/uk/register to register your child restraint
online, mail-in the registration card or send your name, address, the restraint’s
model number, manufacturing date and date of purchase to:
Harmony Juvenile Products UK
10 Beach Priory Gdns.
Southport, UK
PR8 1RT
or call: +44 (0) 1704 549881
For recall information, any questions you may have, or to make a change of address
or contact information please call Customer Service at +44 (0) 1704 549881 or visit
us online at www.harmonyjuvenile.com.
PLEASE DO NOT SEND IN YOUR REGISTRATION CARD IF
YOU HAVE REGISTERED YOUR RESTRAINT ONLINE.
I F Y O U N E E D H E L P
Please fill in the information below for future reference. The model number and
manufacturing date can be found on a label on the underside of the child restraint.
Model Number: ___________________________________________________________
Manufacture Date: ________________________________________________________
Date of Purchase: _________________________________________________________
Our Customer Service Department is standing by to help you with any questions or
concerns you may have regarding installation, use, care and/or parts. Please have
your product’s model number and manufacturing date available when contacting us.
3
A
H
I
D
G
PA R T S L I S T
Headrest Fabric Cover (pre-installed)
Backrest Fabric Cover (pre-installed)
Base Fabric Cover (pre-installed)
Harness Straps, Buckle and Clips
Shoulder Pads
Crotch Strap and Pad
Harness Metal Adjustment Button
(above strap, under fabric)
Up-front Harness Adjustment Strap
Infant Insert Pad
Cup holder (when applicable)
Recline Handle
Recline
1-Hand Headrest Height Adjustment
Handle
Backrest Belt Guides
Harness Strap Connector
Harness Splitter Plate
Backrest Belt Slot Opening
Locking Clip
A
B
C
D
E
F
G
R
TO PURCHASE REPLACEMENT PARTS:
In the United Kingdom, please contact us at
www.harmonyjuvenile.com
or by calling +44 (0) 1704 549881.
B
H
I
J
K
L
M
E
F
P
N
Q
C
N
K
L
M
N
O
P
Q
R
Q
J
O
4
PREPARING CHILD RESTRAINT FOR USE
1 2
3
4 5
5
ADJUSTING CROTCH STRAP POSITION
6
HEADREST HEIGHT ADJUSTMENT
10 11
7
8 9
6
RECLINE
12
13
2
1
14
7
INSTALLING WITH VEHICLE SEAT BELT
G R O U P 1 ( 9 - 1 8 K G )
15

16

18 19
2
1
17
8
20 21
22 23
24
9
USING CHILD RESTRAINT
WITH BUILT-IN HARNESS
25 26
27
28 29
1 0
USING CHILD RESTRAINT IN BOOSTER MODE
(WITHOUT BUILT-IN HARNESS)
36
33 34
35
SECURING CHILD AND BOOSTER SEAT IN VEHICLE
30
31
32
37
40
38
41
39
1 1
44
IN STA LLI NG WI TH V E H I C L E S E AT B E LT
G R O U P 2 & 3 ( 1 5 - 3 6 K G )
2
1
43
45
INSTALLING CUP HOLDER (WHEN APPLICABLE)
46
23
5
8
42
1 2
REMOVING/INSTALLING FABRIC SEAT COVER
47 48
CERTIFICATIONS
This is a “Universal” child restraint when installed using the 3-point vehicle seat
belt only. It is approved to the requirements of the European Standard for Child
Safety Seat Equipment under Regulation No. 44, 04 series of amendments, for
general use in vehicles and it will fit most, but not all, car seats.
A correct fit is likely if the vehicle manufacturer has declared in the vehicle
handbook that the vehicle is capable of accepting a “Universal” child restraint for
this age group.
This child restraint has been classified as “Universal” under more stringent
conditions than those which applied to earlier designs which do not carry this
notice.
If in doubt, consult either the child restraint manufacturer or the retailer.
! Only suitable for use in the listed vehicles fitted with 3-point with retractor safety-
belts, approved to ECE Regulation No. 16 or other equivalent standards.
This restraint is NOT CERTIFIED for aircraft use.
This child restraint must NOT be used in homes, boats, buses, motorcycles, motor
homes, or any other vehicles that have non-forward-facing seats, missing seat
belts, or whose seat belts do not meet the requirements of this child restraint.
1 3
PREPARING CHILD RESTRAINT FOR USE
! ENSURE the harness height is correct for your child’s size. VERIFY OFTEN.
1. Loosen harness system by pushing the up-front metal harness adjuster at the
front of the seat JUST ABOVE the adjustment strap (under the fabric) (2) and by
simultaneously pulling the chest harness straps towards you (3).
TIP: PULL ON THE HARNESS STRAPS. DO NOT PULL ON THE SHOULDER
PADS AS THEY ARE LOCKED IN PLACE.
2. Face the rear of the child restraint. Release the shoulder pad straps and remove
the harness straps from the splitter plates (see “Removing/installing harness”) (4).
3. Gently pull the straps out from the front harness slots (4).
4. Select the proper harness slot height and feed the straps (harness and
shoulder pads) back through (5). ENSURE THAT THE HARNESS STRAPS
ARE THREADED AT THE SAME LEVEL, ARE NOT TWISTED AND ARE IN THE
CORRECT SLOTS.
! ENSURE BOTH HARNESS STRAPS ARE PROPERLY
SECURED ON THE SPLITTER PLATE.
! WARNING: The shoulder harness must be EVEN OR
SLIGHTLY ABOVE the child’s shoulders (A). If the upper most
harness position is below the child’s shoulders, DO NOT use
this child restraint with harness.
! WARNING: DO NOT use this child restraint if the midpoint
of your child’s head is above the top of the child restraint’s
headrest at its maximum height (B).
5. Reattach shoulder pads and the harness straps to the metal
splitter plates (5).
REMEMBER to check the shoulder straps position frequently
and move them to the next position when necessary. The
harness straps MUST be in the height position EVEN WITH or
just ABOVE the shoulders. The harness pads and crotch pads
are optional and are not a safety feature.
WARNING!
!
INCORRECT USE OF THE HARNESS SYSTEM IS THE MOST COMMON
MISTAKE PEOPLE MAKE. IT IS VERY IMPORTANT TO READ, UNDERSTAND
AND FOLLOW ALL INSTRUCTIONS AND WARNINGS. DO NOT MISTAKE
COMFORT FOR SAFETY. THE HARNESS SYSTEM MUST BE SNUGLY
ADJUSTED AT ALL TIMES.
ADJUSTING HARNESS SHOULDER STRAPS
A
B
1 4
The crotch strap has two (2) positions.
(6).

through the opening in the plastic base (7). Continue to thread the crotch strap
through the fabric seat cover and completely remove it (8). Reinstall with crotch
buckle facing forward in the desired slot (9).
! WARNING: ENSURE that the buckle is facing FORWARD (9).
!ENSURE that the strap is COMPLETELY in the slot and the crotch strap is NOT
twisted.

Your child restraint has eight (8) height adjustments:

of the headrest (10) while simultaneously pulling the headrest up or down to the
desired height with the other hand.


Adjust headrest height so that the harness straps MUST be in the height position
EVEN with or JUST ABOVE the shoulders (11).
WARNING!
!
FAILURE TO REINSTALL THE HARNESS STRAPS CORRECTLY COULD
RESULT IN SERIOUS INJURY OR DEATH.
ADJUSTING CROTCH STRAP POSITION
WARNING!
!
FAILURE TO REINSTALL THE CROTCH STRAP CORRECTLY COULD RESULT
IN SERIOUS INJURY OR DEATH.
HEADREST HEIGHT ADJUSTMENT
1 5

Place the child restraint in the desired seating position. Lift the recline handle
found underneath the front of the seat (12, 13) and adjust the base to the
desired angle (14). Release the handle when done and gently push on the seat
to ensure it is firmly locked in place. An audible ‘click’ will ensure it is locked in
place.
PLEASE USE THE RECLINE THAT ALLOWS FOR THE BEST AND TIGHTEST
INSTALLATION.
! RECLINE CANNOT BE USED IN BOOSTER MODE (GROUP II / III).
! Use ONLY the vehicle’s 3-point lap-and-shoulder belt system when restraining this
child restraint to the vehicle (15). DO NOT use this child restraint with a 2-point
vehicle belt (16). Your child would be seriously injured in the event of a crash.
PLEASE USE THE RECLINE THAT ALLOWS FOR THE BEST AND TIGHTEST
INSTALLATION (17).
HEADREST HEIGHT ADJUSTMENTS #1 - #4 CAN BE USED IN HARNESS MODE.
1. Place the child restraint flush against a forward-facing vehicle seat. The vehicle
seat MUST be equipped with a 3-point lap-and-shoulder belt. The child
restraint must be level, stable and not rock side-to-side.
2. Thread the vehicle shoulder belt portion of the seat belt through the backrest belt
guide on top of backrest ON THE SAME SIDE as the seat belt retractor (18).
3. Open harness system and lift insert cushion. Thread the lap portion of the
vehicle’s seat belt through the red belt base positioning guide ON THE SAME
SIDE as the seat belt retractor (18). Replace insert cushion.
4. From BEHIND the child restraint, pass both the lap and shoulder portions
around the rear of the seat and back through the opening (18) on the opposite
side of the seat as indicated (19). Take both portions of the vehicle seat belt
and guide them over the side of the child restraint (20).
(20). The vehicle seat
belt MUST NOT be twisted.
6. If your vehicle is equipped with a ELR/ALR switchable seat belt retractor system,
we recommend that you pull out the full length of the vehicle seat belt (until you
cannot pull out any more slack). This locks the retractor. If not equipped with

7. Tighten vehicle seat belt by placing your knee on the child restraint base and
by using your full weight to push the child restraint down as you simultaneously
RECLINE
INSTALLING WITH VEHICLE SEAT BELT
G R O U P 1 ( 9 - 1 8 K G )
1 6
release the extra belt length until seat belt is taught and has no slack (21,22).
LAP PORTION (21,22) and then
feed the shoulder portion back into the retractor.
8. While holding the seat belt as retracted as possible, attach the locking clip
around both lap and shoulder belts once vehicle seat belt is adjusted and
tightened (23, 24).
For more information on how to tighten the seat belt for your seat belt system, see
your vehicle owner’s manual.
! Incorrect use of the harness system is the most common mistake people make. It
is VERY important to read, understand and follow ALL instructions and warnings.
DO NOT mistake comfort for safety. The harness system MUST be snugly
adjusted at all times.
! Snugly adjust the harness provided with this child restraint around your child. A
snug strap is one with no slack. It should not press on the child’s flesh or cause
your child’s body to be in an unnatural position. You should only be able to slide
ONE FINGER between the shoulder straps and the child’s shoulder.
! Avoid unnecessary bulky clothing.
1. To loosen the harness strap: Push the up-front metal harness adjuster at the
front of the seat just ABOVE the adjustment strap (under the fabric) and
simultaneously pull the chest strap towards you (25).
TIP: PULL ON THE HARNESS STRAPS. DO NOT PULL ON THE SHOULDER
PADS AS THEY ARE LOCKED IN PLACE.
2. Unbuckle harness straps by pressing on the RED buckle release button and by
pulling the buckle clips out (26)
3. Place child in child restraint with child’s back flat against back of the backrest.
4. Adjust headrest height so that the harness straps MUST be in the height position
EVEN with or JUST ABOVE the shoulders (see “Headrest height adjustment”).
SECURING CHILD IN CHILD RESTRAINT
USING CHILD RESTRAINT
WITH BUILT-IN HARNESS
WARNING!
!
FAILURE TO FASTEN AND TIGHTEN THE HARNESS SYSTEM CORRECTLY MAY
CAUSE THE CHILD TO BE EJECTED FROM THE RESTRAINT SYSTEM IN CASE
OF A SHARP TURN, SUDDEN STOP OR CRASH CAUSING SERIOUS INJURY
OR DEATH. In a crash, the child restraint will provide NO protection for your child
unless the harness straps are properly secured. DO NOT mistake comfort for safety.
Harness system MUST be snugly adjusted. Follow these instructions carefully.
1 7
5. Place harness straps over child’s shoulders. Hold the two buckle clips together
and insert the two-piece buckle clip into buckle until they ‘click’ into place (27).
! ENSURE that the buckle is properly fastened by gently tugging on it.
! ENSURE that the straps are NOT twisted.
! DO NOT use child restraint if harness does not lock.
6. Tighten harness system by gently pulling on the up-front harness adjuster strap
until all slack is removed from the system (28).
!ENSURE straps are flat and snug against child’s shoulders and thighs. You should
NOT be able to slide more than one finger between the strap and the child’s
shoulder (29).
A snug strap should not allow any slack. It lies in a relatively straight line without
sagging. It should not press the child’s flesh or cause your child’s body to be in an
unnatural position.
! Any straps holding the restraint to the vehicle should be tight, any straps
restraining the child should be adjusted to the child’s body, and all straps should
not be twisted.
1. Loosen the harness system by pressing on the up-front metal harness adjuster
(under the fabric), and simultaneously pulling the shoulder straps towards you.
2. Unbuckle harness by pressing on the RED buckle release button.
IF YOUR CHILD HAS REACHED 15 KG,YOU CAN USE THE SEAT IN BOOSTER MODE.
!DO NOT use infant insert in booster mode.
Harmony Juvenile Products advises that your child remains in a 5-point harness for
as long as possible per the mass and height requirements of the child restraint.
1. Open harness buckle.
2. Face the rear of the child restraint. Release the shoulder pad straps and remove the
harness straps from the splitter plates (30, 31).
3. Pull the harness straps out of their respective slots in the backrest (32) and
remove shoulder pads.
4. Continue to thread the harness strap through the plastic base and completely
remove it (33).
5. Store complete harness system for future use.
REMOVING CHILD FROM CHILD RESTRAINT
USING CHILD RESTRAINT IN BOOSTER MODE
(WITHOUT BUILT-IN HARNESS)
REMOVING/INSTALLING HARNESS
1 8
6. To remove the crotch buckle:


strap through the opening in the plastic base (34). Continue to thread the
crotch strap through the fabric seat cover and completely remove it (35).
7. Pull the up-front harness adjustment strap as far as it will go. This will lock the
splitter plate into the base of the seat.
8. Roll strap tightly, secure roll with an elastic band and store rolled strap under the
fabric seat cover in the opening of the up-front adjuster.
To reinstall, reverse the above steps.
!ENSURE the vehicle shoulder belt’s position is correct for your
child’s size. VERIFY OFTEN.
! WARNING: DO NOT use this booster seat if the midpoint of
your child’s head is above the top of the booster seat headrest
at its maximum height.
PREPARING BOOSTER SEAT FOR USE
WARNING!
!
INCORRECT USE OF THE VEHICLE’S 3-POINT LAP-AND-SHOULDER SEAT
BELT SYSTEM IS THE MOST COMMON MISTAKE PEOPLE MAKE. IT IS
VERY IMPORTANT TO READ, UNDERSTAND AND FOLLOW ALL
INSTRUCTIONS AND WARNINGS. DO NOT MISTAKE COMFORT FOR
SAFETY. THE VEHICLE’S 3-POINT LAP-AND-SHOULDER SEAT BELT MUST
BE SNUGLY ADJUSTED AT ALL TIMES.
WARNING!
!
FAILURE TO REINSTALL THE HARNESS SYSTEM AND CROTCH STRAP
CORRECTLY COULD RESULT IN SERIOUS INJURY OR DEATH.
1 9
!DO NOT use this booster seat if it can’t be properly leveled, stabilized, and
installed as per this instruction manual. It is possible that your vehicle has no
suitable seating position for this booster seat due to seating surface, seat belt
type and/or airbag system. Read and follow these instructions, and your vehicle
owner’s manual carefully.
HEADREST HEIGHT ADJUSTMENTS #5 - #8 CAN BE USED IN BOOSTER MODE.
! RECLINE CANNOT BE USED IN BOOSTER MODE.
! WARNING: You MUST use the vehicle 3-point lap-and-shoulder belt system
when restraining the child in the booster seat (36).
! WARNING: Vehicle belts MUST be tight, adjusted to the child’s body, and
should not be twisted (36).
! NEVER use a vehicle lap-only belt to secure child in booster seat (37).
! NEVER USE A LOOSE SHOULDER BELT.
! NEVER position the shoulder belt under the child’s arm (38) or place the
shoulder belt behind the child’s back (39).
Lap portion of lap-and-shoulder belt MUST be low and snug across the hips,
with the pelvis firmly engaged, just touching the child’s thighs. The lap
portion MUST NOT be lying across the child’s stomach as this can cause major
injuries to the child in case of a sharp turn, sudden stop or crash.
! DO NOT allow the child to slouch, slide down in the seat, or create slack in the
belt system (40). If child will not keep vehicle belt properly positioned, DO NOT
use this booster seat.
! The vehicle seat headrest should not create a gap between vehicle seat and
booster seat (41). If so, remove the vehicle headrest.
! DO NOT use any load bearing contact points other than those described in the
instructions and marked in the child restraint.
IF IN DOUBT ABOUT THESE POINTS OR ANY QUESTIONS RELATED TO
INSTALLATION, PLEASE CONTACT HARMONY JUVENILE PRODUCTS.
SECURING CHILD AND BOOSTER SEAT IN VEHICLE
WARNING!
!
FAILURE TO PROPERLY SECURE YOUR CHILD IN THE BOOSTER SEAT
INCREASES THE RISK OF SERIOUS INJURY OR DEATH IN THE EVENT OF A
SHARP TURN, SUDDEN STOP OR CRASH. In a crash, the booster seat provides
NO protection for your child unless the vehicle 3-point lap-and-shoulder belt is
properly secured. Follow these instructions carefully to properly secure your child.
2 0
HEADREST HEIGHT ADJUSTMENTS #5 - #8 CAN BE USED IN BOOSTER
MODE (42).
! RECLINE CANNOT BE USED IN BOOSTER MODE (43).
1. Place the booster seat flush against a forward-facing vehicle seat. The vehicle
seat MUST
level, stable and not rock side-to-side.
2. Place child in the booster seat with child’s back flat against the back of the
booster seat.
3. Adjust headrest height so that the bottom of the headrest is EVEN with or JUST
ABOVE the shoulders (see “Headrest height adjustment”).
4. Thread the vehicle shoulder belt portion of the seat belt through the backrest belt
guide on top of backrest ON THE SAME SIDE as the seat belt retractor (44)
and ensure that shoulder belt lies across child’s shoulder and chest, and NOT
across child’s face or neck.
5. Thread both sides of the lap belt over lower guides on both sides as
indicated (44). ENSURE that the belt is snug across the child’s hips. It
is important to ensure that any lap strap is worn low down, so that the
pelvis is firmly engaged, just touching their thighs and is NOT across their
stomach.
WARNING!
!
!ALWAYS ASSIST YOUR CHILD WHEN GETTING INTO AND OUT OF THE CHILD
.
! ENSURE THAT THE CHILD RESTRAINT     
ROCK SIDE-TO-SIDE. IF THE CHILD RESTRAINT
SEATING LOCATION.
! DO NOT ADD ANYTHING BEHIND OR UNDER THE CHILD RESTRAINT.
IN STA LLI NG W IT H V E H I C L E S E AT B E LT
G R O U P 2 & 3 ( 1 5 - 3 6 K G )
WARNING!
!
DUE TO VARYING ANGLES OF VEHICLE SEAT BELT RETRACTORS,
EXCESS SLACK IN THE VEHICLE BELT SYSTEM MIGHT NOT BE REMOVED
AUTOMATICALLY. Once the lap and shoulder portions of the seat belt are
properly positioned and the buckle is attached, FEED ANY REMAINING
SLACK OF THE SEAT BELT MANUALLY BACK INTO THE RETRACTOR TO
TIGHTEN THE WHOLE SYSTEM.

Other Harmony Car Seat manuals

Harmony COMMANDER User manual

Harmony

Harmony COMMANDER User manual

Harmony DREAMTIME ELITE User manual

Harmony

Harmony DREAMTIME ELITE User manual

Harmony Car Seat User manual

Harmony

Harmony Car Seat User manual

Harmony Phoenix Deluxe User manual

Harmony

Harmony Phoenix Deluxe User manual

Harmony OPTYMA User manual

Harmony

Harmony OPTYMA User manual

Harmony harmony User manual

Harmony

Harmony harmony User manual

Harmony V7 User manual

Harmony

Harmony V7 User manual

Harmony Belt-Positioning Booster Car Seat User manual

Harmony

Harmony Belt-Positioning Booster Car Seat User manual

Harmony youth booster User manual

Harmony

Harmony youth booster User manual

Harmony Optyma Harnessed User manual

Harmony

Harmony Optyma Harnessed User manual

Harmony V6 Highback User manual

Harmony

Harmony V6 Highback User manual

Harmony HMYFLDHBB-S3 User manual

Harmony

Harmony HMYFLDHBB-S3 User manual

Harmony Folding Travel Booster Car Seat User manual

Harmony

Harmony Folding Travel Booster Car Seat User manual

Harmony DEFENDER 360 3-IN-1 User manual

Harmony

Harmony DEFENDER 360 3-IN-1 User manual

Harmony GENESYS User manual

Harmony

Harmony GENESYS User manual

Harmony HMYFLDHBB-F1 User manual

Harmony

Harmony HMYFLDHBB-F1 User manual

Harmony DREAMTIME ELITE User manual

Harmony

Harmony DREAMTIME ELITE User manual

Harmony DEFENDER 360 User manual

Harmony

Harmony DEFENDER 360 User manual

Harmony DEFENDER 360 User manual

Harmony

Harmony DEFENDER 360 User manual

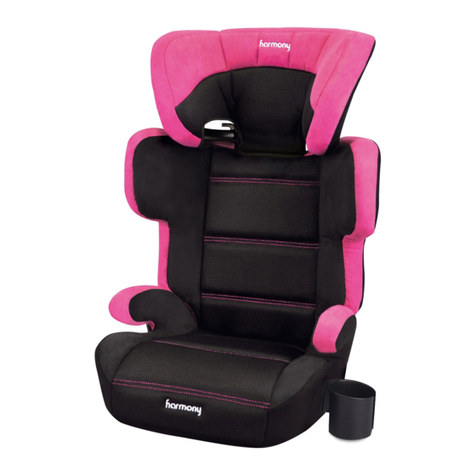
Harmony Baby Armor Belt-Positioning booster car seat User manual
Harmony

Harmony Baby Armor Belt-Positioning booster car seat User manual

Harmony DREAMTIME 2 User manual

Harmony

Harmony DREAMTIME 2 User manual

Harmony Dreamtime Deluxe User manual

Harmony

Harmony Dreamtime Deluxe User manual

Harmony Merydian User manual

Harmony

Harmony Merydian User manual

Harmony Big boost deluxe User manual

Harmony

Harmony Big boost deluxe User manual
Popular Car Seat manuals by other brands

MaxiCosi Streety Fix Instructions for use & warranty

MaxiCosi

MaxiCosi Streety Fix Instructions for use & warranty

ISiGO Hercules Instructions for use

ISiGO

ISiGO Hercules Instructions for use

Nuna PIPA next manual

Nuna

Nuna PIPA next manual

Clek Q-Tether manual

Clek

Clek Q-Tether manual

Clek Olli instruction manual

Clek

Clek Olli instruction manual

Jole STAGES FX C1719 instruction manual

Jole

Jole STAGES FX C1719 instruction manual

Britax ADVOCATE CS user guide

Britax

Britax ADVOCATE CS user guide

Graco 4Ever instruction manual

Graco

Graco 4Ever instruction manual

Gilis BebeStars Monaco user manual

Gilis

Gilis BebeStars Monaco user manual

BEBE CONFORT Trianos manual

BEBE CONFORT

BEBE CONFORT Trianos manual

Chipolino ENIGMA instruction manual

Chipolino

Chipolino ENIGMA instruction manual

Century 44892L instruction manual

Century

Century 44892L instruction manual

Safety 1st Crosstown manual

Safety 1st

Safety 1st Crosstown manual

BHOOP MUHO BH0510 user manual

BHOOP

BHOOP MUHO BH0510 user manual

Diono Cambria 2 instruction manual

Diono

Diono Cambria 2 instruction manual

Evenflo SureRide Titan 65 owner's manual

Evenflo

Evenflo SureRide Titan 65 owner's manual

Evenflo Everystage lx owner's manual

Evenflo

Evenflo Everystage lx owner's manual

Jole Armour C2005B instruction manual

Jole

Jole Armour C2005B instruction manual

manuals.online logo
manuals.online logoBrands
  • About & Mission
  • Contact us
  • Privacy Policy
  • Terms and Conditions

Copyright 2025 Manuals.Online. All Rights Reserved.