HartwellMedical EVAC-U-SPLINT EV3000 Instruction Manual
APPLICATION GUIDELINES
Rx Only
Model Number:
EV 3000
EV 3000SR
_________________
2
APPLICATION GUIDELINES
Dimensions: Large Splint Medium Splint Small Splint
Length: 40.0"(101.6 cm) 27.5"(69.9 cm) 19.5"(49.5 cm)
Width: 30.0"(76.2 cm) 20.0"(50.8 cm) 13.0"(33.0 cm)
Thickness: 1.0"(2.5 cm) 1.0"(2.5 cm) 1.0"(2.5 cm)
Weight: 2.2 lbs. (1.0 kg) 1.0 lb. (.5 kg) 0.5 lb. (.2 kg)
In Carry Case: 25.0"L x 12.0"Wx 12.0"D (64 cm L x 31 cm Wx 31 cm D)
Operating Temp: -30° F to 150° F (-34° C to 66° C)
Compact Pump: 11.0"L x 2.5"Dia. Aluminum Cylinder with 4"handle (28 cm L x 6.4 cm Dia.)
2.0 lbs. (0.9 kg)
Our company philosophy is one of constant improvement in design and craftsmanship.
Therefore, specications are subject to change without notice.
EVAC-U-SPLINT®is a registered trademark of Hartwell Medical LLC
MaxiValve™ is a trademark of Hartwell Medical LLC
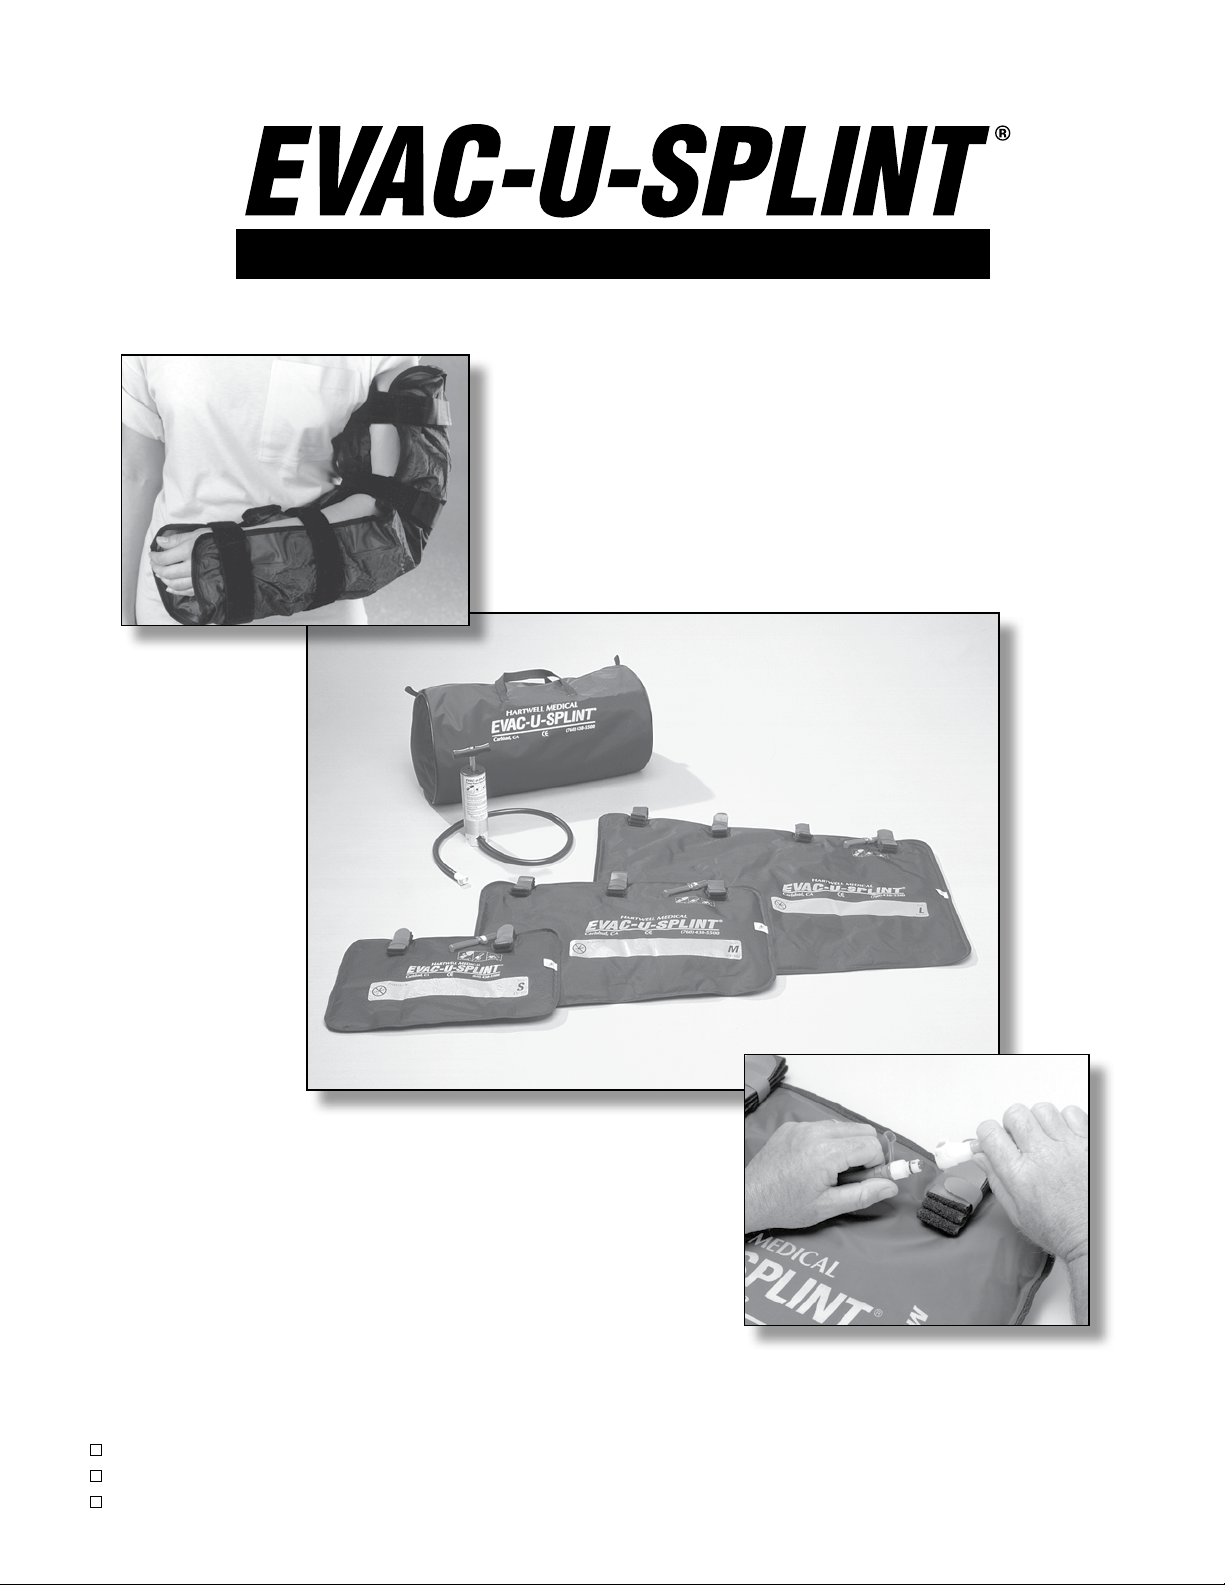
EVAC-U-SPLINT®
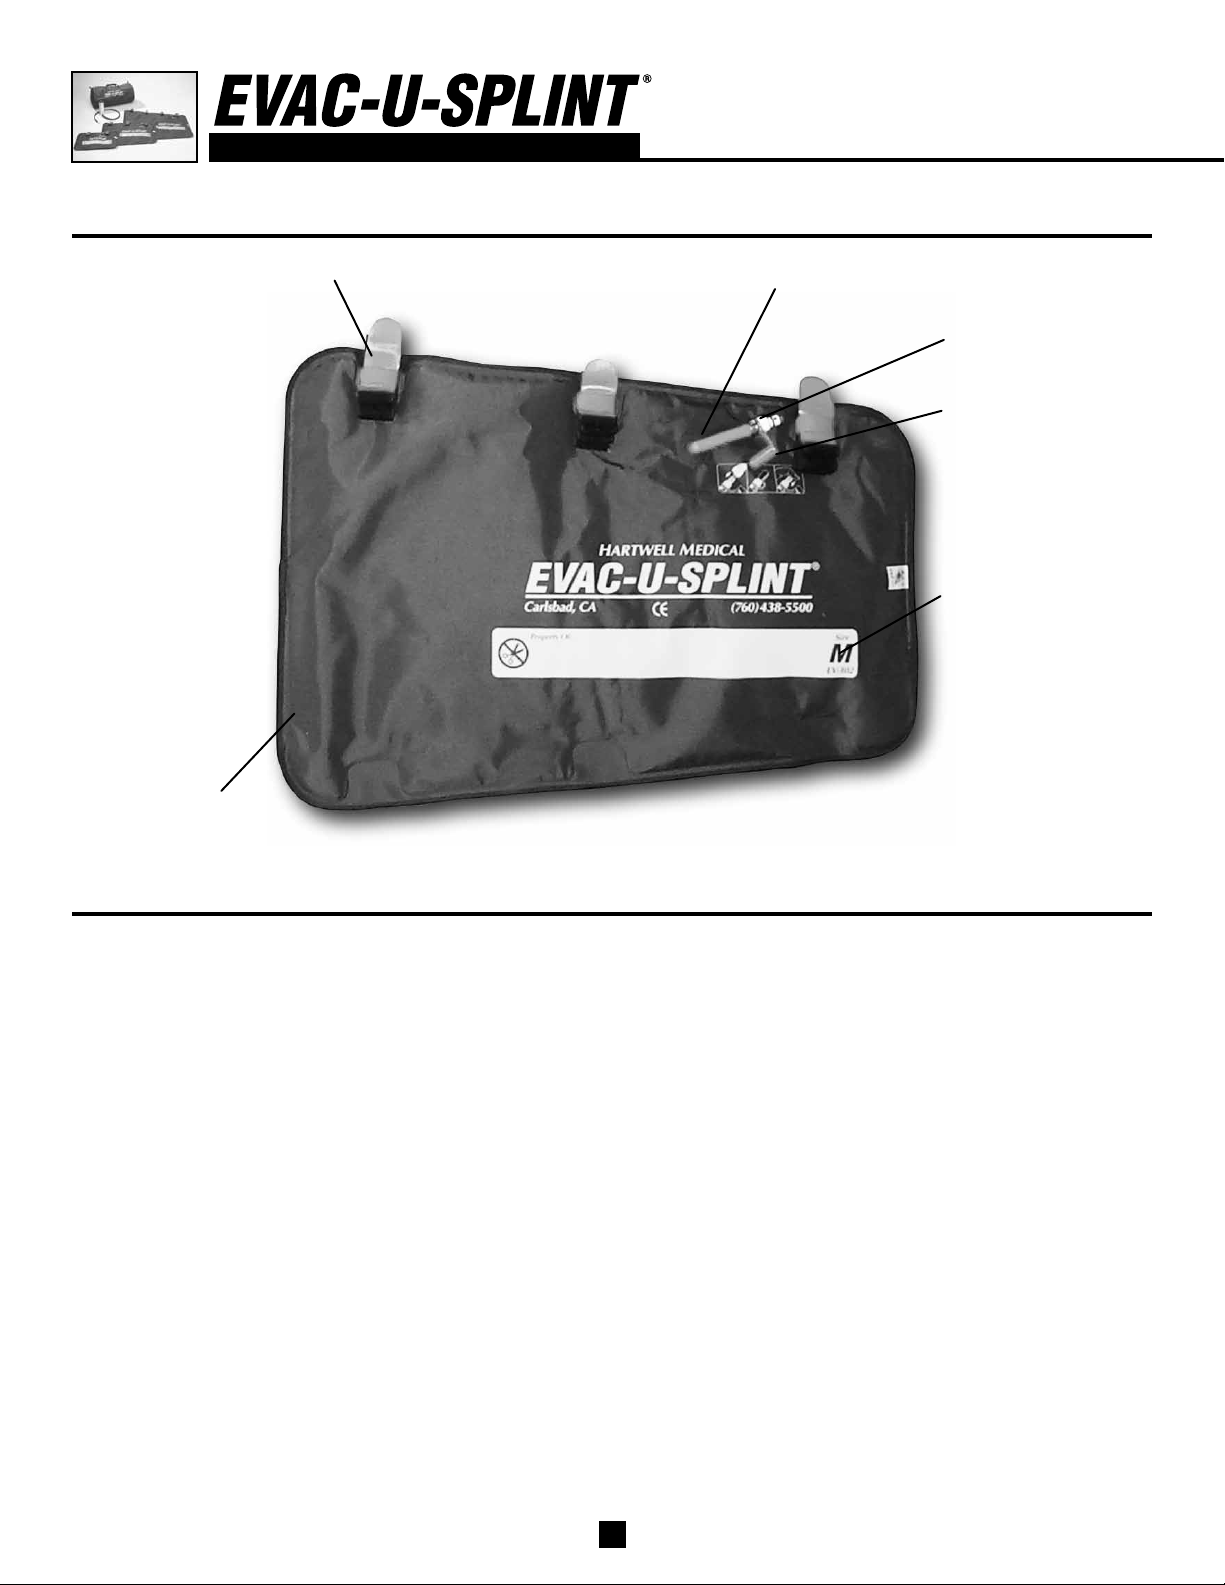
Product terminology
SPecificationS
Splint Straps
EVAC-U-SPLINT®
Flange Tubing
MaxiValve™
Red Leashed Cap
Model Number and
Splint Size (S, M, L,)

table of contentS
Product Terminology .................................... 2
Important Information
Specications ........................................... 2
Introduction .............................................. 3
Authorization............................................ 3
CustomerService ................................... 10
LimitedWarranty ................................... 10
ReturnPolicy.......................................... 10
Operating Instructions
Positioning................................................ 4
Preparation ............................................... 4
Application............................................... 5
Evacuation................................................ 6
ValveandPumpOperation....................... 7
Storage ........................................................... 9
Maintenance and Cleaning........................... 9
Repair Procedures....................................... 10
Parts List...................................................... 11
Training and Maintenance Log ................. 12
introduction
The EVAC-U-SPLINT® has been designed to aid in
stabilizationofaninjuredorillpersonwithaminimumamount
of movement to the injured area or extremity. Unlike a rigid
boardsplintorametalladdersplint,theEVAC-U-SPLINTuses
vacuumtechnologytoconformtotheexactshapeandcontours
of the patient’s anatomy, providing improved immobilization
withoutcircumferentialpressure.
Specicapplicationandoperationtechniquesmayvaryfrom
user to user. Hartwell Medical does not recommend that this
productbeusedforanypurposeotherthanwhatitisdesigned
for as outlined in these guidelines for use. Any other use or
application of the EVAC-U-SPLINT becomes the sole and
completeresponsibilityoftheproductuser.
Physical Abilities of User
AllusersoftheEVAC-U-SPLINTshouldbefamiliarwithits
operationandshouldpossessthefollowingbasicphysicalabilities:
a)beabletograsprmlywithbothhands
b)sufcientstrengthintheirback,armsandlegstosupport
and lift their respective amount of patient weight being
handled
c)goodbalance
d)goodvisionandreexes
e)muscularcoordination
CAUTION: At all times, a sufcient number of properly
trained healthcare providers should be available to move
the patient once they have been immobilized with an
EVAC-U-SPLINT.Usecautionatalltimeswhenhandlingand
maneuveringaninjuredpatient.
These application guidelines are intended solely as
a guide to the appropriate procedures to be employed
when using the EVAC-U-SPLINT.
It is the responsibility of the user of this professional
medical device to obtain competent emergency medical
training and instruction. The application guidelines
furnished here are for use by properly trained and
authorized emergency medical personnel who operate
under proper medical control or under the medical
supervision of a licensed Physician Medical Director.
The application guidelines are not intended as a
statement of the standard of care required in any
particular situation, since circumstances and patient’s
physical condition can vary widely from one emergency
to another.
Further, it is not intended that these application
guidelines shall in any way advise emergency
medical personnel concerning their legal authority to
perform such activities or procedures outlined herein.
Determinations are local, and should be made only with
the authority of their local emergency medical service,
and the aid of legal counsel.
HartwellMedicalrmlyadvocatesthefollowing:
1. Use the application guidelines set forth, when
approved by your local emergency medical
service authority.
2. Supervised emergency medical training is required
in the proper use of the EVAC-U-SPLINTprior to
elduse.
3. Proper application of the EVAC-U-SPLINT
requires a minimum of two trained emergency
medical personnel.
4. Continuing medical education on a regular basis
with “hands-on” experience is recommended.
authorization
AWordofCaution
3
APPLICATION GUIDELINES
It is recommended by the Centers for Disease Control that
emergency medical personnel wear eye and face protection, in
addition to protective gloves, whenever there is a possibility of
coming into contact with patient blood or any body uids.
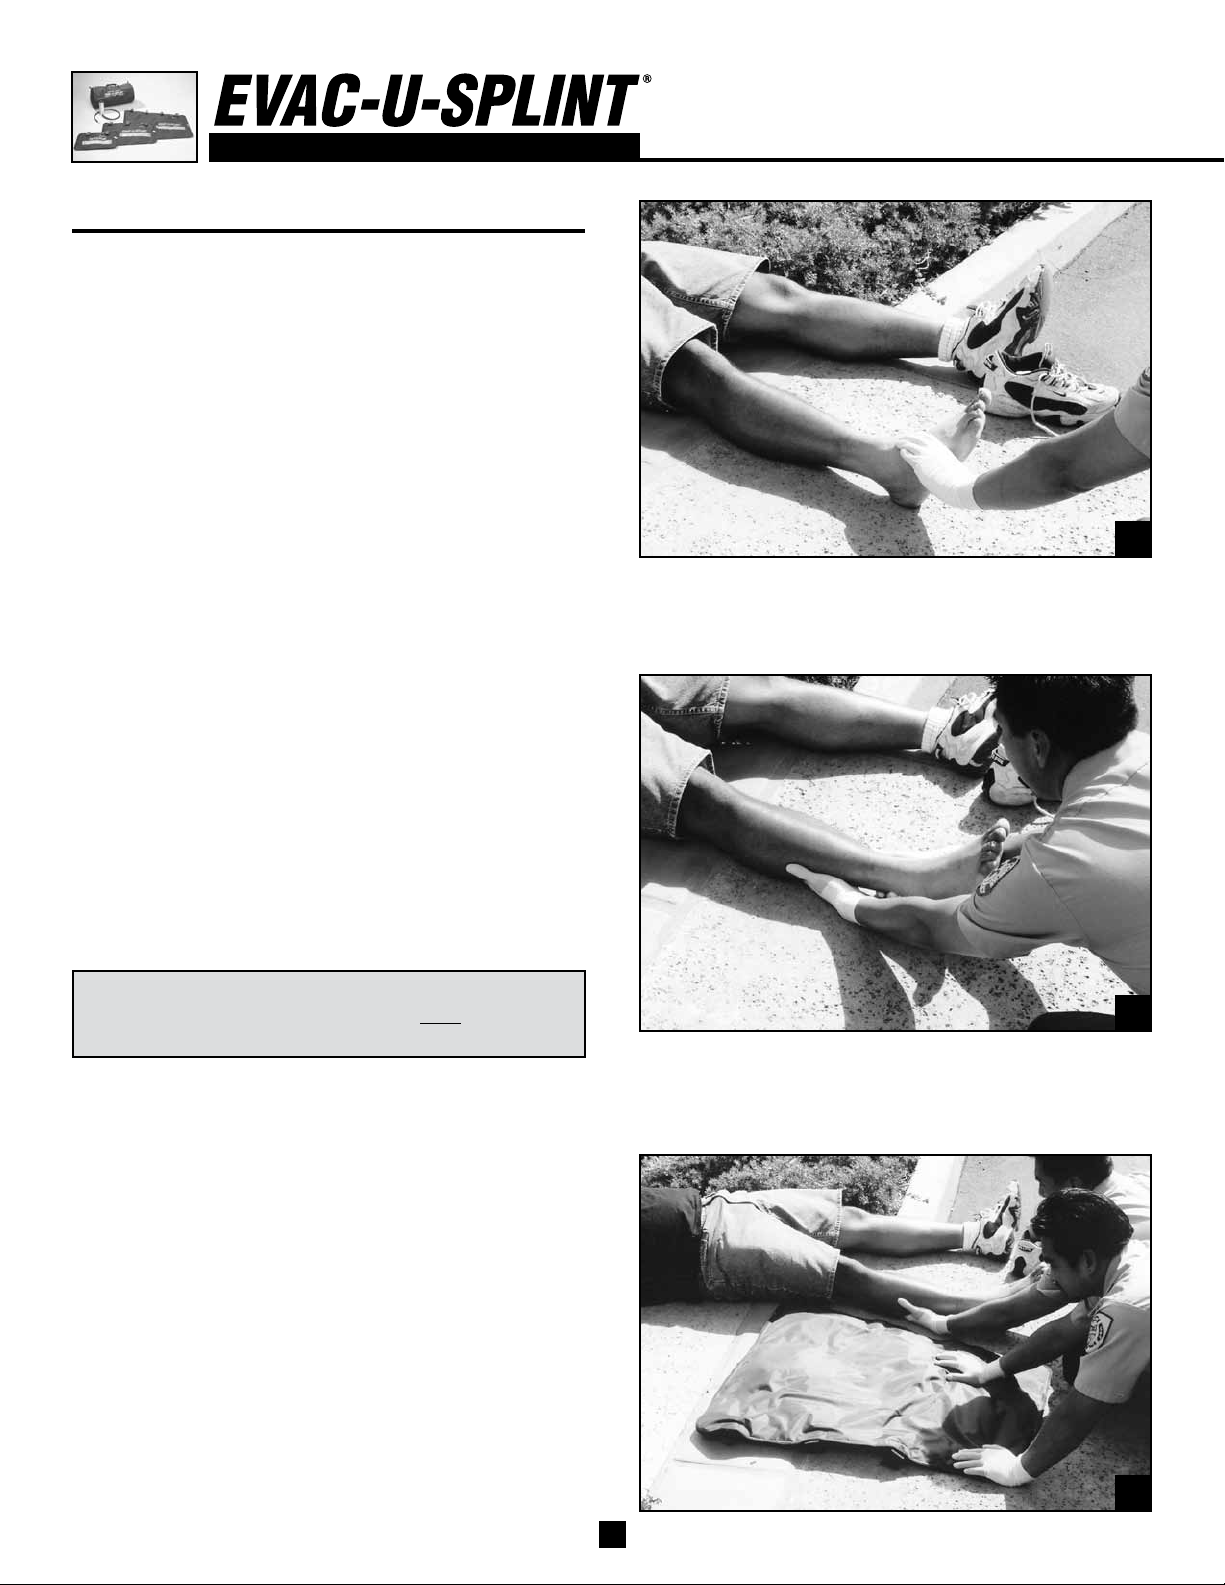
Positioning
AlwaysmakesurethatthebasicABC’sofairway,breathing
andcirculationareintactpriortoanysplintingactivities.
Exposetheinjuredarea.
Observeskincolorandsymmetry.
Determine if there has been a loss of mobility and/or
sensation.
Palpate distal pulse and check for prompt capillary rell.
Photo 1.
Applyconstant,“longaxis”(in-line)gentlemanualtraction
onseverelydeformed,longbonefractures.
Return extremity to its normal anatomical position with
an assistant supporting the extremity under the suspected
fracturesite.
CAUTION: Do not return the extremity to its anatomical
positionwhencontraindicated. If the patientcomplainsof
increased painorifthereisresistanceduringmanipulation
movement,thenSTOPandimmobilizetheextremityasbest
possibleinthepositionfound.Jointsordistallimbfractures
withnoneurovasculardecitsshouldbeimmobilizedinthe
positionfound.
Maintain manual support of the injured area while
coordinatingadditionalassistanceduringtheEVAC-U-SPLINT®
immobilizationprocess.Photo 2.
Preparation
Yourhealthcarepartneroraqualiedassistantshould:
•Applyappropriatedressingstoallwoundsinandaroundthe
suspectedfracturesite.
•OpentheEVAC-U-SPLINTcarrycaseandselectasplint
thatwillimmobilizethejointsaboveandbelowthefracture
site. Shoulder and hip injuries will require additional
immobilizationmethodstoaccomplishthisgoal.
•RemovetheredleashedcapfromtheMaxiValve™andpush
inontheredendofthevalvetoequalizetheairpressurein
thesplint.
•Laythesplintoutonthegroundoronaatsurface,valve
side down, and manually distribute the beads evenly
throughoutthesplint.Photo 3.
oPerating inStructionS
ALWAYS FOLLOW YOUR LOCAL MEDICAL
DIRECTOR’S GUIDELINES FOR ALL TYPES OF
SPLINTING APPLICATIONS.
4
1
2
3
•TheEVAC-U-SPLINT®shouldbesoftenoughtoeasilyand
comfortably conform to the injured area, yet rm enough
to keep the beads in place if positioned vertically. This
adjustmentmethodcaneasilybemadebysimplyremoving
orallowingairtoenterthesplint.
TIP: When working on a dislocated shoulder, evacuate
enoughair fromthesplinttomakeitresemblemodeling
clay, then conform the splint to your partner who is
mimickingthepatient’s injury.Then,simplytransferthe
“shapedsplint”tothepatient.(Seespecialapplicationson
page 8.)
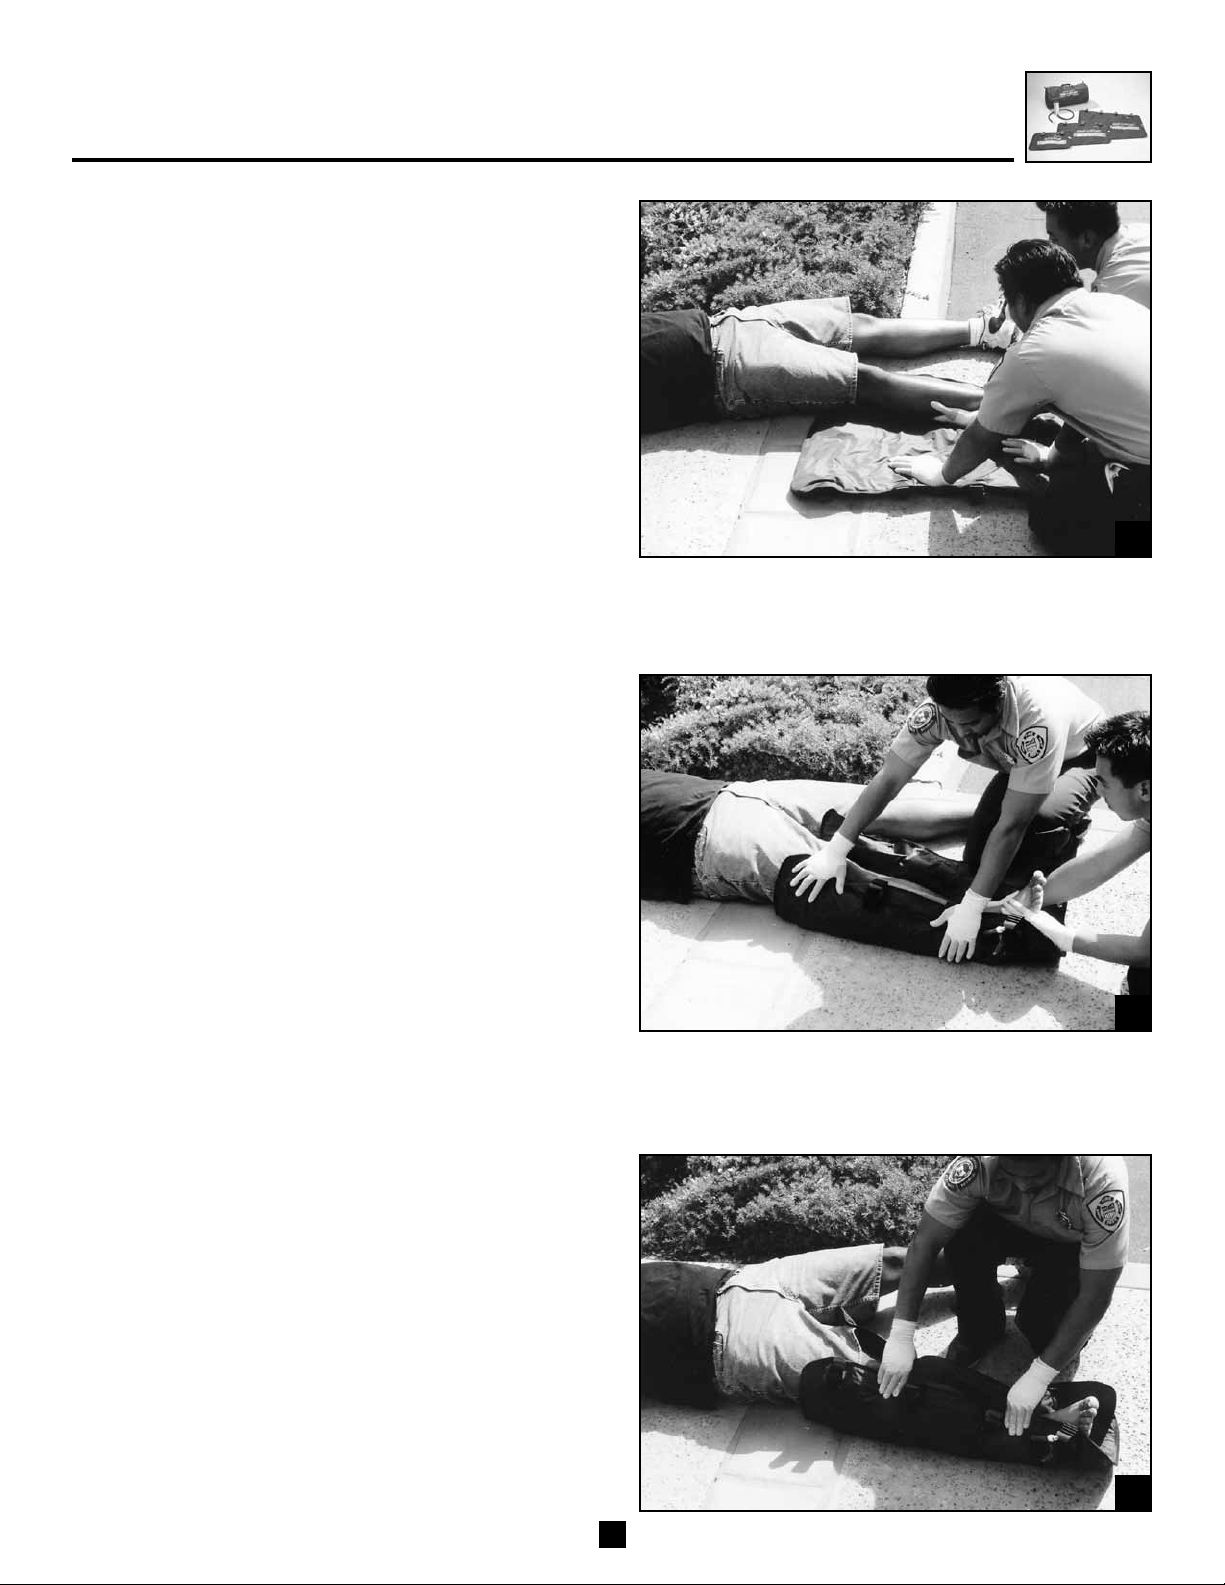
Application
Maintainsupportoftheinjuredareaandelevate(ifindicated)
theinjuredextremityjustenoughtoapplythesplint.Photo 4.
Yourassistantshould:
•Havethesplintpositionedforproperapplicationandassist
withsupportingtheinjuredareaifnecessary.
•Slideorplacethesplintundertheinjuredarea,positioning
thesplintsothatatleastonestrapisabove the suspected
fracture site and at least one strap is below the suspected
fracturesite.
DO NOT SECURE THE SPLINT STRAPS AT THIS TIME.
• Cradle the injured extremity with the splint and gently
manipulatebeadsintovoidstoprovidethebestconforming
mold possible. The splint should conform easily. If not,
simply adjust by allowing air to enter the splint. Splint
edgesshouldnotoverlap.Photo 5.
TIP: Leave an open space approximately 1” whenever
possible along the length of the splint. This provides
proper immobilization, yet allows for visual inspection
alongthefulllengthoftheinjuredextremity.
•Ifthesplintis too wide, foldthestraplessedgebackon
itselfandsmoothouttheedgetoformanarrowersplint.
• Hold the splint in place “hands-on-stable” by grasping
bothtopleadingedgesaboveandbelowthefracturesite.
Photo6.
Oncethesplintisproperlyapplied,releaseyoursupportof
the extremity, letting the splint cradle the suspected fracture
site, assisted by your partner’s “hands-on-stable” support,
whichmaintainstheinjuredlimbinadesiredandcomfortable
position.
5
4
5
6
This manual suits for next models
1
Table of contents
Popular Medical Equipment manuals by other brands


Getinge
Getinge Arjohuntleigh Nimbus 3 Professional Instructions for use

Mettler Electronics
Mettler Electronics Sonicator 730 Maintenance manual

Pressalit Care
Pressalit Care R1100 Mounting instruction

Denas MS
Denas MS DENAS-T operating manual

bort medical
bort medical ActiveColor quick guide

AccuVein
AccuVein AV400 user manual


