hatch Q70B User manual
Hatch Group Inc
Instruction Manual
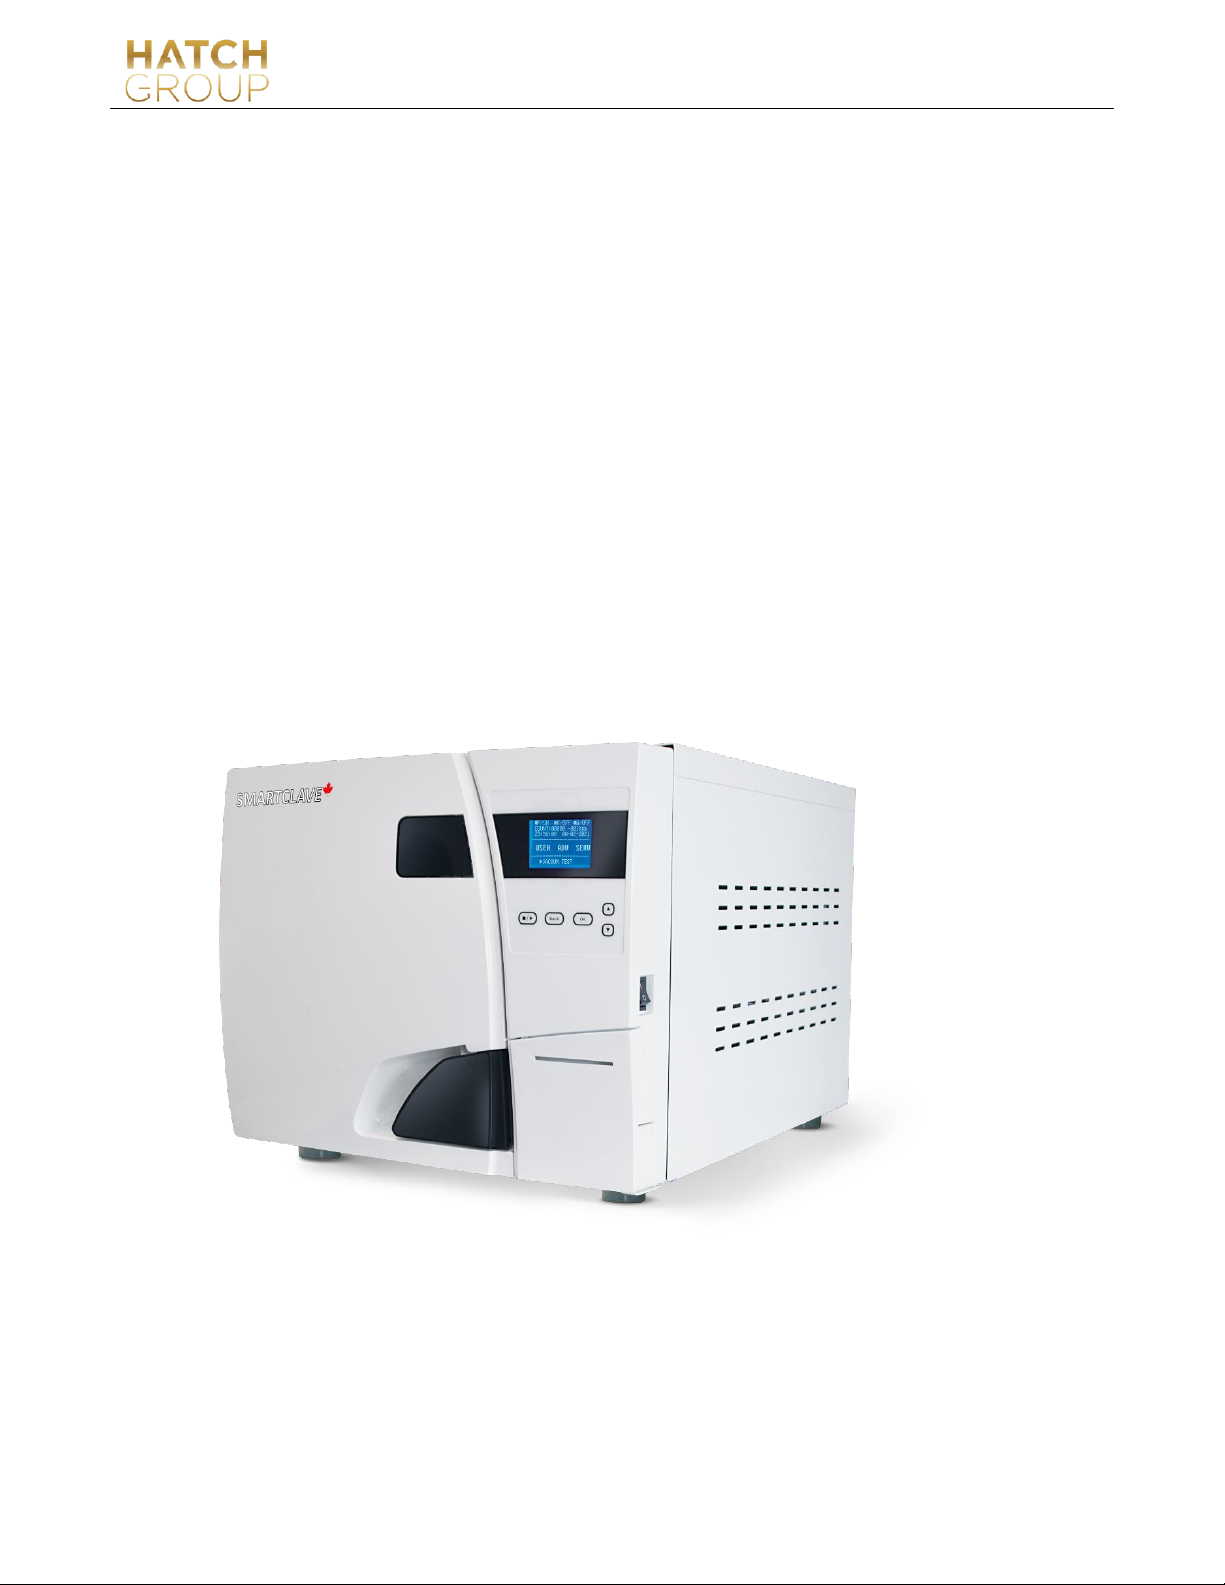
Autoclave/Pressure Steam Sterilizer
Q70B 23L

REV 2
1
Revision History
Revised
Chapter
Content
Revised
Date of
Revision
Revised By
Number of
Revision
Remarks
Please appoint specific person to operate and maintain the device. The person must be well
trained.

REV 2
2
MENU
Using Range of This Instruction ………………………………………………………………………………………
1
Information About This Autoclave ……………………………………………………………………………………
1
Explanation Of Symbols ………………………………………………………………………………………………
2
Safety Warning …………………………………………………………………………………………………………
3
1. Brief Introduction …………………………………………………………………………………………………
4
2. Using Range …………………………………………………………………………………………………………
4
3. Parameters and Sterilization Programs …………………………………………………………………………
5
4. Operation Panel ……………………………………………………………………………………………………
6
5. Installation …………………………………………………………………………………………………………
13
6. Operation ……………………………………………………………………………………………………………
14
7. Abnormal Situations ………………………………………………………………………………………………
16
8. Maintenance ………………………………………………………………………………………………………
17
9. Transportation And Storage ………………………………………………………………………………………
20
10. Warranty …………………………………………………………………………………………………………
21
11. Accessories ………………………………………………………………………………………………………
22
Appendixes ……………………………………………………………………………………………………………
23
Appendix 1: Structure Diagram ……………………………………………………………………………………
23
Appendix 2: Circuit Diagram …………………………………………………………………………………………
24
Appendix 3: EMC ……………………………………………………………………………………………………
25

REV 2
1

1
Using Range of This Instruction
This instruction is for models: Q70B
Please do not operate the device according to other instruction manuals.
Information About This Autoclave
Notice:
➢Please read the manual carefully before operating the autoclave.
➢Please operate the autoclave strictly according to this manual.
➢Please keep this manual for reference.
➢Please contact your local distributor or us if there’s any problem with the autoclave.
➢The person who operate and maintain the autoclave shall be specified and well trained.
Description:
Autoclave Class B
Model number:
SN:
REV 2
2
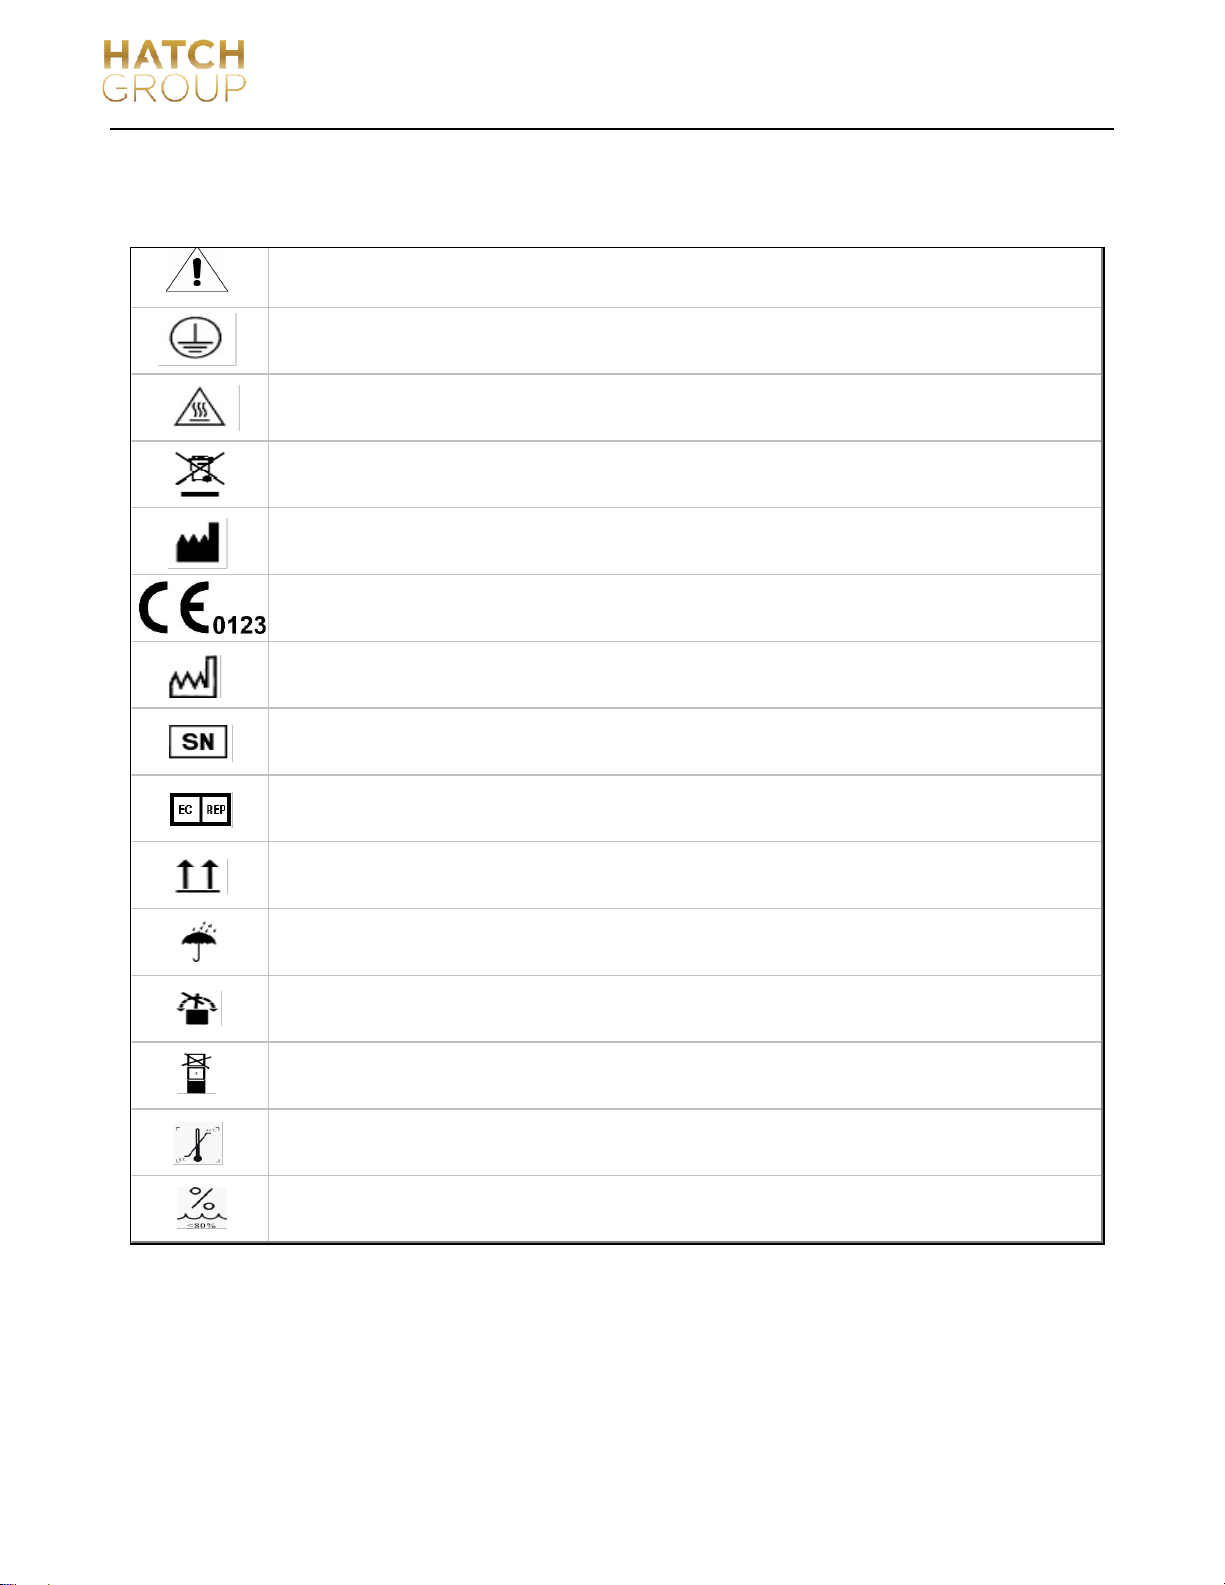
Explanation Of Symbols
Symbol for "Caution!"
Symbol for “PROTECTIVE CONDUCTOR TERMINAL”
Symbol for “HOT SURFACE, KEEP AWAY”
Symbol for “ENVIRONMENTAL PROTECTION –Electrical wastes should not be disposed together with
household wastes.If possible, please contact local distributor or government to recycle it."
Symbol for “MANUFACTURER”
Symbol for “COMPILES WITH MDD93/42/EEC REQUIREMENTS”
Symbol for “DATE OF PRODUCTION”
Symbol for “SERIAL NUMBER”
Symbol for “EUROPEAN REPRESENTATIVE”
Symbol for “THIS SIDE UP”
Symbol for “KEEP AWAY FROM RAIN”
Symbol for “DO NOT ROLL”
Symbol for “STACKING LIMITED 3”
Symbol for "Room Temperature: 5℃~40℃"
Symbol for "Relative humidity:≤80% "
Explanation of symbols on unit

REV 2
3
Safety Warning
Please read below carefully:
❖Please use 3-hole socket, and ensure the socket has been connected well with the ground. Do not put the autoclave on a
place that the power are difficult to be cut off.
❖Do not use power with different voltage with that stated in this manual.
❖Do not touch the plug or socket with wet hands.
❖Do not pull, change, over-bend or twist the wires, and do not put heavy things on the wires.
❖Do not put the autoclave on an unstable table.
❖Do not block the door of autoclave, and cover the ventilation holes and radiation holes.
❖Do not put anything on the top of autoclave.
❖If you find any abnormal smell or sound during operation, please cut off the power immediately and contact your local
distributor or us.
❖If you do not use the autoclave for a long time, please cut off the power and store the autoclave in a dry and cool place.
Electric shock, fire or equipment damage might happen if you ignor below warnings.

REV 2
4
1. Brief Introduction
This autoclave is automatic type steam sterilizer, which is very easy to operate. The parameters and conditions of the program
will be displayed automatically on the digital screen during the sterilization. If there’s problem, the autoclave will alarm
automatically. If there’s over-temperature or over-pressure, the autoclave will automatically cut off the power and ensure the
safety of operator. Inside the autoclave, there’s a waste water tank to collect waste water and vapor to ensure they will not
pollute the inner clean pipes.
2. Using Range
This autoclave can be used for medical purposes, e.g. In general medical practices, dentistry, facilities for personal hygiene
and beauty care and also veterinary practices. It is also used for materials and equipment which are likely to come into contact
with blood or body fluids, e.g. Implements used by beauty therapists, tattooists, body piercers and hairdressers.
Type Description of intended use
B
The sterilization of all wrapped or non-wrapped, solid, hollow load products type A and porous
products as represented by the test loads in standard: EN13060:2004+A2:2010
Type of this autoclave
Do not sterilize liquid!

REV 2
5
3. Parameters and Sterilization Programs
3.1 Parameters:
The working condition of the autoclave:
❖Environmental temperature: 5℃~40℃
❖Relative humidity: ≤80%
❖Atmospheric pressure: >70kPa;
❖Voltage: 110±11VAC/16A/60Hz, 2500VA
❖The highest working pressure: 0.21~0.23MPa
❖The highest working temperature: 134~137℃
❖Life span of the autoclave: 5 years
The requirements of transportation and storage:
❖Environmental temperature range: 5~40℃
❖Relative humidity: ≤80%
❖No corroding gases
Detailed sizes of the autoclave:
(see below pictures)
Net weight of autoclaves
Model
Net Weight
Q70B
53.5 KGS

REV 2
6
3.2 Sterilization Programs
The data have “*” can be adjusted
4. Operation Panel
4.1. LCD screen
4.1.1 ■P/ON:Indicate the status of printer
The relative set-up menu for printer:
❖ADV PRINTER:ON/OFF
✓ON : the printer will work
✓OFF: the printer will not work.
Process
Vacuum times
Sterilizing time
Sterilization
temperature
Sterilization
pressure
Vacuum persist
time
Dry time
121℃/SOLID
1 *
20min *
121℃
110kPa
3 *
121℃/POROUS
3 *
20min *
121℃
110kPa
7 *
121℃/HOLLOW
3 *
20min *
121℃
110kPa
10 *
134℃/SOLID
1 *
4min *
134℃
210kPa
3 *
134℃/PROOUS
3 *
4min *
134℃
210kPa
7 *
134℃/HOLLOW
3 *
4min *
134℃
210kPa
10 *
USER DEFINED
3 *
5min *
134℃*
210kPa
10 *
B-D TEST
3
4min
134℃
210kPa
7
VACUUM TEST
-80kPa
15min
CLEAN PROCESS
3
5min
105℃
20kPa
10
PRIONEN
3
19min
135℃
210kPa
10
Button
LCD screen
Sterilization
Program
Button
B&D Test: The display shows 4min,but normally it takes 3.5min.
REV 2
7
4.1.2 ■K/OFF:Indicate the status of function of “Keep temperature”
The relative menu:
❖ADV KEEP TEMP:ON/OFF” .
✓ON : indicate that the sterilizer will warm up the chamber and steam generator to keep the temperature. When the door is
opened, the sterilizer will stop warming up the chamber and steam generator. The longest time to keep temperature is 8
hours.
This function can shorten the time of your next sterilization program.
✓OFF: Disable the function.
4.1.3 ■W/OFF:Indicate the status of function of “Preheat”
The relative menu:
❖“ADV PREHEAT:ON/OFF” .
✓ON: It means if user has started a sterilization program, the autoclave will not start the next step until the temperature of
chamber reaches 50℃.
User can set up it in menu: “ADV PREHEAT:ON/OFF”
4.1.4 COUNT:Times of already running sterilization program
i.e. 00023 indicate the sterilizer have ran 23 times
B&D/helix test and vacuum test are not counted.
4.1.5 2 Kpa:
It indicates that the pressure in the chamber is 2 Kpa;
when the autoclave’s door is opened, this pressure is the local air pressure.
4.1.6 14:09:00: Time
User can set it in menu: “ADV DATE/TIME”
4.1.7 26-11-2011: Date
User can set it in menu: “ADV DATE/TIME”
4.1.8 USER: User menu
All programs are in this menu, User can select the program in this menu.
4.1.9 ADV: Advance menu/Set-up Menu
User can change options and set the parameters in this menu
If user set ■W/ON, the whole sterilization cycle might be very long. In some countries, it is
required. Please check your local standards before seting up this function.

REV 2
8
4.1.10 SERV: Serve menu
This menu is for maintenance. It requires password. Only the distributor can use this menu. Please don’t change the
parameters inside this menu without the approval of a professional engineer.
4.1.11 134℃/solid : Current Sterilization Program
It can also record the last sterilization program. Users need not to enter USER menu to select the same program.
4.2 Introduction of “USER MENU”
There are 11 sterilization programs for user to choose.
➢121℃-program and 134℃-program has no difference in sterilization results. If the instruments cannot be sterilized in
134 ℃, please choose 121℃program.
➢Solid program can only sterilize solid instruments without wrapped, such as pliers, forfex, forceps etc.
➢Porous program can sterilize the loads which made of porous material
➢Hollow program can sterilize the hollow A and hollow B loads
➢User-defined program: All this program's parameters can be adjusted: The sterilization temperature、the sterilization
time、dry time and vacuum times.
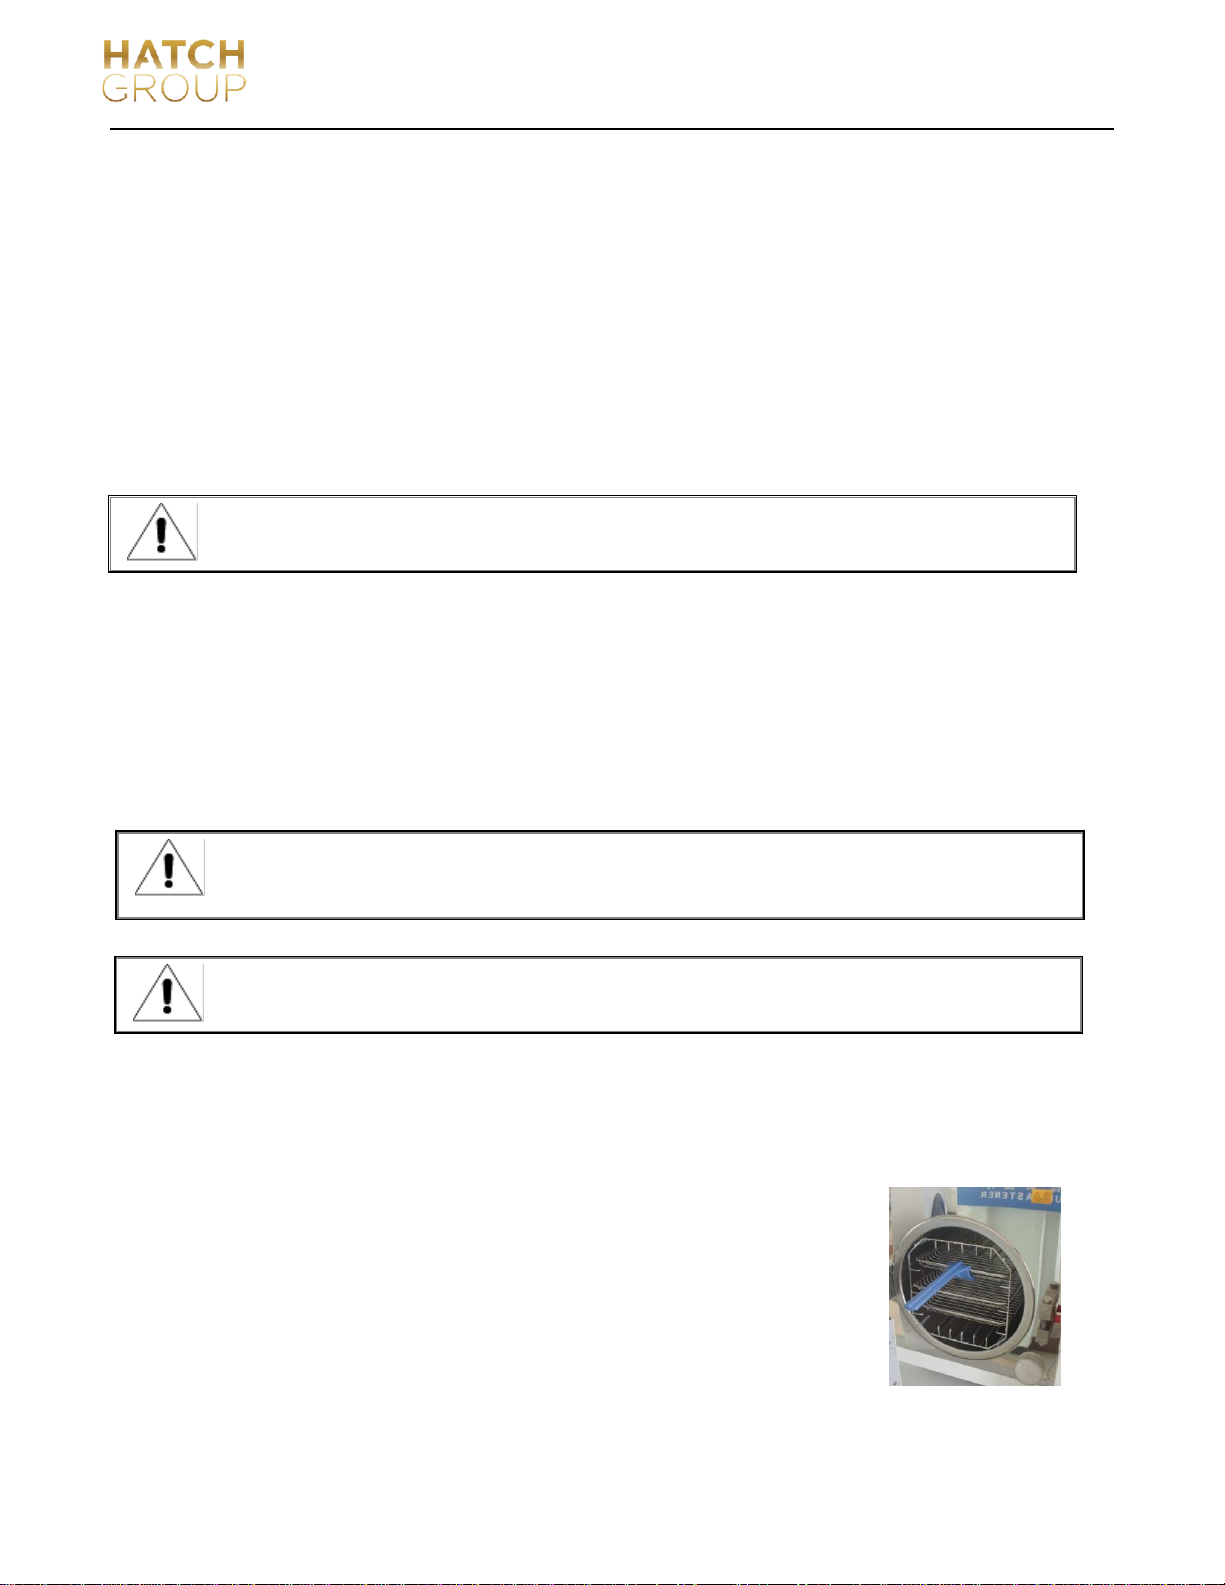
➢B&D test is for hollow A loads test . B-D test and Helix test is the same test program. The only difference is that B-D test
uses a B-D test package, while Helix test uses a Helix test device (PCD:process challenge device).
➢Vacuum test is air leakage test.
➢Clean program: This is used for clean the autoclave. If the autoclave shows “NEED CLEAN”, please run this program.
This program can also be used to clean other loads.
➢Prion program: This program is to sterilize prions.
It is recommended to do a vacuum test every mouth. If the result is FAIL, Do not use
this autoclave.

REV 2
9
4.3 ADV MENU
: Cursor
User can press button “up” or “down” to move the cursor.
When the cursor is next to the option which user wants to set up , user can press “OK” to set up.
4.3.1、KEEP TEMP
This is the “■K” in LCD screen.
✓ON: The sterilizer will warm up the chamber and steam generator to keep temperature. When the door is opened, this
function is stopped. The longest time to keep temperature is 8 hours. Setting it on can shorten the time of the whole
cycle.
✓OFF: Close this function.
4.3.2、PRINTER
✓ON: The printer will print the sterilization records during the working cycle.
✓OFF: The printer will not print the records during the working cycle.
4.3.3、LANGUAGE
✓ENG: English
✓FRN: French
4.3.4、USER-DEFINED SET
It is used to set up the parameters of “USER-DEFINED” menu. When the cursor is moved to this option, user can enter it by
pressing “OK”. The detailed setting page is as below:

REV 2
10
When the cursor is moved to this option, User can press “UP” or “DOWN” to change the setting.
Press “OK”, the cursor will move to the next option.
VACUUM TIMES:
It is used to set up the vacuum times during the sterilization cycle.
✓04: Meaning that: the program “USER-DEFINED” have 4 times vacuum process.
✓The range of the “VACUUM TIMES” is 1~10.
STER TEMP:
It is used to set up the sterilization temperature.
✓134℃:The sterilizer temperature of program “USER-DEFINED” is 134 ℃
✓The range of the “STER TEMP” is 105℃~134℃.
STER TIME:
It is used to set up the sterilization time,
✓05Min: . The sterilizer time of program “USER-DEFINED” is 05Min
✓The range of the “STER TIME” is 04min-60min.
DRY TIME:
It is used to set up the dry time.
✓10Min: . The dry time of program “USER-DEFINED” is 10Min
✓The range of the “DRY TIME” is 01min-25min.
OK:
It is used to save setting and return to the previous page.
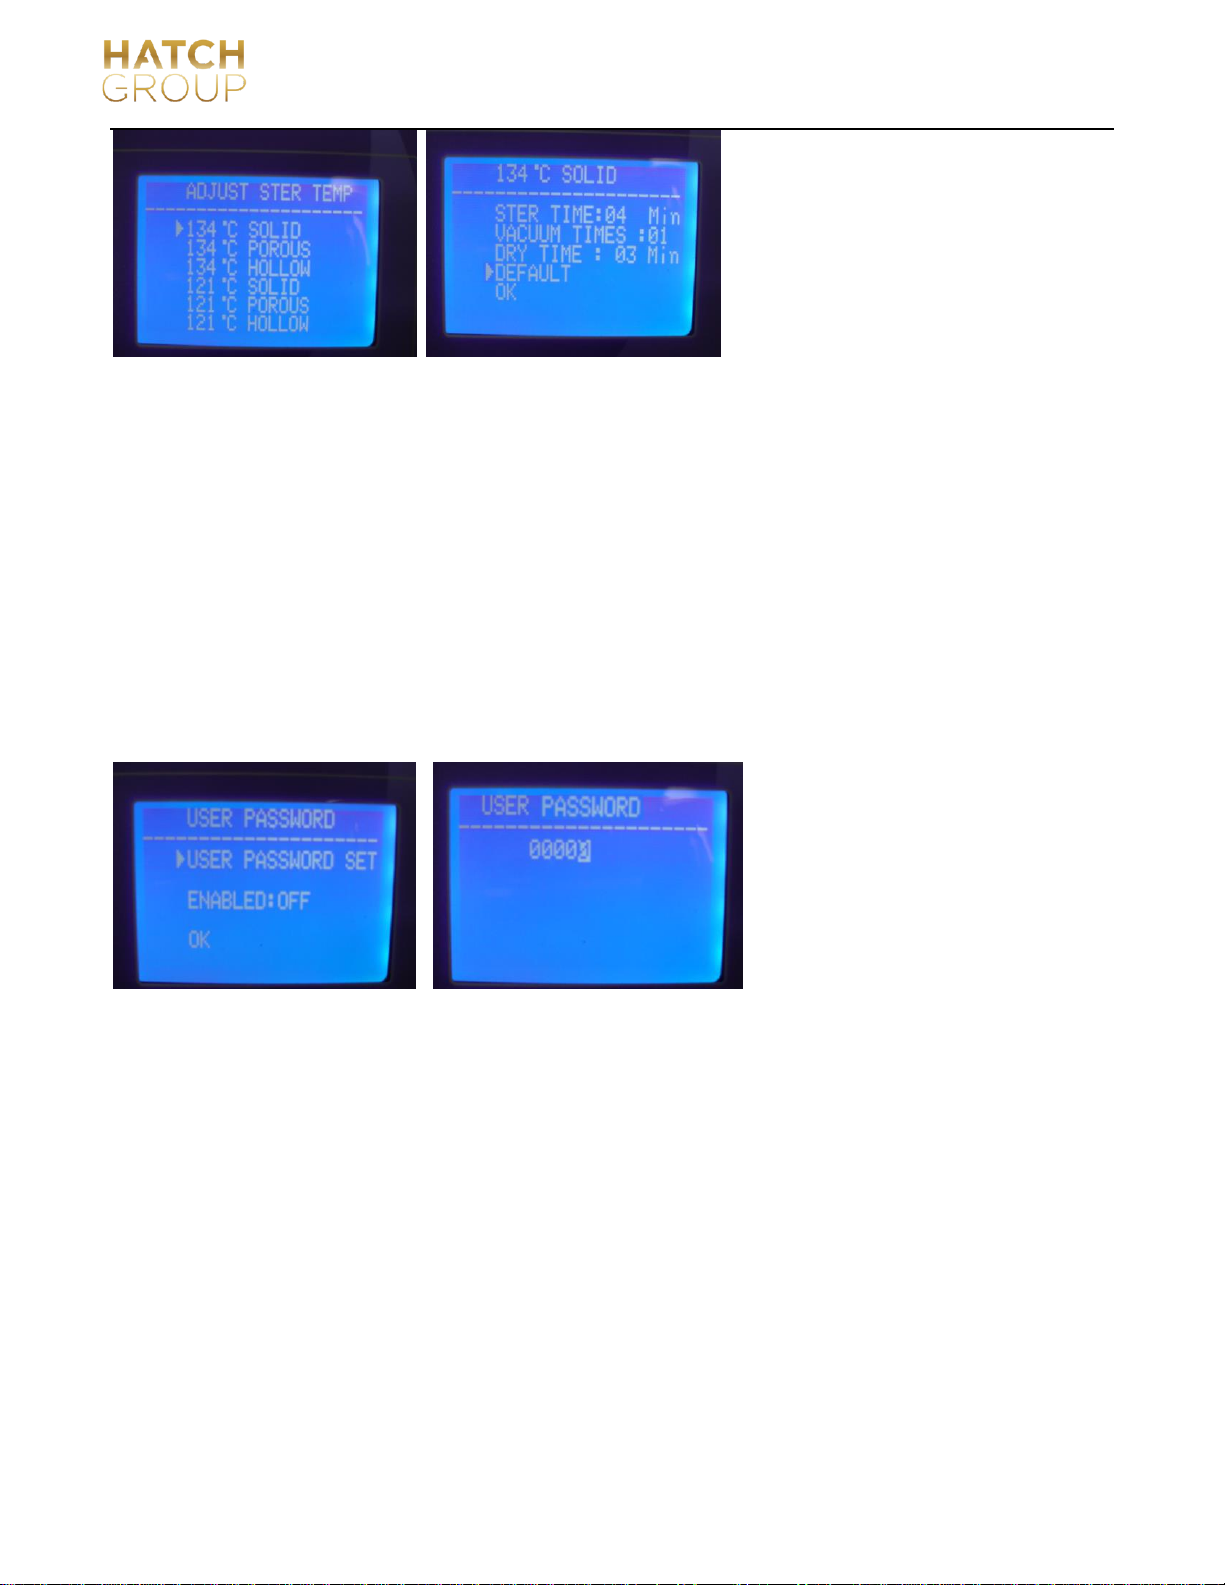
4.3.5、ADJUST STER PAR:
When the cursor is moved to this option, user can press “OK” to enter the program selection page. There are six programs can
be adjusted(Pic1).
REV 2
11
(Pic 1) (Pic2)
For example, you can adjust the parameters of 134℃solid program, after that, the page of Pic2 will be appearing.
Three parameters can be adjusted: STER TIME、VACUUM TIMES and DRY TIME.
The setting method is the same as the setting of user-defined program,
DEFAULT: Return to default.
Move the cursor to the “DEFAULT” option by pressing “OK”, press “UP” to default the parameters.
4.3.6、USER PASSWORD
If the user has set up the password and let it“ENABLED”, the autoclave will run only after correct password has been input. If
you input wrong password, the autoclave will not work.
If user forgets his password, please contact local distributor or us for help.
When the cursor is before the “USER PASSWORD” option in “ADV” menu, press “OK” to enter the next page(pic 3).
(Pic3) (Pic 4)
USER PASSWORD SET:
When the cursor is before the “USER PASSWORD SET” option, then press “OK” to enter the next page (pic 4)
User can change the “0” with white fill by press “UP” or “DOWN”,
❖UP: +1;
❖DOWN:-1
Press “START/STOP” button to move the cursor.
ENABLED:
✓ON: Password enabled.
✓OFF: Password disabled.
✓OK:Return to the previous page.
4.3.7 DATE/TIME

REV 2
12
When the cursor is before the “DATE/TIME” option, press “OK” to enter the next page.
Press “UP” or “DOWN” to change the date:
✓UP: +1;
✓DOWN:-1
Press “START/STOP” button to move the cursor.
4.3.8 Button sound
When the cursor is before the “KEY SOUND” option, press “OK” to
change “ON” or “OFF”.
✓ON: Sound enabled.
✓OFF: Sound disabled.
4.3.9 PREHEAT
It is “■W” in LCD screen.
When the cursor is before the “PREHEAT” option, press “OK” to change “ON” or “OFF”.
✓ON: If user has started a sterilizer program, the autoclave will not start the next step until the temperature in chamber
reaches 50℃.
✓OFF: If user has started a sterilizer program, the autoclave will start the next step no matter the temperature in chamber
reaches 50℃or not.
4.3.10 AUTO START…
User can set the selected program to automatically run at the setting time.
When the cursor is before the “AUTO START…” option, press “OK”to use this function.
After press “OK”key, you can set the time when the sterilizer run automatically. There have two ways to set the time(pic5):
Data and Time: The exact time when the sterilizer run automatically.
XX hours later: To set how long time later, the sterilizer run automatically.
(pic5) (pic6) (pic7)
How to set the date/time(pic6 , pic7):
Press “UP”or “DOWN”to change the date:
UP: +1;
DOWN:-1
Press “OK”to change the place of the digit
After setting the time, user must select the program(pic8),then after pressing “OK”, the time will count down and the selected
program will automatically run when the time arrived(pic9,pic10).

REV 2
13
pic8 pic9 pic10
4.3.11 Dry
It have 3 grades: I, II, III. If user find that:after a cycle,loads are wet ,you can choose II or III. The dry’s temperature
of grade II and III are higher than I grade, using grade II or III may short down the device’s life.
Press “OK”to set dry.
4.4 Buttons
4.4.1 UP button
Move up or left
4.4.2 DOWN button
Move down or right
4.4.3 RETURN button
Return to previous menu
4.4.4 OK button
Confirm or enter the next menu.
4.4.5 START/STOP button
After the program is selected, the LCD will show “please push the start key to start…”, at this time, the user can press
the button Start/Stop to start the program.
During the sterilization cycle, the user can press the button Start/Stop and keep 5 seconds to stop the whole cycle.
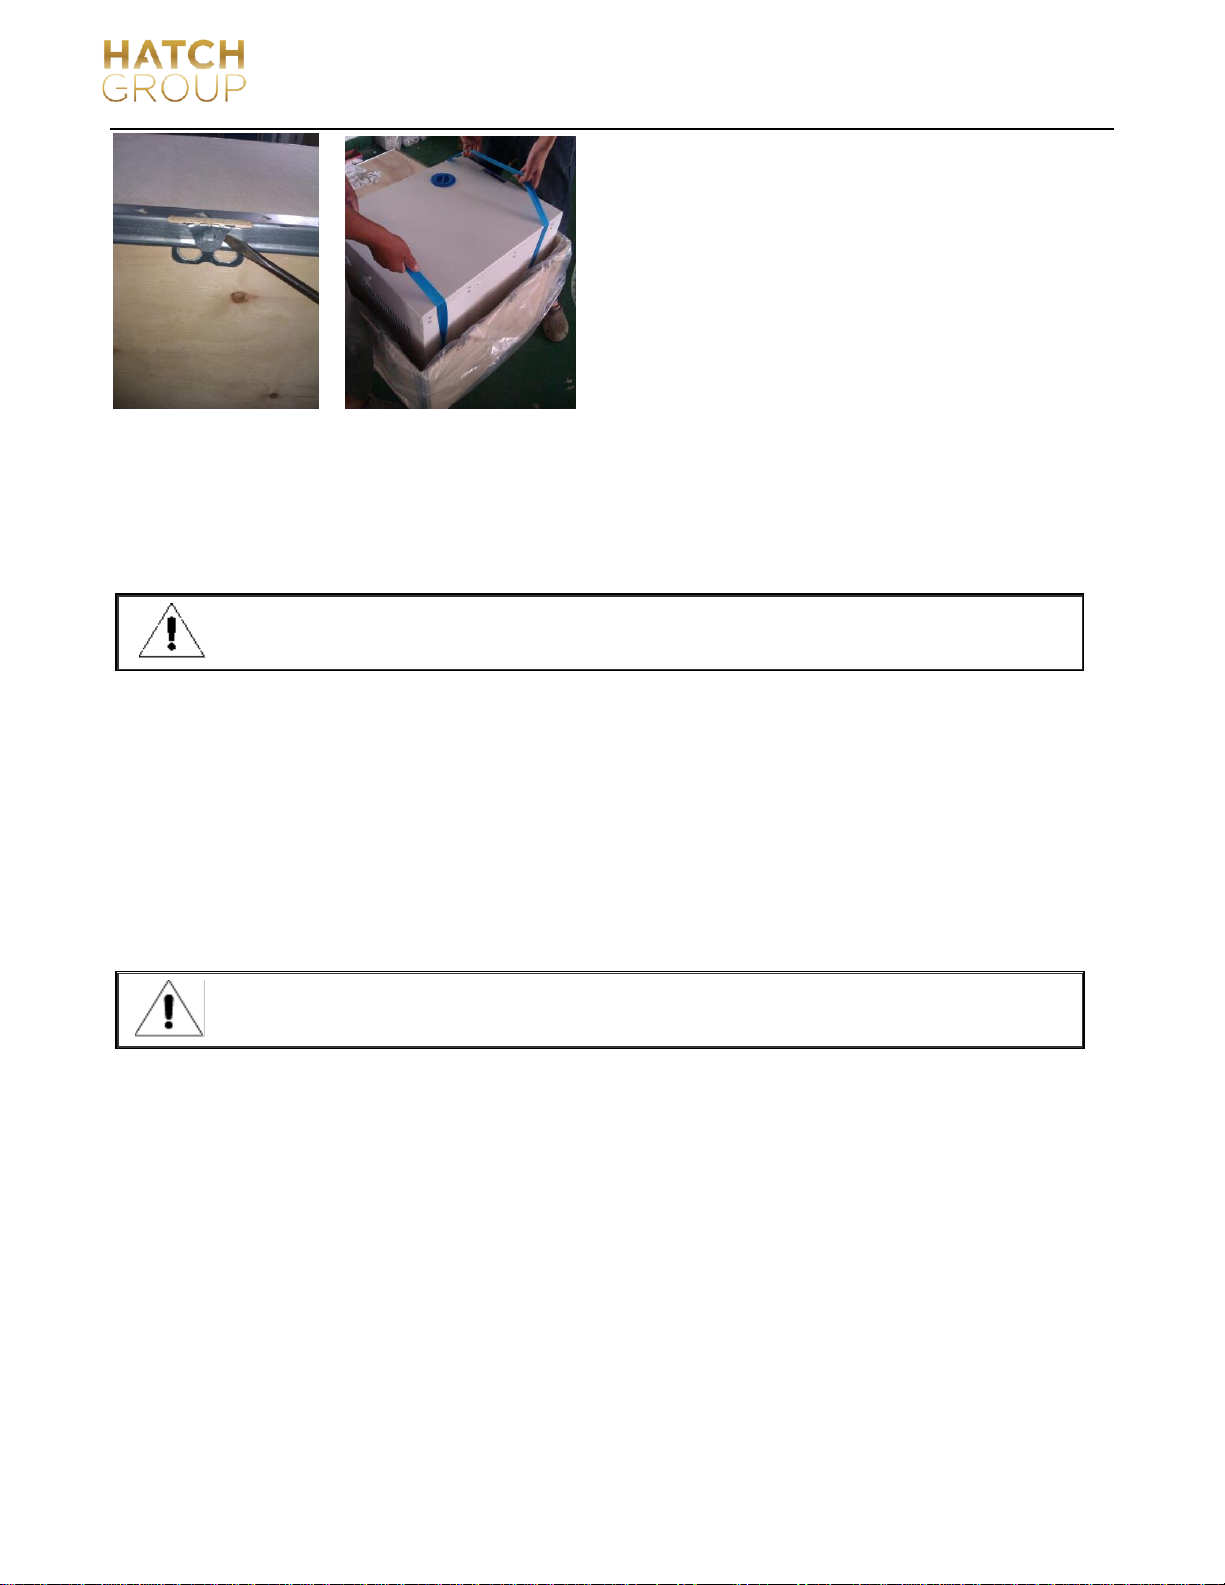
5. Installation
The autoclave is packed by a wooden carton. To open the carton, you need a flat screwdriver to open the cover. Then, the
autoclave can be lifted out by 2 persons.
REV 2
14
5.1) When installing the autoclave onto the table, please keep the autoclave at least 10 cm away from surroundings. And
keep the rear side of the autoclave at least 20cm away from the surrounding.
It is recommended to install the autoclave in a well-ventilated location. Don’t block the radiator of the sterilizer.
Keep the table stable & horizontal.
5.2) Adjust atmospheric pressure
Because different countries have different atmospheric pressure, the user shall adjust the atmospheric pressure before first
use.
Adjust method:
Cut off power
Open the door of autoclave
Turn on the power, and keep it for 20 seconds. Then cut it off.
Atmospheric pressure for autoclave is successfully adjusted.
5.3) Adjust time and date
Please refer to information stated in 4.3.7.
Please ensure the table for installation is strong enough for an autoclave.
The autoclave might not run if the user does not adjust its atmospheric pressure.
REV 2
15
6. Operation
Preparation before using
Before using, please connect power supply, turn on the switch. After that, the LCD screen will be turned on and show the main
menu. At this moment, the autoclave has been ready for use.
Before the first use, the LCD will show “Please fill water”, please fill water from the top of the autoclave. After enough water
has been filled, the alarm will disappear and user can use this autoclave now.
6.1 Fill water
If LCD shows “Please fill water”, that means, the water inside is not enough for run a sterilization cycle and you need to fill
water before starting a new sterilization cycle. (If LCD shows during a sterilization cycle, you need not stop the current
sterilization cycle because the water inside is only enough for the current cycle. But for next cycle, you must fill water firstly.)
This water can be filled from the top of the autoclave. Please see pic. Above. When you are filling water, you will hear 2 times
of beep:
❖First time beep: it means the water inside is enough for a new sterilization cycle. You can stop or continue filling water.
❖Second time beep: It means, the clean water tank is full. Please stop filling water now.
6.2 If you want to use a flash disk to save the sterilization records, please insert the flash disk into USB port.
6.3 Working
When water tank has enough water and waste water tank is not full, it is ready for working.
6.3.1 Put the loads (instruments etc.) into the chamber
Warning:
➢Ensure the total CBM of the loads is less than 70% of the CBM of the chamber.
➢Keep the loads away from the surface, air outlet of chamber. Keep the loads at least 10mm away from the inner side of
Please ensure the autocalve is well grounded.
Only distilled water can be used for the autoclave. Otherwise, there will be problem with the steam
generator and solenoid valves. The user shall be responsible for the problem if he/she uses other
kinds of water.
Before filling water, please turn on the autoclave and ensure the autoclave is horizontal. After filling
water, if possible, please drain the waste water.

REV 2
16
the chamber.
➢If you do B&D test, you need to put the test paper at the center of the sterilization package to ensure the reliable test
result.
➢When putting into and taking out the loads, you shall use the tool attached to prevent your hands from touching the hot
surface.
6.3.3 Set up the parameters
Set the parameters:KEEP TEMP, PRINTER, PREHEAT if in need.
6.3.4 Close the autoclave’s door
If the door is not locked, the LCD will show “Please close the door”.
6.3.5 Choose sterilization program, then start
After the door is closed, choose the relative sterilization program according to the kinds of loads in the chamber.
All the sterilization programs are in “USER” menu. You can press UP or DOWN button to move the cursor to USER menu,
then press OK to enter the menu. Inside the menu, you can press UP or DOWN to choose the sterilization program. After that,
you can press OK. Then, the LCD will show “please push the start key to start” , after seeing that, you can press
“START/STOP” to run the program you selected.
The whole sterilization cycles will be automatically finished. You need not do anything during the programs. The period of
whole cycle is influenced by the initial temperature, the kinds and quantity of the loads.
When the cycle is finished, LCD will show “END”together with 3 beeps. The user can open the door and take out loads inside
now.
6.3.6 After using, you shall turn off the autoclave. If you will not use it for a long time, you shall disconnect the power supply.
6.3.7 If The LCD shows “PLEASE DRAIN WATER FROM WASTER WATER TANK!”,this mean the waster water tank is full,
you must drain the waste water.
If the temperature and pressure inside the chamber are high, the door will be difficult to be closed.
We suggest to close the door quickly, or, you can wait 30 seconds, then close the door.
The user shall fill in water promptly if there is a low-water alert. Otherwise it will show “E08 or E9”
error alarm.
You shall use a tray-holder tool when taking out loads to prevent scald.
Don’t open the door until the pressure is within “-05~05”.
To ensure the effectiveness of sterilization, during daily use, we suggest putting test paper or
pouches with indicators together with the loads into the sterilization chamber.
The waste water might be very hot, please be careful when you are draining them.
This manual suits for next models
1
Table of contents
Other hatch Laboratory Equipment manuals


