Metkon VACUMET 52 Administrator Guide

1
metkon.com
OPERATION & INSTRUCTION MANUAL
VACUUM IMPREGNATION UNIT

2
EC Declaration of Conformity
Manufacturer : Metkon Instruments Inc.
Address : Demirtas Dumlupinar Organize Sanayi Bolgesi
Ali Osman Sonmez Cd. No: 14 Bursa / TURKEY
Model No : VACUMET 52
Herewith declares that;
Vacuum Impregnation Unit
is in conformity with the provisions of the Machinery Directive (directive 2006/42/EEC), as amended, and with national
implementing legislation;
And furthermore declares that
the following (parts/clauses of) standards have been applied
EN ISO 12100:2010, TS EN 60204-1
Authorized Person: ERCIN SENAY
Position: Manager of Research and Development Department
Year: 2019
Bursa / Turkey

3
Index
DESCRIPTION ............................................................................................................................ 4
Design .....................................................................................................................................................................................4
Technical Data ........................................................................................................................................................................5
Warranty .................................................................................................................................................................................5
Safety Precautions ..................................................................................................................................................................5
INSTALLATION & SET UP........................................................................................................... 6
Unpacking & Checking Contents of Package ...........................................................................................................................6
Installation and Set-Up ...........................................................................................................................................................6
CONTROL PANEL....................................................................................................................... 7
Control Button Functions ........................................................................................................................................................7
OPERATION ............................................................................................................................... 7
Without Sucking Function ........................................................................................................ 7
With Sucking Function.............................................................................................................. 7
SERVICE AND MAINTENANCE ................................................................................................... 7
Maintenance ...........................................................................................................................................................................7
ACCESSORIES AND CONSUMABLES.......................................................................................... 8
Accessories .............................................................................................................................................................................8
Consumables...........................................................................................................................................................................8
TECHNICAL DOCUMENTATION ................................................................................................. 9
Recommended Spare Part List ................................................................................................................................................9
Customer Service ....................................................................................................................................................................9
4
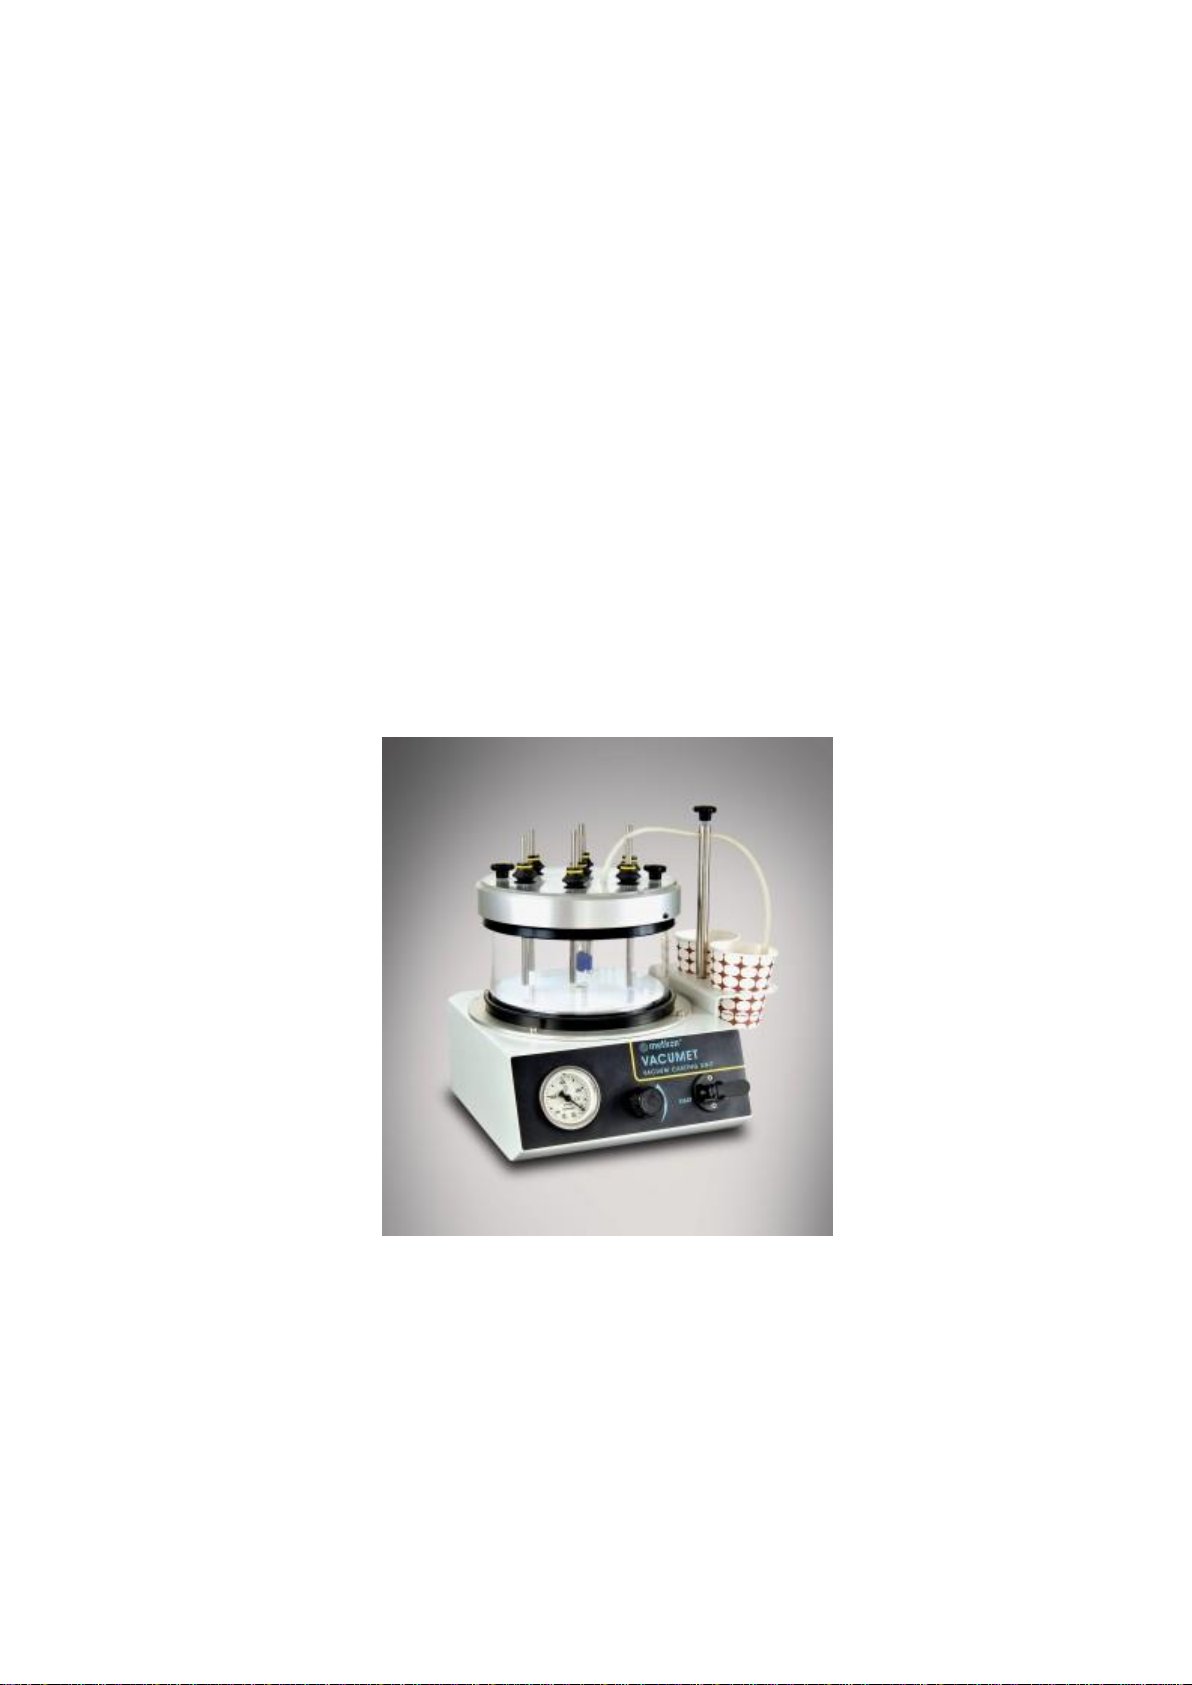
DESCRIPTION
Design
Compact and simple
Built-in vacuum sytem with Gauge
Efficient impregnation
Multi-specimen application.
VACUMET 52 is designed for embedding and impregnation of
porous materials. It removes the trapped air from the
mounting material and eliminates the gaps between the
specimen and the resin.
Most mineralogical specimens have porosities, cavities,
cracks, and ther fore need to be under vacuum. VACUMET 52
fulfills this requirement easily and efficiently. In addition,
VACUMET 52 can also be used for glueing the specimens on
the glass slides for further processing in thin section
preparation.
METKON offers wide range of cold mounting consumables
high quality embedding forms for different types of
mineralogical application.
Only air connection is necessary to operate VACUMET 52. No
electric or water connection is needed.
Embedding mineralogical specimens is very easy with
VACUMET 52. Just place your specimen inside the embedding
form, fill it with cold mounting resin, place it inside the
VACUMET 52, close cover and turn on vacuum. That's all!
Two different operation is possible with VACUMET 52;
embedding with sucking function or without sucking function.
It is also possible to mount specimens with VACUMET 52, if
the specimen has very low density and floating inside the
resin material. VACUMET 52 has feature for fixing low-density
materials.
VACUMET 52

5
Technical Data
Warranty
The VACUMET 52 is guaranteed against defective material or
workmanship defects for a period of 12 months from the date
of receipt by the customer or latest 18 months after the
shipping date. The warranty is not valid if inspection shows
evidence of misuse or unauthorized repair. Warranty covers
only replacement of defective materials. If this unit need to be
returned to our factory for service, please contact your
distributor for authorization and include the following details:
Serial Number of the unit, Invoice number and date. Transport
costs belong to the customer.
NOTE
The equipment is designed to be used with
METKON accessories and consumables. In case
of misuse of equipment, improper installation,
alteration, use of different source parts,
improper repair, METKON will accept NO responsibility for
any damages to the operator or the equipment.
Disassembling of any part should always be performed by a
qualified technician
Safety Precautions
Read the below instructions carefully before use.
Place the machine on a sturdy and safe table.
The equipment must be installed in compliance with
local safety regulations.
Only use approved METKON accessories and
consumables to achieve maximum safety and lifetime.
Follow the instructions and safety regulations when
lifting and carrying the equipment.
Using gloves is recommended when working with cold
mounting consumables.
Follow the periodically maintenance.
NOTE
METKON Instruments Inc. can make any changes
without notice on the equipment, accessories,
consumables and miscellaneous products.
Consequently; visual or written information on
the instruction manuals, technical materials, catalogues,
website, product videos and other marketing materials may
show inconsistencies and may be different from the product.
Model
Order No
VACUMET 52
25 06
Vacuum System
0,65 bar
Air Pressure
4,5 - 6 bar
Dimensions, WxDxH, cm.
30 x 31 x 35
Weight, kgs
8 kgs
Table of contents
Other Metkon Laboratory Equipment manuals


Popular Laboratory Equipment manuals by other brands


Belden
Belden HIRSCHMANN RPI-P1-4PoE installation manual

Koehler
Koehler K1223 Series Operation and instruction manual

Globe Scientific
Globe Scientific GCM-12 quick start guide

Getinge
Getinge 86 SERIES Technical manual

CORNING
CORNING Everon 6000 user manual

Biocomp
Biocomp GRADIENT MASTER 108 operating manual


