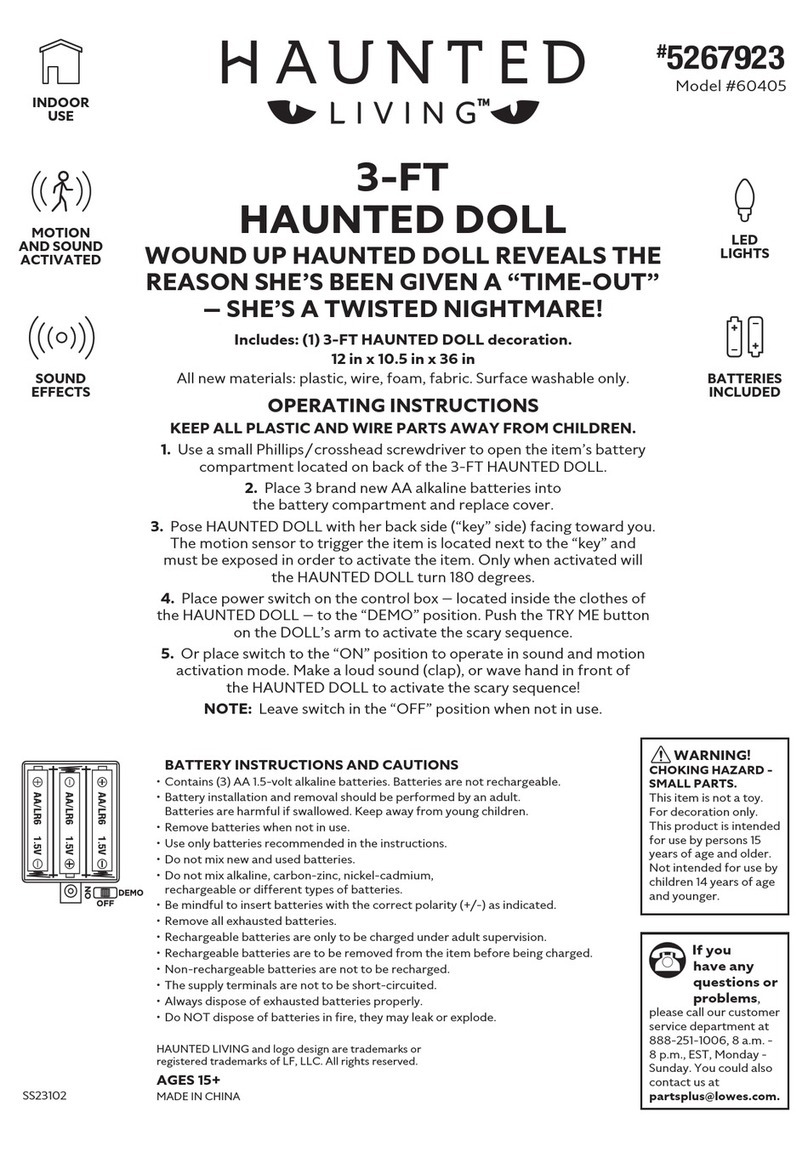
HAUNTED LIVING 61080 User manual

ITEM #5267926
ANIMATED TOY BOX
Questions, problems, missing parts? Before returning to your retailer, call our customer
service department at 888-251-1006, 8 a.m. - 8 p.m., EST, Monday - Sunday. You could also
MODEL #61080
AS23145
HAUNTED LIVING and logo design are trademarks
or registered trademarks of LF, LLC. All rights reserved.

Page 1
PACKAGE CONTENTS
PART DESCRIPTION QUANTITY
A Bear 1
B Clown 1
C Doll and module 1
D Base and control box 1
E Fabric box cover 1
F AA Alkaline Batteries 4
A. B. C.
D. E. F.

SAFETY INFORMATION
Please read and understand this entire manual before attempting to assemble, operate or install
the product.
ADULT ASSEMBLY REQUIRED
Before beginning assembly of product, make sure all parts are present. Compare parts with package
contents list and hardware contents list. If any part is missing or damaged, do not attempt to
assemble the product.
No tools required for assembly.
Estimated Assembly Time:7minutes
PREPARATION
WARNING
•Warning Risk of injury to persons. Read and understand instruction manual before use.
• Warning: CHOKING HAZARD! Small parts. This item is not a toy. For decoration only.
• Do not turn item on until you have completely nished assembly.
• Stay clear of item while operating.
• Do not place item on uneven ground.
• Do not place weight on item while in operation.
Page 2
BATTERY INSTRUCTIONS:
1. Contains (4) AA 1.5-volt alkaline batteries. Batteries are not rechargeable.
2. Battery installation and removal should be performed by an adult. Batteries are harmful if swallowed.
Keep away from young children.
3. Remove batteries when not in use.
4. Use only batteries recommended in the instructions.
5. Do not mix new and used batteries.
6. Do not mix alkaline, carbon-zinc, nickel-cadmium, rechargeable or dierent types of batteries.
7. Be mindful to insert batteries with the correct polarity (+/-) as indicated.
8. Remove all exhausted batteries.
9. Rechargeable batteries are only to be charged under adult supervision.
10. Rechargeable batteries are to be removed from the item before being charged.
11. Non-rechargeable batteries are not to be recharged.
12. The supply terminals are not to be short-circuited.
13. Always dispose of exhausted batteries properly.
14. DO NOT dispose of batteries in re, they may leak or explode.

ASSEMBLY INSTRUCTIONS
1. Press the snap lock on the frame. Insert the Doll and
module into the frame and release the snap lock to
secure the doll and module to the frame.
(Match C to C)
2. Insert the Bear to the Doll and module.
(Match B to B)
3. Insert the Clown to the Doll and module.
(Match A to A)
1
2
3
Page 3

ASSEMBLY INSTRUCTIONS
4. Connect the D wire from the control box to the wire
set located on the Doll, clown, and bear.
(Match D to D)
5. Connect the E wire from the control box to the wire
set located on the Doll, clown, and bear.
(Match E to E)
6. Connect the F wire from the clown to the wire
set located on the Doll and module.
(Match F to F)
4
5
6
Page 4

ASSEMBLY INSTRUCTIONS
7. Connect the G wire from the bear to the wire set
located on the Doll and module. (Match G to G)
8. Turn the fabric box cover upside down. With the fabric
box cover upside down, insert all FOUR metal upright
posts into the bottom of all FOUR corners.
9. With the fabric box cover assembled, turn the
assembled frame upside down and insert the
assembled frame into the four metal uprights with
the control box facing the fabric control box flap.
7
8
9
Page 5
CONTROL BOX FLAP
ASSEMBLED FRAME AND FABRIC BOX COVER

ASSEMBLY INSTRUCTIONS
10. Connect all four hook and loop fasteners located on
the fabric box cover around the frame.
11. Place the Toy box in the upright positon and locate
the control box flap on the back of the fabric cover.
12. Open the control box flap and replace fresh 4AA
batteries (recomended) or insert a 6V 2A adapter
(not included) into the control box.
10
11
12
Page 6

OPERATING INSTRUCTIONS
13. Move the switch to the ON position. Make a loud
sound (clap) to activate the item. Turn the switch to
the OFF position when not in use.
7
Page 7
EXTERNAL SPEAKER IS NOT INCLUDED. MUST BE PURCHASED SEPARATELY.
1. Plug speaker cord into the jack labeled SPEAKER JACK
located on the CONTROL BOX.
2. Use volume knob on external speaker to control volume levels.
OPTIONAL EXTERNAL SPEAKER SET UP
OPTIONAL DEMO SET UP
1. Insert the cable from optional footpad/push button into the
jack labeled DEMO on the CONTROL BOX.
2. Place the switch in the DEMO position to enable
DEMO activation.
3. Step on the FOOTPAD or press push button to activate the
scary sequence!
Footpads and push buttons are sold separately and can be
purchased at www.tekkyaccessories.com
*
FOOTPAD/PUSH BUTTON IS NOT INCLUDED. MUST BE PURCHASED SEPARATELY.
OPTIONAL DEMO AND EXTERNAL SPEAKER SET UP

TROUBLESHOOTING
PROBLEM POSSIBLE CAUSE CORRECTIVE ACTION
Item will not
activate.
• 6V 2A adapter (not included) is not plugged in.
• Switch on control box is not in the ON position.
• Batteries are not inserted correctly.
• Check 6V 2A adapter (not included) is
plugged in and securely inserted into
the control box.
• Move switch to ON position.
• Install batteries with positive and
negative terminals in the
correct positions.
Item has no sound while
operating. • Volume knob is turned all the way down. • Adjust volume knob to desired volume.
You only hear
item sound but no
item activation.
• Wires are not connected. • Check that all wires from the control
box to the Doll, Clown and bear
are connected.
Page 8
CARE AND MAINTENANCE
• STORE IN A COOL AND DRY ENVIRONMENT.
• IN INCLEMENT WEATHER BRING ITEM INDOORS.
• SURFACE WASHABLE ONLY. DO NOT USE ANY HARSH OR ABRASIVE CLEANING AGENTS.
• REMOVE BATTERIES WHEN STORING ITEM FOR LONG PERIODS OF TIME.

FCC REGULATION
Page 9
Printed in China
FCC STATEMENT
FCC RULES: This device complies with Part 15 of the FCC Rules. Operation is subject to the following two
conditions: (1) this device may not cause harmful interference, and (2) this device must accept any interference
received, including interference that may cause undesired operation.
CAUTION: Changes or modications not expressly approved by the party responsible for compliance could void
the user’s authority to operate the equipment.
NOTE: This equipment has been tested and found to comply with the limits for a Class B digital device, pursuant
to Part 15 of the FCC Rules. These limits are designed to provide reasonable protection against harmful
interference in a residential installation. This equipment generates, uses, and can radiate radio frequency energy
and, if not installed and used in accordance with the instructions, may cause harmful interference to radio
communications. However, there is no guarantee that interference will not occur in a particular installation. If this
equipment does cause harmful interference to radio or television reception, which can be determined by turning
the equipment o and on, the user is encouraged to try to correct the interference by one or more of the
following measures:
• Reorient or relocate the receiving antenna.
• Increase the distance between the equipment and receiver.
• Connect the equipment into an outlet on a circuit dierent from that to which the receiver is connected.
• Consult the dealer or an experienced radio/TV technician for help.

Artículo #5267926
CAJA PARA
JUGUETES ANIMADA
Modelo #61080
AS23145
HAUNTED LIVING y el diseño del logotipo son marcas
comerciales o marcas registradas de LF, LLC. Todos los
derechos reservados.
¿Preguntas, problemas, piezas faltantes? Antes de volver a la tienda, llame a nuestro
Departamento de Servicio al Cliente al 888-251-1006, de lunes a domingo, de 8 a.m. a 8
p.m., hora estándar del Este. También puede ponerse en contacto con nosotros en
Página 10

CONTENIDO DEL PAQUETE
A Oso 1
B Payaso 1
C Muñeca y módulo 1
D Base y caja de control 1
E Cubierta de tela de la caja 1
F Baterías alcalinas AA 4
Página 11
PART DESCRIPTION QUANTITY
A. B. C.
D. E. F.

INFORMACIÓN DE SEGURIDAD
Lea y comprenda completamente este manual antes de intentar ensamblar, usar o instalar
el producto.
SE REQUIERE UN ADULTO PARA EL ENSAMBLAJE.
Antes de comenzar a ensamblar el producto, asegúrese de tener todas las piezas. Compare las
piezas con la lista del contenido del paquete y la lista de aditamentos. No intente ensamblar el
producto si falta alguna pieza o si alguna está dañada.
No se necesitan herramientas para el ensamblaje.
Tiempo estimado de ensamblaje: 7 minutos
PREPARACIÓN
ADVERTENCIA
•Advertencia riesgo potencial de lesiones para las personas. Lea y comprenda el manual
de instrucciones antes de usar el producto.
• Advertencia: ¡RIESGO DE ASFIXIA! Piezas pequeñas. Este artículo no es un juguete.
Solo para decoración.
• No encienda el artículo hasta que haya completado el ensamblaje.
• Manténgase alejado del artículo mientras está en funcionamiento.
• No coloque el artículo sobre piso desparejo.
INSTRUCCIONES DE LA BATERÍA:
1. Contiene (3) baterías alcalinas AA de 1,5 voltios. Las baterías no son recargables.
2. La instalación y el retiro de las baterías deben estar a cargo de un adulto. Las baterías son
dañinas si se tragan. Mantenga las baterías alejadas de los niños.
3. Retire las baterías cuando la bombilla no esté en uso.
4. Utilice únicamente las baterías recomendadas en las instrucciones.
5. No mezcle baterías nuevas con baterías usadas.
6. No mezcle batería alcalinas, cinc-carbono, níquel cadmio,
recargables o diferentes tipos de baterías.
7. Tenga cuidado de insertar las baterías con la polaridad correcta (+/-) como se indica.
8. Retire todas baterías agotadas.
9. Las baterías recargables se deben recargar solo con la supervisión de un adulto.
10. Las baterías recargables deben retirarse del artículo antes de cargarlas.
11. Las baterías que no son recargables no deben recargarse.
12. Los terminales de alimentación no deben hacer corto circuito.
13. Deseche siempre las baterías agotadas de forma adecuada.
14. NO incinere las baterías, ya que podrían ltrarse o explotar.
Página 12

INSTRUCCIONES DE ENSAMBLAJE
1. Presione la traba en el marco. Inserte la muñeca y
el módulo en el marco y suelte la traba para asegurar
la muñeca y el módulo al marco.
(Emparejar C con C)
2. Inserte el oso en la muñeca y el módulo.
(Emparejar B con B)
3. Inserte el payaso en la muñeca y el módulo.
(Emparejar A con A)
1
2
3
Página 13

INSTRUCCIONES DE ENSAMBLAJE
4. Conecte el cable D de la caja de control al conjunto
de cables ubicado en la muñeca, el payaso y el oso.
(Emparejar D con D)
5. Conecte el cable E de la caja de control al conjunto
de cables ubicado en la muñeca, el payaso y el oso.
(Emparejar E con E)
6. Conecte el cable F del payaso al conjunto de cables
ubicado en la muñeca y el módulo.
(Emparejar F con F)
4
5
6
Página 14

7. Conecte el cable G del oso al conjunto de cables
ubicado en la muñeca y el módulo.
(Emparejar G con G)
8. Voltee la cubierta de la caja de tela hacia abajo.
Con la cubierta de la caja de tela hacia abajo, inserte
las CUATRO varillas verticales de metal en la parte
inferior de las CUATRO esquinas.
9. Con la cubierta de la caja de tela ensamblada, invierta
el marco ensamblado e inserte el marco ensamblado
en los cuatro soportes metálicos con la caja de control
mirando hacia la solapa de la caja de control de tela.
7
8
9
SOLAPA DE LA CAJA DE CONTROL
MARCO Y TAPA DE LA CAJA ENSAMBLADOS
Página 15
INSTRUCCIONES DE ENSAMBLAJE

10. Conecte los cuatro sujetadores de velcro ubicados
en la cubierta de la caja de tela alrededor del marco.
11. Coloque la caja de juguetes en posición vertical y
ubique la solapa de la caja de control en la parte
posterior de la cubierta de tela.
12. Abra la solapa de la caja de control y reemplace por
baterías 4 AA nuevas (recomendado) o inserte un
adaptador de 6V 2A (no incluido) en la caja
de control.
10
11
12
INSTRUCCIONES DE ENSAMBLAJE
Página 16

INSTRUCCIONES DE FUNCIONAMIENTO
13. Coloque el interruptor en la posición "ON"
(Encendido). Haga un sonido fuerte (aplauso) para
activar el artículo. Gire el interruptor hasta la posición
“OFF” (Apagado) cuando no esté en uso.
7
Página 17
EL ALTAVOZ EXTERNO NO ESTÁ INCLUIDO. SE DEBE COMPRAR POR SEPARADO.
1. Enchufe el cable del altavoz en el conector etiquetado como
SPEAKER JACK (conector del altavoz) ubicado en la
CAJA DE CONTROL.
2. Use la perilla de volumen en el altavoz externo para controtar los
niveles de volumen.
CONFIGURACIÓN DE LOS ALTAVOCES
EXTERNOS OPCIONALES
CONFIGURACIÓN DE LA DEMOSTRACIÓN OPCIONAL
1. Inserte el cable de la almohadilla del botón pulsador opcional
en el conector etiquetado DEMO (demostración) en la
CAJA DE CONTROL.
2. Coloque el interruptor en la posición DEMO para permitir
la activación de la demostración.
3. ¡Pise la ALMOHADILLA o presione el botón para activar
la secuencia aterradora!
Las almohadillas y los botones pulsadores se venden por separado
y se pueden comprar en www.tekkyaccessories.com
*
LA ALMOHADILLA DE BOTÓN PULSADOR NO ESTÁ INCLUIDA.
SE DEBE COMPRAR POR SEPARADO.
DEMOSTRACIÓN OPCIONAL Y CONFIGURACIÓN DE ALTAVOCES EXTERNOS

SOLUCIÓN DE PROBLEMAS
PROBLEMA CAUSA POSIBLE ACCIÓN CORRECTIVA
El artículo no se activa. • El adaptador de 6 V y 2 A (no incluido)
no está enchufado.
• El interruptor de la caja de control no está en
la posición ON (Encendido).
• Las baterías no se colocaron correctamente.
• Verifique que el adaptador de 6V 2A
(no incluido) esté enchufado y bien
colocado en la caja de control.
• Coloque el interruptor en la posición
""ON"" (Encendido).
• Instale las baterías con los terminales
positivo y negativo en las
posiciones correctas.
El artículo no tiene
sonido mientras está
en funcionamiento.
• La perilla de volumen está girada al mínimo. • La perilla de volumen está girada
al mínimo.
Solo se escucha el
sonido del artículo,
pero no se activa.
• Los cables no están conectados. • Verifique que todos los cables desde
la caja de control que se dirigen hasta
la muñeca, el payaso y el oso
estén conectados.
CUIDADO Y MANTENIMIENTO
• ALMACENE EN UN AMBIENTE FRESCO Y SECO.
• CUANDO HAYA MAL CLIMA, LLEVE EL ARTÍCULO AL INTERIOR.
• SOLO SE PUEDE LAVAR EN LA SUPERFICIE. NO USE LIMPIADORES FUERTES O ABRASIVOS.
• QUITE LAS BATERÍAS AL ALMACENAR EL ARTÍCULO DURANTE LARGOS PERÍODOS DE TIEMPO.
Página 18

REGLAMENTO DE LA FCC
Impreso en China
REGLAS DE LA FCC: este dispositivo cumple con la sección 15 de las
reglas de la FCC. Su funcionamiento está sujeto a las siguientes
condiciones: (1) este dispositivo no debe causar interferencia
perjudicial, y (2) debe aceptar cualquier interferencia recibida,
incluida la interferencia que pudiese causar un funcionamiento no
deseado.
PRECAUCIÓN: cualquier cambio o modicación que no esté expresamente
aprobado por la parte responsable del cumplimiento podría anular la
autorización del usuario para utilizar el equipo.
NOTA: este equipo se probó y se vericó que cumple los límites para
un dispositivo digital clase B, conforme a la sección 15 de las reglas
de la FCC. Estos límites están diseñados para proporcionar protección
razonable contra interferencias perjudiciales en una instalación
residencial. Este equipo genera, utiliza y puede irradiar energía de
radiofrecuencia y, si no se instala y usa de acuerdo con las
instrucciones, puede causar interferencia perjudicial a las
comunicaciones de radio. Sin embargo, no se garantiza que no se
producirán interferencias en una instalación en especial. Si este
equipo genera una interferencia perjudicial para la recepción de radio
o televisión, que se puede determinar al encender y apagar el equipo,
se recomienda al usuario que intente corregir la interferencia con una
o más de las siguientes medidas:
• Reorientar o reubicar la antena de recepción.
• Aumentar la separación entre el equipo y el receptor.
• Conectar el equipo a un tomacorriente de un circuito distinto al que usa el receptor.
• Solicitar ayuda al distribuidor o a un técnico con experiencia en radio/TV.
Página 19
This manual suits for next models
1
Table of contents
Languages:
Other HAUNTED LIVING Home Lighting Accessories manuals
Popular Home Lighting Accessories manuals by other brands

Home Accents Holiday
Home Accents Holiday TY636-1914 Assembly instructions
HSV
HSV KS-CL106HSV operating instructions

Home Accents Holiday
Home Accents Holiday TY229+739-1614-1 Assembly instructions
Guirled
Guirled HT339R-100 user manual

Home Accents Holiday
Home Accents Holiday 23RT14122112 Assembly instructions
Goobay
Goobay LED Wire Star 3D user manual


