Hawking HWL2 User manual


LIMITED WARRANTY
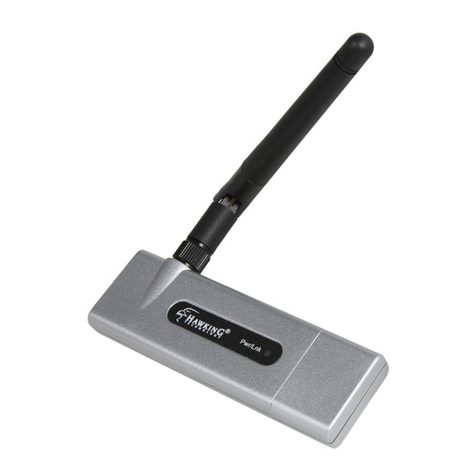
Hawking Technology guarantees that every HWL2 Hi-Gain WiFi Locator Professional
Edition is free from physical defects in material and workmanship under normal use for
two (2) years from the date of purchase. If the product proves defective during this
two-year warranty period, call Hawking Customer Service in order to obtain a Return
Authorization number. Warranty is for repair or replacement only. Hawking
Technology does not issue any refunds. BE SURE TO HAVE YOUR PROOF OF
PURCHASE. RETURN REQUESTS CAN NOT BE PROCESSED WITHOUT
PROOF OF PURCHASE. When returning a product, mark the Return Authorization
number clearly on the outside of the package and include your original proof of
purchase.
IN NO EVEN SHALL HAWKING TECHNOLOGY’S LIABILTY EXCEED THE
PRICE PAID FOR THE PRODUCT FROM DIRECT, INDIRECT, SPECIAL,
INCIDENTAL OR CONSEQUENTIAL DAMAGES RESULTING FROM THE USE
OF THE PRODUCT, ITS ACCOMPANYING SOFTWARE OR ITS
DOCUMENTATION.
Hawking Technology makes no warranty or representation, expressed, implied or
statutory, with respect to its products or the contents or use of this documentation and
all accompanying software, and specifically disclaims its quality, performance,
merchantability, or fitness for any particular purpose. Hawking Technology reserves
the right to revise or updates its products, software, or documentation without obligation
to notify any individual or entity. Please direct all inquiries

Federal Communication Commission
Interference Statement
This equipment has been tested and found to comply with the limits for a Class B
digital device, pursuant to Part 15 of FCC Rules. These limits are designed to
provide reasonable protection against harmful interference in a residential installation.
This equipment generates, uses, and can radiate radio frequency energy and, if not
installed and used in accordance with the instructions, may cause harmful
interference to radio communications. However, there is no guarantee that
interference will not occur in a particular installation. If this equipment does cause
harmful interference to radio or television reception, which can be determined by
turning the equipment off and on, the user is encouraged to try to correct the
interference by one or more of the following measures:
1. Reorient or relocate the receiving antenna.
2. Increase the separation between the equipment and receiver.
3. Connect the equipment into an outlet on a circuit different from that to which the
receiver is connected.
4. Consult the dealer or an experienced radio technician for help.
FCC Caution
This device and its antenna must not be co-located or operating in conjunction with
any other antenna or transmitter.
This device complies with Part 15 of the FCC Rules. Operation is subject to the
following two conditions: (1) this device may not cause harmful interference, and (2)
this device must accept any interference received, including interference that may
cause undesired operation.
Any changes or modifications not expressly approved by the party responsible for
compliance could void the authority to operate equipment.
Federal Communications Commission (FCC) Radiation Exposure Statement
This equipment complies with FCC radiation exposure set forth for an
uncontrolled environment. In order to avoid the possibility of exceeding the
FCC radio frequency exposure limits, human proximity to the antenna shall not
be less than 2.5cm (1 inch) during normal operation.

Federal Communications Commission (FCC) RF Exposure Requirements
SAR compliance has been established in the laptop computer(s) configurations with
PCMCIA slot on the side near the center, as tested in the application for Certification,
and can be used in laptop computer(s) with substantially similar physical dimensions,
construction, and electrical and RF characteristics. Use in other devices such a PDAs
or lappads is not authorized. This transmitter is restricted for use with the specific
antenna(s) tested in the application for Certification. The antenna(s) used for this
transmitter must not be co-located or operating in conjunction with any other antenna
or transmitter.
R&TTE Compliance Statement
This equipment complies with all the requirements of DIRECTIVE 1999/5/EC OF THE
EUROPEAN PARLIAMENT AND THE COUNCIL of March 9, 1999 on radio
equipment and telecommunication terminal Equipment and the mutual recognition of
their conformity (R&TTE)
The R&TTE Directive repeals and replaces in the directive 98/13/EEC
(Telecommunications Terminal Equipment and Satellite Earth Station Equipment) As
of April 8, 2000.
Safety
This equipment is designed with the utmost care for the safety of those who install and
use it. However, special attention must be paid to the dangers of electric shock and
static electricity when working with electrical equipment. All guidelines of this and of
the computer manufacture must therefore be allowed at all times to ensure the safe
use of the equipment.
EU Countries Intended for Use
The ETSI version of this device is intended for home and office use in Austria,
Belgium, Denmark, Finland, France, Germany, Greece, Ireland, Italy, Luxembourg,
the Netherlands, Portugal, Spain, Sweden, and the United Kingdom.
The ETSI version of this device is also authorized for use in EFTA member states:
Iceland, Liechtenstein, Norway, and Switzerland.
CONTENTS
1INTRODUCTION............................................................................. 6
1.1 Features ......................................................................................................................... 7
1.2 Specifications................................................................................................................ 7
1.3 Package Contents .......................................................................................................... 8
2WIFI LOCATOR MODE – HOW TO USE ..................................... 9
3ADAPTER MODE – FIRST TIME INSTALLATION................... 12
4CONFIGURATION UTILITY ....................................................... 18
1.1 Wireless Connection Status......................................................................................... 18
1.2 Using the Utility.......................................................................................................... 19
1.3 More Settings – Advanced Settings ............................................................................ 20
1.4 Wireless Security Settings .......................................................................................... 21
1.5 Setting WPA and WPA2:............................................................................................. 22
1.6 Using Profiles.............................................................................................................. 23
1.7 Other Settings / Power Consumption Settings............................................................ 24
1.8 Software Access Point Mode ...................................................................................... 26
1.9 Advanced / More Settings For AP Mode .................................................................... 28
1.10 Setting Wireless Security in AP Mode ............................................. 28
1.11 Advanced Settings in AP Mode........................................................ 29
1.12 MAC Address Filtering in AP Mode................................................ 29
5TROUBLESHOOTING .................................................................. 30

6
1 Introduction
-- Detect and Connect
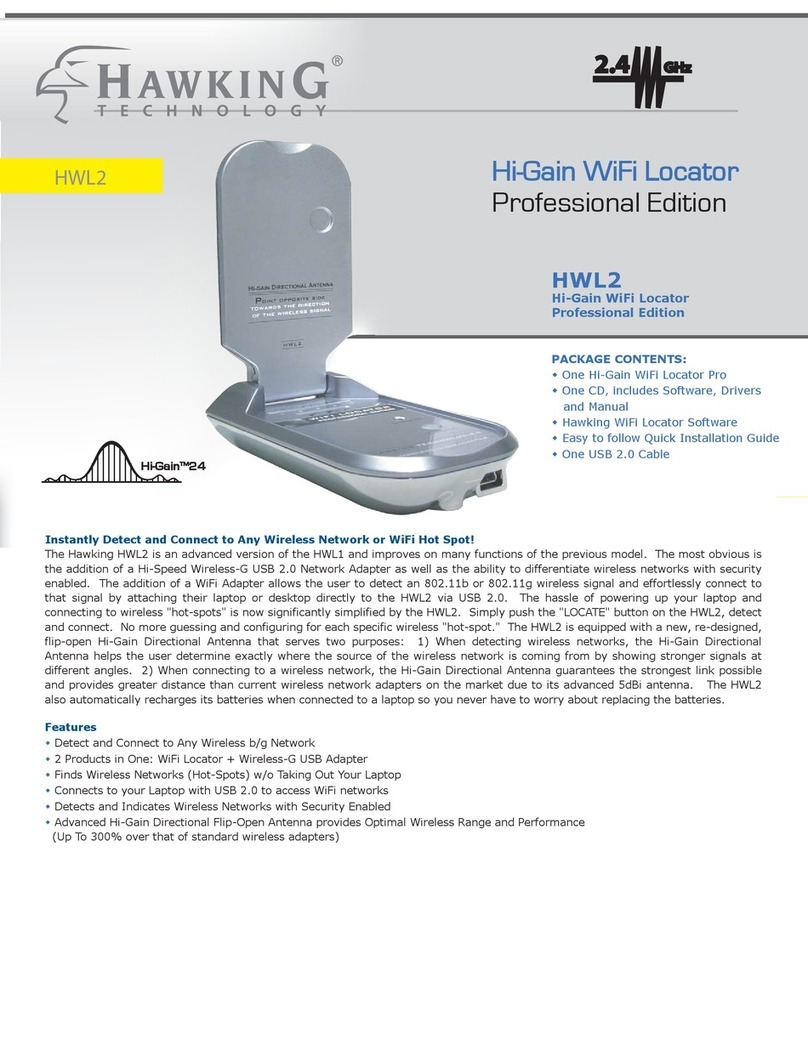
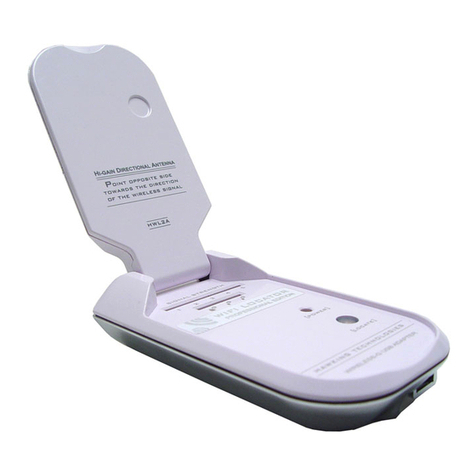
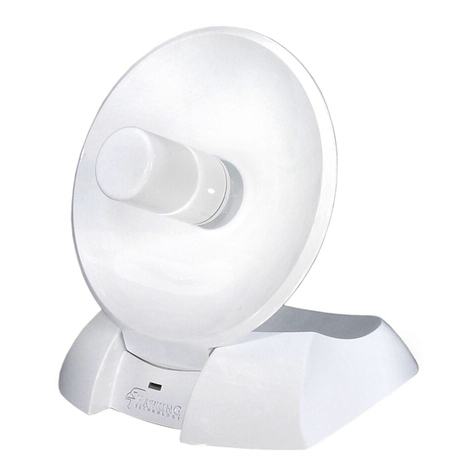
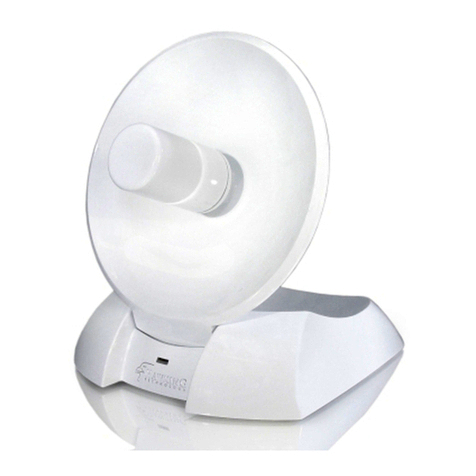
Thank you for purchasing the Hawking Hi-Gain WiFi Locator Professional Edition.
This Hi-Gain Wireless-G USB Adapter and Advanced Wireless Hot Spot Detector is
designed to comply with the IEEE 802.11b/g Wireless LAN. The integration of
Hawking’s award winning Hi-Gain Advanced Antenna Technology and proven record
in creating superior wireless products makes the HWL2 a very powerful wireless
adapter/detector capable of obtaining wireless distances up to 3 times that of normal
Wireless-G cards. The HWL2 detects any wireless network within a given vicinity,
provides detailed information regarding the network and allows for fast easy
connection to that same network.
This adapter supports the highest security standards to maintain a secure wireless
connection within your wireless network. Along with the standard 64, 128, 256-bit
WEP encryption, the HWL2 also supports WPA (Wi-Fi Protected Access) and WPA2
which combines IEEE 802.1x and TKIP (Temporal Key Integrity Protocol)
technologies.
The Hawking HWL2 is a powerful, portable tool for the mobile user.

7
1.1 Features
-Detect and Connect to Any Wireless b/g Network (Bold)
-
-2 Products in One: WiFi Locator + Wireless-G USB Adapter
-
-Finds Wireless Networks (Hot-Spots) w/o Taking Out Your Laptop
-
-Connects to your Laptop with USB 2.0 to access WiFi networks
-
-Detects and Indicates Wireless Networks with Security Enabled
-
-Hi-Gain Directional Flip-Open Antenna provides Optimal Wireless Range.
-
-Up to 300% performance increase when compared to standard wireless laptops
-
-Compact Pocket Sized Design
1.2 Specifications
•Standard: IEEE 802.11g/b
•Bus Type: USB 2.0 Type A
•Frequency Band: 2.4000~2.4835GHz (Industrial Scientific Medical Band)
•Modulation: OFDM with BPSK, QPSK, 16QAM, 64QAM (11g)
BPSK, QPSK, CCK (11b)
•Data Rate: 54/48/36/24/18/12/11/9/6/5.5/2/1Mbps auto fallback
•Security: 64/128/256-bit WEP Data Encryption, WPA (IEEE 802.1x with TKIP), WPA2 and
AES
•Antenna: Directional 5dBi Hi-Gain Antenna
•Drivers: Windows 98/SE/Me/2000/XP/2003 Server
•LED: (5x Signal Strength) (1x Power)(1x Wireless Security)(2x 802.11b/g)
•Transmit Power: 21~22 dBm (Typical w/ Antenna)
•Dimension: 92(L) x 56(W) x 25(H) mm
•Temperature: 32~131°F (0 ~55°C)
•Humidity: 0-95% (Non Condensing)
•Certification: FCC, CE

8
1.3 Package Contents
Before you begin the installation, please check the items of your package. The
package should include the following items:
•One Hi-Gain WiFi Locator Professional Edition
•One USB 2.0 Extension Cable (100 cm)
•One Quick Installation Guide
•One CD (Driver/Install Wizard/Manual)
•One Hawking Wireless Hot Spot Finder Software (Inside the CD)
If any of the above items is missing, contact your supplier as soon as possible.

9
2 WiFi Locator Mode – How to Use

10
The HWL2 security LED will light up when it detects a network with WEP,
WPA or WPA2. It is also capable of detecting networks that do not
broadcast their SSIDs.

11

12
3 Adapter Mode – First Time Installation
Before you proceed with the installation, please notice following descriptions.
Note1: Please do not install the USB adapter into your computer before installing the software
program from the CD.
Note2: The following installation was operated in Windows XP. (Procedures are similar for
Windows 98SE/Me/2000/2003 Server.)
Note3: If you have previously installed a wireless adapter card or adapter, please uninstall the
driver and utility.
Please follow the instructions below to install the WiFi Locator Professional Edition as
a Wireless USB Adapter.
I. Install the Configuration Utility
A. Insert the Installation CD to your CD-ROM Drive. Execute the “Driver and Software
Setup” program from the Autoload CD Menu. If your CD rom does not autoload,
fine your CD-Rom drive and explore the contents. Double click the icon that says
Autoload.exe.

13
B. If you want to install the software program in another location, click “Browse” and
select an alternative destination. Then, click “Next”.

14
C. Click “Continue Anyway” to finish the installation.
d) Click Finish to restart your computer after the installation.

15
II. Install the USB Adapter
A. Plug the WiFi Locator Adapter into the USB port of your computer.
B. The “Found New Hardware Wizard” is displayed. Some computers will have the
option of asking Windows Update to search automatically for software. If this
happens on your computer select No not at this time.
C. Select “Install the software automatically (Recommended)” and click “Next”.

16
D. Click “Continue Anyway” and the system will start to install the USB adapter.

17
E. Click “Finish” to complete the installation.
III. Using the Configuration Utility
To setup the USB adapter, double-click the icon in the system tray.
For Windows XP, there is a “Windows Zero Configuration Tool” by default for you to
setup wireless clients. If you want to use the Hawking Utility of the HWL2, please
follow one of the ways as below. The Hawking Utility may provide more detailed
features and options to adjust the adapter with.
First Method
A. Double-click the utility
icon in the system tray.
B. Click “Yes” to use the
utilit
y
of the USB

18
4 Configuration Utility
The Configuration Utility is a powerful application that helps you configure the
Hawking Technologies WiFi Locator Professional Edition and monitor the link status
during the communication process.
The Configuration Utility appears as an icon on the system tray of Windows while the
card is running. You can open it by double-clicking the icon.
Right click the icon, there are some items for you to operate the configuration utility.
zOpen Utility Window
Select “Open Utility Window” to open the Configuration Utility tool.
zExit Hawking Wireless Utility
Select “Exit Hawking Wireless Utility” to close the Configuration Utility tool.
Before using the utility, you have to know some restrictions of the utility.
1. If you want to connect to an 11g (up to 54Mbps) network, please ensure to install
the adapter to a PC or laptop with an available USB 2.0 interface. This adapter is
backwards compatible with USB 1.1 or USB 1.0 interfaces, however due to the
performance limitations of legacy interfaces the adapter cannot perform at its
optimal level.
2. Under Ad-Hoc mode the adapter works in 802.11b mode only. This is a rule
defined by the WiFi Organization. If you want to enable the data rate up to
54Mbps (11g), please follow the steps listed below.
A. Go to “Network Connections”.
B. Right Click the “Wireless Network Connection” and select “Properties”.
C. From the pop-up screen, click “Configure”.
D. Enter into “Advanced” page of the “Properties” screen.
E. Enable the setting of “IBSS_G_Mode”.
1.1 Wireless Connection Status
When you open the Configuration Utility, the system will scan all channels to find the
access points/stations within the accessible range of your card and automatically
connect to the wireless device with the highest signal strength. From this screen, you
can find details and information on the wireless networks in your environment.

19
1.2 Using the Utility
If you are using Windows XP as your operating system , the “Zero Configuration”
feature/tool of Windows XP must be disabled first , then the Hawking Wireless Utility can
be used.
Figure2-1
Open the Hawking Wireless Utility. The Utility Window is shown in “Figure 2-1”.
The adapter can be set in “Station” or “Access Point” Mode from the Mode drop
down menu. This section will go over the “Station” Mode settings.
- You can site survey the neighboring SSID/wireless networks by pressing the
“Refresh” key, the names of the wireless networks and their signal strength
information will be shown in the “Available Networks” field.
- Double click the SSID site from the “Available Networks” field to connect
directly to a specific SSID or wireless network.
-The information of the SSID is shown on the “Current Network Information”.
-Show the BSSID of the associated AP is diaplayed in the “Link Status” field.
-“Signal Strength” and “Link Quality” are shown below the BSSID and
described with percentages.
-The number of TX Frames are displayed underneath the Signal Strength and
Link Quality fields. The numbers here show the amount of data going out of
your adapter to the network.
-The number of RX Frames are displayed underneath the Signal Strength and
Link Quality fields. The numbers here show the amount of data coming into
your adapter from the network.

20
1.3 More Settings – Advanced Settings
Figure2-2
Click the “ More Settings “ icon of Figure 2-1 to enter “More settings “ window. The
window is shown in “ Figure 2-2 ”.
General Connection Settings:
- To adjust settings in the General Connection Settings page you will need to
click the “Change” button.
- Press the “Change” button to modify the status, when the modification is
finished, press “Apply” to save it. The button “Change” and “Apply” is
alternately shown over the same position.
- Modify the SSID name from the “SSID” field. When use the item, the “any
“will be unchecked previously.
- Change the channel using the drop down menu “ Channel”. When using this
feature, Ad Hoc mode will automatically be set.
- Select the transmission rate using the “ Tx Rate” drop down menu.
- Select the “Ad_Hoc” or “Infrastructure” Mode from the “Network Type”
drop down menu.
- Select the Security settings: “Open System” , “Shared Key”, “Auto”,
“WPA” , “WPA PSK”, “WPA2”, “WPA2 PSK” from the “Authentication
Mode” drop down menu.
- Select the “Disable” ,“WEP”, “TKIP” , “AES” by the “Encryption” drop
down menu.
Other manuals for HWL2
1
Table of contents
Other Hawking Adapter manuals

Hawking
Hawking HBTC2 User manual

Hawking
Hawking PN672TX User manual

Hawking
Hawking Hi-Gain HWU54DM User manual

Hawking
Hawking HAWNU1 User manual

Hawking
Hawking HWUG1 User manual

Hawking
Hawking HUF2 User manual

Hawking
Hawking Hi-Gain User manual

Hawking
Hawking HBB1 User manual

Hawking
Hawking HW12ACU User manual

Hawking
Hawking H-WU300 User manual

Hawking
Hawking HW7ACU User manual

Hawking
Hawking Hi-Gain HWU54DM User manual

Hawking
Hawking HW17ACU User manual

Hawking
Hawking Hi-Gain User manual

Hawking
Hawking HWL2A User manual

Hawking
Hawking HWL2 User manual

Hawking
Hawking HWUN1 User manual

Hawking
Hawking HWUG1A User manual

Hawking
Hawking HWDN3 User manual

Hawking
Hawking WU250 User manual