USE ONLY HAYWARD GENUINE REPLACEMENT PARTS
7
Note that the following examples will be shown for the Pool only. All of the equipment shown in
the Features Screens will have been initially configured in the Configuration Wizard to operate with
a Pool body of water. You may have configured the OmniHub to share equipment with the Spa in
which case the equipment will be shown in the Features Screen for both the Pool and Spa.
Control Screens
After an item has been selected in the Features Screen, you’ll be brought to a control screen.
Control Screens are used to make changes to the pool’s equipment settings. To change a setting,
you’ll first touch the left side of the Home Screen to enter the Features Screen, then select the
equipment you’d like to set.
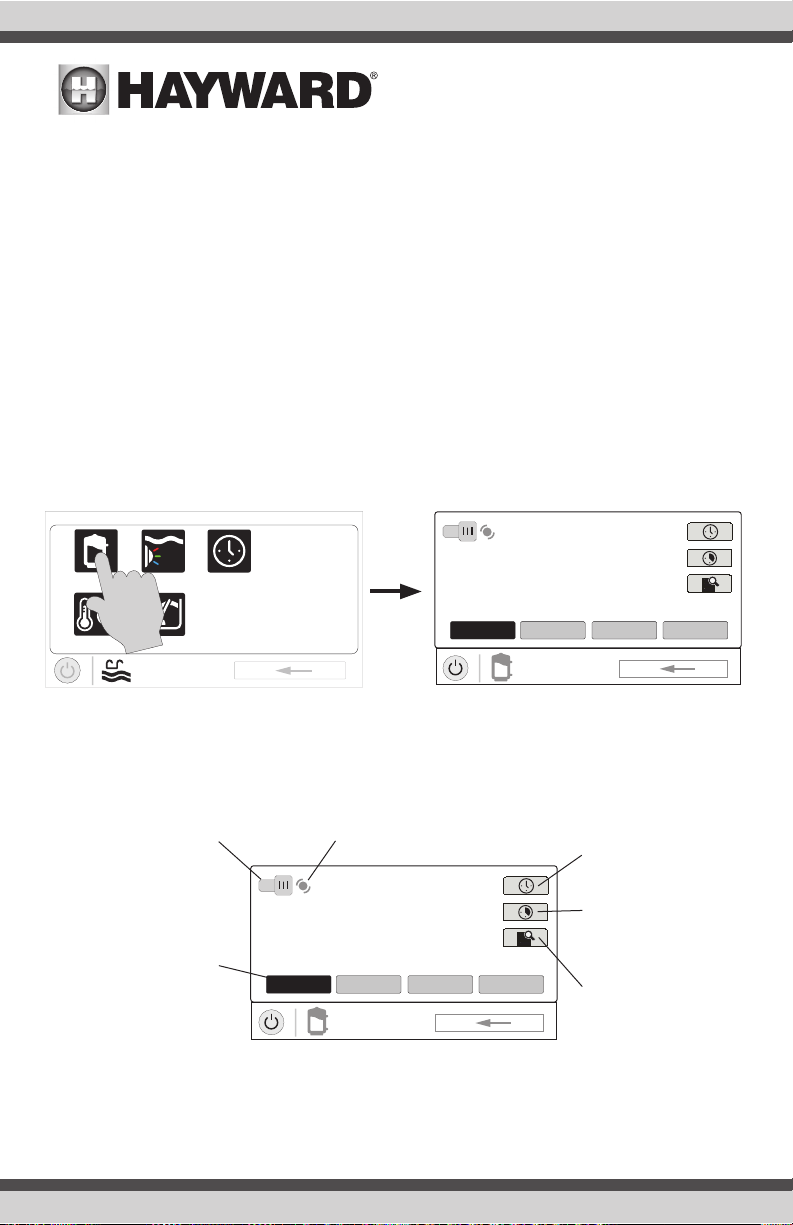
Filter Pump
In the example below, a variable speed pump which was named “vsp” has been configured to be
used with the Pool in the Configuration Wizard. Touching the “vsp” button in the Features Screen
will bring you to a pump Control Screen which will let you manually turn on/off the pump, view
the status, set a schedule, set a speed, start a countdown timer, or view the pump’s diagnostics.
Single speed and two speed pumps will have a similar Control Screen.
ON
POOL
vsp pump
ON
MED HIGH CUSTOMLOW
Change Speed - Manually
select the desired speed. This
will not be shown for single
speed pumps. Low, Med, and
High are fixed speeds. The
Custom button will bring you
to a screen that allows you to
select a speed based on per-
centage or RPM (determined
during configuration).
Turn On / Turn Off - Slide
this switch manually to turn
on/off the pump. This will
override any schedules or timer
settings.
Status of Equipment - This is an indicator
only. When lit up and in motion (shown be-
low), the equipment is active. When grayed
out and stationary, the equipment is off.
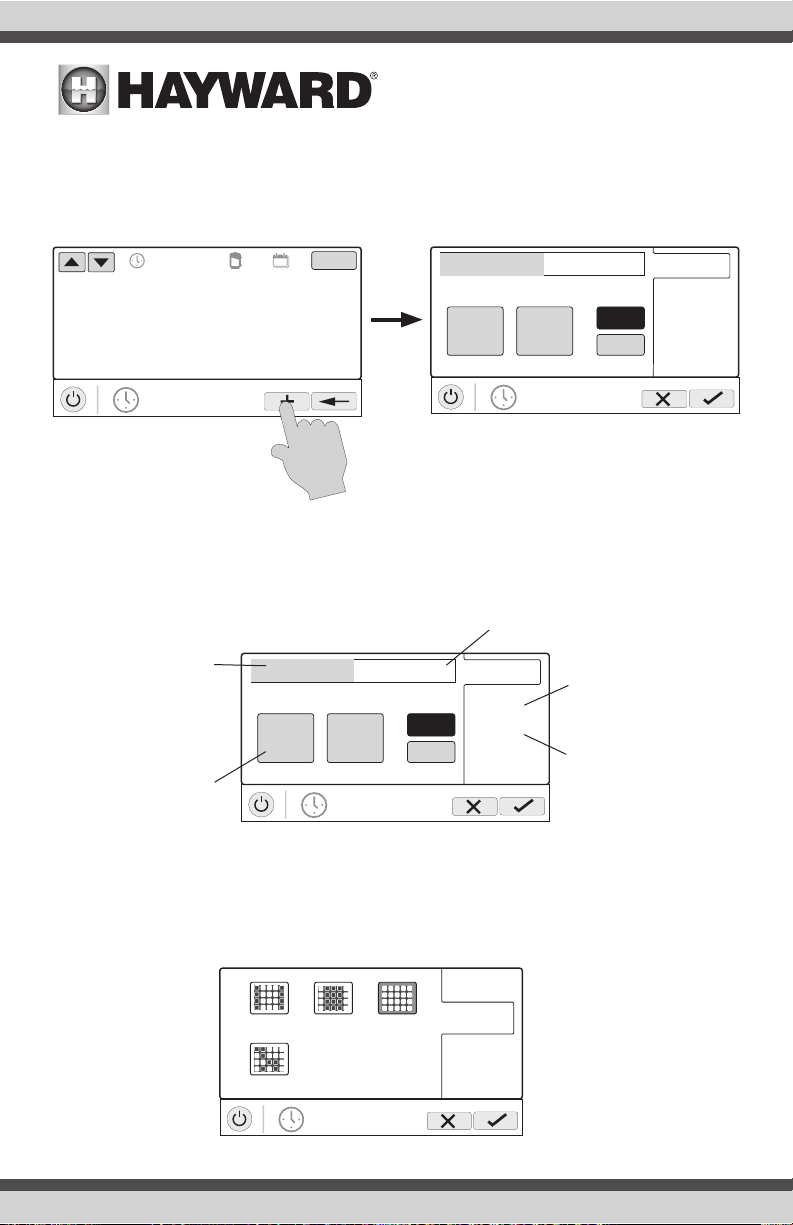
Set Schedule - Touch
this button to add/delete a
schedule for the filter pump
or to enable/disable an
existing schedule.
Countdown Timer - Touch
this button to set a count-
down timer for the filter
pump.
Diagnostics - Touch this
button to view the filter
pump’s diagnostics. This
option only appears for vari-
able speed pumps.
uclights
vsp
heat/cool cleaner
POOL
features
schedule
ON
POOL
vsp pump
ON
MED HIGH CUSTOMLOW
Pool Features Screen Pump Control Screen