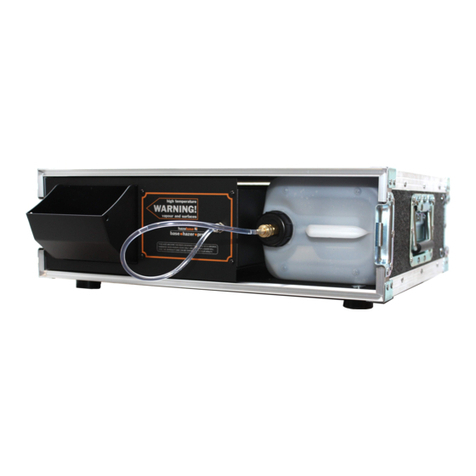
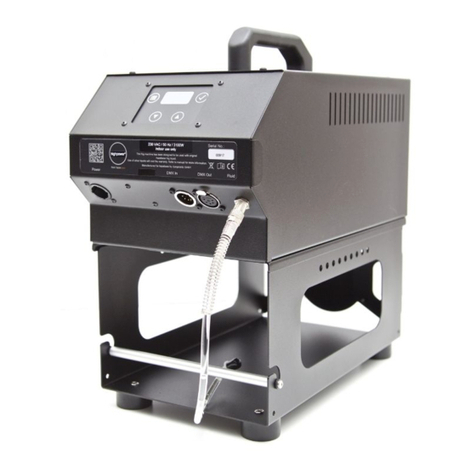
HazeBase Hazer2 the Cube User manual

Instruction manual
www.hazebase.com

Hazer² – the cube
Scope of delivery
•Hazer²
•1 liter empty canister
•1 liter Base*V luid
•uel tank cap with quick coupling
•Power cord with TrueOne plug
•Instruction manual
Please check the completeness of the delivery
1

Hazer² – the cube
content
1. Introduction.......................................................................................................3
2. safety instructions...............................................................................................4
3. Designation of the parts......................................................................................5
4. Preparation.........................................................................................................6
4.1 Select of the location...................................................................................6
4.2 Changing the fluid bottle.............................................................................6
4.3 Air baffle....................................................................................................6
5. haze fluid...........................................................................................................7
6. Working with the Hazer².....................................................................................7
6.1 Control panel of the hazer²..........................................................................8
6.2 Operation in the stand-alone mode..............................................................8
6.3 Operation via DMX512/RDM.........................................................................9
6.4 Operation via cable remote (option)...........................................................10
6.5 Operation via radio remote (option)............................................................10
7 options menue...................................................................................................12
7.1 Setting the communication protocol of the XLR jacks...................................12
8. Care and maintenance.......................................................................................13
9. Troubleshooting................................................................................................14
10. Technical data................................................................................................15
10.1 Hazer²....................................................................................................15
2

Hazer² – the cube
1. Introduction
The Hazer² is a latest generation haze generator. It offers a variety of
possibilities to show your light effects even better.
The Hazer² is used to generate haze. Thus, the atmospheric
effect can be created, which is necessary for an appealing light show.
Due to the adjustability of pump power, fan speed and blow-out angle, almost any
desired haze density can be generated.
A newly developed vegan, highly concentrated fluid is used. This
produces the finest droplets with maximum lifetime in the air.
The extremely quiet and adjustable fan allow the use in areas
where ambient noise is disturbing.
The Hazer² also offers several control options. In addition to the direct
operation at the device by means of a membrane keypad, the haze generator can be
controlled via DMX512/RDM, as well as via wired and wireless remote controls
(optionally available).
The 1 liter fluid bottle lasts from approximately 80 hours at minimum settings to 5
hours at maximum output.
The Hazer²'s directly heated vaporizer is up to
operating temperature in less than 10 seconds and requires only 350W despite
extremely high output.
It´s wide range input (100V-240V AC) allows it to be used anywhere in the world.
3

Hazer² – the cube
2. safety instructions
•Very hot steam escapes from the mist outlet. Caution: Danger of burns!
•During the fogging process, very hot fluid droplets may occasionally escape
from the fog outlet opening. Therefore, there must be no persons or heat-
sensitive objects within a distance of 1.5 m from the fog outlet opening.
•Never handle the mist outlet opening during operation or when it is
activated.
•The device must be set up in a place that is not sensitive to heat. Keep a
minimum distance of 60 cm from flammable, combustible and heat-sensitive
objects.
•The fog fluid used contains glycerine, which burns with a slightly bluish,
almost invisible flame. Therefore, never mist into strong ignition sources
such as open fires.
•Never open the device connected to a power source.
•During operation, sporadic leakage of hot fluid droplets is possible. Care
should therefore be taken to ensure that these cannot become a hazard to
people. Keep a safety distance of 3m to the fog outlet nozzle.
•Do not ingest the fog fluid and keep it away from children. In case of eye
contact, rinse with plenty of water. In case of accidental ingestion, consult a
physician.
•Spilled or splashed fluid may cause slipping hazard. Absorb fluid and
dispose of as directed.
•Do not allow visibility to drop below 2m, you are responsible for persons
moving in the fogged area.
•The generated fog may set off smoke detectors.
The method used here to generate artificial fog is largely harmless and is used
worldwide in the entertainment sector. We are not aware of any case in which a
healthy person has been harmed by the use of this artificial fog.
Nevertheless, we recommend that people who are ill or have previous
respiratory damage or a tendency to allergies avoid contact with artificial
fog!
4

Hazer² – the cube
3. Designation of the parts
Top view
back view
5
handle
Haze nozzle
Air baffle
luid bottle
Difusor
keyboard with
OLED-Display
Air intake
DMX/RDM and
remote port
Power connection
Viewing slot
Air baffle

Hazer² – the cube
. Preparation
.1 Select of the location
The location where the Hazer² is operated must
•have good ventilation, with cold and fog-free air
•be dry
•be vibration and shock free
•consist of a non-flammable footprint
•be far enough away from easily flammable objects
•have an ambient temperature between 5°C and 45°C
•have a relative humidity of less than 80%.
.2 Changing the fluid bottle
•Release the plug-in nozzle from the quick coupling by pressing the locking
button
•Hold the suction hose by the edge in the slot provided for it
•Remove the fluid bottle from the tank holder
•Unscrew the tank cap from the empty bottle and screw it onto a new, or
full, bottle.
•Push the fluid bottle back into the tank holder.
•Re-insert the plug-in nozzle into the tank cap.
.3 Air baffle
The Hazer² is equipped with a swiveling air baffle. This can be used to adjust the
angle of the discharge direction. or transport, the air baffle can be folded shut and is
held in place by magnets.
The Hazer² may only be operated with the air baffle open.
6

Hazer² – the cube
5. haze fluid
Please use only the original base*V luid for the Hazer².
6. Working with the Hazer²
The Hazer² is a latest generation haze generator. It can be used to generate anything
from the finest haze to a fog-like effect.
The effect can only build up slowly. Therefore, you should switch on the device some
time before use.
Please ensure that no objects are placed either at the air inlet or at the outlet so that
a free so that free circulation is possible. The air baffle must also be open.
After plugging in the power plug, the main menu appears. The machine does not heat
up yet, as this takes less than ten seconds and only takes place if required.
7

Hazer² – the cube
6.1 Control panel of the hazer²
The Hazer² is operated via the four push buttons (menu, minus, plus, confirmation)
and the OLED display. The menu fields are located in the corners of the display, and
the value field in the center, which displays the value of the selected menu field. The
menu key is used to select the individual menus counterclockwise. With the help of
the plus and minus keys, the corresponding value can then be changed and then
saved with the confirmation key.
On the left and right side of the screen, the white bars indicates whether the heater is
activated. In the switch-off process, these bars become smaller and smaller until
finally the heater and the air pump are deactivated. This evaporates any fluid drops
still in the heating element.
6.2 Operation in the stand-alone mode
The simplest case of control is the stand-alone mode. or this, the pump value is set
to the desired value and the confirmation key is pressed. The heating element is
heated up and the haze process starts after a few seconds as soon as the correct
temperature is reached.
The pump value can also be changed during the haze process.
Pressing the confirmation key again stops the haze process again.
The same applies to the setting of the fan value.
8
Menue
button
Minus button Plus button
Enter button
menue field
Value field
Heater on

Hazer² – the cube
6.3 Operation via DMX512/RDM
When operating via DMX512, the
XLR input must first be set to DMX
(see chapter Options).
As shown, "DMX" appears in the
upper right menu field. The DMX
address can be changed with the
plus and minus keys and must be
stored afterwards with the
confirmation key.
If a valid DMX signal is present, this is indicated at the top center with "active". The
currently read pump value can be displayed by selecting the pump menu item. If the
received value is greater than zero, the Hazer² starts the haze process and stops it
accordingly at the value zero.
The Hazer² has two DMX channels. Channel 1 is assigned to the pump, channel 2 sets
the fan speed.
Via RDM the Hazer² is configurable (DMX address) as well as readable (error or
temperature data). urthermore, a firmware update can be done via this RDM input.
9
DMX signal DMX mode

Hazer² – the cube
6. Operation via cable remote (option)
When operating via the cable
remote, the XLR input must
first be set to Remote (see
chapter Options).
After plugging in the cable
remote control, the Hazer²
automatically recognizes that
an analog cable remote control
has been plugged in. On the
cable remote control there is a
power switch and a potentiometer for setting the pump value. The fan speed must
still be set on the device.
6.5 Operation via radio remote (option)
When operating via radio
remote control, the XLR input
must first be set to Remote (see
chapter Options).
After plugging in the radio
remote control, the Hazer²
automatically recognizes that a
radio remote control has been
plugged in.
10

Hazer² – the cube
Up to 60 different radio remote transmitters can be programmed on the machine. or
this purpose, the "Remote" submenu must first be selected.
In the Remote submenu, the
menu fields are replaced. At
the top left, the channel (key
on the hand-held transmitter)
can be selected. At the bottom
left, a new radio remote
transmitter is taught-in and at
the bottom right, the taught-in
hand-held transmitters are
deleted again.
A new hand-held transmitter is taught as follows. irst select the menu item add and
confirm this with the confirmation key. „Adding" now appears at the bottom left. The
machine now waits for a valid radio signal. To do this, press any key on the handheld
transmitter. The teach-in process is now complete and "add" appears again at the
bottom left. You can then select the key and save it.
To delete the already taught-in handheld transmitters, select the menu item "del" and
confirm it. At the bottom right, "deleting" now appears. The deleting process is now in
progress. The display changes back to "del" after a successful deleting process.
To exit the submenu, the menu item "exit" must be selected and confirmed with the
confirmation key.
11

Hazer² – the cube
7 options menue
In the submenu "options" the protocol of the XLR sockets can be selected.
7.1 Setting the communication protocol of the XLR jacks
In the menu item "Input" the communication protocol of the XLR sockets can be
selected. The following protocols can be selected here:
•DMX/RDM
•Remote (cable or radio)
Please select the desired protocol and confirm it with the confirmation button.
12

Hazer² – the cube
8. Care and maintenance
•Avoid running the Hazer² without fluid. The pump will otherwise run dry.
•Avoid overheating the device due to direct sunlight or direct spotlight. The
permissible ambient temperature can be found in the technical data.
•Make sure that the ventilation slots of the machine are not clogged with
dust deposits. If necessary, the ventilation slots must be cleaned.
•Wipe up leaked fluid immediately.
•Check the suction strainer in the tank from time to time. Clean it or replace
it.
•If you use the same fluid bottle frequently, you should rinse it thoroughly
before each filling with fresh fluid. This will prevent contamination.
•If necessary, clean the surface of the device with a suitable, solvent-free
cleaning agent
•Make sure that sufficient mist-free cooling air permanently surrounds the
machine. Otherwise, moisture damage could occur inside the machine.
•after a few hours of operation, condensate droplets may have formed in the
condensate droplets may have formed in the discharge area. This does not
represent an operating fault. Please clean the area only when the machine
has cooled down.
•PLEASE NOTE: The vaporizer of our fog machines does NOT need to be
cleaned! Cleaning fluids offered on the market can damage the vaporizer!
The warranty will be void in this case.
13

Hazer² – the cube
9. Troubleshooting
The Hazer² does not haze
•Check external control
•Check power source
•Check fluid quantity
•Check connection at fluid tank for tightness
•Check suction strainer in tank for contamination
•Check fluid hose and connector for tightness
The Hazer² clacks loudly when hazing
•The pump runs dry. This must be avoided at all cost
•Refill fluid
•Check hose and coupling, engage again if necessary.
The Hazer² shows the error message "machine too hot" in the display
•The temperature inside the device is too high. After cooling down, the error
disappears again.
The Hazer² shows the error message "faulty vaporizer" in the display
•Something is wrong with the evaporator. The machine shuts down for
safety reasons.
14

Hazer² – the cube
10. Technical data
10.1 Hazer²
Device type Haze machine with directly heated vaporizer
Power 100-240V~, 50-60 Hz, 350 W
(PowerCON TRUE1)
Heat up time ca. 10 sec.
Fluid consumption Up to 200 ml /h.
Fluid bottle size 1 Liter
control 1,3“ OLED-Display, keypad
ports 5pol XLR In/Out
Air baffle Infinitely adjustable
Air flow rate of the fan 255 m³/h
Protection class of the fan IP 65
Haze output Adjustable 1-100% in 1% steps
Fan speed Adjustable 1-100% in 1% steps
Supported protocols DMX512, RDM, JT-Remote
Control ports DMX/RDM, cable remote „commander“, radio
remote „communicator“, stand alone
Accessories (option ) HB Commander, HB Communicator
Fluid base*V
dimensions (LxBxH) 305 x 205 x 300 (L x B x H) mm
weight (kg) ca. 7 kg
15

Hazer² – the cube
11. Warranty conditions
hazebase provides warranty for the purchased haze machine Hazer² according to
the following conditions:
1. We shall remedy free of charge in accordance with the following conditions
(Nos.
2 to 6) damage or defects to the device which are demonstrably due to factory
defects if they are reported to us immediately after discovery and within 24
months after delivery to the end user. A warranty obligation is not triggered by
minor deviations from the nominal condition which are insignificant for the value
and usability of the device, by damage from the effects of water and generally
from abnormal environmental conditions or force majeure.
2. The warranty service is provided in such a way that defective parts are
repaired
free of charge or replaced by faultless parts at our discretion. Devices for which
a warranty claim is made with reference to this warranty must be handed over to
us and sent free of charge.
The proof of purchase with the date of purchase and/or delivery must be
presented. Replaced parts become our property.
3. The warranty claim expires if repairs or interventions are carried out by
persons who are not authorized by us to do so or if our devices are equipped
with supplementary or accessory parts that are not matched to our devices.
urthermore, the warranty claim expires if a fog fluid other than the original
hazebase fog fluid was used. If the devices are sent to us without prior removal
or emptying of the fluid canister, the warranty also expires, as well as in the case
of demonstrable disregard of the operating instructions or in the case of faults
due to improper handling/handling as well as in the case of damage due to the
effects of violence.
4. We do not grant any performance claims for components or component
groups what are subject to natural wear or normal wear. In particular, all fluid-
conveying parts such as pumps and heating elements are considered to be
wearing parts. A goodwill settlement will be checked in each individual case.
5. Warranty services do not cause an extension of the warranty period, nor do
they start a new warranty period. The warranty period for installed spare parts
ends with the warranty period for the entire device.
16

Hazer² – the cube
6. If a damage or defect cannot be remedied by us, or if the remedy is refused
or unreasonably delayed by us, within 6 months from the date of
purchase/delivery, at the request of the end user either
a. replacement delivered free of charge or
b. the reduced value is remunerated or
c. take back the device for a refund of the purchase price, but not more than the
market price.
7. urther or other claims, in particular those for compensation for damage
occurring outside the device, are excluded - unless liability is mandatory by law.
17

Hazer² – the cube
18
hazebase
Stargarder Strasse 2
30900 Wedemark
Deutschland
Inhaberin: Uta Raabe
Telefon: 0049-5130-37 10 05
Telefax: 0049-5130-37 10 06
Email: [email protected]
Internet: www.hazebase.com
Table of contents
Other HazeBase Fog Machine manuals
