manuals.online logo
Brands
  1. Home
  2. •
  3. Brands
  4. •
  5. HDS Systems
  6. •
  7. Flashlight
  8. •
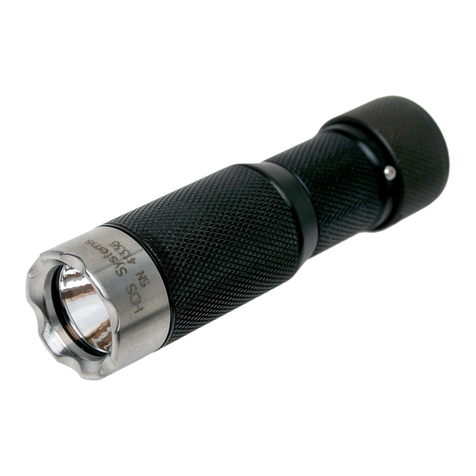
  9. HDS Systems EDC LE Flashlight User manual

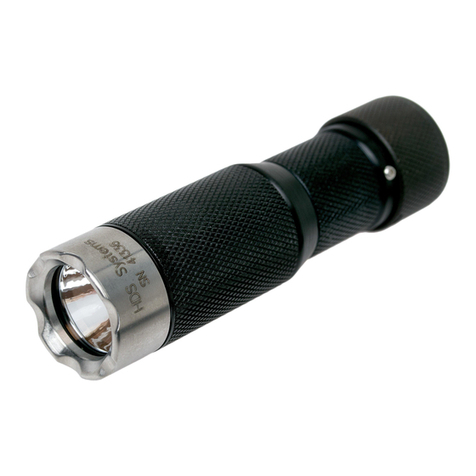
HDS Systems EDC LE Flashlight User manual

EDC LE™ Flashlight User’s Guide
Copyright 2018 by HDS Systems, Inc.
All rights reserved.
Basic Operation
Clicking the button (a quick press and release of the button)
will turn on your flashlight to the High setting. Clicking the
button a second time will turn off your flashlight.
While your flashlight is on, you can press-and-hold the button
to momentarily activate the Maximum setting – releasing the
button returns to the previous brightness setting. You can also
click-press-hold-release to activate Maximum and stay on
the Maximum setting. There is no delay between the click and
the press.
While your flashlight is on, you can double-click to toggle
between the High and Medium settings. A double-click is two
rapid clicks without a delay. A double-click will also return you
to whichever of the two settings you used last if you happen to
be on one of the other settings.
While your flashlight is on, you can triple-click to change to the
Fast Strobe setting. A triple-click is three rapid clicks without a
delay.
Your flashlight differentiates between a click and a press-and-
hold when you are turning on your flashlight. When you hold the
button for an extended period – over 1/3 of a second – the press
becomes momentary. That is, when you release the button,
your flashlight will turn off. This behavior is called pseudo-
momentary. Click-press-and-hold from off works in a similar
momentary fashion but turns on to Maximum instead. This
behavior is controlled by the Pseudo-Momentary option.
Your flashlight can provide a true momentary operating mode if
you enable the True Momentary option. In true momentary
mode, when the button is pressed, your flashlight is on
Maximum; when the button is released, your flashlight is off.
This mode of operation is used for tactical “flash and dash”
techniques. This mode ensures that if you should accidentally
drop your flashlight, your flashlight will not provide your
opponent with a ready target. When enabled, you rapidly click
the button 6 times when your flashlight is turned off to start true
momentary mode. To restore normal operation, remove the
battery for 60 seconds.
Low Battery Indication
Your flashlight will turn off momentarily and then back on one
level below the previous brightness level when the battery is
unable to supply enough power to run the current brightness
level. This process is repeated as needed as the battery’s
power is depleted.
Your flashlight will double-blink once every two minutes to
remind you that the battery needs to be changed when the
battery is no longer capable of maintaining a 50 lumen output
level and you are asking for an output level higher than the
battery can maintain.
Your flashlight restricts the output to the highest brightness level
the battery can maintain. However, if you turn off your flashlight
and turn it back on again to a higher level, your flashlight will
slowly step up through the brightness levels testing the battery
again.
Button Lockout
You can disable the switch by unscrewing the battery
compartment from the head one half turn. The O-ring will
remain completely covered. You restore operation of the switch
by screwing the battery compartment completely into the head.
You can also enable the Button Lockout option. When enabled,
triple-click from off locks and unlocks the button.
Cleaning and Maintenance
Periodically clean the open end of the battery compartment,
threads and O-ring with a clean lint-free cloth lightly moistened
with isopropyl alcohol. Apply a coat of non-conductive silicon or
petroleum grease to these surfaces.
Replace the battery compartment O-ring if it becomes worn or
damaged. O-ring: 1.5mm x 20.5mm, 70 durometer Nitrile
(Buna-N).
The recessed electrical contacts and interior threads in the head
can be cleaned using a lint-free swab lightly moistened with
isopropyl alcohol. Recessed contacts and threads should be
cleaned in a counter-clockwise direction to prevent snagging the
swab in the threads. Be sure to remove any particles or fibers
that may be left behind. Apply a coat of non-conductive silicon
or petroleum grease to the interior threads and contacts.
The exterior can be cleaned with a mild soap and water. Rinse
well and dry with a soft cotton cloth.
Note:the anti-reflective coating on the lens can be abraded by
excessive rubbing or cleaning. Never use paper tissues or
paper towels to clean or dry the lens as the fibers are abrasive.
Additional Information
Your flashlight has many capabilities not presented here.
Please see the EDC Clicky Advanced User's Guide on our web
site for a complete coverage of all features.
Warranty
Please view the full warranty on our web site.
Specifications subject to change without notice.
HDS Systems, Inc. Phone: 520-325-3004
P.O. Box 42767 E-mail: info@HDSsystems.com
Tucson, Arizona 85733 USA Web: www.HDSsystems.com
Updated February 21, 2018. Software version 2.18.

Other HDS Systems Flashlight manuals

HDS Systems EDC Tactical User manual

HDS Systems

HDS Systems EDC Tactical User manual

HDS Systems EDC Executive Flashlight User manual

HDS Systems

HDS Systems EDC Executive Flashlight User manual

HDS Systems EDC Tactical Flashlight User manual

HDS Systems

HDS Systems EDC Tactical Flashlight User manual

HDS Systems EDC Bicycle Flashlight User manual

HDS Systems

HDS Systems EDC Bicycle Flashlight User manual

HDS Systems EDC Executive User manual

HDS Systems

HDS Systems EDC Executive User manual

HDS Systems EDC Rotary Flashlight User manual

HDS Systems

HDS Systems EDC Rotary Flashlight User manual

HDS Systems EDC Rotary User manual

HDS Systems

HDS Systems EDC Rotary User manual

HDS Systems EDC Ultimate User manual

HDS Systems

HDS Systems EDC Ultimate User manual

HDS Systems EDC User manual

HDS Systems

HDS Systems EDC User manual

Popular Flashlight manuals by other brands

Milwaukee M18 IL Original instructions

Milwaukee

Milwaukee M18 IL Original instructions

Jula 948-002 User instructions

Jula

Jula 948-002 User instructions

Steren LAM-250 instruction manual

Steren

Steren LAM-250 instruction manual

Black & Decker BRIGHT BAR WLB36B instruction manual

Black & Decker

Black & Decker BRIGHT BAR WLB36B instruction manual

Pelican 7600 quick start guide

Pelican

Pelican 7600 quick start guide

Philips Ultinon Essential LED-HL Series manual

Philips

Philips Ultinon Essential LED-HL Series manual

steamlight LiteBox operating instructions

steamlight

steamlight LiteBox operating instructions

Daihen MWXC-2001 instruction manual

Daihen

Daihen MWXC-2001 instruction manual

Silva RANGER Product information

Silva

Silva RANGER Product information

Pro-4 Tactical PRO-1800 instruction manual

Pro-4 Tactical

Pro-4 Tactical PRO-1800 instruction manual

heinrichs weikamp hw Backup manual

heinrichs weikamp

heinrichs weikamp hw Backup manual

Sealey AK293 instruction manual

Sealey

Sealey AK293 instruction manual

AEG 97141 FITTING INSTRUCTION

AEG

AEG 97141 FITTING INSTRUCTION

Larson Electronics ATX-20-S quick start guide

Larson Electronics

Larson Electronics ATX-20-S quick start guide

Sunnydaze Decor WKO-857 quick start guide

Sunnydaze Decor

Sunnydaze Decor WKO-857 quick start guide

Stanley 95-155 manual

Stanley

Stanley 95-155 manual

Nitecore ec2 user manual

Nitecore

Nitecore ec2 user manual

Easylife EL6969 instruction manual

Easylife

Easylife EL6969 instruction manual

manuals.online logo
manuals.online logoBrands
  • About & Mission
  • Contact us
  • Privacy Policy
  • Terms and Conditions

Copyright 2025 Manuals.Online. All Rights Reserved.