#731204
For ages 5 and up.
Adult assembly and installation required.
Takes 2 adults 30 minutes to set up.
For outdoor use only, over soft surfaces.
Not intended for use as a trampoline or for rough play.
Weight capacity: 500 lbs.
Must be no higher than 6' off the ground.
Made in China ©HearthSong 2016. Madison, VA 22727. 1-800-533-4397 hearthsong.com
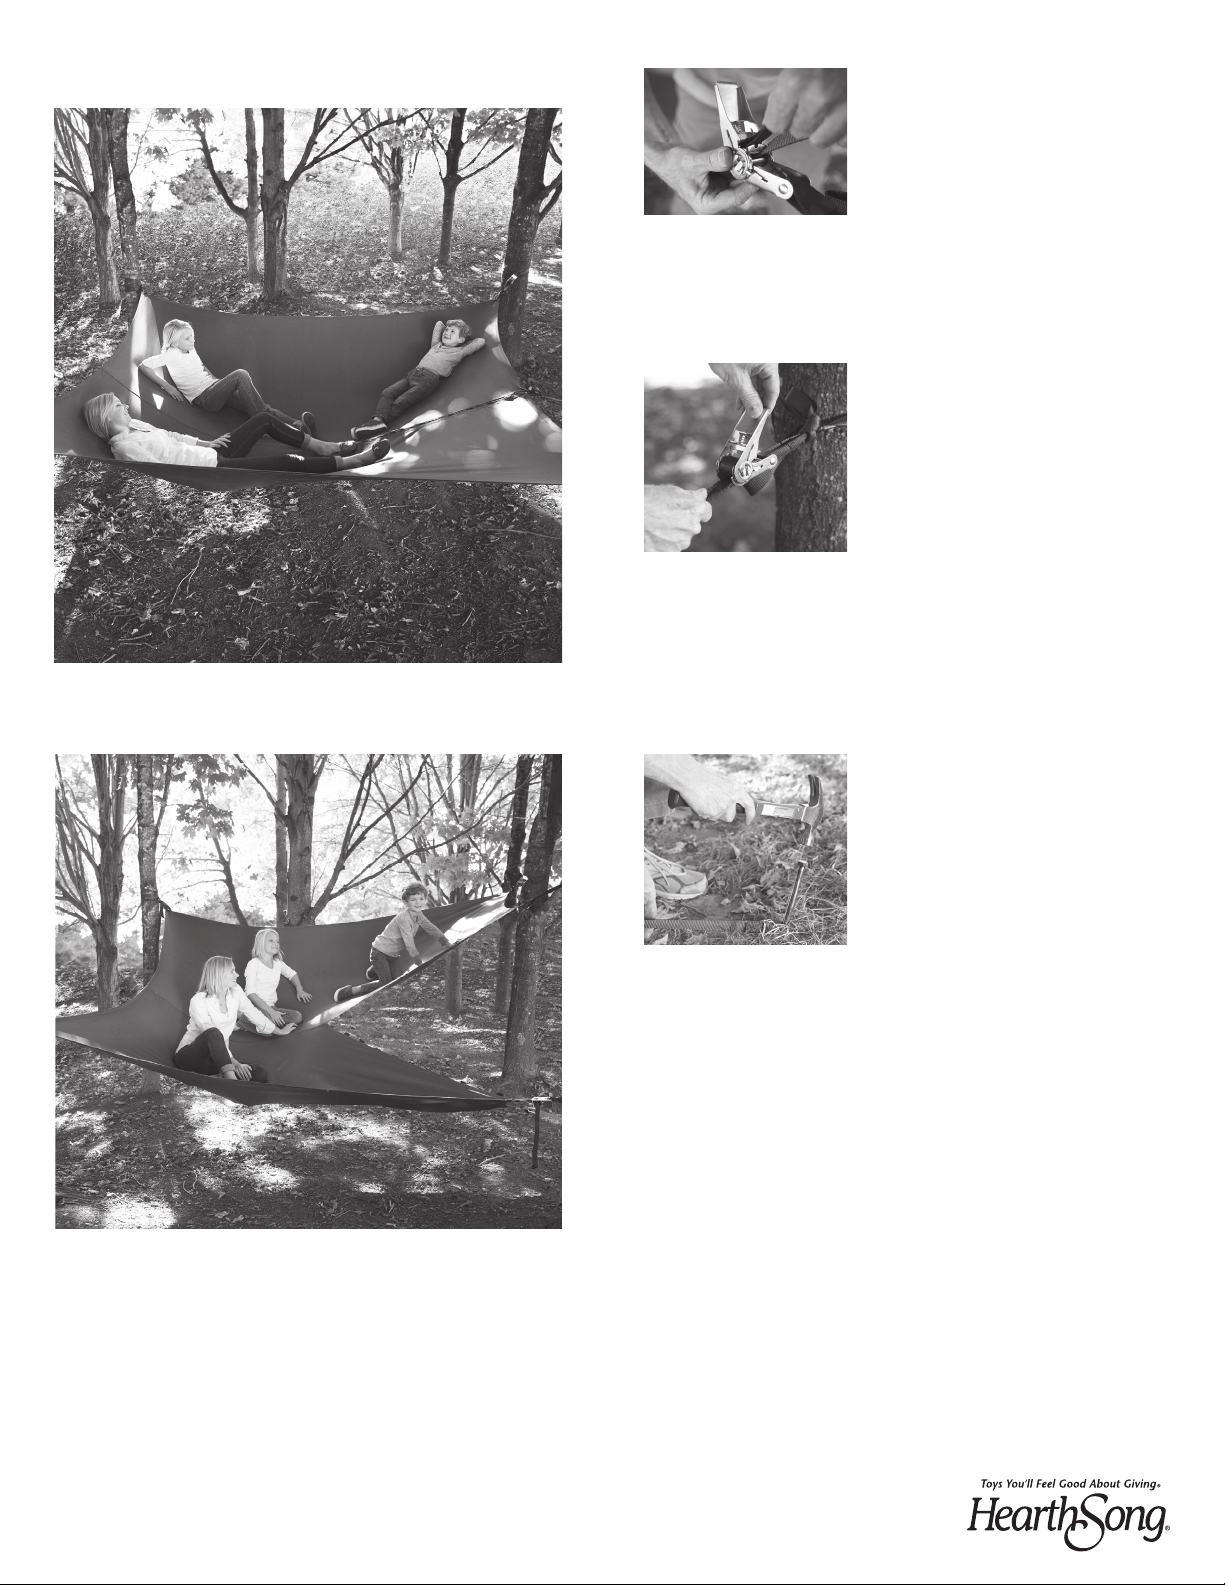
Aerial
Hammock
Assembly Instructions
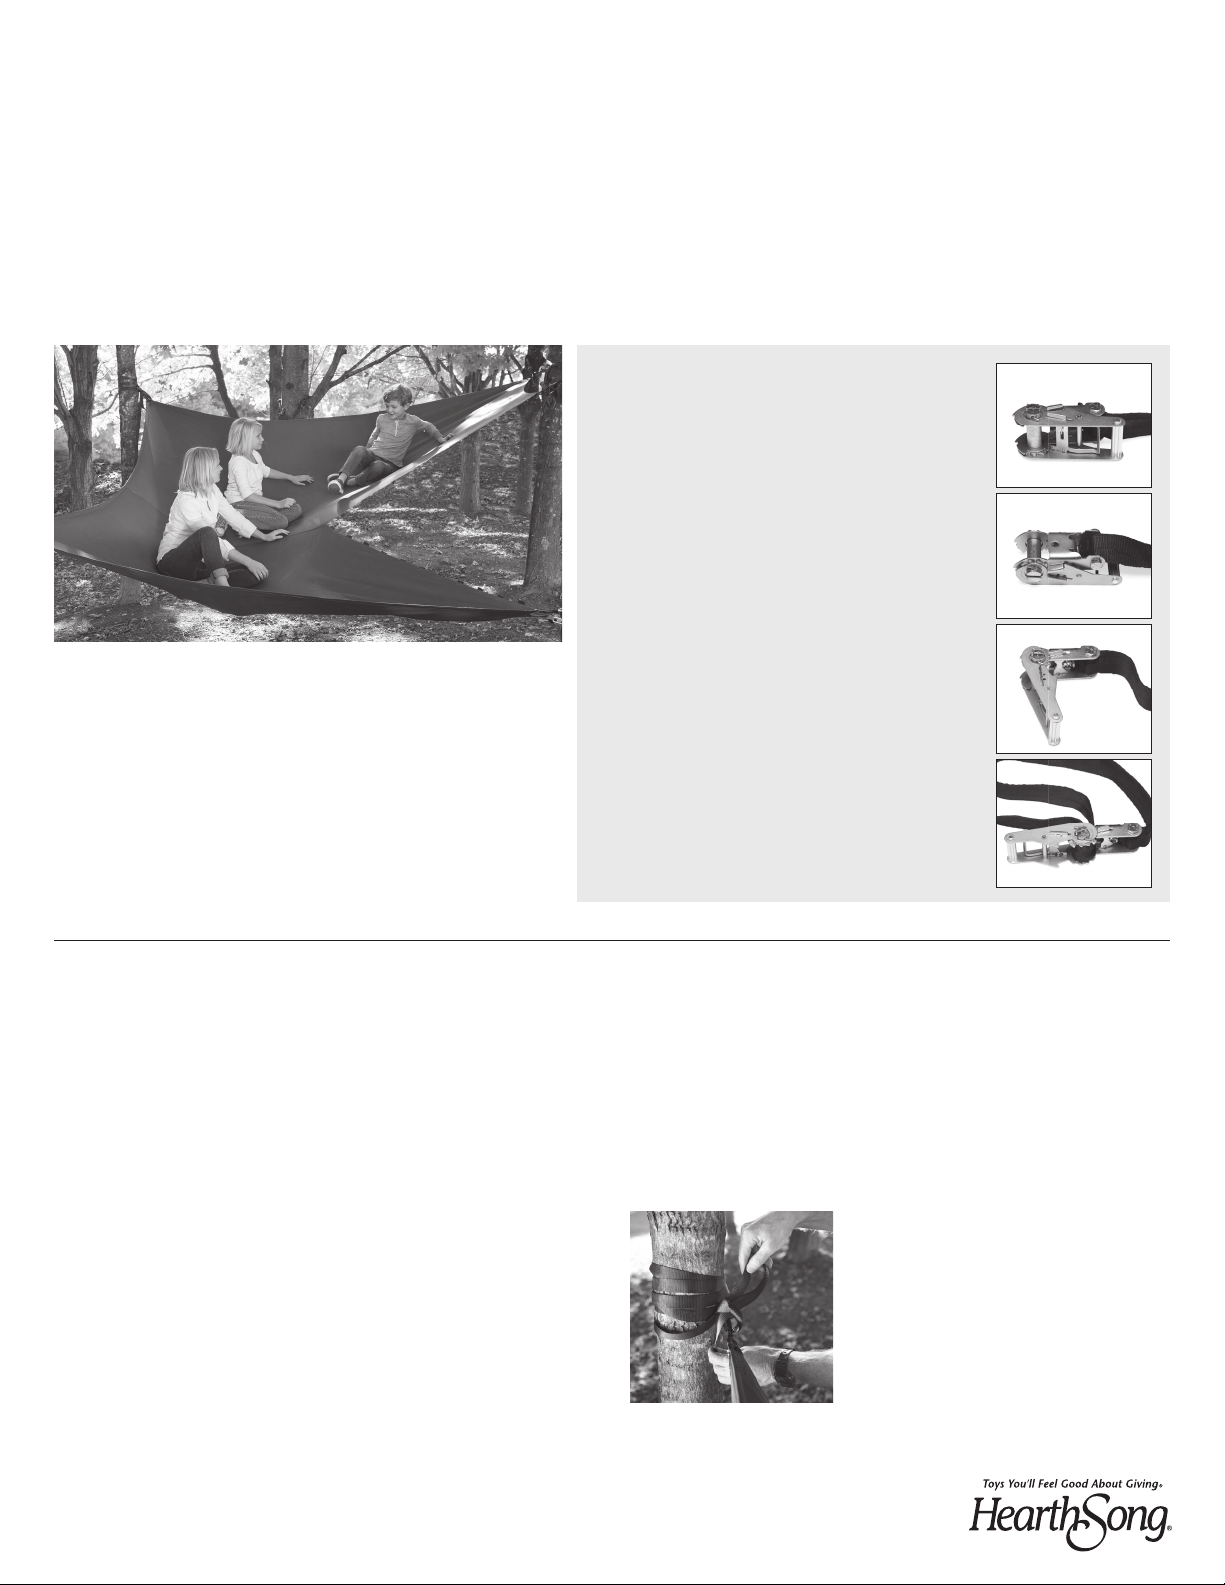
General Notes on Using Ratchets:
1. To use a ratchet, two operating elements are
important: the crank and the lever.
2. In the base position (crank folded in half and
locked in place), the winding axle (where the
second strap will be threaded) is locked.
3. Pull the lever to unlock the crank so that you
can adjust the angle of its opening.
4. When the crank is unlocked and partially
opened, the strap can be inserted into the
winding axle and tightened by moving the
crank back and forth (without using the lever).
The typical “ratcheting” sound of the crank
can be heard. To avoid injuries, please watch
where you place your fingers when operating
the crank.
5. To pull the strap out of the ratchet, open the
ratchet crank completely to release the axle
(the lever must be pulled with some force to
reach that position). This position can be hard
to attain so it is good to familiarize yourself
with usage carefully.
Hanging the Aerial Hammock:
**Do not suspend the Aerial Hammock higher than 6'
above the ground. Height from the ground can vary depend-
ing on the size of the users, and should be at a height that
is easily accessible.
**When attaching the hammock to posts or trees, start
with the two back points and move your way to the points
on the front edge of the hammock fabric where the cen-
ter slit is located. The center slit can either be left closed
or opened. If closed, only four connection points will be
needed (but you can still add a fifth connection in the
front). If you wish to open the slit to create two levels, you
will definitely need five connection points.
1. Choose the appropriate trees or posts from which to
hang your Aerial Hammock. There must be at least
four connection points for the single-level hammock
configuration, but five are preferred. Five are definitely
necessary for the split-level hammock.
a. Maximum Distance Apart: 20 ft
b. Minimum Distance Apart: 11 ft
c. Optimal Distance Apart: 13-15 ft
What you get:
• 5 black straps with loops
• 3 ratchets with straps
• 1 hammock fabric
• 1 red strap (use this strap to close the center slit on the
front half of the hammock: attach one carabiner to the
outermost loops on the front edge of both sides of the
center slit, and after removing the other carabiner, weave
the strap through the loops on each side of the slit until
reaching the center of the hammock. Attach with the
remaining carabiner.
2.
2.
4.
5.
2. Lay out the hammock and straps, making sure the seams on
the hammock fabric are facing down and that the hammock is
centered between all of the points to which it will be connected.
3. Attach the black straps with loops to the two back corners of the
hammock (“back” = behind the center slit) by pulling one end of
the black straps through the hammock loops, and then inserting
the free ends of the black straps through the strap loops and
pulling tight.
4. Tie the free ends of the straps to two
trees or posts that
are next to the back corners, using
knots that can be removed easily, such
as a half bow knot (or similar knot that
can be untied easily), because once you
attach the ratchets to the other end of
the fabric, the knots will be pulled
very tight.