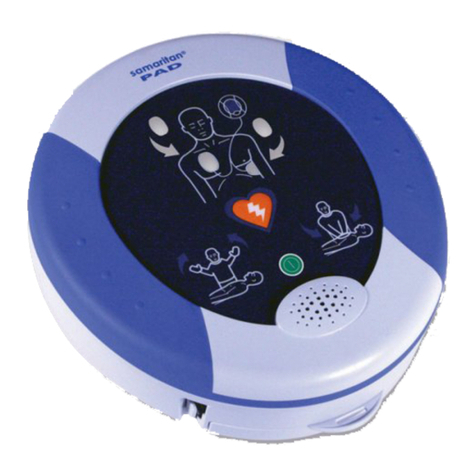
HeartSine samaritan SAM 350P User manual

SAM 350P SAM 360P SAM 450P
Trainer Trainer Trainer
EN-US
HeartSine®samaritan®PAD Trainer
user manual

2 EN-US Trainer user manual 3
EN-US
IntroductionTable of contents
Introduction 3
About the HeartSine samaritan PAD Trainer 3
Recommended training 3
CPR Rate Advisor (HeartSine SAM 450P Trainer) 3
Get to know your HeartSine Trainer 4
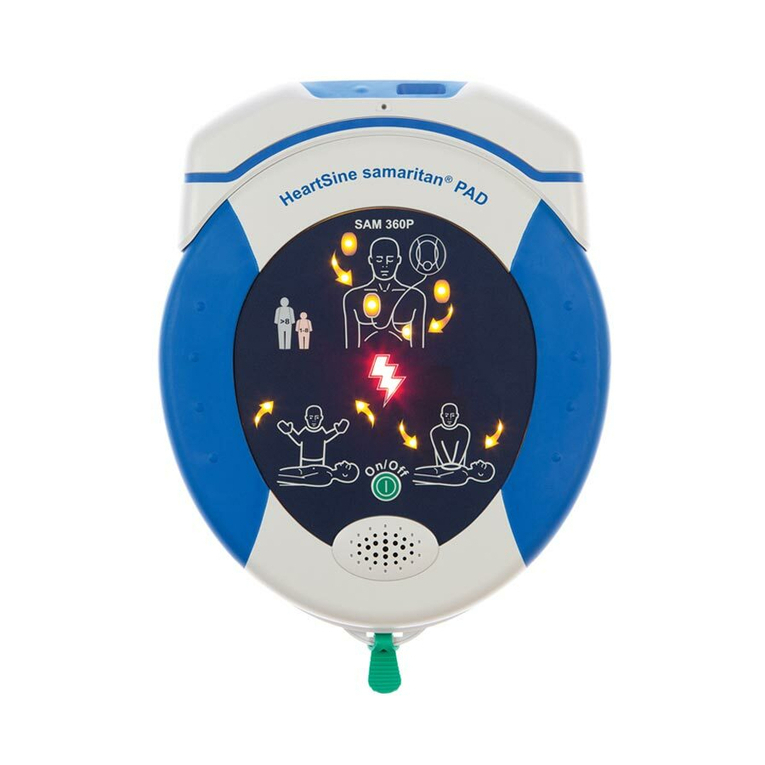
HeartSine SAM 350P Trainer layout 4
HeartSine SAM 360P Trainer layout 5
HeartSine SAM 450P Trainer layout 6
Trainer-Pak 7
HeartSine SAM 350P Trainer remote control 8
HeartSine SAM 360P Trainer remote control 9
HeartSine SAM 450P Trainer remote control 10
Set up your HeartSine Trainer 11
Use your HeartSine Trainer 14
Instructor 15
Student 19
Training scenarios 22
Training scenario descriptions 22
Mode descriptions 24
Maintain your HeartSine Trainer 26
Electrodes 26
Batteries 29
Disposal 30
Configure your HeartSine Trainer 31
Install the HeartSine Trainer Configuration Tool 31
Configure your HeartSine Trainer 31
Configure the HeartSine Trainer Configuration Tool 40
Appendices
Appendix A
Limited warranty statement A-1
This user manual provides instructions on how to
operate the HeartSine samaritan PAD Trainer:
SAM 350P, SAM 360P and SAM 450P models.
About the HeartSine samaritan
PAD Trainer
The HeartSine samaritan PAD Trainer (also called
HeartSine Trainer) is a non-medical device intended
to be used for the training of emergency responders
in the proper use of a HeartSine samaritan PAD
automated external defibrillator (AED), which is
designed to operate in accordance with the latest
American Heart Association (AHA) and European
Resuscitation Council (ERC) guidelines. The
HeartSine Trainer has no therapeutic capabilities and
must not be used in real life rescue situations.
For quick and easy identification, each HeartSine
Trainer has a gold face while each HeartSine AED has
a navy blue/black face.
Note: To avoid confusion in the event of a real-life
rescue, do not store or leave the HeartSine Trainer
near a HeartSine AED
If the CPR guidelines change, software will be
available to upgrade the HeartSine Trainer to
comply with the updated guidelines. In this case,
please contact your Authorized Distributor or
HeartSine Technologies directly.
When turned on, the HeartSine Trainer will play
audible voice prompts with accompanying visual
indicators. As an instructor, you can control the
HeartSine Trainer using the included remote control.
You may need to replace some of the accessories from
time to time. For a list of replacement accessories,
please see the HeartSine Trainer Family brochure or
contact your Authorized Distributor.
Recommended training
HeartSine recommends that responders who may
use one of its defibrillators should be trained in
cardiopulmonary resuscitation (CPR) and in the use
of an AED (CPR-D). The HeartSine Trainer is intended
to be used by approved CPR-D training providers for
this purpose.
CPR Rate Advisor
(HeartSine SAM 450P Trainer)
The CPR Rate Advisor feature, available only on the
HeartSine samaritan PAD 450P, provides feedback to
the rescuer on the rate of the CPR they are providing
to the patient. SAM 450P uses impedance cardiogram
measurements to analyze the rate of compressions
and provide the student with instruction to “Push
faster,” or “Push slower,” or to continue to provide
compressions according to the AHA/ERC resuscitation
guidelines (“Good speed”). SAM 450P uses both
audible and visual feedback to give the rescuer
instruction on CPR rate.
The instructor can simulate and control the CPR
Rate Advisor function using the remote control. The
HeartSine SAM 450P Trainer will initially assume
correct compressions are being performed and
play the audible prompt: “Good speed.” Training
instructors should observe the CPR being provided
by the student and, based on observations, press the
appropriate CPR Rate Advisor buttons.

Trainer user manual 5
EN-US
4 EN-US
Get to know your HeartSine Trainer
Get to know your HeartSine Trainer
Data port
Remove blue cover and plug in
custom USB data cable to
program the HeartSine Trainer.
Attach Pads icon/Action arrows
Attach electrode pads to patient’s
bare chest as indicated when the
action arrows are flashing.
HeartSine SAM 350P Trainer layout HeartSine SAM 360P Trainer layout
Power port
Plug in power cable to charge the
HeartSine Trainer battery.
Battery charge status LED
Flashes red to indicate the battery
is charging.
Shock button
Press to simulate delivery
of a therapeutic shock.
Do Not Touch icon/
Action arrows
Do not touch the patient
when the action arrows
above this icon are flashing.
This simulates how SAM
350P analyzes patient’s
heart rhythm or is about
to charge in preparation to
deliver a shock.
On/Off button
Press to turn on or off the
HeartSine Trainer.
Green tab
Pull this tab to release the
electrode pads.
Status indicator
The HeartSine Trainer
is ready for use when
this indicator is flashing
green when turned on. If
flashing red, charge the
HeartSine Trainer.
Safe to Touch icon/
Action arrows
You may touch the
patient when these action
arrows are flashing.
Speaker
Listen for metronome and
verbal prompts.
Trainer-Pak
Contains the electrode
pads.
Data port
Remove blue cover and plug in
custom USB data cable to
program the HeartSine Trainer.
Attach Pads icon/Action arrows
Attach electrode pads to patient’s
bare chest as indicated when the
action arrows are flashing.
Power port
Plug in power cable to charge the
HeartSine Trainer battery.
Battery charge status LED
Flashes red to indicate the battery
is charging.
Shock indicator
Flashes to simulate
automatic delivery of
a shock.
Do Not Touch icon/
Action arrows
Do not touch the patient
when the action arrows
above this icon are flashing.
This simulates how SAM
360P analyzes patient’s
heart rhythm or is about
to charge in preparation to
deliver a shock.
On/Off button
Press to turn on or off the
HeartSine Trainer.
Green tab
Pull this tab to release the
electrode pads.
Status indicator
The HeartSine Trainer
is ready for use when
this indicator is flashing
green when turned on. If
flashing red, charge the
HeartSine Trainer.
Safe to Touch icon/
Action arrows
You may touch the
patient when these action
arrows are flashing.
Speaker
Listen for metronome and
verbal prompts.
Trainer-Pak
Contains the electrode
pads.

6 EN-US Trainer user manual 7
EN-US
Trainer-Pak
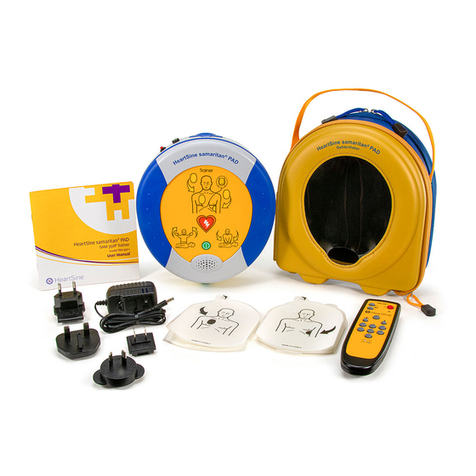
Each HeartSine Trainer comes with a Trainer-Pak installed and two pairs of additional training electrode pads.
The Trainer-Pak includes one pair of training electrode pads, which can be replaced after multiple uses. See
Replace electrode pads on page 28.
Note: You should ensure that the Trainer-Pak is installed before using the HeartSine Trainer
You will not need to remove the Trainer-Pak to use or maintain the HeartSine Trainer. However, if the need
arises to remove and/or install the Trainer-Pak, follow these steps.
Remove the Trainer-Pak
• Place HeartSine Trainer face up on a table or other flat surface
• Squeeze the tab on each side of the Trainer-Pak
• Pull to remove Trainer-Pak from the AED; it will slide forward
Install the Trainer-Pak
• Place the HeartSine Trainer face up on a flat surface
• Slide the Trainer-Pak into the HeartSine Trainer until you hear the
“double click” to indicate that the tabs on the right and left side of the
Trainer-Pak are fully engaged
Get to know your HeartSine TrainerGet to know your HeartSine Trainer
HeartSine SAM 450P Trainer layout
Data port
Remove blue cover and plug in
custom USB data cable to
program the HeartSine Trainer.
Attach Pads icon/Action arrows
Attach electrode pads to patient’s
bare chest as indicated when the
action arrows are flashing.
Power port
Plug in power cable to charge the
HeartSine Trainer battery.
Battery charge status LED
Flashes red to indicate the battery
is charging.
Shock button
Press to simulate delivery
of a therapeutic shock.
CPR Rate Advisor
indicator
Provides visual feedback
about the rate of chest
compressions during CPR.
Do Not Touch icon/
Action arrows
Do not touch the patient when
the action arrows above this icon
are flashing. This simulates how
SAM 450P analyzes patient’s heart
rhythm or is about to charge in
preparation to deliver a shock.
Green tab
Pull this tab to release the
electrode pads.
Status indicator
The HeartSine Trainer
is ready for use when
this indicator is flashing
green when turned on. If
flashing red, charge the
HeartSine Trainer.
Safe to Touch icon/
Action arrows
You may touch the
patient when these action
arrows are flashing.
On/Off button
Press to turn on or off
the HeartSine Trainer.
Speaker
Listen for metronome
and verbal prompts.
Trainer-Pak
Contains the electrode
pads.
Training
electrode pads
Green tab

8 EN-US Trainer user manual 9
EN-US
TRN-360-1
Get to know your HeartSine Trainer Get to know your HeartSine Trainer
HeartSine SAM 360P Trainer remote control
TRN-350-1
Volume control
Press + to increase the volume
and – to decrease the volume.
(Four volume settings are
available: low, medium, high and
max.)
Pause/Play button
Press once to pause and a second
time to resume the training
scenario.
No Shock Required button
Press to override the selected
training scenario and simulate
a non-shockable rhythm. Each
subsequent analysis period will
advise no shock to be delivered
until either the HeartSine Trainer
is turned off or you press the
Shock Required button.
Training Scenario buttons
(1-6)
Press a numbered button to
change to that training scenario.
The selected training scenario
will continue to play until another
training scenario is selected. (The
HeartSine Trainer comes with six
preprogrammed training scenarios.
See Training Scenarios.)
Off button
Press to turn off the HeartSine
Trainer.
Low battery indicator
Flashes red two times after a
button is pressed to indicate the
two AAA batteries need to be
replaced.
Shock Required button
Press to override the selected
training scenario and simulate
a shockable rhythm. Each
subsequent analysis period will
advise a shock to be delivered
until either the HeartSine Trainer
is turned off or you press the No
Shock Required button.
Attach Electrode Pads button
Press to play the “Check pads”
prompt indicating the student
should check that the pads are
placed correctly. The HeartSine
Trainer will continue to play
prompt until you press the Attach
Electrode Pads button again.
HeartSine SAM 350P Trainer remote control
Volume control
Press + to increase the volume
and – to decrease the volume.
(Four volume settings are
available: low, medium, high and
max.)
Pause/Play button
Press once to pause and a second
time to resume the training
scenario.
No Shock Required button
Press to override the selected
training scenario and simulate
a non-shockable rhythm. Each
subsequent analysis period will
advise no shock to be delivered
until either the HeartSine Trainer
is turned off or you press the
Shock Required button.
Training Scenario buttons
(1-6)
Press a numbered button to
change to that training scenario.
The selected training scenario
will continue to play until another
training scenario is selected. (The
HeartSine Trainer comes with six
preprogrammed training scenarios.
See Training Scenarios.)
Off button
Press to turn off the HeartSine
Trainer.
Low battery indicator
Flashes red two times after a
button is pressed to indicate the
two AAA batteries need to be
replaced.
Shock Required button
Press to override the selected
training scenario and simulate
a shockable rhythm. Each
subsequent analysis period will
advise a shock to be delivered
until either the HeartSine Trainer
is turned off or you press the No
Shock Required button.
Attach Electrode Pads button
Press to play the “Check pads”
prompt indicating the student
should check that the pads are
placed correctly. The HeartSine
Trainer will continue to play
prompt until you press the Attach
Electrode Pads button again.

Trainer user manual 11
EN-US
10 EN-US
Get to know your HeartSine Trainer Set up your HeartSine Trainer
HeartSine SAM 450P Trainer remote control with CPR Rate Advisor
buttons
Rate control buttons
If the student’s compressions are
too fast, press + once to change
the CPR Rate Advisor indicator to
amber (right side). If the student’s
compressions remain slow, press
this button a second time to play
the prompt “Push slower” and
change the CPR Rate Advisor
indicator to red (right side).
The “Push slower” prompt will
continue to play until you press
a different rate control button.
If the student’s compression rate
is within the correct range, press
this Thumbs Up button to play
the prompt “Good speed” and
to change the CPR Rate Advisor
indicator to green.
If the student’s compressions are
too slow, press –once to change
the CPR Rate Advisor indicator to
amber (left side). Press a second
time to play the prompt “Push
faster” and change the CPR Rate
Advisor indicator to red (left side).
The “Push faster” prompt will
continue to play until you press a
different rate control button.
TRN-450-1
Note: See previous page for a
description of all other buttons
No compressions/Good speed
button
If the student is not performing
compressions when prompted,
press this button to play the
prompt “Begin CPR” and change
the CPR Rate Advisor indicator
to flashing red. “Begin CPR” will
continue to play until you press
this button a second time.
If the student’s compression
rate is within the correct range,
press this button again to play
the prompt “Good speed” and
to change the CPR Rate Advisor
indicator to green.
1. Unpack your HeartSine Trainer
Contents include:
HeartSine samaritan PAD Trainer with
Trainer-Pak and carry case
Remote control with two AAA batteries
TRN-350-1
Two additional pairs of training electrodes
Battery charger
User manual
Note: The prompt “Good speed” will play initially and will continue until you press the No compressions/Good
speed button or the rate + or – button

12 EN-US Trainer user manual 13
EN-US
Set up your HeartSine Trainer
2. Plug the battery charger into the power port. (When delivered,
the HeartSine Trainer is only partially charged, so you will need
to fully charge the battery.)
Note: If the HeartSine Trainer has insufficient charge, it will
not function correctly. If the battery is low, when the HeartSine
Trainer is turned on, the status indicator will flash red to
indicate that charging is required. If the battery is fully depleted
the device will not turn on. For full charging instructions see
Batteries section of this manual
3. Place the two AAA batteries supplied with your HeartSine
Trainer into the rear of the remote control.
Note: Do not press any buttons while inserting the batteries
into the remote control as this will reset the remote control ID
4. Press the On/Off button on the HeartSine Trainer to turn it on.
• Listen for the voice prompts to ensure the HeartSine Trainer is
functioning properly
Set up your HeartSine Trainer
5. Verify that the status indicator is blinking green to indicate the
HeartSine Trainer is ready for use.
6. Press the On/Off button or press the Off button on the remote
control to turn off the HeartSine Trainer.
7. Store your HeartSine Trainer in the carry case when it’s not
being used.
• Place the remote control, battery charger, spare electrode pads
and user manual into the zippered compartment on the rear of
the carry case

Trainer user manual 15
EN-US
14 EN-US
Use your HeartSine Trainer
The HeartSine Trainer enables training on the use of HeartSine samaritan AEDs, which are designed to operate
in accordance with the latest American Heart Association (AHA) and European Resuscitation Council (ERC)
guidelines.
There are six preprogrammed training scenarios available on each HeartSine Trainer. The steps for each
training scenario are provided in this section. As an instructor, you can use the remote control to manually
control the scenario; at any time you can override the training scenario by pressing the Shock Required, No
Shock Required and/or Attach Electrode Pads buttons. For the HeartSine SAM 450P Trainer, you also can use
the remote control to provide CPR Rate Advisor feedback on the student’s rate of compressions.
See Training scenarios on page 22 for a description of each training scenario.
Notes:
• By default, the HeartSine Trainer will function in training scenario 1 until the default setting is changed
using the HeartSine Trainer Configuration Tool or a different training scenario is selected on the remote
control. If a different scenario is selected using the remote control or HeartSine Trainer Configuration
Tool, the last used training scenario will be played each time the HeartSine Trainer is turned on
• The HeartSine Trainer will automatically turn off after fifteen minutes if the device is not being used
Use your HeartSine Trainer
Instructor
1. Press the On/Off button to turn on the HeartSine Trainer.
2. From the remote control, press a training scenario button (1-6) to
select a training scenario. (See Training scenarios for a description
of each scenario.)
TRN-350-1
3. If you have selected training scenario 1, 2, 5 or 6, after the
student places the pads, press the Attach Electrode Pads button to
proceed.
OR
If you have selected training scenario 3, after you hear the last
prompt in monitor mode (“Analyzing, do not touch the patient”),
press the Attach Electrode Pads button to proceed.
TRN-350-1

16 EN-US Trainer user manual 17
EN-US
Use your HeartSine Trainer
Instructor
4. During any of the training scenarios, press any of these buttons to
change the prompts provided:
• Press No Shock Required button to override the selected
training scenario and simulate a non-shockable rhythm. (Each
subsequent analysis period will advise no shock to be delivered
until either the HeartSine Trainer is turned off or you press the
Shock Required button)
• Press Shock Required button to override the selected training
scenario and simulate a shockable rhythm. (Each subsequent
analysis period will advise a shock to be delivered until either
the HeartSine Trainer is turned off or you press the No Shock
Required button)
• Press a numbered button to change to that training scenario.
(The selected training scenario will continue to play until
another training scenario is selected)
• Press Attach Electrode Pads button to play the “Check pads”
prompt indicating the student should check that the pads are
placed correctly. (The HeartSine Trainer will continue to play
prompt until you press the Attach Electrode Pads button again)
TRN-350-1
TRN-350-1
TRN-350-1
TRN-350-1
Use your HeartSine Trainer
Instructor
5. While the student is performing CPR, press any of these buttons to
play CPR Rate Advisor prompts (HeartSine SAM 450P Trainer
only):
• If the student is not performing compressions when prompted,
press the No compressions/Good speed button once to play the
prompt “Begin CPR” and change the CPR Rate Advisor indicator
to flashing red
• If the student is performing compressions after being prompted
to stop compressions, press the No compressions/Good speed
button a second time to play the prompt “Stop CPR”
• If the student’s compressions are too fast, press Rate + button
to play the prompt “Push slower”
• If the student’s compressions are too slow, press Rate –button
to play the prompt “Push faster”
• If the student’s compression rate is within the correct range,
press the Rate Thumbs Up button to play the prompt “Good
speed”
Note: The prompt “Good speed” will play initially and will
continue until you press the No compressions/Good speed button
or the rate + or – button
TRN-450-1

18 EN-US Trainer user manual 19
EN-US
text goes here
Use your HeartSine Trainer
Instructor
6. At any time, press the Pause/Play button to pause or play the
training scenario. (Push once to pause and a second time to
resume the training scenario.)
TRN-350-1
7. Press the Off button on the remote control or On/Off button to
turn off the HeartSine Trainer.
Use your HeartSine Trainer
Student
1. Place the HeartSine Trainer on the floor next to you, press the
On/Off button and follow the directions.
2. Pull green tab to remove the electrode tray from the HeartSine
Trainer.
3. Remove pads from Trainer-Pak, fully lengthening the wires.
samaritan
®
TRN-350-1

20 EN-US Trainer user manual 21
EN-US
Use your HeartSine Trainer
Student
4. Peel first pad.
• With one thumb on the liner and one thumb on the pad, peel the
first pad from the plastic liner
5. Place first pad.
• Place the first pad as shown in picture
H
e
a
r
t
S
i
n
e
s
a
m
a
r
i
t
a
n
P
A
D
Trainer
®
6. Peel second pad.
• With one thumb on the liner and one thumb on the pad, peel the
second pad from the plastic liner
Use your HeartSine Trainer
Student
7. Place second pad.
• Place the second pad as shown in picture
Note: After you have placed pads on the person’s chest, if you
continue to hear the prompt “Check pads. Press pads firmly to
patient’s bare skin,” check that:
• Pads are placed correctly as shown in the pictures
• Pads are not touching and at least 1 inch apart
• Entire surface of each pad is stuck to bare skin
H
e
a
r
t
S
i
n
e
s
a
m
a
r
i
t
a
n
P
A
D
Trainer
®
Trainer
8. Follow the prompts.
9. When finished, press the On/Off button to turn off the HeartSine
Trainer.

Trainer user manual 23
EN-US
22 EN-US
Training scenarios
Step Training scenario 1 Training scenario 2 Training scenario 3
Training
scenario
description
Shock advised condition
followed by no shock
advised condition
No shock advised condition
followed by shock advised
condition
Assumes pads are attached
After analyzing, prompts to
check pads
After pads are checked,
shock advised condition
followed by no shock
advised condition
1Setup mode Setup mode Monitor mode
2Instructor intervention Instructor intervention Check pads
3Monitor mode Monitor mode Instructor intervention
4Shock advised No shock advised Monitor mode
5CPR mode CPR mode Shock advised
6Monitor mode Monitor mode CPR mode
7No shock advised Shock advised Monitor mode
8CPR mode CPR mode No shock advised
9Repeat steps 6-8 until
HeartSine Trainer is turned
off
Repeat steps 6-8 until
HeartSine Trainer is turned
off
CPR mode
10 N/A N/A Repeat steps 4 to 9 until
HeartSine Trainer is turned
off
Training scenarios
Step Training scenario 4 Training scenario 5 Training scenario 6
Training
scenario
description
Assumes pads are attached
Two shock advised
conditions, followed by no
shock advised condition
Shock advised condition
followed by no shock
advised condition
CPR mode calls for rescue
breaths
No shock advised condition
followed by shock advised
condition
CPR mode calls for rescue
breaths
1Monitor mode Setup mode Setup mode
2Shock advised Instructor intervention Instructor intervention
3CPR mode Monitor mode Monitor mode
4Monitor mode Shock advised No shock advised
5Shock advised CPR mode* CPR mode*
6CPR mode Monitor mode Monitor mode
7Monitor mode No shock advised Shock advised
8No shock advised CPR mode* CPR mode*
9CPR mode Repeat steps 6-8 until
HeartSine Trainer is turned
off
Repeat steps 6-8 until
HeartSine Trainer is turned
off
10 Repeat steps 4 to 9 until
HeartSine Trainer is turned
off
N/A N/A
* CPR mode calls for rescue breaths in this scenario.
Training scenario descriptions

24 EN-US Trainer user manual 25
EN-US
Training scenariosTraining scenarios
Mode Prompts Activity
No shock advised “Stop CPR.” (not played during first
Monitor mode)
“No shock advised.”
“Begin CPR.”
“It is safe to touch the patient.
“Press overlapping hands in middle of
chest.”
“Press directly down on the chest in time
with metronome.”
“Remain calm.”
• Student follows prompts
Setup “Adult patient.”
“Call for medical assistance.”
“Remove clothing from patient’s chest to
expose bare skin.”
“Pull green tab to remove pads.”
“Peel pads from liner.”
“Apply pads to patient’s bare chest as
shown in picture.”
“Press pads firmly to patient’s bare skin.”
• Student follows prompts
Shock advised “Stand clear of patient.”
“Shock advised.”
“Stand clear of patient.”
“Press the orange Shock button now.”
(SAM 350P, SAM 450P)
“Stand clear of patient; shock will be
delivered in 3, 2, 1.” (SAM 360P)
“Shock delivered.”
• Student follows prompts
• Student must press Shock
button on SAM 350P and
SAM 450P
Mode Prompts Activity
Check pads “Check pads.”
“Press pads firmly to patient’s bare skin.”
• Student follows prompts
CPR “Begin CPR.”
“It is safe to touch the patient.”
“Place overlapping hands in middle of
chest.”
“Press directly down on the chest in time
with metronome.”
“Remain calm.”
“Good speed.” (SAM 450P)
Metronome
“Press faster.” (SAM 450P)
“Press slower.” (SAM 450P)
• Student performs
compressions
• Where indicated, the
student performs
compressions, followed
by rescue breaths when
the tone of the metronome
changes from a lower
beep to a higher tick
for the duration of ten
compressions
• For SAM 450P, instructor
can press CPR Rate Advisor
control buttons to provide
feedback to the student
Instructor intervention N/A • As soon as the student
places the pads, instructor
must press Attach Electrode
Pads button
Monitor “Stop CPR.” (not played during first
Monitor mode)
“Assessing heart rhythm.”
“Do not touch the patient.”
“Analyzing, do not touch the patient.”
• Student stands clear of
patient
Mode descriptions
For each training scenario the list of prompts and required activity for each mode are provided here:

Trainer user manual 27
EN-US
26 EN-US
Maintain your HeartSine Trainer
Electrodes
Rewind electrodes after use
1. Reattach the protective liners to the back of each electrode pad.
2. Fold the pads together so that the liner is on the outside (image
facing in).
3. Turn over the HeartSine Trainer to locate the blue rewind handle
on the back of the Trainer-Pak.
Maintain your HeartSine Trainer
4. While holding the HeartSine Trainer with the pad wires hanging,
lift and turn the blue rewind handle clockwise to retract the wires.
Note: If the rewind mechanism locks up, you can access the
rewind mechanism by inserting a flat-head screwdriver into the
hole (as shown) and pushing downward to lift the yellow cover
5. With the wires under the pads, place the pads on top of the
Trainer-Pak cartridge with the tops and bottoms aligned correctly.
6. Slide the bottom cover of the Trainer-Pak cartridge into place.

28 EN-US Trainer user manual 29
EN-US
Maintain your HeartSine TrainerMaintain your HeartSine Trainer
Replace electrode pads
After a large number of uses, the electrode pads may lose their stickiness. You can replace the used electrode
pads with a new pair.
1. Pull the green tab on the Trainer-Pak to remove the used pair of
electrodes.
2. Detach the round Velcro button from the first used electrode
pad and attach it to the Velcro on the same electrode pad in the
new pair.
3. Detach the round Velcro button from the second used electrode
pad and attach it to the Velcro on the same electrode pad in the
new pair.
4. Follow steps 2 through 6 in the previous section (Rewind
electrodes after use) to prepare the Trainer-Pak for use.
Batteries
Each HeartSine Trainer contains a rechargeable battery and comes with a battery charger. It is recommended
that you ensure the HeartSine Trainer is fully charged prior to beginning training activities.
When fully charged the HeartSine Trainer will provide approximately seven hours of usage before it needs to
be recharged. The HeartSine Trainer will monitor the capacity of its battery and a minimum of one hour prior
to the battery becoming depleted will play the following message: “Warning. Low battery.” If you hear this
warning you can continue to use your HeartSine Trainer for a limited time. If the battery becomes completely
depleted the HeartSine Trainer will turn off. At this point, recharge the HeartSine Trainer.
Notes:
• The HeartSine Trainer must only be charged with the provided charger; use of any other charging
device will nullify the warranty and may result in damage to the HeartSine Trainer
• The HeartSine Trainer and battery charger are designed for indoor use only; do not use in wet or damp
environments
• There are no user serviceable parts inside your HeartSine Trainer, Trainer-Pak or battery charger. These
products should not be opened. In the unlikely event of a malfunction, please immediately contact your
Authorized Distributor or HeartSine Technologies support directly (heartsinesupport@stryker.com)
Charge HeartSine Trainer battery
To safely charge or recharge the HeartSine Trainer:
1. Plug the battery charger into the power port on the top of the HeartSine Trainer, ensuring the adapter is
fully inserted.
2. Plug the battery charger into the mains electricity supply.
3. Charge for six hours. The Battery Charge Status LED will be red when fast charging and will flash when
charging is almost complete. Once charging is complete the LED will turn off.
4. Unplug the battery charger from the HeartSine Trainer.
5. Press the On/Off button to turn on the HeartSine Trainer to ensure that the device is charged.
Note: If the HeartSine Trainer is turned on during charging, the charger should be unplugged and plugged in
again to restart fast charging

Trainer user manual 3130 EN-US
Configure your HeartSine Trainer
Maintain your HeartSine Trainer
Change remote control batteries
The low battery warning indicator on the remote control will flash red two times after a button on the remote
control is pressed to indicate the two AAA batteries need to be replaced.
1. Remove the battery cover at the back of the remote control.
2. Remove and replace both AAA batteries.
3. Replace the battery cover.
Note: Inserting the batteries into the remote control while pressing
the Off button will cause the remote control to enter pairing mode and
take a new transmission ID. This will be different to the ID previously
stored on the HeartSine Trainer. If this occurs, it will be necessary to
complete the pairing procedure in full to pair the remote control with
the HeartSine Trainer again. This should not occur during a normal
battery replacement since pairing is initiated only when the Off button
is also held down
Disposal
The HeartSine Trainer is a reusable device. If maintained in accordance with the instructions in this manual it
has a warranty period of two years from the date of manufacture.
The HeartSine Trainer, remote control or remote control batteries should be disposed of at an appropriate
recycling facility according to national, state and local requirements. Alternatively, return the unit to your local
distributor or HeartSine Technologies for disposal.
Disposal within the European Union
Do not dispose of the HeartSine Trainer as unsorted municipal waste: keep the HeartSine Trainer separate, to
be reused or recycled in accordance with Directive 2002/96/EEC of the European Parliament and the Council of
the European Union on Waste Electronic and Electrical Equipment (WEEE) or return it to your local distributor
or HeartSine Technologies for disposal.
The HeartSine Trainer Configuration Tool (titled “TrainerConfig”) enables you to change the default training
scenario, change the volume, pair a remote control with a HeartSine Trainer, or language settings on the
HeartSine Trainer. The HeartSine Trainer Configuration Tool can be downloaded at no cost from the HeartSine
website (heartsine.com). However, you will need the optional HeartSine USB data cable to connect the
HeartSine Trainer to your computer. Contact your Authorized Distributor or Stryker representative directly to
obtain the data cable or with questions about downloading and using the HeartSine Trainer Configuration Tool.
Install the HeartSine Trainer Configuration Tool
1. Download the HeartSine Trainer Configuration Tool from heartsine.com.
2. Open the zipped file.
3. Double-click to run the TrainerConfigTool_setup.exe installation program and click “Run” to open the Set-
up Wizard and follow the instructions for each screen.
Note: Driver files are required to be installed on any PC to which you wish to connect the HeartSine Trainer;
these files will be installed along with the HeartSine Trainer Configuration Tool
Configure your HeartSine Trainer
1. Connect the HeartSine USB cable to the data port on the HeartSine Trainer and to a USB port on the
computer on which you are running the HeartSine Trainer Configuration Tool.
EN-US

32 EN-US Trainer user manual 33
EN-US
Configure your HeartSine TrainerConfigure your HeartSine Trainer
2. Launch the HeartSine Trainer Configuration Tool (TrainerConfig) app.
TrainerConfig
The main screen will appear:
On this screen you can see the device firmware version and the device number, which is the number assigned to
the HeartSine Trainer for purposes of pairing the remote control.
3. Make your desired changes as detailed in the following sections.
4. Click “Exit” to close the program.
Note: HeartSine Trainer Configuration Tool will not launch unless a HeartSine Trainer is connected to your
computer through the HeartSine USB cable
Change the volume
You can change the volume of the prompts and metronome on the HeartSine Trainer. When delivered, the
volume of the HeartSine Trainer will be set to “Max.”
1. In the Speaker Volume box, click to select the volume (“Low”, “Med”, “High” or “Max”).
2. Click “Set Volume.” The software will communicate the change to the HeartSine Trainer.

34 EN-US Trainer user manual 35
EN-US
Change the training scenario
You can change the default training scenario, which will be played when the HeartSine Trainer is turned on.
(Note: If the scenario is changed using the remote control, the last selected scenario will play the next time the
HeartSine Trainer is turned on)
1. In the Scenario Number box, select the number of the default training scenario (1 through 6).
2. Click “Set Scenario.” The software will communicate the change to the HeartSine Trainer.
Pair a remote control with a HeartSine Trainer
Each HeartSine Trainer is assigned an identification number between 001 and 255. The remote control
delivered with the HeartSine Trainer is given the same identification number. This enables two or more
HeartSine Trainers to be used side by side.
In the unlikely event that two devices with the same ID number are being used at the same time, you can assign
a new ID number to the HeartSine Trainer. It will be necessary to pair the device with its remote control after
assigning a new ID number.
1. In the Controller Pairing box, select “On” and click “Set Pairing.”
2. Unplug the USB cable and press the On/Off button to turn on the HeartSine Trainer. The LEDs on the
Attach Pads icon/Action arrows on the HeartSine Trainer will light up to indicate it is in pairing mode.
3. From the remote control you wish to pair, remove the battery cover.
4. While holding down the Off button on the remote control, remove one of the AAA batteries.
5. While continuing to hold down the Off button, replace the battery. The remote control will pair with the
HeartSine Trainer.
Configure your HeartSine TrainerConfigure your HeartSine Trainer

36 EN-US Trainer user manual 37
EN-US
6. When you begin to hear a series of 12 beeps, release the Off button and replace the battery cover.
7. When the beeps have finished, press the Off button again. The HeartSine Trainer will turn off to
indicate the pairing procedure is now complete.
Note: Inserting the batteries into the handheld remote while pressing the Off button will cause the
remote control to take a new transmission ID. If this occurs when the device is not in pairing mode, you
must complete the above procedure to pair the HeartSine Trainer with the remote control again
Change the language on the HeartSine Trainer
You can change the language of the prompts on the HeartSine Trainer to any one of a selection of languages.
1. In the Language Selection box, from the pull-down menu, select the language of the prompts.
2. Click “Set Language.” A progress bar will appear to indicate the status of the programming while the
software communicates the change to the HeartSine Trainer.
3. When the Programming Successful pop-up appears, click “OK.” The language on your HeartSine
Trainer has been updated.
Configure your HeartSine TrainerConfigure your HeartSine Trainer

38 EN-US Trainer user manual 39
Change the CPR duration
You can change the duration of the CPR periods within the training scenarios, to between 30 and 240 seconds.
1. In the CPR Duration box, move the slider to the number of seconds you wish to set for the CPR period (30
to 240). The selected number will appear in the box below.
2. Click “Set CPR.”
Upgrade the device firmware
You can upgrade the firmware (software) on your HeartSine Trainer to the latest version. Be sure to download
the latest Trainer Configuration Tool software from the HeartSine website (heartsine.com).
1. In the Device Firmware box, click “Upgrade.”
EN-US
Configure your HeartSine TrainerConfigure your HeartSine Trainer
Other manuals for samaritan SAM 350P
3
This manual suits for next models
2
Table of contents
Other HeartSine Fitness Equipment manuals
Popular Fitness Equipment manuals by other brands

XULT Fitness
XULT Fitness XT-24-INC Assembly guide

BRONZE GYM
BRONZE GYM MT-006 user manual
Sharper Image
Sharper Image SR410 instructions

Merrithew Health & Fitness
Merrithew Health & Fitness STOTT PILATES Foam Roller quick start guide
Kettler
Kettler MG1041-300 manual
Super Handy
Super Handy GUO097 Operator's manual
