HeartSine Samaritan User manual

samaritan PAD TRAINER
samaritan PAD TRAINER
user manual
user manual
TM
®

H017-001-028-3
ENGLISH
ABOUT THIS EDITION
The information in this manual applies to the samaritan® PAD TRAINER. Information in this document is subject to
change without notice and does not represent a commitment on behalf of HeartSine Technologies.
Information in this document is subject to change without notice and does not represent a commitment on behalf of
HeartSine Technologies. No part of this manual may be reproduced or transmitted in any form or by any means,
electrical or mechanical, including photocopying and recording for any purpose without the express written
permission of HeartSine Technologies.
Copyright© 2006 HeartSine Technologies. All rights reserved.
“ ” is a registered trademark of HeartSine Technologies.
“ ”, and “ ” are trademarks of HeartSine Technologies.
All other trademarks and registered trademarks are the property of their respective owners.
samaritan
Saver SCOPE
SAMARITAN® PAD CONFIGURATION 3
SAMARITAN® PAD 2000-2005 TRAINER 3
PAD Trainer Accessories 4
Installing the Trainer Pad-Pak 4
Turning the PAD Trainer ON and OFF 4
Setup Mode, overview scenarios 5
Choosing a scenario 5
TABLE OF CONTENT
HeartSine Technologies
Programming 6
Choosing language 6
Using the Trainer Pads 6
Charging the PAD Trainer 7
Cleaning 7
Product list 8
www.heartsine.com
2

AHA/ERC 2000
100J-150-J-200J
AHA/ERC 2005
150J-150-J-200J
AHA/ERC 2005
3
60
Shocks
sec CPR Pause
150J-150J-200J
1
120
Shock
sec CPR Pause
150J-150J-200J
Configuration
Label
AHA/ERC 2000
HeartSine Technologies provides you with a fully configurable samaritan PAD system to allow you to comply with your chosen SCA treatment
protocol. Our current devices can be configured to be compliant with the or version of the AHA/ERC guidelines on Cardiopulmonary
Resuscitation (CPR) and Emergency Cardiovascular Care (ECC). You should have been trained in the appropriate version of the AHA/ERC
guidelines and the use of your device configuration. Contact your authorised HeartSine distributor for further information.
®
2000 2005
HeartSine or
SAMARITAN® PAD CONFIGURATION
SAMARITAN® PAD 2000-2005 TRAINER
PAD TRAINER MANUAL
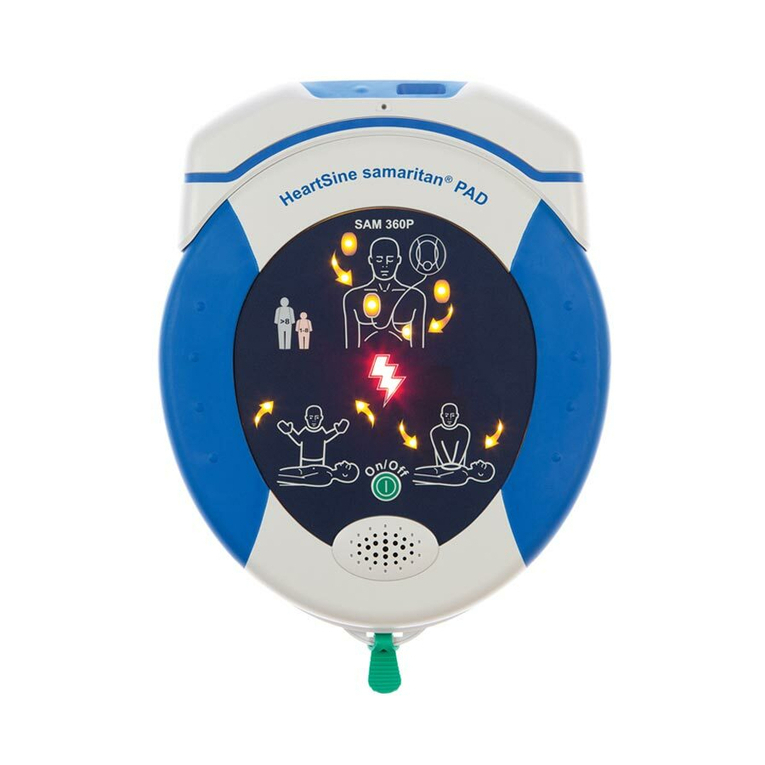
ON/OFF Button
Trainer Placements
PAD Indicator
Position of
Data Port
Position of receptacle for
battery charger
Shock Button
Speaker
Removable Tray and
Training
electrode cartridge
Pause Button
PAD TRAINER 3

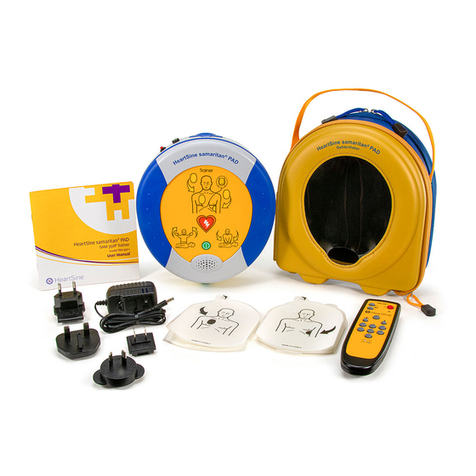
The trainer package includes: One set of samaritan PAD Trainer Pads (accessed by removing tray lid)
Trainer replacement Pads Trainer Charger with multiadapter.
“Install correct adaptor for your outlet style. Press
slide switch on face of charger unit to detach/add the
correct adaptor plug.”
PAD TRAINER ACCESSORIES
HeartSine Technologies
Installing the Trainer PAD-PAK
Ensure that the trainer Pad-Pak is fully
charged. Place the PAD trainer and the
trainer Pad-Pak on a flat surface. Push the
trainer Pad-Pak into the opening and listen
for a “click” sound to ensure that it is properly
inserted.
Press the On/Off Button and listen to the
voice prompts to ensure that the unit is
functioning.
Pressing the Pause Button when a scenario
is playing wil stop the scenario. An LED will
illuminate to show that the pause function is
active. Pressing the Pause Button again will
cause the scenario to resume from
immediately after the voice prompt that was
previously spoken and the LED will go off.
If the PAD Trainer has insufficient charge, it
will not function correctly. Plug charger into
the system to re-charge the system. Unit
may also be operated while plugged in.
Turn on the samaritan PAD Trainer by
pressing the On/Off button. By Default
the Trainer will function in the last
scenario setting used.
Turn off the samaritan PAD Trainer by
pressing the On/Off Button again. After
the PAD Trainer has entered setup mode
the On/Off Button is disabled as the setup
mode automatically switches off. Once
the PAD Trainer has resumed normal
operation in a training scenario the
On/Off Button will function.
To change the scenario played, the
language spoken or the volume level of
the samaritan® PAD Trainer follow the
instructions.
Turning the PAD Trainer ON and OFF
www.heartsine.com
4

CHANGING THE VOLUME
1. Press and hold the Shock Button, and at the
same time press and release the On/Off
button, keep the shock button pressed until
“setup mode” is spoken.
2. Press the Pause Button to change the volume
level of the device. The trainer will emit a
beep and speak a number (1 - 4) at the
selected volume level.
3. Press the Pause Button again to change the
volume level. If the Pause Button is not
pressed to change the volume level within 10
seconds then the PAD trainer will repeat the
volume level number 3 times and shut down.
When the desired volume is selected do not
press any further buttons. The trainer will repeat
the number of the volume three times, then emit
3 short beeps and shut down. Trainer will now
default to the selected volume.
PAD TRAINER MANUAL
SETUP MODE PROGRAMMING
Under 2005 Guideline Scenarios:
Setup mode can only be entered when the trainer is switched OFF. The Samaritan PAD trainer has 8 scenarios to choose from. Scenarios 1-4
are based on AHA/ERC 2005 guidelines and 5-8 are based on AHA/ERC 2000 guidelines.
CHOOSING SCENARIOS
1. Press and hold the Shock Button, and at the same
time press and release the On/Off Button, keep
the Shock Button pressed until “setup mode” is
spoken.
2. Press the shock button to scroll through the
scenarios available (see chart above). The system
will announce “Training scenario” and then the
number of the scenario currently set.
3. Within 10 seconds press the Shock Button again to
change the scenario. If the Shock Button is not
pressed to change the scenario then the PAD
Trainer will repeat the previously selected scenario
number several times and shut down.
When the required scenario number is selected do
not press any further buttons. The scenario number
will repeat a number of times, and the trainer will
emit 3 short beeps and shut down. If the trainer is now
turned on it will play the selected scenario.
No pads attached, SA, CPR 2 minutes
No pads attached, NSA, CPR 2 minutes
No pads attached, Check pads, SA,
SA, CPR 2 min, SA, CPR 2 min, NSA, CPR 2 min
(NSA No Shock Advised); (SA Shock Advised).
2005 Guidelines scenarios
1
2
3
4
No pads attached, SA, SA, SA, CPR 1 min,
SA, NSA, CPR 1 min.
No pads attached, Check pads, SA, SA, NSA,
CPR 1 min.
SA, NSA, CPR1 minute.
No pads attached, SA, NSA, CPR 1 minute.
(NSA No Shock Advised); (SA Shock Advised).
2000 Guidelines scenarios
5
6
7
8
PAD TRAINER 5

SETUP MODE PROGRAMMING
HeartSine Technologies
CHOOSING LANGUAGE
1. Press and hold the Pause Button, and at the same
time press the On/Off Button, keep the Pause
Button pressed until “setup mode” is spoken.
2. Press the Pause Button to change the language.
The trainer will say “Call for medical assistance” in
the possible languages programmed in the device.
3. Press the Pause Button again to change the
spoken language. If the pause button is not
pressed to change the language within 10
seconds then the PAD trainer will repeat the
message in the current language 3 times and shut
down.
When the desired language is selected do not press
any further buttons. The trainer will repeat the
message three times, then emit 3 short beeps and
shut down.
If the trainer is now turned on, it will speak in the
selected language.
USING THE TRAINER PADS
The Trainer Pads are located inside the
Trainer Pad tray. Pull on the green tab (on
the Trainer Pad tray lid) and remove Pads.
The Pads can then be peeled from their
liner ...
... and placed on a Mannequin.
The Trainer Pads are designed to be a single
use component and can be replaced by
disconnecting from the connector on the Pad.
When replaced the Trainer Pads can be
returned to the Trainer Pad Tray. Take care
not to crush the Trainer Pads or cables when
re-inserting the Trainer Pad tray lid. Contact
your local HeartSine Technologies distributor
for Replacement Trainer Pads when required.
www.heartsine.com
6

The charger supplied with the samaritan PAD Trainer
has a yellow button adjacent to the LED indicators on
the charger mains adaptor. This button can be
pressed while the charger is connected to both the
Trainer Pad-Pak and the mains supply to discharge
the Trainer power cells. It is recommended that this
is used to exercise the Trainer power cells from time
to time.
The samaritan PAD Trainer can be used while plugged into an AC
Mains Power supply.
To use the samaritan PAD Trainer while attached to
an AC mains supply, simply connect it to the charger,
plug the charger into a nearby wall socket and
continue training. As an added benefit, your samaritan
PAD Trainer will charge while you are using it.
The PAD Trainer and charger are designed for indoor
use only. Do not use in wet or damp environments.
There are no user-serviceable parts inside your
PAD Trainer or charger. These products should never
be opened. In the unlikely event of a malfunction,
please contact your distributor immediately.
Use only the charger supplied with your samaritan
PAD Trainer. Use of any other charging device will
nullify the warranty.
You may clean your samaritan PAD Trainer with a soft cloth that
has been dampened by one of the following:
or
(70% solution).
CLEANING
. soapy water
Isopropyl alcohol
PAD TRAINER MANUAL
Your samaritan PAD Trainer can be recharged using the charger
supplied. To charge the samaritan PAD Trainer:
1. Plug the charger's power adapter into the
main AC supply. (See charger insert for the
correct adaptor for the AC main supply in your
territory).
2. Insert the charger lead into the charging
socket in the Trainer Pad-Pak.
3. The charger will automatically test for the
ability to accept a charge. This is indicated by
a flashing red LED on the front of the charger
mains adaptor.
4. When the test is complete, the red LED will
remain illuminated for the duration of the
charge.
5. Once the samaritan PAD Trainer is fully
charged the green LED on the charger mains
adapter will illuminate.
When fully charged the samaritan PAD Trainer
will give you approximately 6 hours of usage
before it needs to be recharged You will hear
an audible warning when the battery is nearly
depleted (“Warning. Low Battery”).
If the samaritan PAD Trainer becomes
completely depleted of power, it will shut itself
down.
CHARGING THE PAD TRAINER
PAD TRAINER 7

PRODUCT LIST (SELECTION)
Worldwide Headquarters:
©HeartSine Technologies Inc
105 Terry Drive
Newtown
PA 18940 - USA
Tel: 1.215.860.8100
Fax: 1.215.860.8192
Manufactured by:
©HeartSine Technologies Ltd
Canberra House
203 Airport Road West
Belfast BT3 9ED - Northern Ireland
Tel: +44 (0)28 9093 9400
Fax: +44 (0)28 9093 9401
Authorised Distributor
H017-001-028-3
HeartSine Technologies
TRAINING SYSTEMS & LITERATURE
TRN-SYS-XX-05 PAD Training System, AHA/ERC 2000 - 2005 Guidelines
TRN-PAK-01 Trainer PAK
TRN-ACC-02 Trainer electrodes Set of 10
PLEASE ASK FOR MORE INFORMATION AND ACTUAL PRODUCT LIST
8
Table of contents
Other HeartSine Fitness Equipment manuals
Popular Fitness Equipment manuals by other brands
Trekkrunner
Trekkrunner GM-280 owner's manual
Australian Barbell Company
Australian Barbell Company 6 PAIR RACK Assembly instructions
Keys Fitness
Keys Fitness Dumbbell Rack 3ft KF-DB3 owner's manual
Cortex
Cortex GS9 user manual

TDS Fitness Equipment
TDS Fitness Equipment C8275 Assembly instructions

Homietec
Homietec HTF-010D instructions
