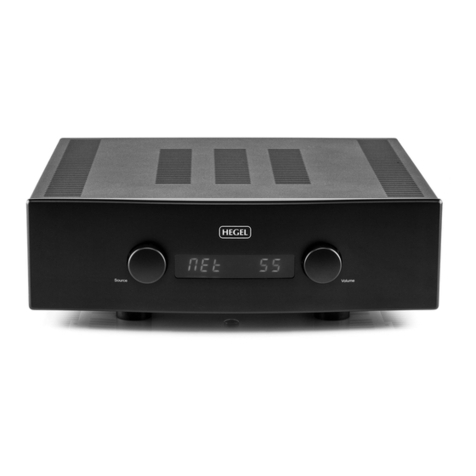
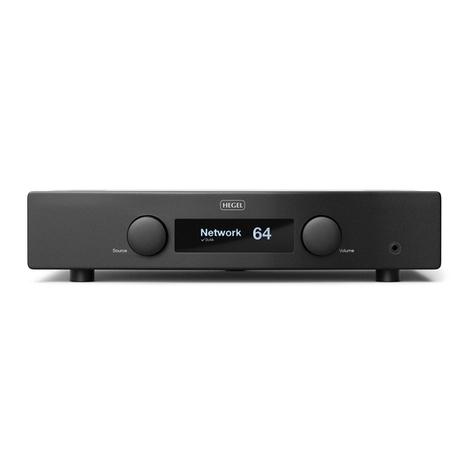
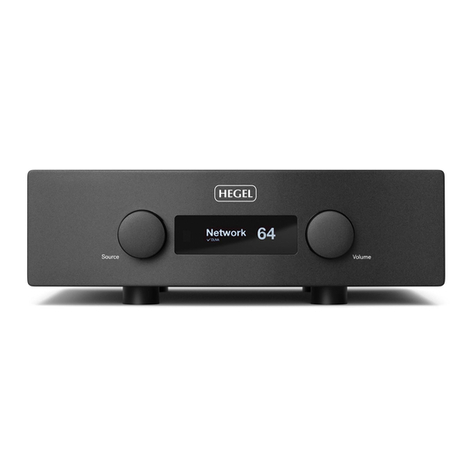
Hegel H190 User manual

H190 User Manual


3
Congratulations, on your new Hegel H190.
All Hegel products are based on a simple
philosophy: Add as little as possible. Keep
the music signal as close to the original as
possible. We always chase lower distortion
and lower noise. The music is reproduced
as close to the original as possible and is
limited only by the quality of the record-
ing. Our aim is to give you the best pos-
sible music experience. Our minimalistic
Scandinavian design is styled to fit in with
any interior. The products shall be easy to
operate and manufactured according to
the best quality principles.
“Hegel H190 replaces the Hegel H160,
one of our all time best sellers, and the first
EISA Award winning product from Hegel.
The new H190 has newer features, up-
dated design and sounds much better. The
new soundengine gives it better woofer
control with a damping factor of more than
4000. A bigger soundstage, more details,
clearer sound and the ability to play loud
longer, on bigger speakers than the H160
could. Hope you enjoy it as much as we
do.”
Bent Holter
Founder Hegel Music System

4

5
A word from Bent 3
What’s in the box 6
Quickstart 7
General Use 11
Connections 12
Network Configuration 13
Using AirPlay 14
Using Spotify 15
Remote Control 16
Special Functions 17
General Information 18
Additional Information 19
Index

6
Amplifier
Accessory Box
Power Cord
User Manual
Remote
Control
What’s in the box

7
Quickstart
1. Connect your speakers
For the best audio experience the distance
between the listener and each speaker should
be the same.

8
Quickstart
2. Connect a source
Unbalanced Analog
Balanced Analog
Coaxial Digital
USB Computer
Network streaming
Optical Digital

9
Quickstart
3. Connect the power cord
4. Turn on the amplifier
Power Switch

10

11
On/Off
The H190 amplifier is switched on and off
with the power button, located on the un-
derside of the amplifier, towards the front of
the unit. When powered up, the H190 takes
a few seconds to calibrate. During this time,
the outputs are muted.
NOTE: When powered up, the outputs are
muted and the right hand part of the display
flashes for a few seconds, indicating mute.
This is normal, and is part of the start-up
procedure.
NOTE: When the H190 has been switched off,
wait 30 seconds before powering on again.
Display
The left side of the display shows the se-
lected source input, while the volume value
is shown on the right side of the display. A
flashing volume value indicates the amplifier
is in mute mode.
Headphone Output
Connect the 6.3mm headphone jack to
the front of the H190. This activates the
headphone volume control and mutes the
speaker outputs.
NOTE: Variable Line Output is still active.
Source Selector
The input source selector knob is on the left
side of the front panel.
Volume
The volume control knob is on the right
side of the front panel. The volume level is
indicated by a number between 0 and 99 on
the right side of the display, with 0 being the
mute level and 99 being max volume. The
H190 powers up with a preset volume value.
The volume level is adjusted by turning the
volume knob clockwise or counter clockwise,
or by using the Hegel remote control.
Mute
Pressing the mute button on the Hegel
remote control mutes the outputs on the
amplifier. The volume number flashes to
indicate that mute is on. Press the mute
button, or adjust the volume level, to switch
mute off.
Status Indicators
The Hegel H190 will display the product status
If it is connected to a network
If there is a network problem
General Use

12
Always power the amplifier off before con-
necting input/output audio cables and the
power cable.
Line Level Outputs
Fixed Line level (RCA)
WARNING High level output.
Variable Line Level (RCA)
Analog Inputs
analog input (Pin 1 is Chassis Ground;
Phase)
If you want to connect Röst to a Home
Theater, see page 16
Speakers
Right outputs
Left outputs
Digital Connections
Computer USB input
AC Power Connection
country.
Connections

13
Use the Network Configuration page to
change the name, the IP settings and up-
date the firmware.
Media devices the Hegel H190 will appear.
If the Hegel H190 does not appear, make
sure the network is setup to hand out IP
addresses automatically. When you click on
the Hegel H190, the Network Configuration
page opens.
-
marks, you will find the Bonjour tab, and
here the Hegel H190 will appear.
If you can’t find the Bonjour tab, select on
(Preferences -> Advanced -> Bonjour) in the
Bookmarks Menu.
Playing Files on a Network Device
The Hegel H190 can function as a DLNA
Digital Media Renderer. This means that
it can receive and play media files from a
UPnP/DLNA compatible media player.
For details on how to set up your media
player, please refer to the user manual
supplied with the player.
The Hegel H190 supports the following for-
PCM (WAV), FLAC, ALAC, Ogg and MP3.
For more tips and tricks about how to use
the H190 with a NAS drive, DLNA players
and other software solutions, go to
www.hegel.com/products/integrated/H190
Network Configuration

14
When using AirPlay on the Hegel H190, you
can send the music stream from your AirPlay
compatible device, to the amplifier. Start
with connecting your Hegel H190 to your
-
of the amplifier, to your router.
Make sure the Hegel H190 is connected to
your local network.
When connected, the unit will set up to
DHCP, and will automatically receive an
IP-address and then integrate in your home
network. All AirPlay compatible devices
will now detect the Hegel H190 in their list
of AirPlay speakers, it will be displayed as
“H190”, followed by a unique number.
To activate the AirPlay function on your AirPlay
compatible device, you must first make sure
the device is connected to the same net-
work as the Hegel H190. For details on this
please check the device manual. Then the
AirPlay icon will be displayed and you can
select the H190. You are now ready to send
the music stream to your amplifier.
Using AirPlay
Playing from iTunes on your Hegel H190.
Install iTunes 11, or later, on your Mac or
Windows computer. Launch iTunes, press
the AirPlay Logo, and select the H190. You
can also play to more than one speaker
at a time, select the AirPlay logo, then
”multiple”and check of the speakers that
you want to listen to. You can also adjust the
volume on each individual speaker.
After selecting the H190 as
the output, always remember to check the
iTunes volume-setting before pressing play.
The H190 will change its volume to the
volume set in iTunes, when iTunes starts
playing to the H190.


16
The Hegel H190 can be controlled with the
included Hegel RC8 Remote Control. The
RC8 controls other Hegel products, such
as amplifiers and preamplifiers, and most
Media players on your Mac/PC, avoiding the
need for multiple remote control device
volt LR03 AAA batteries. To insert the bat-
teries, use a crosshead (Phillips) screw-
driver to gently remove the four screws on
the underside of the remote control.
Insert the batteries with the correct polarity
with + sign and – sign, as shown inside the
battery holder. Be careful when inserting the
batteries to not damage the battery holder.
Replace the cover. Insert the screws by gen-
tly turning them by hand, to avoid damaging
the threads in the remote control chassis.
Do not tighten the screws too much, as this
can damage the screws and the soft metal
chassis of the remote control.
on the floor, as this can damage its internal
parts and the battery holder.
To avoid damage to the remote control by
leakage from the batteries during transport
and storage, the remote control is supplied
without batteries from Hegel.
Remote Control - RC8
Remote control buttons (starting top left)
1. Skip to previous track on most computers/media players
3. Skip to next track on most computers/media players
6. Display on/off (hold for off)
7. Skip to previous track on Hegel CD-players
8. Play/Pause for Hegel CD-players
9. Skip to next track on Hegel CD-players
10. Switches up to next input on your Hegel amplifier
13. Switches down to previous input on your Hegel amplifier

17
Display On/Off
The DISP button on the RC8 remote control
may be used to turn the display of the H190
on or off. Hold the DISP button for more
than 1 second to turn the display off.
Press the button turn the display on.
Home Theater or Standard Analog Input
All inputs can be changed into a Home
Theater input. This will set the Volume at a
fixed high volume level. Use the RC8
remote to change the settings. Hold
computer play until the setup menu
appears. Use computer prev/next to
navigate to “HT” and press computer play
to select this submenu. Now use computer
next/prev to maneuver to the input you want
to change into a fixed level input. Press
computer Play to toggle between a fixed
level input or normal variable input. Now
H190 will return to normal mode.
the volume at a high fixed level. This may
harm your speakers if a fixed level input is
connected.
Set Power Up Volume
A user defined volume value may be used as
the power-up volume. The current volume is
set as the power-up volume by pressing and
holding the DAC+ button while pressing Vol-
on the RC8 remote control.
Reset to Factory Default Settings
By pressing and holding the DAC+ button
while pressing Mute on the RC8, the H190
will be reset to factory settings. This will
clear all user defined settings, including IP
settings, and reinitialize the H190.
Max Volume
A user defined volume value may be used as
the max volume.
The current volume is set as the max volume
by pressing and holding the DAC+ button
while pressing Vol+ on the RC8 remote
control. To reset, put to max voulme, press
and holding the DAC+ button while pressing
Vol+ on the RC8 remote control.
Using the USB Connection:
When you connect H190 to a computer
with a USB cable (not included), the H190
will automatically install itself as a USB
soundcard on all newer versions of Win-
versions of Linux.
When your computer is connected with
the USB-cable you may use the supplied
remote control to skip/play/pause in most
media players.
The first time you connect your computer to
and close all media players, such as iTunes
or Windows Media Player.
H190 connected but no sound out of the
w/ SPDIF” as the Output Device.
24 bit Audio:
-
nals, from your computer, may require some
set-up in your media player. Setup varies
depending on the operating system and the
media player. Consult the FAQ section of the
media player for details.
No additional set-up is needed.
Special Functions

18
Transport and Shipment
If you are packing the amplifier for shipping,
please follow these instructions to avoid
Be careful not to hold the volume- and
source-knobs when lifting the amplifier.
Put the plastic bag around the amplifier.
Make sure that the plastic bag does not
press tightly on the knobs as this may
damage them during transportation.
Make sure the bottom shock absorber is
placed at the bottom of the original card-
board box.
Place the amplifier into the shock absorber.
Place the top shock absorber on top of the
amplifier.
Make sure the plastic bag is still loose
around the volume and source knobs to
avoid any damage to the knobs during
transport. Close the cardboard box using
a suitable tape.
Cleaning
Fingerprints or stains on the front panel or
top cover can be removed with a cloth moist-
ened with warm water or a mild detergent
suitable for cleaning mirrors and windows.
Technical Specifications
H190 Integrated Amplifier
Power output
Analog Inputs
Digital
Line level
Frequency
Signal-to-noise ratio More than 100dB
Crosstalk Less than -100dB
Distortion Less than 0.01% @
Intermodulation Less than 0.01%
Damping
(main power output stage)
Dimensions
(HxWxD),
19kg shipment weight.
(HxWxD),
General Information

19
Warning
Hegel products should only be opened
or serviced by certified technicians. The
devices contain electronic components
that may cause severe electric shock. Work
performed on Hegel products by unquali-
fied personnel may cause serious damage
or personal injury.
Opening of the product by non-authorized
personnel will void the guarantee.
The products must not be exposed to rain
or moisture.
Warranty
warranty against defective materials and
workmanship.
In case you would need any assistance with
your Hegel product please find your nearest
dealer or distributor by looking at the Hegel
-
rience any problems locating your dealer or
More Information
For more information, please visit
www.hegel.com/products/integrated/H190
Use and Placement
hard surface for proper cooling. The amplifier
performs best after being switched on for
about 1 hour for heating up. A certain space
is required for air circulation above and
below the amplifier. The amplifier must never
be placed on a carpet or similar surface that
obstructs air circulation through the unit. Nor
must it be covered while in use or placed on
a narrow shelf or in another confined space.
The amplifier will automatically switch itself
off if overheated.
Never lift the H190 by holding around the
volume knob or input selector knob. The
H190 is heavy, and applying pressure may
damage the knobs.
AirPlay works with iPhone, iPad and iPod touch with iOS
“Made for iPod,” “Made for iPhone,” and “Made for iPad”
mean that an electronic accessory has been designed to
connect specifically to iPod, iPhone, or iPad, respec-
tively, and has been certified by the developer to meet
Apple performance standards. Apple is not responsible
for the operation of this device or its compliance with
safety and regulatory standards. Please note that the use
of this accessory with iPod, iPhone, or iPad may affect
wireless performance.
AirPlay, iPad, iPhone, iPod and iPod touch are trade-
marks of Apple Inc., registered in the U.S. and other
Additional Information

www.hegel.com
Other manuals for H190
1
Table of contents
Other Hegel Amplifier manuals
Popular Amplifier manuals by other brands

Aura Audio
Aura Audio D2Q manual
ButtKicker
ButtKicker BKA1000-P owner's manual

Kenwood
Kenwood XXV-02A - 25th Anniversary Products... Service manual

AEM
AEM LSA150-001 Installation and operation manual supplement
Krell Industries
Krell Industries Preamplifier PAM-5 owner's manual

Monacor
Monacor PA-3120 instruction manual


