HEIRLOOM Artos Wall Series User manual

Artos Wall NZAust v1.3
ARTOS WALL SERIES TOWEL WARMER
The Advanced Art of Towel Warming
Operation
Your ARTOS Towel Warmer uses only minimal electrical power - about the same as an average light bulb. It will take
approximately 20-30 minutes to reach maximum operating temperature. For best results, only two - three generous
sized towels should be heated at one time. The heat of this unit may increase significantly if overloaded with an
excessive number of towels. NOTE: The temperature of your towel warmer will vary with the ambient temperature of
your room. As a result of this the warmer will feel hotter to touch during warmer periods. A towel warmer is designed
to warm and assist the drying of towels and will normally operate at a temperature that is too hot for the warmer to be
grasped for an extended time
Locating Instructions
Detailed installation instructions are provided on the reverse side. The ARTOS Towel Warmer should be fixed through
the wall cladding directly to studs or other suitable anchor material. It should be at least 55mm below the ceiling or any
overhanging surface and at least 300mm above the floor or 40mm above counter top and should not in any
circumstances be located in the direct path of a water source (tap or shower etc)
Electrical Installation
Please ensure your towel warmer is installed by a registered electrician and ensure the electrical supply, plug & switch
location, and product location will comply with your local regulations.
New Zealand electrical wiring requirements stipulate that this appliance must be wired by a registered electrician in
accordance with current electrical wiring regulations. This appliance must be fitted with an air gap phase isolation
switch which isolates the phase & neutral in accordance with local wiring regulations. This product must be used in
conjunction with a hard wired switch.For greater temperature control a wall mounted dimmer switch (with “off”
position) is recommended.
Care and Cleaning
All components are made from high quality materials. The finish of your Towel Warmer is hard wearing and easily
maintained. Clean with a soft cloth and non-abrasive cleaning agent as required to keep the warmer in good condition.
Warranty
This product is warranted against defects due to faulty workmanship or materials for 10 years from date of purchase.
In the event of a defect in the product, turn it off at the wall, and contact the retailer from which it was purchased and
provide details from your sales receipt and the products serial number from the label on the towel warmer. The retailer
will contact Heirloom who will assess the matter and if accepted as a valid warranty claim the product will be repaired
or replaced at Heirloom’s option – free of charge. Costs of disconnection, reconnection, and freight are the
responsibility of the owner, as is any damage arising in transit to and from servicing by Heirloom. This warranty does
not cover:
a. Any damage to the product caused by misuse, neglect, accident, or in violation of the manufacturer’s
instructions, or
b. Any damage, loss or injury arising as a consequence of the use of the product.
Australia: Our goods come with guarantees that cannot be excluded under the Australian Consumer Law. You are
entitled to a replacement or refund for a major failure and compensation for any other reasonably foreseeable loss or
damage. You are also entitled to have the goods repaired or replaced if the goods fail to be of acceptable quality and
the failure does not amount to a major failure.
Heirloom International Limited, P O Box 204 235, Auckland 2161, New Zealand.
Contact Us
We welcome your feedback on our products. You can view our full range of towel warmers on our website and send us
your comments about this product using the Contact Us page on our website www.heirloom.co.nz
Artos Wall NZAust v1.3
INSTALLATION OF ARTOS WALL SERIES TOWEL WARMER
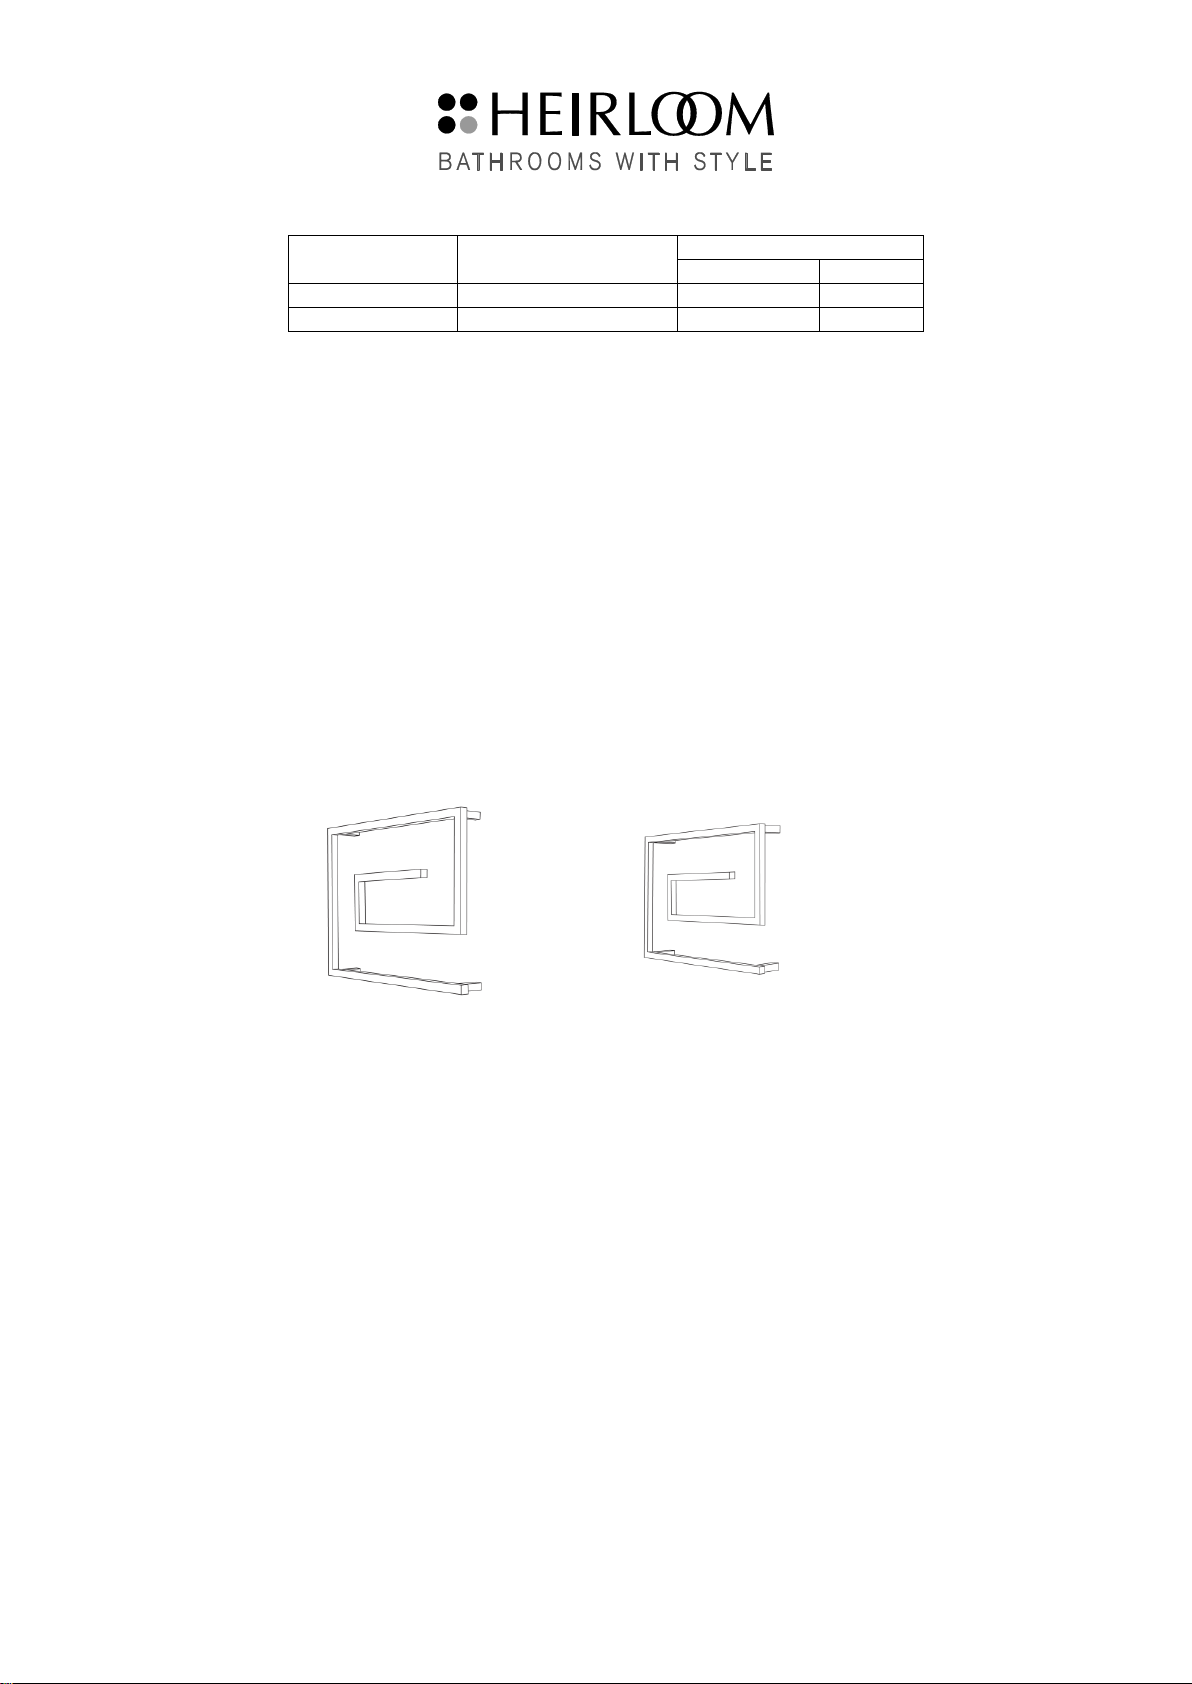
SPECIFICATIONS
Voltage
Model WA600W
Artos Wall
107 Watts
240 VAC
Model WA490W
Artos Wall
77 Watts
240 VAC
This Package Contains:
1 Towel Warmer and Leg Kit Mounting Barrels & Screws Mounting Template (Paper)
CAUTION
Prior to installation please ensure the product is to your satisfaction. Once installed Heirloom cannot be responsible for defects in
the product finish. This product is not intended for use by young children or infirmed persons without supervision. Young
children should be supervised to ensure they do not play with the product. If the supply cord is damaged it must be replaced
by the manufacturer, its service agent, or similarly qualified persons in order to avoid a hazard.
Installation:
Please ensure your towel warmer is installed by a registered electrician and ensure the electrical supply, plug & switch location,
and product location will comply with your local regulations. We recommend that the towel warmer be installed on a flat and
uniform wall, and into studs or other suitable anchor material. While not recommended, if fixing to hollow cavity walls, Toggle
Anchors or similar devices must be used.
Position the towel warmer so that the plug and mains power receptacle are easily accessible, with the cable entry to the towel
warmer NEAREST THE FLOOR. Avoid the supply cable coming into contact with the heated parts of the towel warmer.
DO NOT CONNECT THE UNIT TO THE POWER SUPPLY BEFORE INSTALLATION IS COMPLETE.
WA600W WA490W
1. If the towel warmer is to be installed with concealed wiring the concealed wiring instructions below should be followed for
the first leg mount. Thereafter revert to these instructions at point 2 below, and use the template to position the other
three legs once the template has been aligned with the concealed wiring fixing point.
2. Attach the legs to the warmer
3. IMPORTANT: Leg Location: Check that the distance from left to right side of the template matches the towel warmer.
Place the towel warmer onto the template so that the top legs of the towel warmer align with the top fixing points on the
template. Adjust the markings on the template to match the towel warmer if necessary (if the template is more that 3mm
out). Repeat for the width of the bottom legs.
Do not adjust the template for the vertical spacing between legs from top to bottom. If however the vertical distance is
more than 8mm different from the template contact Heirloom for installation advice
4. Place the enclosed paper template on the wall with removable tape holding all four sides in place. Make sure the marked
fixing points are level both horizontally and vertically. Mark the centres of each fixing point (If mounting with concealed
wiring then first align the template with the leg that has the concealed wiring point)
5. Drill the holes through the wall cladding into a stud, fix the mounting barrels and place the warmer legs onto the
mounting barrels. This may require gentle force to adjust the spacing of the legs to match the mounting barrels
6. Once the towel warmer is in position, secure the warmer in place with the grub screws
Artos Wall NZAust v1.3
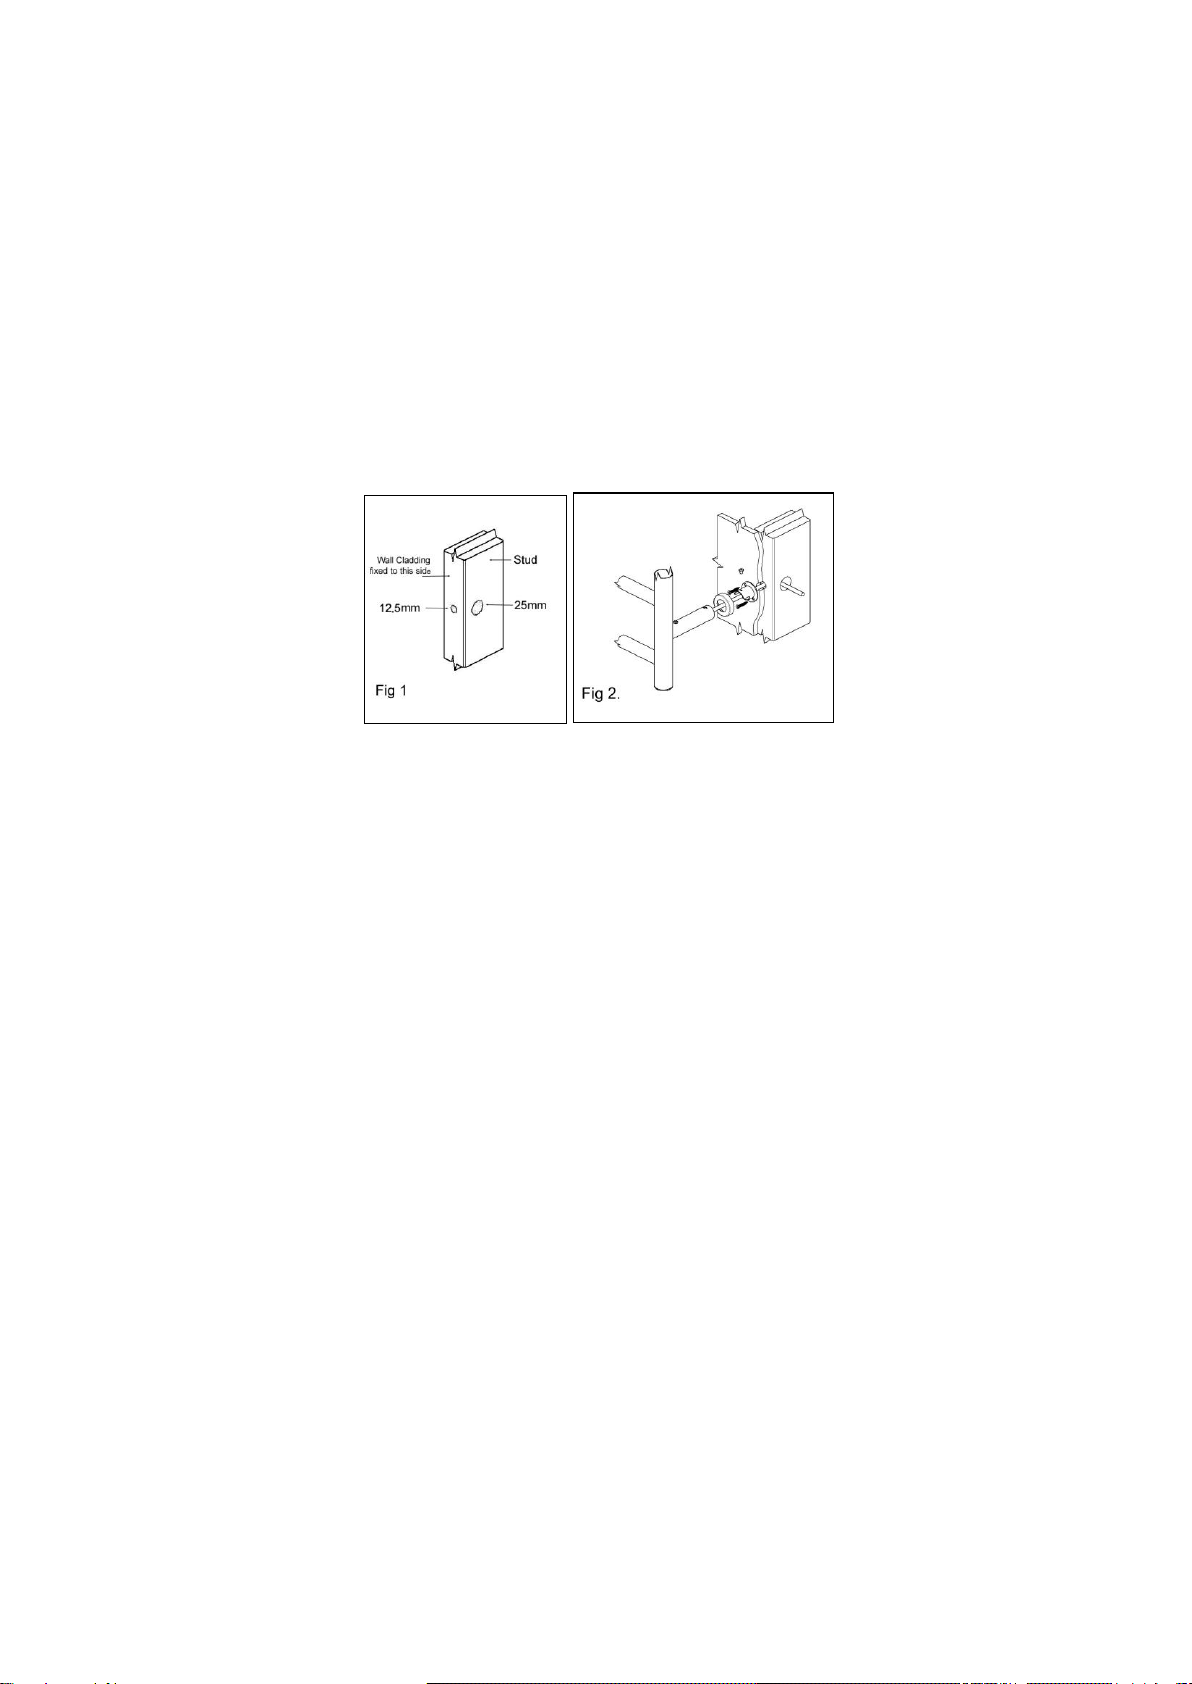
Concealed Wiring Option Instructions:
.
1. Ensure that the flush box that the towel warmer will be wired to can be reached by the flex from the
mounting position of the towel warmer. Allow for loss of flex length due to connections.
2. Drill a 12.5mm hole into the face of the stud where the towel warmer foot with the flex is to be
positioned. Drill the hole approximately 25mm deep. (On masonry walls drill a 14mm hole.)
3. Identify the side of the stud facing the flush box that the towel warmer will be wired to. On that side of
the stud, drill a 25mm deep hole at right angles to this first hole so that the hole will break into the base
of the first hole. Refer to Fig1.
9. Place a pull through line from the flush box and out the 12.5mm hole so that the line can be picked up later
once the wall cladding is in place
10. When the wall cladding is installed a hole will be required to provide access to the above 12.5 mm hole in
the stud. Locate the pull through and leave hanging out of the hole that has been created in the wall cladding.
(NOTE: care must be taken to ensure that the hole created in the wall cladding is a lesser diameter than that
of the towel warmer leg to ensure that the hole in the cladding will be concealed by the towel warmer leg
when it is fixed into position)
11. When installing the towel warmer, thread the pull through line, through the concealed mounting adaptor and
screw the mounting adaptor into position. The pull through line should now exit through the concealed
wiring adaptor. (On masonry walls epoxy resin the adaptor into position). (refer Fig 2)
This manual suits for next models
2
Table of contents
Other HEIRLOOM Food Warmer manuals


Popular Food Warmer manuals by other brands


Wells
Wells MOD-200TDMAF owner's manual

Maxi-matic
Maxi-matic Elite Gourmet EWM-6122 instruction manual

Alto-Shaam
Alto-Shaam HALO HEAT 100-PC Operation and care manual

Alto-Shaam
Alto-Shaam Halo Heat 100-HW/D6 Installation and operation guide

Alto-Shaam
Alto-Shaam TY2-96 Specification sheet

WarmlyYours
WarmlyYours Infinity Installation & operation manual

mr. steam
mr. steam W500 Installation & operating instructions

Alto-Shaam
Alto-Shaam HALO HEAT ED2-96 Specification sheet

Alto-Shaam
Alto-Shaam HN2-48 Specification sheet

mr. steam
mr. steam WX24 Installation and operating instructions

Alto-Shaam
Alto-Shaam EC2-48 Specification sheet

Goldmedal
Goldmedal 2252 instruction manual