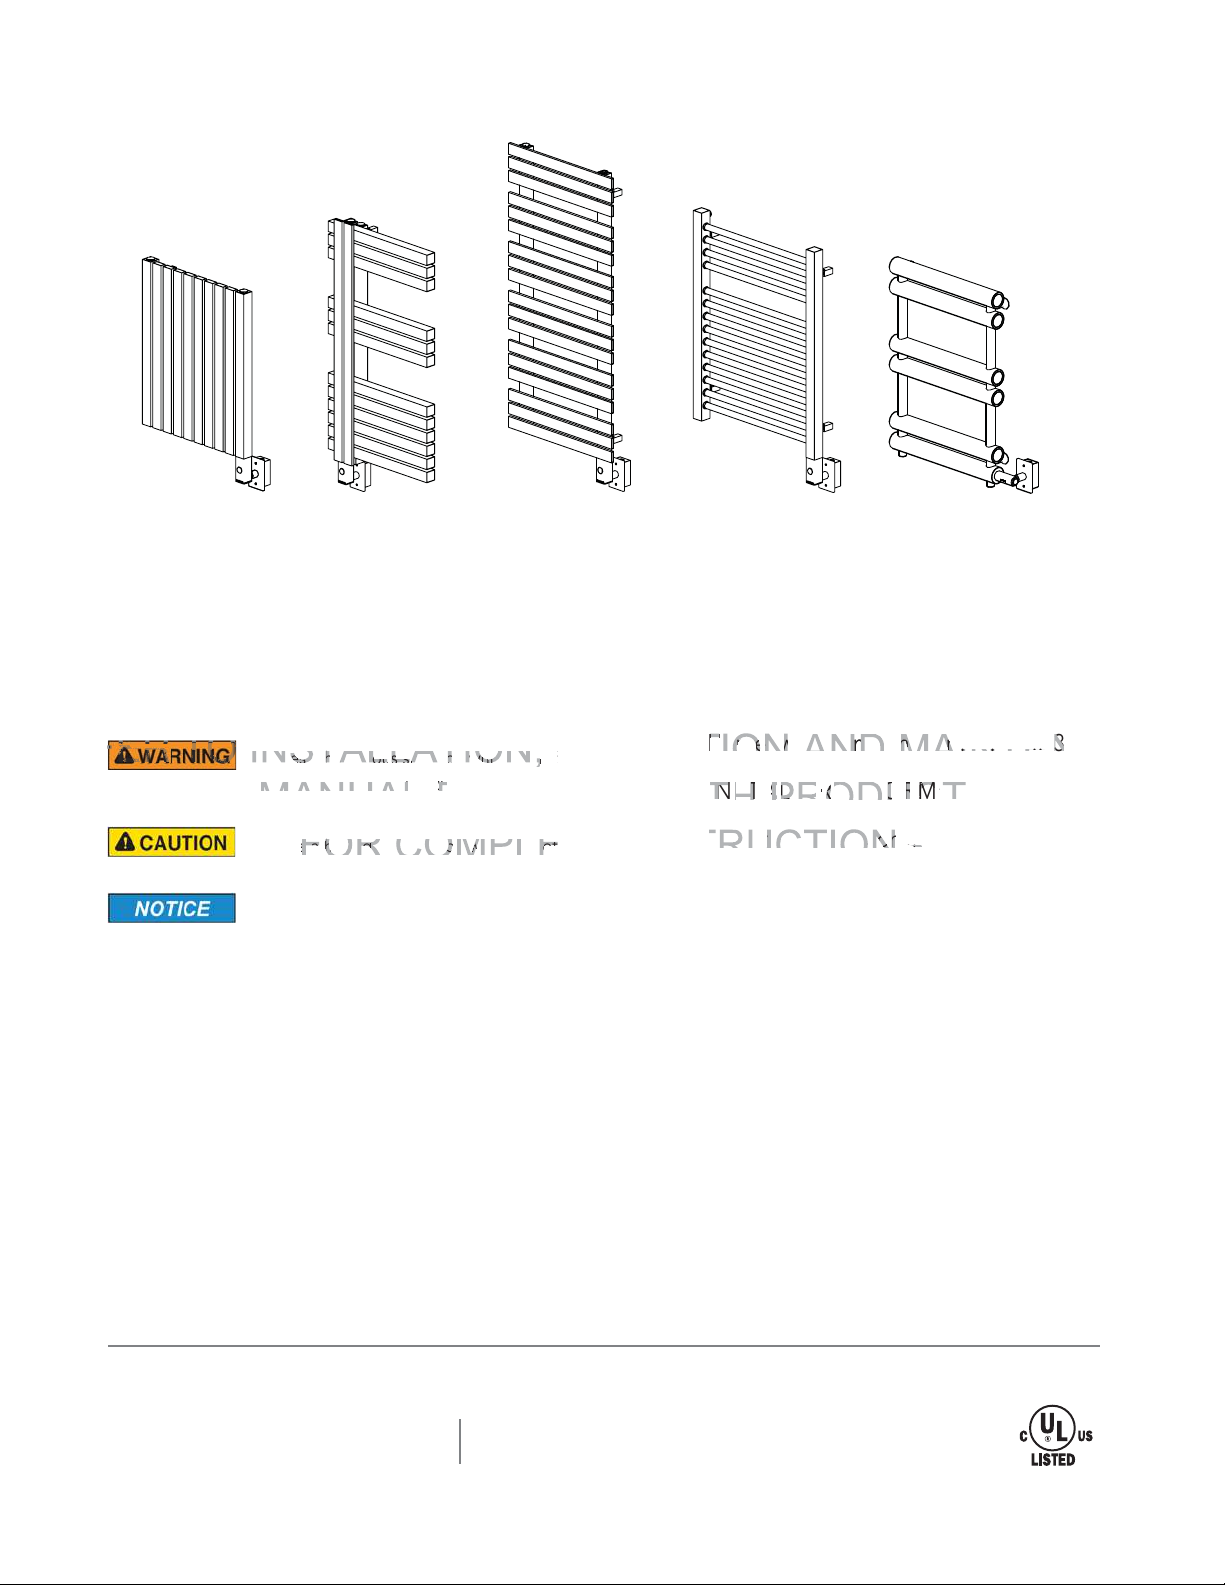
mr.steam®Electric Towel Warmers Installation and Operating Instructions
________________________________________________________________
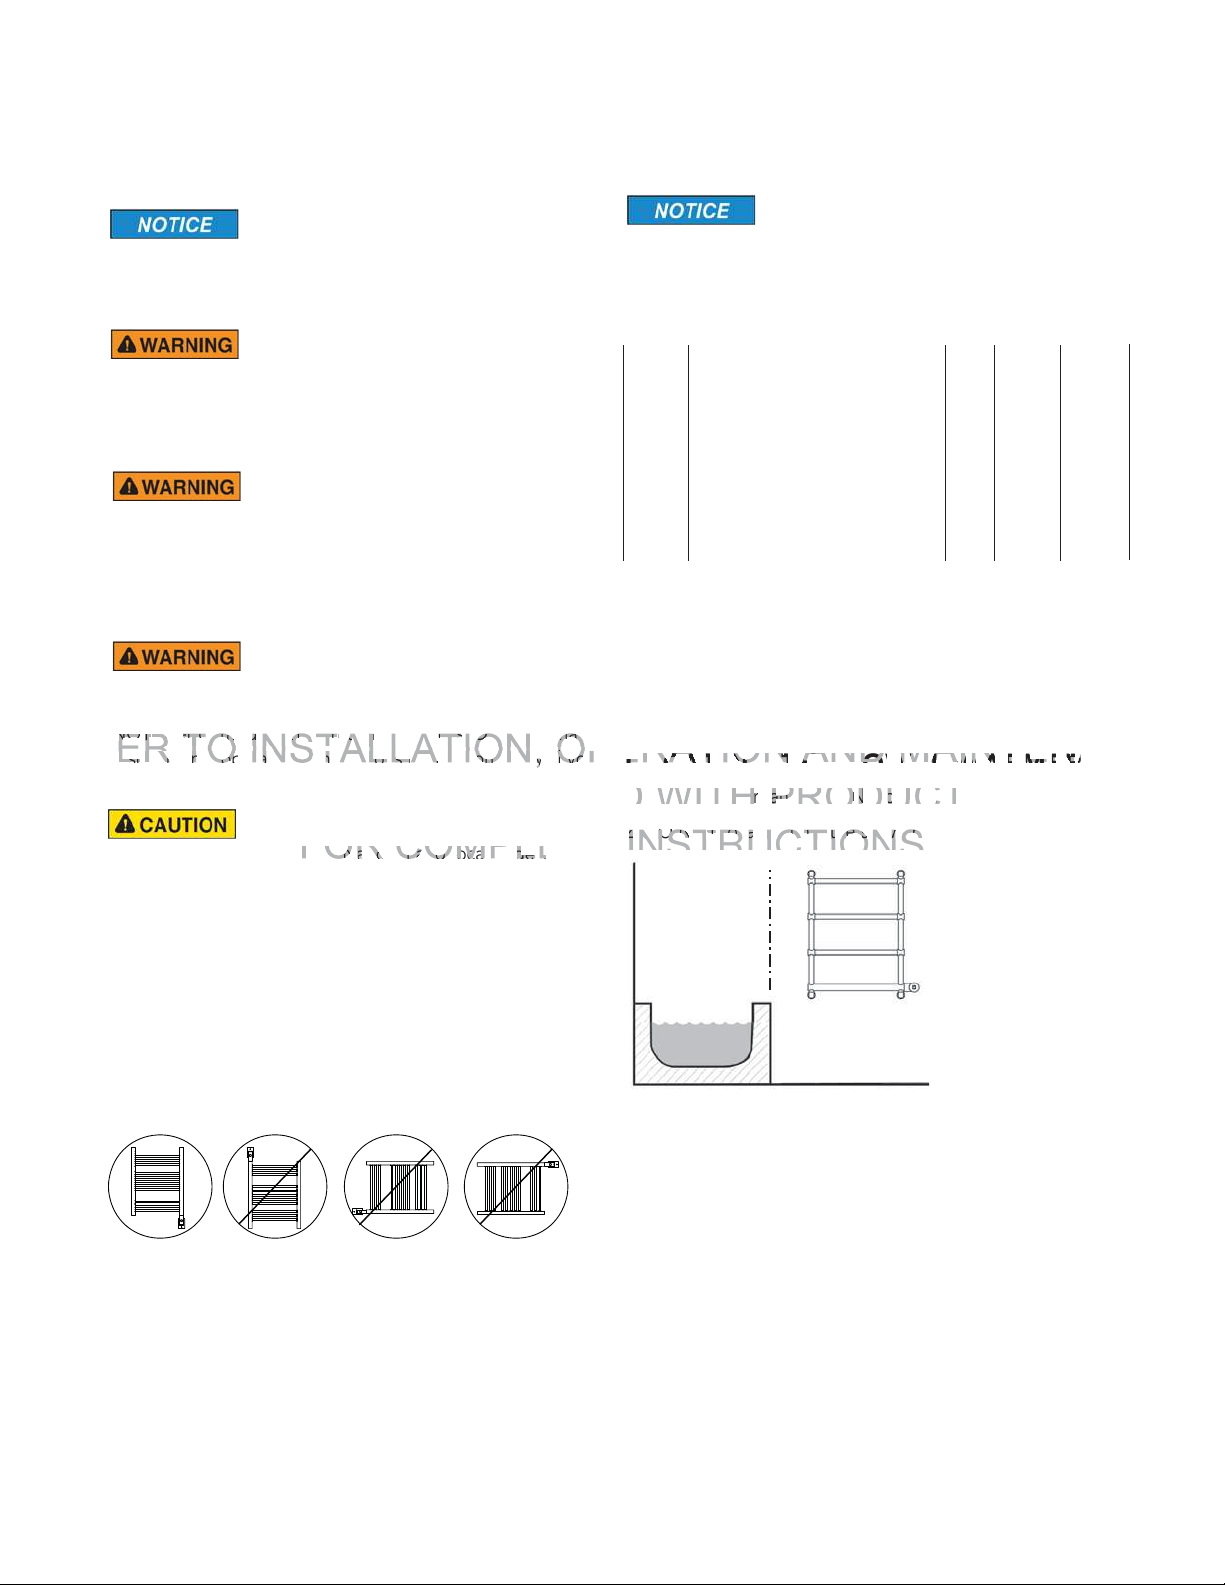
LOCATING THE TOWEL WARMER
1. Install in accordance with National and local codes.
2. DO NOT locate within the shower or tub zone.
3. Locate the Towel Warmer where incidental or unintentional
contact will not occur. Towel Warmer are HOT!
4. DO NOT locate in any space where children are active.
Children should not use the Towel Warmer. Towel
Warmers are HOT! DO NOT climb on the Towel Warmer.
DO NOT use the Towel Warmer as a step stool or ladder.
5. DO NOT Locate the Towel Warmer in any location it may
be used to support a persons weight. DO NOT climb on
the Towel Warmer as a step stool or as a ladder.
6. DO NOT hang anything on the Towel Warmer other than
a suitable heat resistant towels or garments. DO NOT
mount or hang anything from the Towel Warmer.
INSTALLER INFORMATION:
_____
_____________________________________________
READ THIS ENTIRE INSTRUCTION
MANUAL THOROUGHLY BEFORE BEGINNING
INSTALLATION. LEAVE THESE INSTRUCTIONS WITH
HOMEOWNER.
Towel Warmers are constructed of steel
and are liquid filled. They are heavy, with some models
approaching 60 lbs. Use methods and manpower as re-
quired to insure personal safety and to avoid property dam-
age when handling and installing MrSteam Towel Warmers.
BE CERTAIN ELECTRICITY IS SHUT OFF
AT MAIN PANEL BEFORE WIRING OR SERVICING THE
TOWEL WARMER. Follow instructions to make certain the
Towel Warmer is properly attached to the wall. FAILURE TO
FOLLOW THESE STEPS COULD RESULT IN HAZARDOUS
CONDITIONS.
To avoid possible fire hazard, the Towel
Warmer must remain in its intended position. MOUNT THIS
UNIT ONLY AS SHOWN IN THESE INSTRUCTIONS. DO
NOT alter or modify any MrSteam products. Doing so may
result in an inoperable or hazardous installation and will void
the warranty.
1. Install in accordance with National and local codes.
2. Do not place units inside a shower, sauna, steam room or
wherever unit would be exposed to water.
3. Do not locate within the shower or tub zone.
4. All models are to be protected by dedicated and
suitably rated GFCI circuit breaker or equal.
TO ENSURE CORRECT INSTALLATION OF THE TOWEL
WARMER, FOLLOW ALL THE INSTRUCTIONS CAREFULLY,
OBSERVING THE “WARNING”, “CAUTION” and “NOTICE”
NOTATIONS FOR EACH STEP.
Inspect Towel Warmer
Unpack the Towel Warmer carefully to avoid any damage
or loss of any part. When opening the box be sure that the
parts are not accidentally discarded. Towel Warmers are
shipped in specially designed shipping cartons. The entire
surface of the Towel Warmer is hand-wrapped to protect the
finish. It is your responsibility to immediately inspect for
any damage or lost parts.
4
Shower/Tub
Zone
For illustrative purposes only
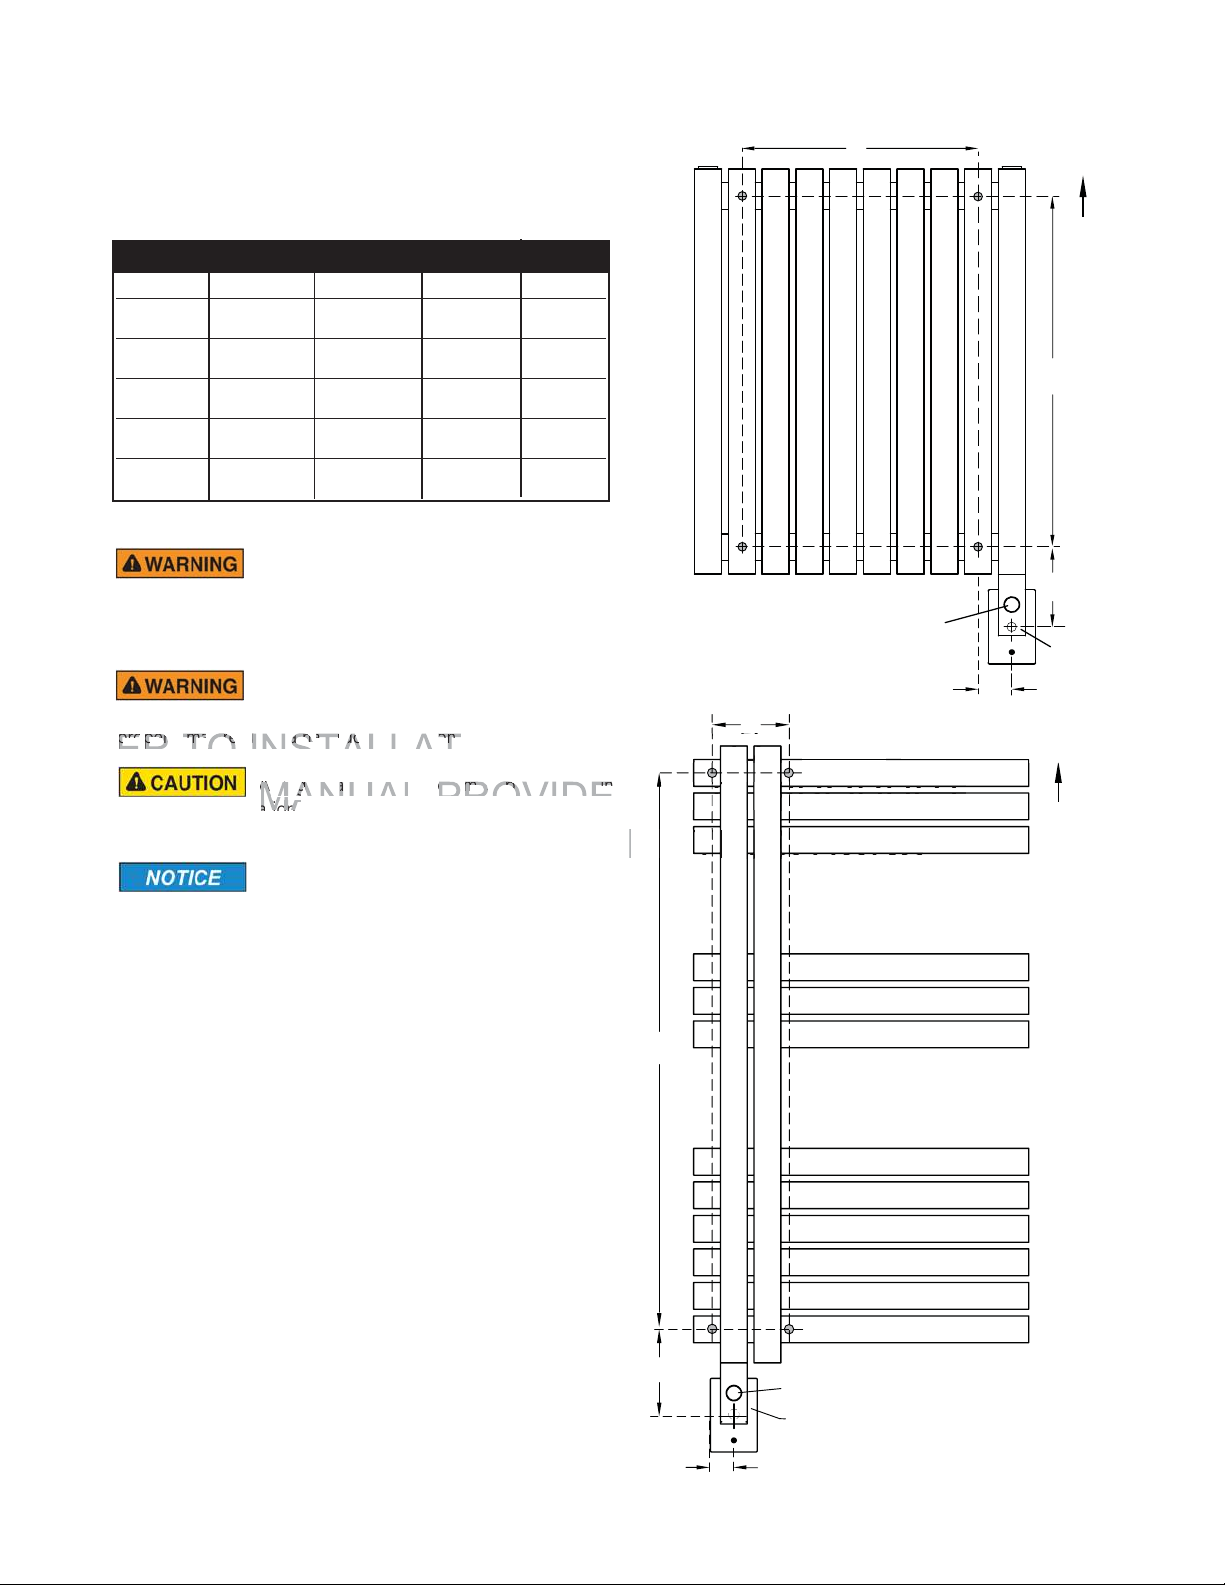
Table 1: TOWEL WARMER SPECIFICATIONS
__________________________________________________________________
Model Dimensions (inches) Volts Weight
No. W x H x D Amps /Phase (lbs.)
__________________________________________________________________
WX24 19 1/4 x 23 5/8x1
1/22.5 120/1 28
__________________________________________________________________
WX36 19 3/4 x 36 1/4 x 3 1/83.3 120/1 57
__________________________________________________________________
WX41 19 3/4 x 41 x 1 1/23.3 120/1 48
__________________________________________________________________
WX29 22 7/8 x 29 1/2 x 1 1/22.5 120/1 28
__________________________________________________________________
WX27 19 3/4 x 27 3/4 x 2 3/82.5 120/1 27
__________________________________________________________________
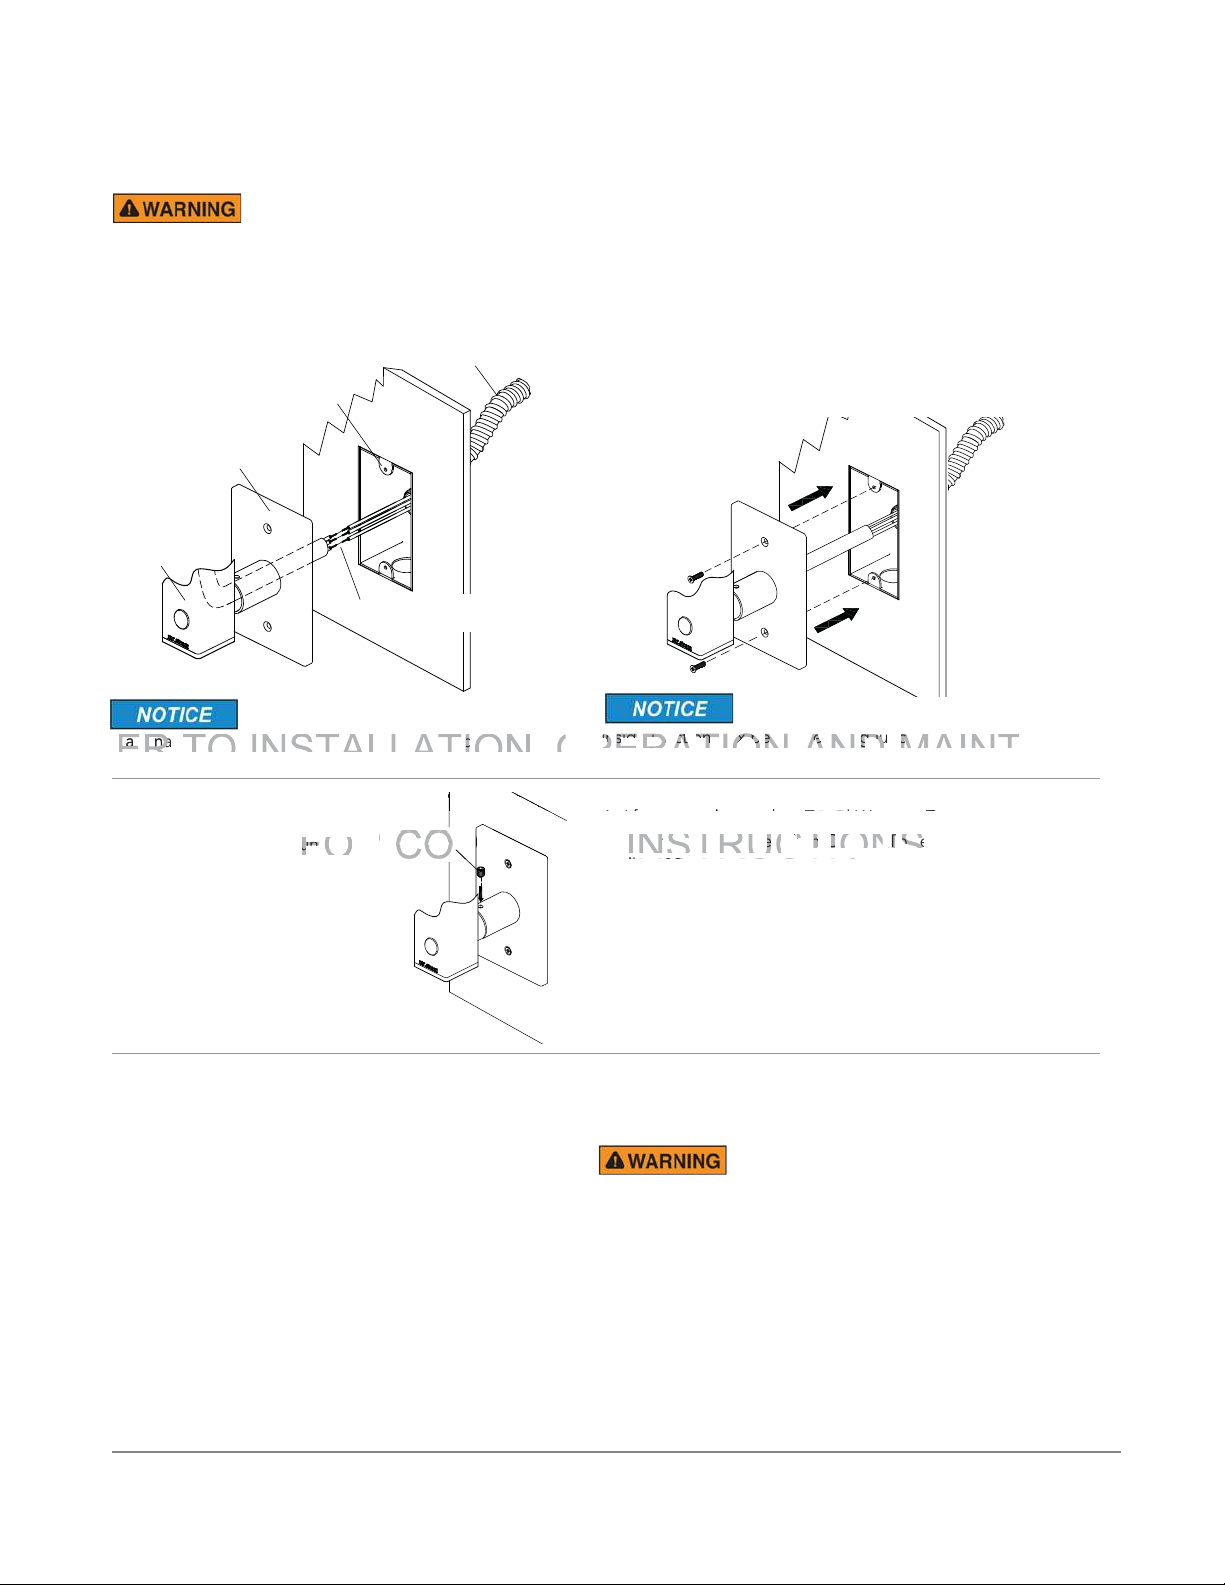
NOTE: All switches and control devices must be installed on
the load (black) side of the Towel Warmer circuit in compli-
ance with the National Electric Code and Local Codes. (see
pages 8 & 9 for installation instructions)
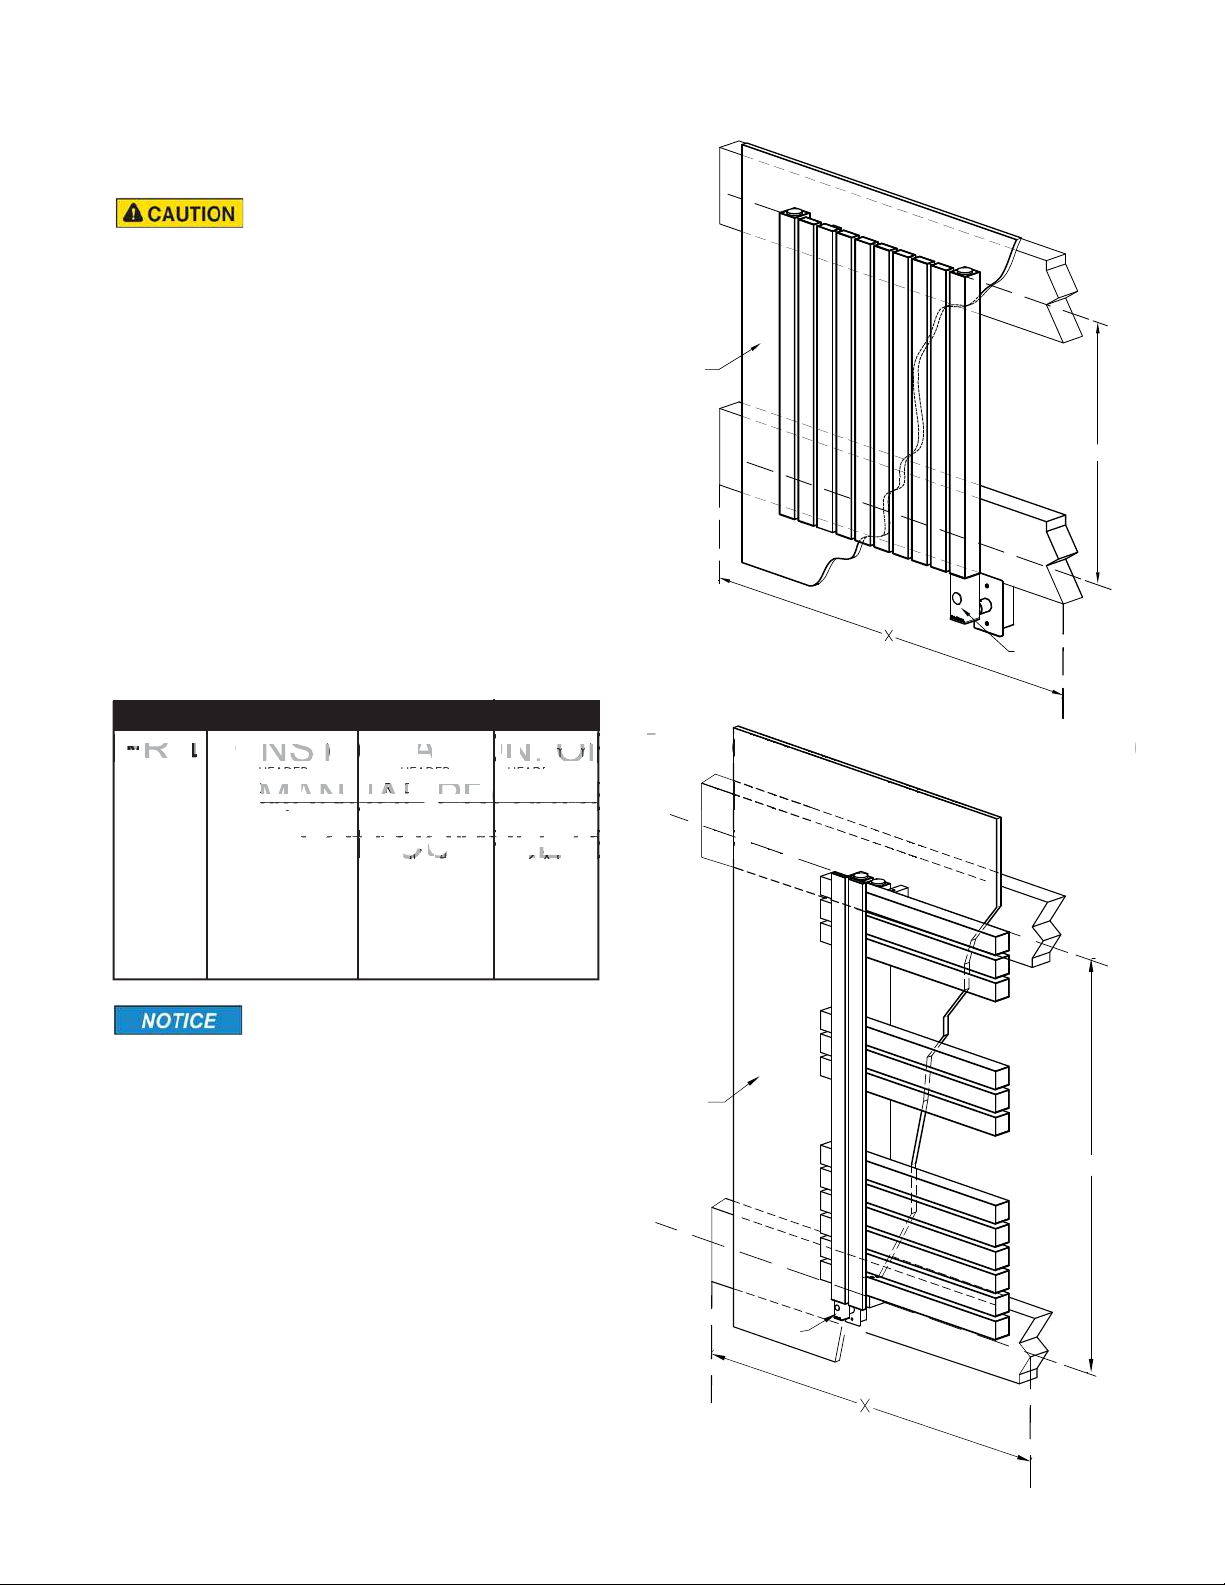
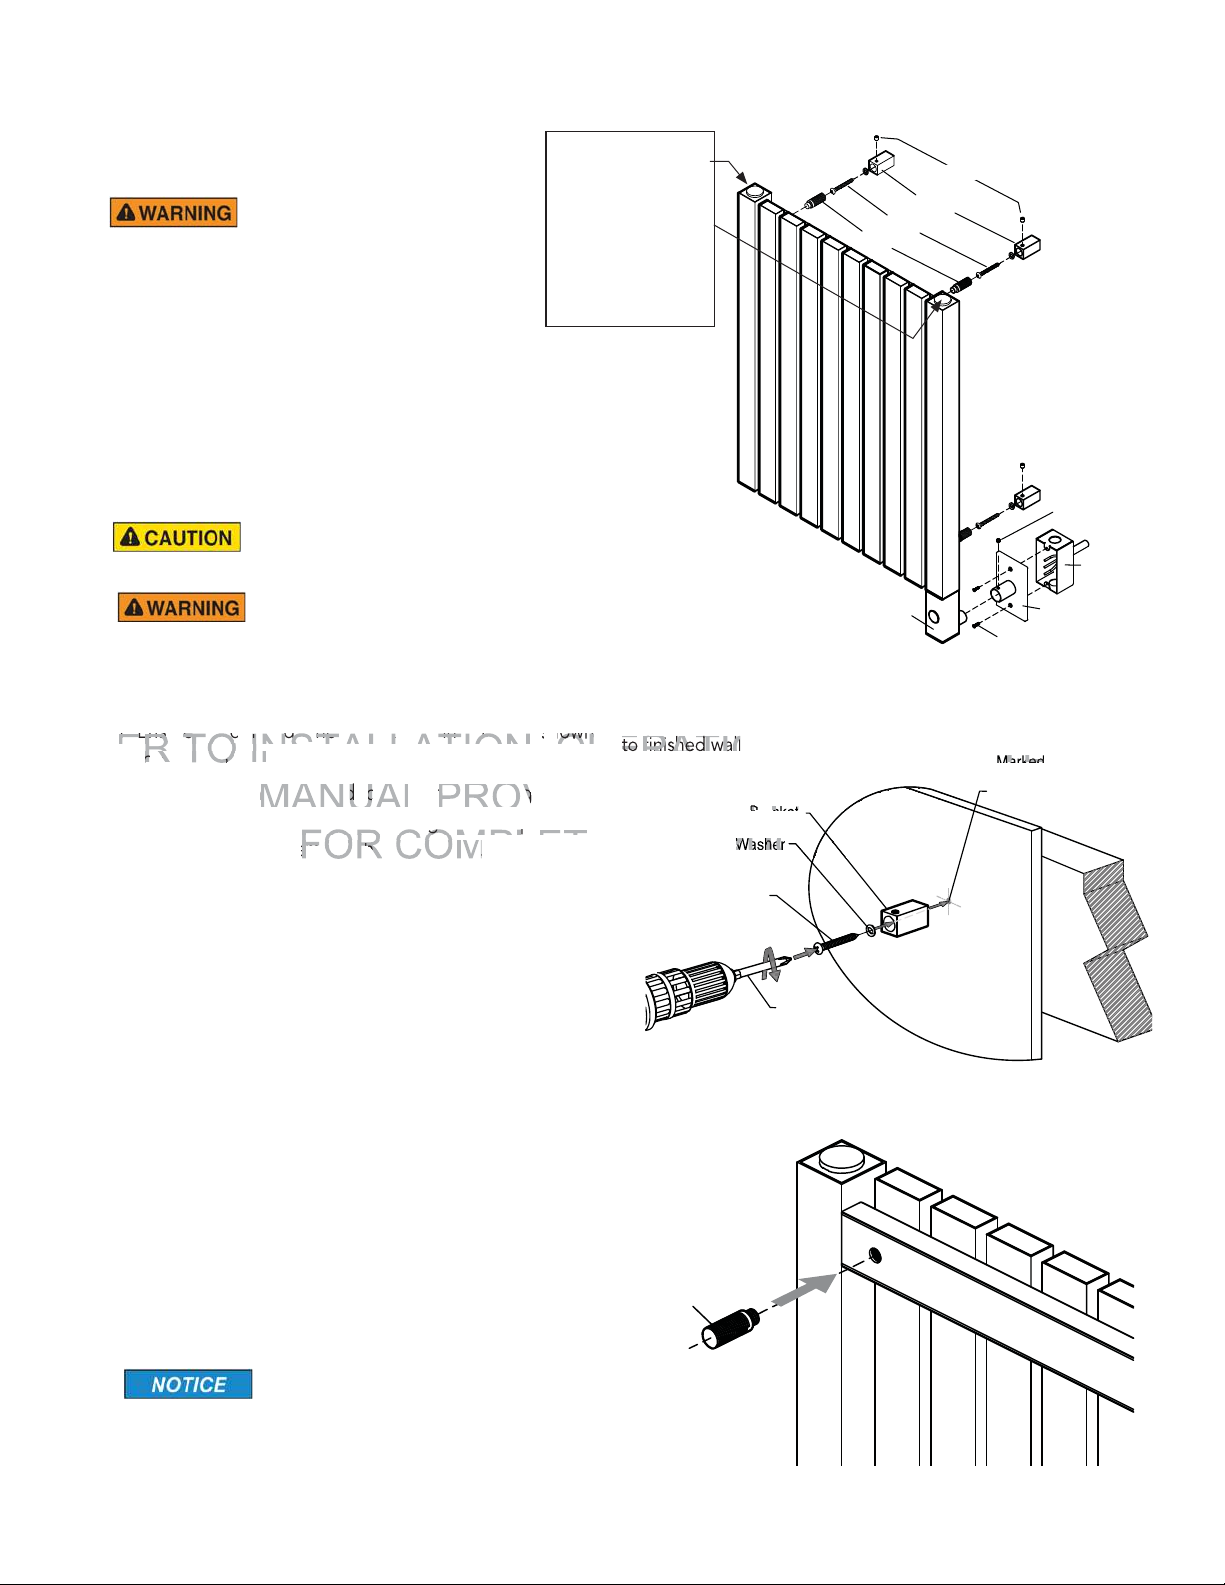
DO NOT LOOSEN SCREWS ON TOP
OR BOTTOM. LOOSENING SCREWS WILL CAUSE INTERNAL
LIQUID TO ESCAPE AND CAUSE PRODUCT DAMAGE.
Correct Wrong Wrong Wrong
.
rable or hazardous installation and
rable or hazardous installation and w
AN
AL
1.
ll in
n
wi
h N
i
n
l
n
l
.