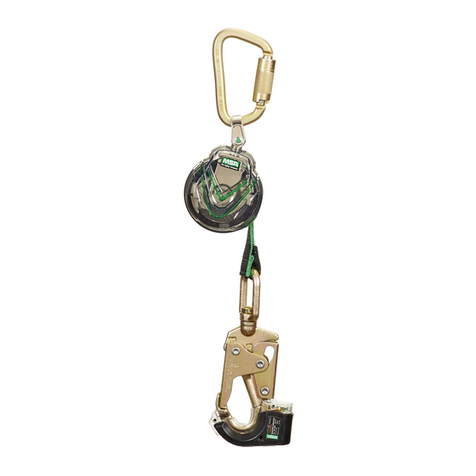
Helite E-TURTLE User manual

ELECTRONIC AIRBAG
SYSTEM
Helite
www.helite.com
Manufacturer: Helite
1, rue de la petite n
21121 Fontaine-Lès-Dijon
MANUEL D'UTILISATION / USER GUIDE
BEDIENUNGSANLEITUNG / GUÍA DEL USUARIO
GUIDA UTENTE / UŽIVATELSKÁ PŘÍRUČKA
Airbag certié / Certied airbag
Zertizierter Airbag / Airbag certicado
Airbag certicato / Certikovaný airbag
E-TURTLE / E-GP AIR

P3 P19 P35 P51 P67 P83

19
User Guide USER GUIDE
Product presentation ............................................................... 20
First use ......................................................................................... 21
Daily use ........................................................................................ 23
Reactivating the airbag system after ination ...................... 26
Technical description ................................................................. 28
Maintenance ................................................................................ 32
General information & Safety precautions ............................... 33
Warranty & After sales service .................................................... 34
Certications ............................................................................... 34
Disclaimer .................................................................................... 34
To get the most out of your electronic Helite
airbag system, please read this manual
carefully.
This user guide may change over time,
please refer to the product section of our
website www.helite.com for the latest
version.
This user guide concerns our products e-Turtle and e-GP Air. The electronic
airbag systems were created to protect motorcyclists when riding.
The system is not suitable for the following practices: motocross, trial,
freestyle, pit bike, acrobatictricks (rearing, wheeling, swerving, etc.) or
other sports.

User Guide
20
1. Product presentation
The electronic airbag system contains a vest, an e-cartridge and a USB cable.
a. Vest: The e-Turtle contains an airbag, a back protector level 2 and a CDU sensor
(Crash detection unit). The CDU sensor analyzes the motion in context (position in
space of the rider, speed, etc.) and detects accidents. The e-GP Air contains an airbag,
a back, a chest protector and a CDU sensor.
b. e-Cartridge: inates the airbag in the event of a fall or an accident. It is for single
use only and must be replaced after each ination (see page 26).
c. USB cable: to recharge the battery of the vest (see page 24). Caution: only the USB
cable is included, you can plug it into any standard USB charger.
With fork sensor option
d. Fork sensor: analyzes the movements of the motorcycle. Discreet and autonomous,
it needs to be installed on the motorcycle fork (see page 22). The fork sensor has an
autonomy of around 5 years (not rechargeable).
e. Magnet: used to pair vest and fork sensor (see page 21) and also for periodic control.
f. 3 bracelets, 2 screws, 1 Allen key, 1 shim and a foam: you need these elements to
install the fork sensor on the motorcycle (see page 21 for rst use).
A
a)
b)
c)
d) e)
f)

21
User Guide
2. First use
AUTONOMOUS AIRBAG SYSTEM (WITHOUT FORK SENSOR):
1. Recharge your vest (see page 24).
2. Switch the vest on by quickly pressing the ON/OFF button 3 times. The LED ashes
green and you hear a beep.
3. You are ready to ride.
See page 26 for precautions before use.
OPTION WITH FORK SENSOR (SDU):
A. PAIR THE FORK SENSOR AND THE VEST
Before using your vest for the rst time, you need to pair (i.e. associate) the vest with
the fork sensor. To do so, you need your vest, the fork sensor and the magnet.
1. Switch on the vest by pressing three
times the button quickly. The LED ashes
green and you hear a beep.
2. Press the ON/OF button for 3 seconds
until the LED turns blue. Release the button
and go to the next step.
3. Place the magnet on the fork sensor
over the round slot. Please note that you
only have 30 seconds to eect this
procedure.
yIf you hear a long beep: the vest and the
fork sensor are paired.
yIf you hear a short beep: the fork sensor
has recognized the vest. The 2 sensors
have already been paired.
yIf you hear several beeps (+ red LED):
the pairing has failed. Either you have
taken more than 30 seconds to place the
magnet over the sensor, or you already
have 5 fork sensors associated with the
vest. In the rst case, repeat the pairing
procedure. In the second case, you must
delete all the sensors associated with the
vest (see page 25).
CAUTION Check that the e-cartridge is properly screwed and connected to the vest.
x3
3sec

User Guide
22
A
A
B. INSTALLING THE FORK SENSOR ON THE MOTORCYCLE
1. Choose the right bracelet size.
Try the dierent sizes referring to the table
above. The right size has to be adjusted to
the motorcycle fork. The screw needs to be
screwed into the nut of the bracelet.
2. Assemble the sensor and the bracelet.
Clip the wide side of the bracelet to the side
of the fork sensor. Choose notch A to adjust the
bracelet to the size of your motorcycle fork.
3. Place the sensor.
a) Place the sensor on the bottom of one of the fork sleeves
of the motorcycle. Please check that no part of the motorcycle
comes into contact with the sensor while riding.
CAUTION If other vests are paired to the
sensor, they must be switched o.
Fork Shim Foam Notch Bracelet Screw size
35 mm A 1 35 mm
≥ 37 mm A 1 35 mm
≥ 40 mm A 2 35 mm
≥ 44 mm A 2 35 mm
≥ 48 mm A 2 35 mm
≥ 50 mm A 2 50 mm
≥ 53 mm A 3 50 mm
CAUTION Make sure to thoroughly clean your fork
before installing the sensor.

23
User Guide
b) Add the shim if necessary to adjust the fork sensor.
c) Tighten the screw by using the nut. Do not tighten more than 1.5 Nm to avoid
breaking the fork sensor (you can stop screwing when it gets dicult to turn the
bracelet with your hand).
C. ADJUST THE VEST TO YOUR SIZE
Be sure to choose the right size of your Helite airbag according to your body type
and the size chart of your model. For optimal protection, you need to adjust your
airbag correctly.
e-Turtle: adjust the straps (you must be able to put a st under the vest) and
close the 3 clips.
e-GP Air: place the velcros correctly and close them.
3. Daily use
A. THE VEST
1. SWITCH ON & OFF THE VEST
The vest can be switched ON / OFF by
pressing quickly 3 times the button.
There is no need to turn o your vest
on a daily basis as it automatically goes
into sleep mode.
Caution, there are some situations in which it is
imperative to switch o the vest:
- When transporting the vest at a speed of more than
20km/h using dierent means of transport (car, subway,
streetcar, train, bus, plane, boat, etc).
- During a long storage time (in winter for example).
ON
ON
ON
x3

User Guide
24
2. WEARING THE VEST
yThe vest is worn over the motorcycle garment.
yThe vest is water resistant. You can ride with the vest in the rain or snow without the
need for additional protection over it.
yThe vest can be worn by both the rider and the pillion.
3. RECHARGING THE VEST
The vest has an autonomy of 25H when it is switched on.
a) Open the part which contains the e-cartridge.
b) Connect the charger to the corresponding connector (battery symbol).
You must use the Helite USB cable provided with your vest. Only the cable is
included, you have to plug it afterwards into a standard USB charger (5 Volt).
During the charging, the LED will remain orange. The charging time is around 3 hours
with the Helite USB cable included with the vest. As soon as the LED turns green
the charging is completed and you can reuse the vest.
CAUTION
yPeople using a pacemaker or other electromedical devices should not use the
system. The risk of interference with these devices has not been tested.
yPeople suering from any kind of back and neck pathology, or who have had
recent abdominal or thoracic surgery, should seek the advice of their doctor.
yNot recommended for pregnant women. Please ask your doctor for advice.
Green LED: System operational
You can use the vest.
Orange LED: Battery low
You need to recharge the vest.
Orange LED + beep: Battery almost empty > only 30 minutes of
use remaining. You need to recharge the vest.
CAUTION
During charging, the vest is not operational.
Do not charge the vest near ammable surfaces or objects.
Never connect an electrical device or an external battery to the system with a
voltage of more than 5V.

25
User Guide
Green LED: system operational
Orange LED: battery low
Blue LED: pairing *
Red LED: problem
No LED: vest o or in sleep mode
4. VEST LED DESCRIPTION
To know if the system is working properly, here are the 4 LED colors used and their
dierent signications:
More info on page 31 about the operation of the LEDs and the beeps.
*only for additional fork sensor option.
B. THE FORK SENSOR - SDU (OPTIONAL)
Once installed and correctly paired (see First use page 20), the fork sensor is completely
autonomous. Its lifespan is about 5 years, you do not need to recharge it. To check the
battery status of your sensor, pass the magnet over the sensor.
GOOD TO KNOW:
To delete all the sensors that are paired with the vest, press the
button on the vest that is switched on for 8 seconds.
It is possible to pair several fork sensors to a single vest (5 maximum), for example if
you have several motorcycles. For each fork sensor you will have to repeat this pairing
process. It is possible to pair as many vests as you like with one fork sensor.
Rider and pillion rider can use the same fork sensor.
Green LED: battery OK
Red LED: battery low = you need to
change the sensor.
A beep sound on the vest:
the fork sensor and the vest are paired.

User Guide
26
CAUTION
The use of the fork sensor is not recommended with the use of non-approved
accessories (exhaust pipe) and on a non-approved motorcycle. Some motorcycles
prepared only for the race track may exceed a too high vibration threshold and
mislead the sensor.
C. PRECAUTIONS BEFORE USING THE AIRBAG SYSTEM
If one of these conditions is not validated, you may not be protected
properly.
The vest is adjusted correctly to your size.
The e-cartridge must be new and properly connected to the system.
The vest is properly closed.
The vest is suciently charged (green LED on).
The fork sensor is recognized by the vest (version with fork sensor).
The green LED is on and ashes.
4. Reactivating the airbag system after ination
After ination, you need to reactivate the airbag system. Only replace the e-cartridge by
a Helite branded e-cartridge of the same capacity.
1. Get access to the e-cartridge (zip or velcro).
2. Remove the empty e-cartridge.
ya) Disconnect the e-cartridge.
yb) Unscrew the e-cartridge.
For the steps 2 to
5 the vest must
always be
switched o.
!
1 1
5
5
3 4
2

27
User Guide
3. Remove air from the vest with both hands.
4. Install a new e-cartridge.
ya) Slide the e-cartridge cable in the cartridge holder.
yb) Screw the e-cartridge until the thread is no longer visible.
yc) Connect the e-cartridge.
5. Close the zip or the velcros and the vest can be reused.
CAUTION Do not damage the cable while
screwing the e-cartridge (e.g. by bending
or twisting it). Only connect the e-cartridge
once it is entirely screwed (see example on the
scheme below).
The e-cartridge must be screwed entirely. Do
not apply too much pressure when screwing
in the e-cartridge.
1 1
5
5
3 4
2
1 1
5
5
3 4
2

User Guide
28
PRECAUTIONS AFTER AIRBAG INFLATION
Before reusing the airbag you must check the following points:
The airbag is not damaged.
The used e-cartridge is replaced by a new Helite e-cartridge of the same
capacity.
The airbag is deated.
The new e-cartridge is properly connected with the vest.
Other precautions before each use:
The vest is properly adjusted.
The vest is correctly closed.
The battery of the vest is suciently charged (green LED on).
The fork sensor is recognized by the vest (if fork sensor option).
The green LED is on and ashes.
5. Technical description
The Helite electronic airbag vests detect the rider’s movements and trigger the
airbag if an accident or fall situation is regognized.
An optional fork sensor (SDU) installed on the fork detects the movements of the
motorcycle. Combined with the sensor (CDU) in the vest, it improves the detection
of falls and accidents. The fork sensor is an option that is only compatible with Helite
motorcycle electronic vests.
CAUTION After ination, the airbag automatically deates slowly. External damage to
the vest can be detected by very rapid deation (less than 5 sec). If you observe any
marks on the airbag, please contact us or take it to an authorized dealer for servicing.
In the event of extensive external or internal damage, repair may not be possible.

29
User Guide
A. IMPACTS AND DETECTED ACCIDENTS
Autonomous version (without SDU fork sensor), the system only detects accidents
from a speed above 20 km/h. Here are the possible detection cases:
- Motorcycle striking or being struck by a signicant obstacle (vehicle, wall, post, etc.)
from the front, side or rear.
- Slides and falls (high side, low side).
The detection system of the autonomous version uses the GPS signal to optimize the
triggering situations. If the system does not detect or badly detects the GPS signal we
cannot guarantee the triggering of the airbag.
When the vest is associated with the SDU fork sensor, the list of detected
accidents is extended to impacts from 0 km/h (e.g. impact when stopped by a third
party vehicle).
The detection time is signicantly faster in case of an impact against a vehicle.
Please note that each accident is dierent. Even though the Helite crash detection
system covers a large majority of potential accidents, there is always a non-zero risk of
non-triggering.
B. AUTONOMY
The vest has 25h of autonomy when switched on (except in sleep mode). It
automatically switches to sleep mode when no movement is detected for about 45
seconds and is reactivated at the rst movement.
The fork sensor (SDU) has an autonomy of around 5 years (not rechargeable).
However, it is recommended to check the battery level of the sensor regularly (once a
month). To check whether the sensor is still active, simply position the magnet on the
round sensor slot:
- green LED on the fork sensor > battery OK.
- red LED on the fork sensor > battery low, you need to change the fork sensor.
- no LED > battery empty, the fork sensor is no longer operational. You must change it.
It is recommended to eect this procedure in an environment of +10°C.
C. UPDATE
The system and the algorithm may evolve. In case of an update you will be contacted
by your dealer.
CAUTION The vest sensor is sensitive to sudden body movements. Do not
intentionally execute movements that are not necessary for normal motorcycle
riding (it is possible to stand on the footrests of the motorcycle). It is equally
important to not intentionally cause shocks to the fork sensor when your vest is
on. Both of these cases could trigger the airbag to inate.

User Guide
30
E. SIZES
yChoosing your size:
Please consult the size chart below in order to choose the regarding model in the right
size for your body type. Measures must be taken with clothing and equipment.
CAUTION
yThe e-cartridges are for single use only and must be replaced after each
ination.
yUse only Helite branded GG60 or GG100 e-cartridges (depending on the size of
your airbag vest).
yNever connect the e-cartridge before it is completely screwed into the cartridge
holder, as this may damage or break the cable (see page 26).
yThe e-cartridge should be stored and used in temperatures below 60°C. Do not
leave full e-cartridges in the car in high temperatures for example.
yNever let the e-cartridge fall down.
yIf rust or other corrosive marks appear on the outer surface of the e-cartridge,
change it immediately and discard the e-cartridge. Never cut the e-cartridge.
yDo not throw the e-cartridge into re.
yIt is important to weigh the e-cartridge once a year (see page 32).
E-TURTLE
in cm XS S M L XL LL XLL
Height 145-165 155-170 165-175 170-185 180-195 170-185 180-195
Chest line 80-95 85-95 90-100 95-105 100-110 100-120 105-140
Shoulder
to waist
distance 38 40 43 47 51 47 51
e-Cartridge 60 GG 60 GG 60 GG 60 GG 60 GG 100 GG 100 GG
E-GP AIR in cm SM L L-L XL XL-L
Height 160-180 165-185 170-190 170-190 175-195 175-195
Chest line 75-85 80-90 85-95 90-100 90-105 95-115
Shoulder to waist
distance 40 50 55 55 60 60
e-Cartridge 60 GG 60 GG 60 GG 60 GG 60 GG 60 GG
D. THE E-CARTRIDGE
The airbag is sold with an e-cartridge (trigger system + gas cartridge) already installed
in the vest and ready to use.

31
User Guide
F - OPERATION OF LEDS
Please note: a loss of GPS signal can aect the speed of LED ashing (faster
LED ashing).
If you notice any other malfunctions, please contact your dealer or our after sales
service via e-mail [email protected] or by phone +33 3 80 35 48 26.
System operational
Green ashing LED / no beep You can ride.
Battery low
Orange ashing LED / no beep
You need to
recharge the vest.
You can still
ride for 2 hours.
Battery almost empty
Orange ashing LED / 4 beeps
30 minutes of
battery life
remaining.
Battery charging
Orange LED / no beep
Wait until the
charging is
completed.
Charging completed
Green LED / no beep
when the charger is still connected
Unplug the
charger.
Pairing in process
Blue LED / 1 beep every 5 sec.
(during 30 sec.)
You have 30 se-
conds to pair the
fork sensor.
Pairing succeeded
Blue LED / 1 beep every 2 sec.
(2 short beeps when the sensor is already
recognized)
The vest and the
fork sensor are
paired.
Pairing failed
Red LED / 4 beeps
(or too many sensors recognized
by the vest)
Restart the
pairing.
Disconnected e-cartridge, empty
e-cartridge or damaged cable.
Red LED / 1 beep every second
(while the e-cartridge is not connected or
replaced)
Connect or
replace the
e-cartridge.
Option with fork sensor
SDU

User Guide
32
G. TRAVELING WITH THE VEST
-> Train, bus, car
No specic restrictions. Caution, you must turn o your vest
when using any means of transport other than the motorcycle.
-> Plane
From a legal point of view (IATA regulations), you are authorized
to travel by airplane with 2 e-cartridges (with a volume of less than 200cc), in the cabin
or in the hold.
However, even if it is legally allowed, it is possible that the security service or the
airline will refuse you to board the aircraft with the e-cartridge. We advise you to print
the IATA regulation (available on helite.com “FAQ”) and to show it during the control
if you are asked for further explanation. In any case, the security department of the
airport and the airline will make the nal decision whether to take your equipment on
board or not.
On the plane, you always have to turn o your garment and unplug the e-cartridge.
6. Maintenance
A. WASHING
Do not machine wash, do not immerse in water, do not dry clean. This could damage
the airbag and the electronic system inside the vest. Do not use detergents or bleach.
We recommend washing the vest with a sponge or soft brush and warm soapy water.
Do not iron. Do not tumble dry or put on a radiator. We advise you to dry the vest on a
hanger in a dry place away from humidity.
B. E-CARTRIDGE
The e-cartridge comes with a 10 year warranty. The e-cartridges have a long life
span but we recommend to check them annually. The check consists in weighing
your e-cartridge on a scale and making sure that the weight is approximately (+/- 3g)
equivalent to the weight written on your e-cartridge.
C. STORAGE
After each use, store your vest in a dry place away from humidity.
Follow the guidelines below to enjoy a long and reliable use of your airbag system:
- Avoid high temperatures (direct sunlight, if left in a vehicle, near a heat source or
ame).
- Do not cover with anything heavy.
- Do not fold or roll, store your vest on a hanger.
- Keep out of children’s reach.
- Do not leave within reach of rodents or other animals.
!

33
User Guide
D. RECYCLING
If your e-cartridge is empty or your airbag vest has reached the end of its life, please do
not throw it away with your household waste. To avoid any harm to the environment
or health, please sort them. Please refer to local sorting rules for electronic and metal
waste (local authority, waste disposal center, etc). You can also return your empty or
discarded Helite products so that we can recycle them to : Helite, 1 rue de la Petite Fin,
21121 Fontaine-Lès-Dijon, FRANCE.
7. General information & Safety precautions
yHelite airbags oer full protection only when inated. They stien the trunk from
neck to pelvis and reduce impact forces.
yAn airbag system cannot guarantee the total safety of the biker, it reduces the
risks. It does not protect parts of the body that are not covered by the airbag. For
additional protection on a motorcycle, the user must wear a helmet, gloves and CE-
certied motorcycle equipment.
yThe user must comply with the speed limits and trac regulations in force in the
country in which he is riding.
yWhen an accident or a fall is detected, the airbag inates automatically in a fraction
of a second. Nevertheless, the user must ensure that the airbag system is switched
on before riding the motorcycle, and that it is correctly charged.
yAir cushions may deteriorate or get pierced during a fall if they hit a sharp or pointed
object.
yTake out any sharp objects from your pockets before using your Helite airbag.
yCheck that your airbag is in good working condition, i.e. no rips or tears, before
each use.
yOur products do not contain any allergenic substances. The design will not cause
any irritation or discomfort to the wearer.
yDo not sew or stick anything onto the Helite airbag (neither the airbag itself nor its
fabric) as it could pierce the airbag and prevent it from working properly.
yDo not remove or modify any part of the airbag, the electronic system or the fabric.
yThe whole vest (textile, electronics, airbag, sensor) must not be put in the microwave.
yThe vest and the SDU fork sensor should only be used in a temperature range of
-10 to + 45°C. Prolonged exposure of the system to temperatures below -10°C and
above 45°C may impair the proper functioning of the system.
yKeep out of reach of children.
CAUTION Failure to follow safety instructions may lead to airbag
malfunctioning or reduce its eectiveness.

User Guide
34
8. Warranty & After sales service
1. WARRANTY
Our products are covered by a 2-year legal warranty against any manufacturing defect.
You can benet from a free 2-year warranty extension by registering your airbag on
www.my.helite.com. The textile and electronic part of the product are not included
in the warranty extension.
2. REPLACEMENT
If you encounter any of the problems described below, consult a dealer or contact
our after sales service to replace the product:
- If you’ve just had a severe fall and you don’t know if your airbag is still in good working
condition.
- If the textile is torn, the airbag is visible or pierced.
- If any breaks, cracks or corrosion appear on the trigger mechanism or on the
e-cartridge.
- If the system does not switch ON although the vest is charged and activated.
- If you detect any abnormal wear of the product.
Contact after sales service: [email protected] - +33 3 80 35 48 26
9. Certications
This product is CE certied by ALIENOR CERTIFICATION (Zone du Sanital, 21 Rue
Albert Einstein CHATELLERAULT-France) notied body number 2754 according to the
protocol CRITT AMC 012. This product complies with the requirements of EU Regulation
2016/425. The EU Declaration of Conformity can be consulted on the website www.
helite.com.
10. Disclaimer
Please note that no product can provide complete protection against injury, serious
injury or death to the user. Airbag protection is provided only when inated. We remind
you that you must follow the instructions in the user guide. The product must only be
used for its intended purpose.
Helite cannot be held responsible:
- For material damage that may occur during the use of the vest;
- If the vest does not inate;
- For injuries covered or not covered by the airbag;
- For improper installation, improper use and improper maintenance of the vest;
- For any modication or repair of the product that is not performed by an authorized
service provider;
- In the event of accidental triggering: in extreme situations, the system could be
triggered without the user falling;
- In some cases, the minimum speed to detect a fall is 20km/h;
- The vest does not cover 100% of the risks in the event of an accident;
- The vest does not guarantee the detection of 100% of accidents.

Bedienungsanleitung 35
BEDIENUNGSANLEITUNG
Vorstellung des Produkts .............................................................36
Erstgebrauch ................................................................................ 37
Täglicher Gebrauch ..................................................................... 39
Reaktivierung des Airbag-Systems nach einer Auslösung ....... 42
Technische Beschreibung .......................................................... 44
Lagerung und Wartung ................................................................ 48
Allgemeine Informationen & Sicherheitsvorkehrungen ....... 49
Garantie & Kundenservice .......................................................... 50
Zertizierungen ........................................................................... 50
Haftungsausschluss .................................................................... 50
Damit Ihr elektronisches Helite Airbag-
System optimalen Nutzen bietet, bitten wir
Sie die Bedienungsanleitung aufmerksam
zu lesen.
Die Bedienungsanleitung kann mit
der Zeit geändert werden. Die neueste
Version nden Sie im Produktbereich
unserer Website www.helite.com.
Die Bedienungsanleitung betrit die Produkte e-Turtle und e-GP Air. Diese
elektronischen Airbag-Systeme wurden zum Schutz von Motorradfahrern
beim Fahren entwickelt. Das System ist für folgende Praktiken nicht
geeignet: Motocross, Trial, Freestyle, Pitbike, akrobatische Tricks
(Rearing, Wheeling, Swerving etc.) oder andere Sportarten.

Bedienungsanleitung
36
1. Vorstellung des Produkts
Das elektronische Airbag-System enthält: eine Weste, eine e-Kartusche und
ein USB-Kabel.
a. Weste: e-Turtle: Airbag, Rückenprotektor Level 2, CDU-Sensor (Crash Detection Unit).
Der CDU-Sensor analysiert die Situation in Echtzeit (Bewegung des Fahrers, Position
und Geschwindigkeit) und erkennt Stürze oder Unfälle. e-GP Air: Airbag, Rücken- und
Brustprotektor, CDU-Sensor.
b. e-Kartusche: bläst den Airbag im Falle eines Sturzes auf. Sie darf nur einmal
verwendet und muss nach jeder Auslösung ausgetauscht werden (siehe S. 42).
c. USB-Kabel: um den Akku in der Weste aufzuladen (siehe S. 40).
Achtung: Nur das USB-Kabel ist enthalten, Sie können es an einem beliebigen Standard
USB-Ladegerät anschließen.
Mit der Option „Gabel-Sensor‘‘
d. Gabel-Sensor: analysiert die Bewegungen des Motorrads. Er ist autonom und wird
an der Motorradgabel befestigt (siehe S. 37). Der Gabel-Sensor hat eine Lebensdauer
von 5 Jahren (nicht wiederauadbar).
e. Magnet: dient zur Überprüfung der Kopplung der Weste mit dem Gabel-Sensor
(siehe S. 37) und der regelmäßigen Überprüfung der Aktivität des Gabel-Sensors.
f. 3 Befestigungsvorrichtungen, 2 Schrauben, 1 Inbusschlüssel, 1 Keil, 1 Gummistreifen:
zur Befestigung des Gabel-Sensors an der Motorradgabel (siehe S. 37 zm Erstgebrauch).
A
a)
b)
c)
d) e)
f)
Other manuals for E-TURTLE
1
This manual suits for next models
2
Table of contents
Languages:

