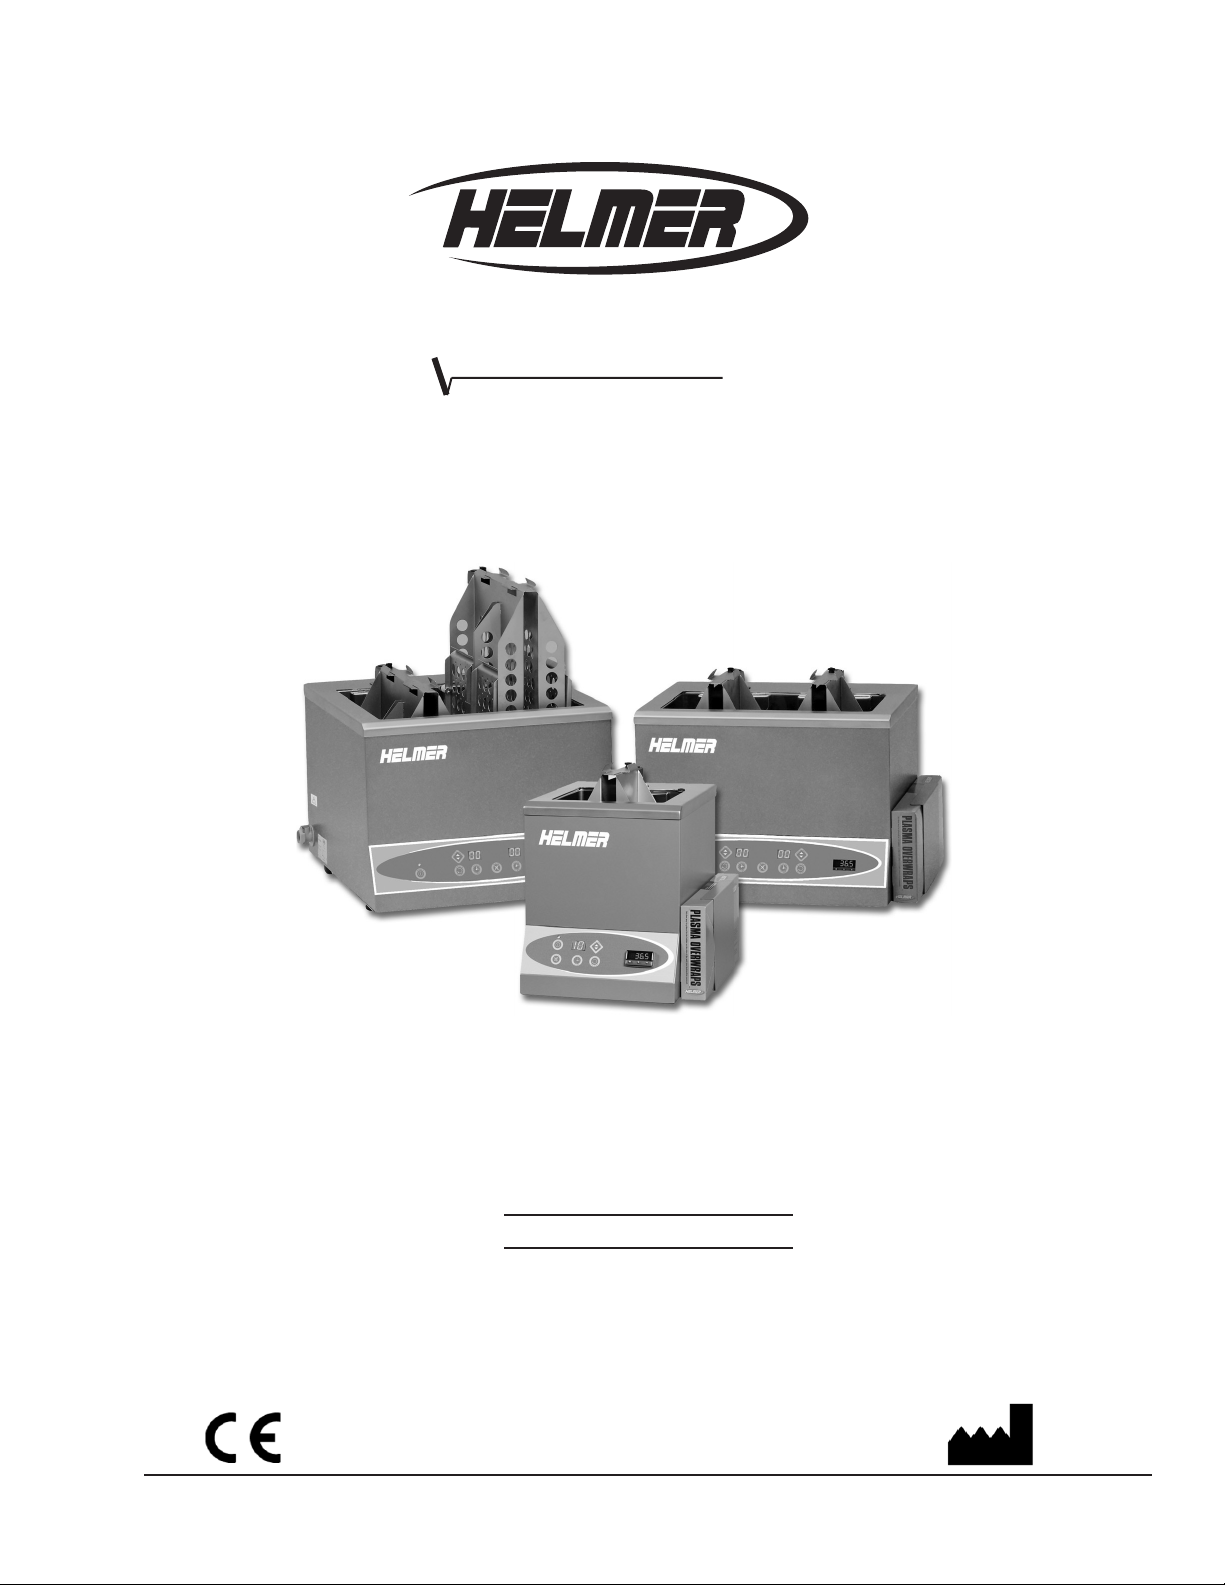
Helmer QuickThaw DH2 User manual
360094-1/J
OuickThaw
TM
DH2 Version A
DH4 Version A
DH8 Version A
Model
S/N
HELMER, INC. 14395 BERGEN BLVD., NOBLESVILLE, IN 46060 USA
PHONE (317) 773-9073 FAX (317) 773-9082
USA and CANADA (800) 743-5637
www.helmerinc.com
ISO 13485:2003 CERTIFIED
Plasma Thawing System
Operation Manual

i
360094-1/J
1 Safety ..................................................................1
2 Components .............................................................2
3 Installation ..............................................................6
3.1 Location requirements ..............................................................6
3.2 Power on ........................................................................6
3.3 Install external thermometer .........................................................6
3.4 Specications.....................................................................6
4 General Operation ........................................................8
4.1 Fill chamber ......................................................................8
4.2 Thaw times.......................................................................8
4.3 Loading bags .....................................................................8
4.4 Enable/disable agitation............................................................10
4.5 Start/stop/pause thaw process.......................................................10
4.6 Drain chamber ...................................................................11
4.7 Remove baskets .................................................................11
5 Maintenance schedule....................................................12
Copyright and trademark information
Copyright © 2011 Helmer, Inc.
CleanBath™ and QuickThaw™ are trademarks of Helmer, Inc
All other trademarks and registered trademarks are the property of their respective owners.
Contents
Contents
1
360094-1/J
Safety
1 Safety
1.1 Labels
The following safety-related labels appear on the thawer.
Caution: risk of danger Caution: Hazardous moving parts Protective earth ground terminal
1.2 Avoiding injury
► Use the equipment for its intended purpose. Do not use if any components are damaged.
► Review safety instructions before installing, using, or maintaining the equipment
► Before performing procedures, review any specic safety instructions.
► Perform maintenance described in this manual. Maintenance not specied herein is to be performed by
technical service representatives authorized by Helmer.
► Never physically restrict any moving component. Do not move or bump the unit during operation.
► Lift safely. If too heavy or awkward, get assistance.
! CAUTION ► The thawer has the potential to be a shock hazard.
► When attaching or using external devices, follow manufacturers’ safety rules.
► Inspect all electrical equipment and address problems prior to installation.
► Avoid removing electrical service panels and access panels unless so instructed.
► Use supplied power cords only.
► Avoid using multi-plug power strips. Connect directly to properly grounded wall outlets.
► Use appropriate protective equipment when cleaning or servicing the equipment
► Notify appropriate safety personnel when handling or disposing of materials that are infectious, toxic,
pathological, radioactive, or otherwise biologically or environmentally harmful.
► See Service manual for more detail on maintenance, parts, and troubleshooting.
! CAUTION Decontaminate parts prior to sending for service or repair. Items not decontaminated
appropriately will not be accepted. Documentation stating contents are not contaminated
and are safe to handle must accompany returns. Contact Helmer or your distributor for
decontamination instructions and a Return Authorization Number.

2
360094-1/J
QuickThaw™ Plasma Thawing System Operation Manual
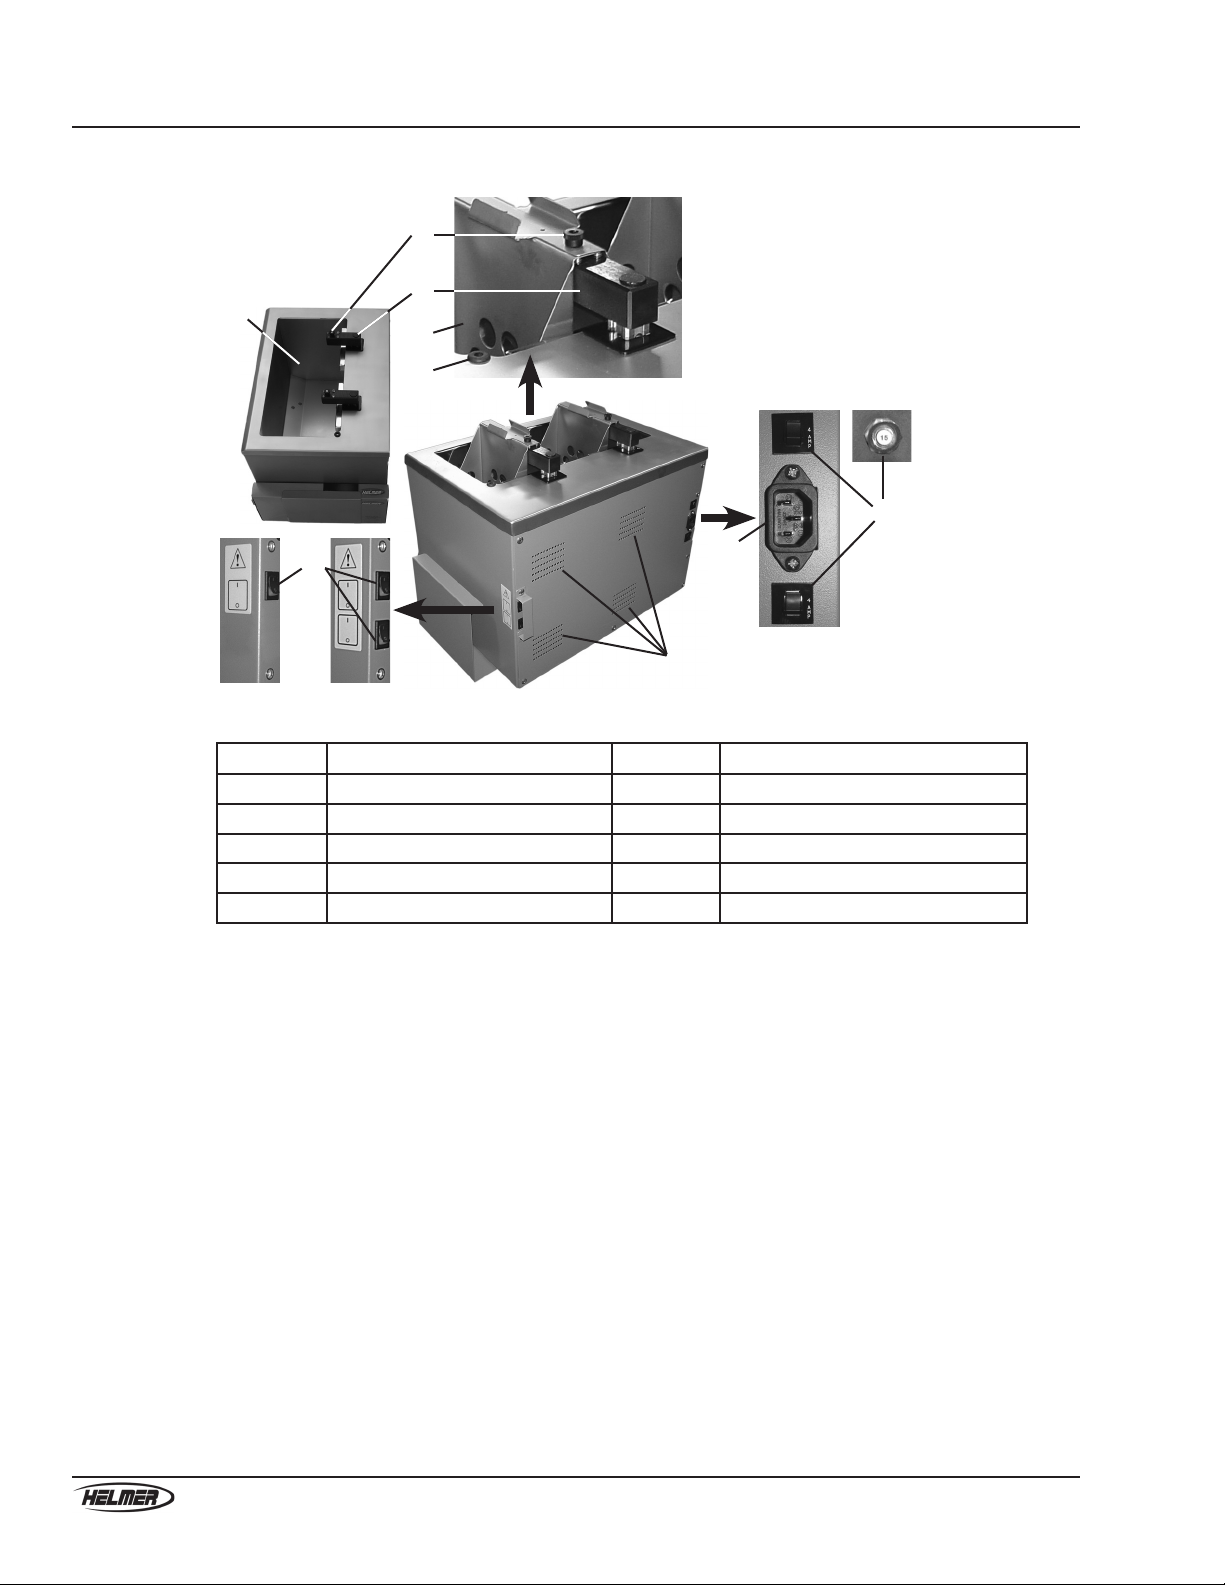
2 Components
2.1 Front and sides
C
H
D
B
EIF
G
A
Front and left side of thawer (DH4 115 V model shown)
Label Description Label Description
A Fan (DH8 100 V models) F Control panel
B Drain port G Cover
C Drain tube with coupling valve H Basket
D Drain port cover I Plasma overwrap holder
EProduct specication label

3
360094-1/J
Components
2.1.1 Control panel
A C
G
B
D
H
E
F
GF CD
E
A
B
Control panel. Top: DH2 models. Bottom: DH4 and DH8 models.
Label Description Label Description
A Power indicator LED E MUTE button
B POWER button F CYCLE TIME button
C LIFT OUT button G CYCLE START button
D Cycle time indicator H Temperature controller
4
360094-1/J
QuickThaw™ Plasma Thawing System Operation Manual
2.2 Chamber and rear
H
I
B
F
C
D
E
A
G
Rear of thawer (DH4 230 V model shown with parts from various models)
Label Description Label Description
A Chamber F External thermometer access port
B Agitation switch G Vent
C Finger knob H Power connector
D Lift-out system I Circuit breaker
E Basket

5
360094-1/J
Components
2.2.1 Thawer basket
C
F
A
D E
B
Basket for DH8 model shown with two plasma bags in standard overwraps
Label Description Label Description
A Basket D Basket divider (DH8 models)
B Bearing E Overwrap
CTab F Security snap

6
360094-1/J
QuickThaw™ Plasma Thawing System Operation Manual
3 Installation
3.1 Location requirements
► A level surface
► Clear of temperature extremes
► Minimum of 8 inches (203 mm) above
► Access to grounded outlet
► Access to water supply
► Meets limits specied for ambient temperature and relative humidity
► Adjacent drain or waste container
NOTE: If possible, drain or waste container should be on same side as drain port. Otherwise, U-tube and
180 degree tting will extend drain tubing to other side.
3.2 Power on
1 With thawer at room temperature, connect power cord to thawer and to proper grounded outlet.
2 Press power button on control panel (ON/OFF toggle).
For DH8 100 V models, the POWER button also controls the fan.
NOTE: High temperature alarm activates quickly when chamber is empty.
3.3 Install external thermometer
Optional. Install per manufacturer documentation. If using a Helmer DT1 digital thermometer, see
instructions on the CD.
3.4 Specications
Input voltage and frequency
The requirements for a particular thawer are specied on the Product Specication label. The voltage
tolerance is ±10% of the nominal voltage.
Options:
► 100 V, 50 Hz
► 115 V, 50 Hz to 60 Hz
► 230 V, 50 Hz to 60 Hz
Power consumption
Power consumption is measure in full load Amperes.
Input voltage Model
DH2 DH4 DH8
100 V 3.0 A 8.0 A 12.0 A
115 V 2.5 A 6.0 A 10.0 A
230 V 1.25 A 3.0 A 5.0 A

7
360094-1/J
Installation
Circuit breakers
All 100 V and 115 V models have 1 circuit breaker. All 230 V models have 2.
Input power Model / Ratings
Voltage DH2 DH4 DH8
100 V 5 A 10 A 15 A
115 V 4 A 7 A 15 A
230 V 2 A + 2 A 4 A + 4 A 6 A + 6 A
Weight
Dry weight:
► DH2: 38 lb (17 kg)
► DH4: 58 lb (26 kg)
► DH8: 74 lb (34 kg)
Size
Dimensions for overall exterior, including items protruding from main unit, unless specied otherwise.
Dimension Model
DH2 DH4 DH8
Width 14.50 in (368 mm) 21.75 in (553 mm) 21.75 in (553 mm)
Height with baskets lowered 16.25 in (413 mm) 16.25 in (413 mm) 16.25 in (413 mm)
with baskets raised 23.00 in (584 mm) 23.00 in (584 mm) 23.00 in (584 mm)
Depth 15.50 in (394 mm) 15.50 in (394 mm) 22.50 in (572 mm)
Interior volume
Overall chamber volume
► DH2: 2.2 U.S. gallons (8.2 liters)
► DH4: 4.75 U.S. gallons (18 liters)
► DH8: 8.5 U.S. gallons (32 liters)
Maximum capacity (per basket compartment)
► DH2: 2 units
► DH4: 4 units
► DH8: 8 units
Operating conditions
Indoor use only
Altitude (maximum): 2000 m
Ambient temperature range: 5 °C to 32 °C
Relative humidity (maximum for ambient temperature): 80% for temperatures up to 31 °C, decreasing
linearly to 50% at 40 °C

8
360094-1/J
QuickThaw™ Plasma Thawing System Operation Manual
4 General Operation
4.1 Fill chamber
Refer to ll lines, chamber rear. The upper is the maximum level for thawing random bags. The lower is the
maximum level for thawing apheresis bags.
NOTE: Determine water type to be used (tap, distilled, or deionized). Use a bacterial growth inhibitor,
such as Helmer CleanBath.
Chamberlllines,atarrow.
1 Ensure chamber and drain are free of debris, and drain tube is not connected.
2 Fill to appropriate level.
3 (Optional) Add bacterial growth inhibitor.
4 Power ON to heat water.
4.2 Thaw times
Thaw time varies by bag type and manner frozen (at or folded). The table provides median thaw times for
bags previously stored at -30 °C.
Plasma bag size and type Manner frozen Median thaw time
(minutes)
10 ml to 15 ml cryoprecipitate Folded 5
250 ml standard Flat 10
250 ml thick plastic Flat 16
250 ml standard Folded 17
300 ml standard Flat 14
500 ml (jumbo) apheresis Flat 18
4.3 Loading bags
! CAUTION ► DO NOT manually lift the baskets out of the chamber, as this damages lift-
out system. Press the LIFT OUT button every time.
► Press the LIFT OUT button ONLY IF the basket is attached to the lift-out
system. Basket weight is required for proper positioning during operation.
Each DH2 basket compartment holds 2 standard bags. DH4 holds 4, and DH8 holds 8. On the DH8, the
divider between compartments on each side can be removed to hold jumbo or wide bags.
9
360094-1/J
Operation
Overwrap bag
Overwrap bag MUST be used because:
1 It secures plasma bag to the basket
2 It protects plasma bag against water-borne contaminants
3 If plasma bag breaks, contents will not contaminate water bath.
NOTE: Use one overwrap of appropriate size per plasma bag.
Recommended:
► Use security snaps on smaller bags that tend to oat.
► Load plasma bags requiring same thaw time.
► In DH8 models: when loading 2 bags on same side of basket, place thicker bag in the front-most
compartment.
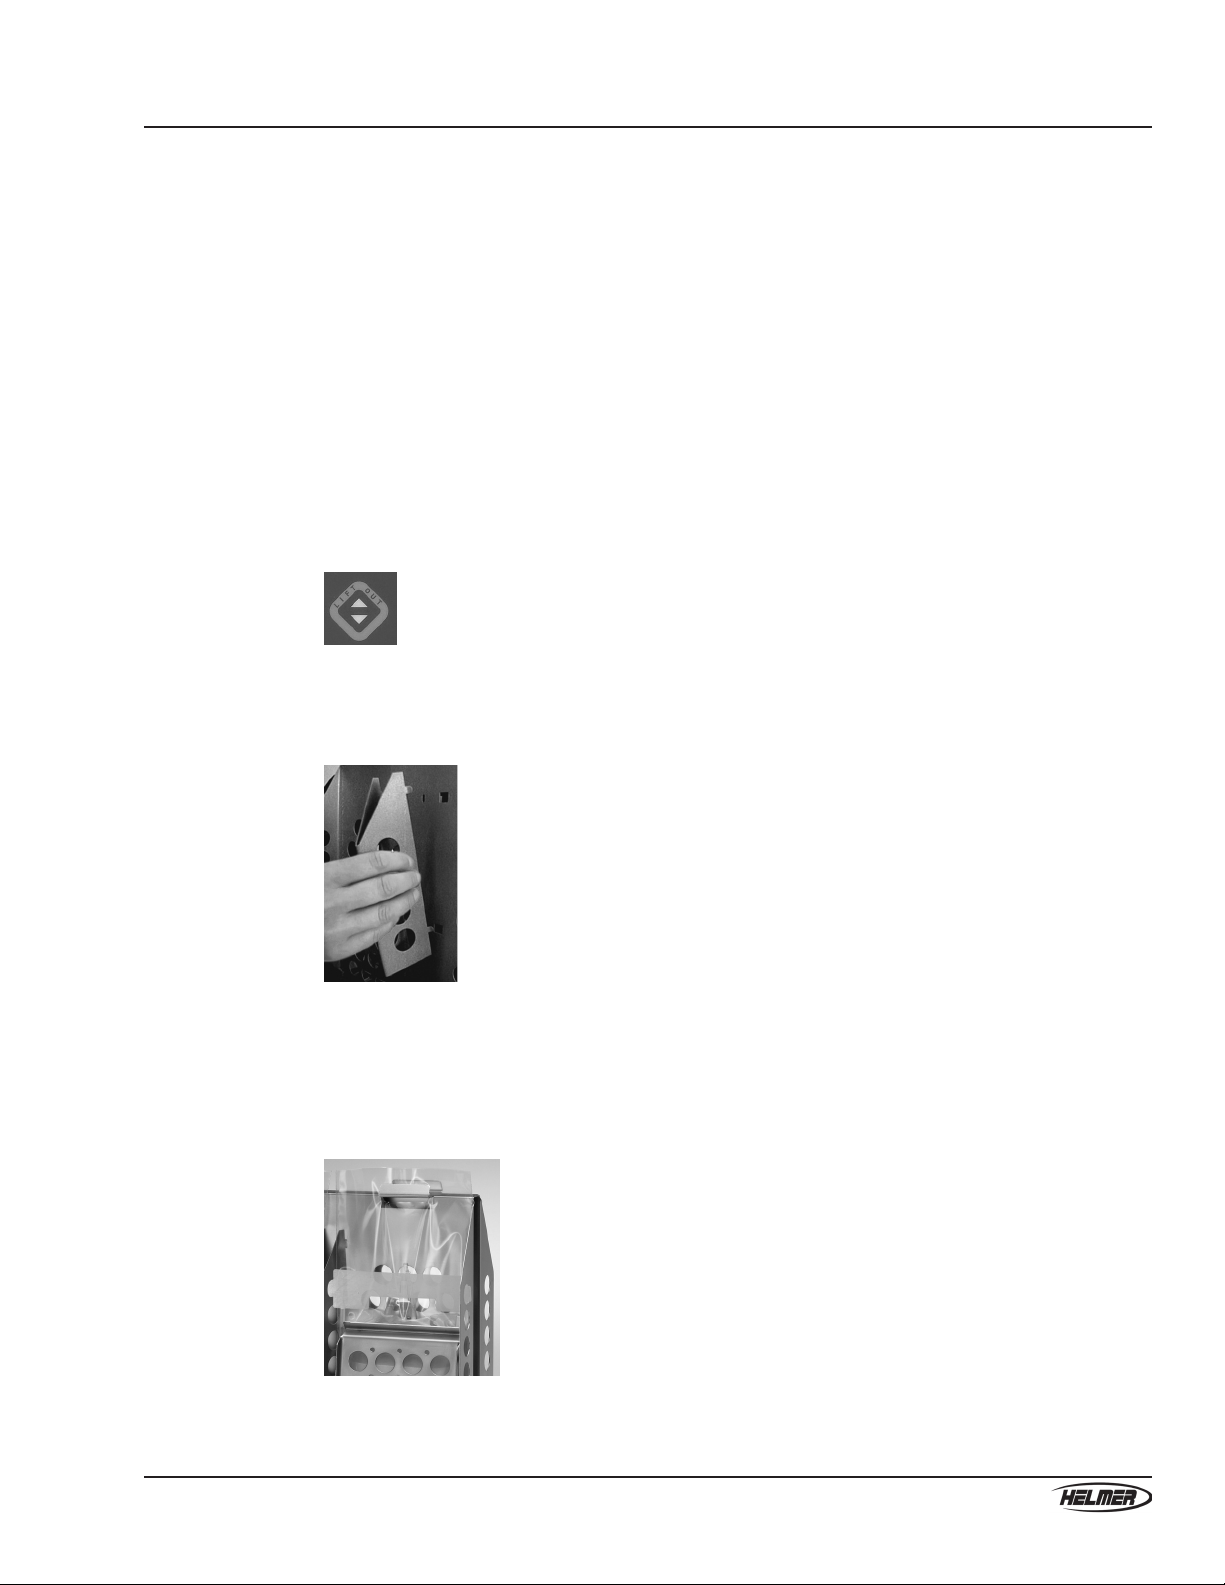
1 Insert bag into appropriate size overwrap.
2 On control panel, press LIFT OUT button to raise and open basket.
LIFT OUT button
3 (DH8 models) If loading a jumbo or wide bag, remove basket divider. Squeeze sides of the divider
together and pull divider away from basket.
Removing divider from DH8 basket.
4 Place overwrapped plasma bag in basket, hooking top overwrap slot around top basket tab. For large
overwraps, ensure both slots are hooked around the tabs.
5 Insert security snap through top set of holes of basket compartment. Push snap toward basket until it
snaps against overwrap bag.
Bag in standard-sized overwrap with security snap

10
360094-1/J
QuickThaw™ Plasma Thawing System Operation Manual
4.4 Enable/disable agitation
Default is enabled. Agitation reduces thaw time. It is controlled by switch located at rear of thawer. For DH4
and DH8, top and bottom switches control right and left basket agitation, respectively.
Agitation switches
4.5 Start/stop/pause thaw process
START: Lift-out system closes basket and lowers it into chamber. Basket starts agitating (if enabled).
Remaining cycle time (in minutes) displays on corresponding indicator.
Select a pre-programmed CYCLE TIME (minutes): 0, 3, 5, 8, 10, 12, 14, 16, 18, 20, 25, 35, 45, 55 or ‘HO’
(hold) for an indenite run.
STOP/PAUSE/RESUME: Basket lifts out before cycle completes. Remaining time displays. LIFT OUT
button resumes process. ‘HO’ may also be selected in PAUSE.
COMPlETE: Basket stops agitating, lifts out, and opens. ‘End of process’ alert sounds, and cycle time
indicator resets.
Buttonsusedtosettime,start,pause,resume,extend,andstopprocesses.
Left: CYCLE TIME (set or extend). Middle: CYCLE START. Right: LIFT OUT (pause/resume/stop).
! CAUTION ► Keep ngers and clothing away from basket(s) in motion.
► Active temperature alarms prevent process start.
► A lift-out malfunction alarm on one basket will not prevent starting other
basket (DH4 and DH8).
► To optimize: let water temperature reach setpoint before starting new run.
1 Conrm appropriate ll level.
2 Conrm water temperature stabilized at setpoint.
3 Enable or disable agitation.
4 Load overwrapped bags into basket(s), with security snap(s) as needed.
5 For each basket, press CYCLE TIME button on control panel for desired time.
6 Press CYCLE START button to lower basket and start thaw.
NOTE: DH4 and DH8 models: each basket is controlled individually.

11
360094-1/J
Operation
4.6 Drain chamber
! CAUTION ►Turn off and disconnect power before draining.
►Do not move thawer if lled or when connected to power.
Thawer has a drain port with closed valve. Connect the coupling valve with drain tube to the port. If the
waste container or drain is not adjacent drain port, use 180 degree tting and U-tube to extend drain tube.
Left: Drain port with coupling valve and drain tube connected. Note release button at arrow.
Middle: Drain tube with coupling valve installed.
Right:U-tubewith180degreettinginstalled.
1 Turn off thawer. Disconnect from power.
2 Place open end of drain tube into waste container or drain.
3 Push coupling valve on closed end of drain tube into drain port until it clicks into place.
Water immediately starts to drain.
4 Release drain tube from port by pressing down on drain release button.
4.7 Remove baskets
! CAUTION If basket is not installed, DO NOT press LIFT OUT button.
Remove the nger knob holding basket to the lift-out arm, and lift basket out.
Basket installed on lift-out arm. Finger knob circled.
12
360094-1/J
QuickThaw™ Plasma Thawing System Operation Manual
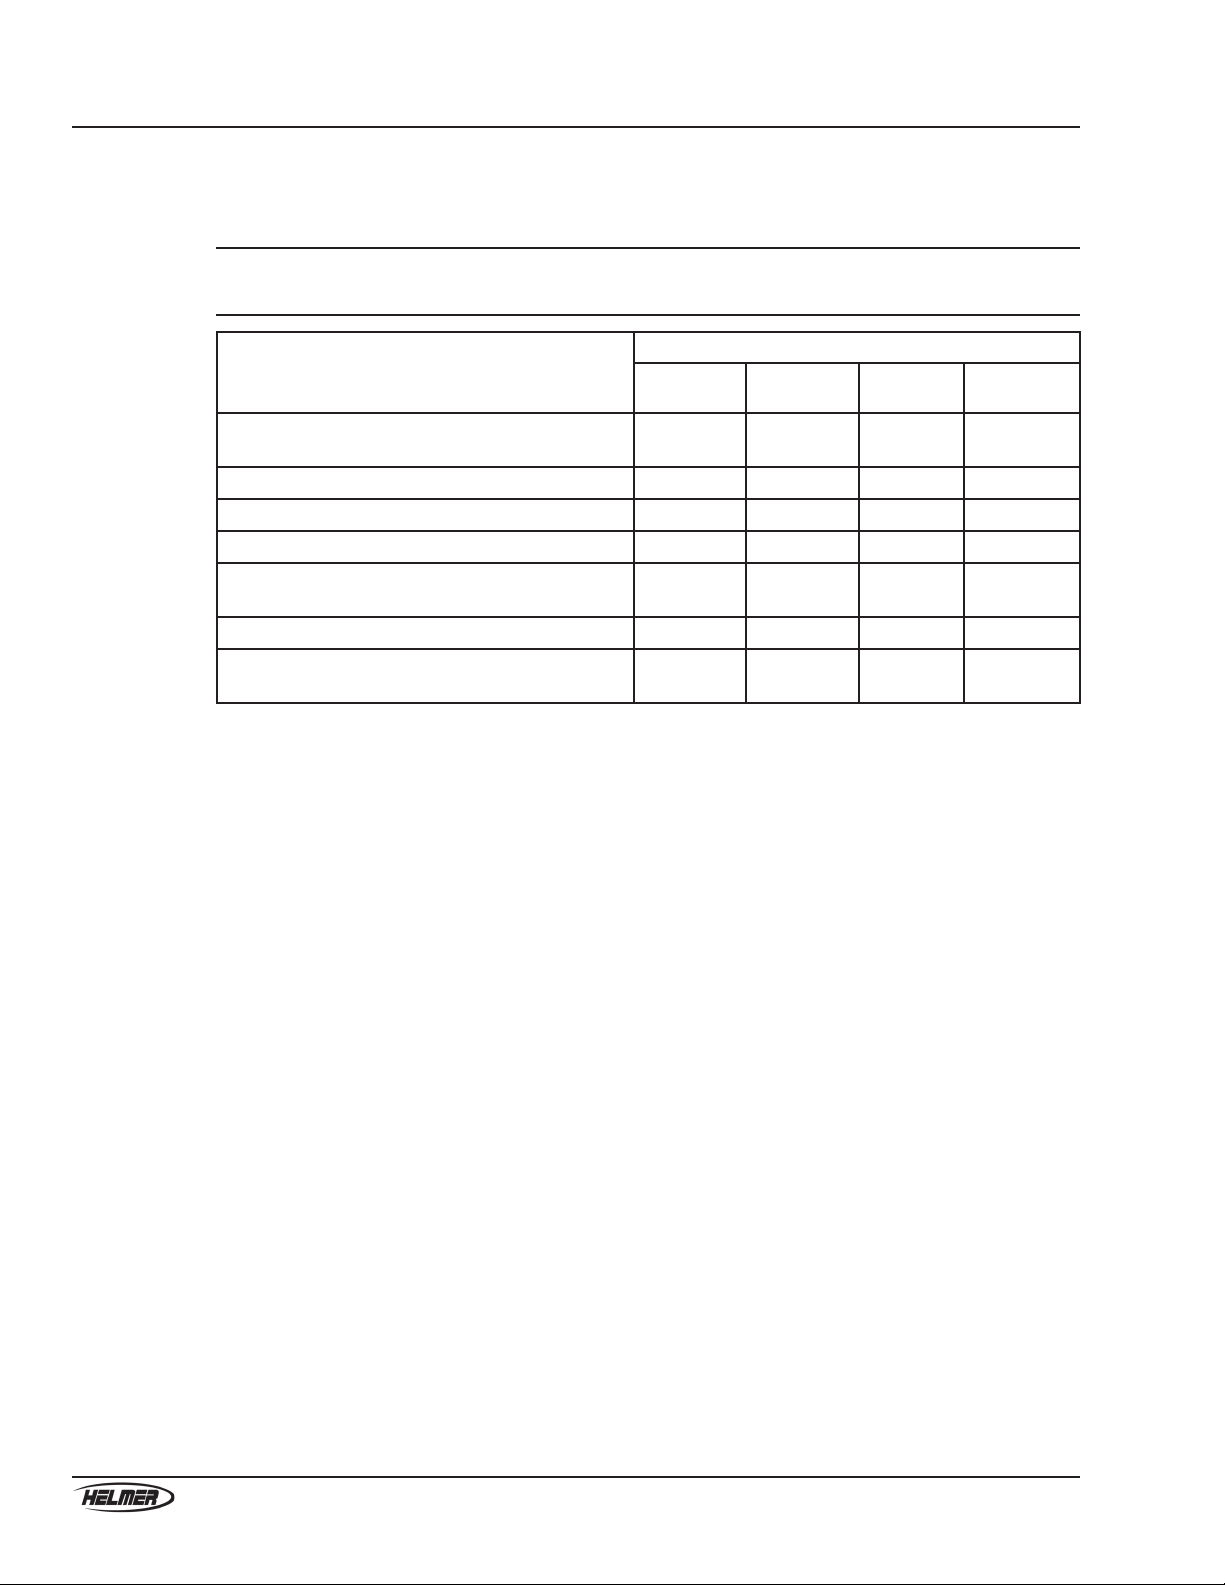
5 Maintenance schedule
Maintenance tasks must be completed according to the following schedule.
NOTE These are minimum requirements. See Service manual for parts, calibration,
alarm testing, and cleaning information.
Task
Frequency
Weekly Quarterly Annually As
needed
Clean the chamber and basket (DH2 models) or
baskets (DH4 and DH8 models).
Clean the exterior.
Clean the fan. (DH8 100 V models)
Lubricate moving parts.
Check temperature calibration for the temperature
controller readout. Change if necessary.
Test the high temperature alarm.
Check the bearings on each basket for wear and
replace them if necessary.
END OF MANUAl
Other manuals for QuickThaw DH2
1
This manual suits for next models
2
Table of contents
Other Helmer Laboratory Equipment manuals


Popular Laboratory Equipment manuals by other brands


biochrom
biochrom Anthos 2010 quick start guide

Molecular Devices
Molecular Devices SkanWasher 300 user guide

TestEquity
TestEquity 1016H-2 Operation and service manual

Velp Scientifica
Velp Scientifica MULTISTIRRER Digital 6 instruction manual

ThermoFisher Scientific
ThermoFisher Scientific invitrogen Countess 3 user guide

Showa Denko
Showa Denko Shodex IEC CM-825 Operation manual


