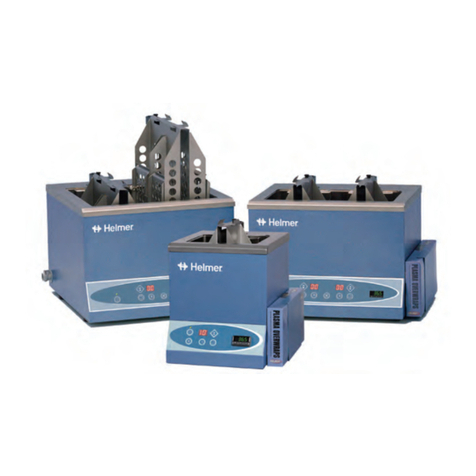
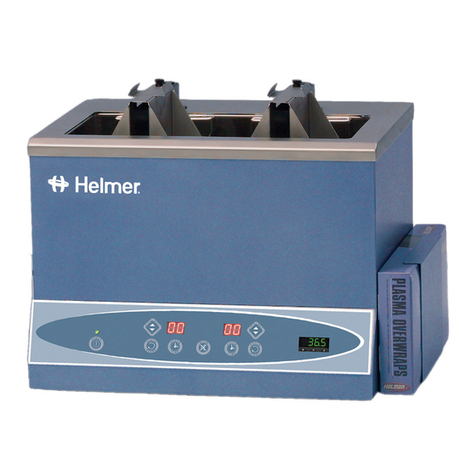
Helmer QuickThaw DH2 User manual

360097-1/K
Plasma Thawing System Service Manual
OuickThaw
TM
MODELS
DH2
DH4
DH8

Document Updates
The document is furnished for information use only, is subject to change without notice and should not be construed as a commitment
by Helmer Scientic. Helmer Scientic assumes no responsibility or liability for any errors or inaccuracies that may appear in the
informational content contained in this material. For the purpose of clarity, Helmer Scientic considers only the most recent revision of
this document to be valid.
Notices and Disclaimers
Condential / Proprietary Notices
Use of any portion(s) of this document to copy, translate, disassemble or decompile, or create or attempt to create by reverse
engineering or otherwise replicate the information from Helmer Scientic products is expressly prohibited.
Copyright and Trademark
Helmer® is a registered trademark of Helmer, Inc. in the United States of America. Copyright © 2019 Helmer, Inc. All other trademarks
and registered trademarks are the property of their respective owners.
Helmer, Inc., doing business as (DBA) Helmer Scientic and Helmer.
Disclaimer
This manual is intended as a guide to provide the operator with necessary instructions on the proper use and maintenance of certain
Helmer Scientic products.
Any failure to follow the instructions as described could result in impaired product function, injury to the operator or others, or void
applicable product warranties. Helmer Scientic accepts no responsibility for liability resulting from improper use or maintenance of
its products.
The screenshots and component images appearing in this guide are provided for illustrative purposes only, and may vary slightly from
the actual software screens and/or product components.
Helmer Scientic
14400 Bergen Boulevard
Noblesville, IN 46060 USA
www.helmerinc.com Part No. 360097-1/ Rev K
Document History
Revision Date CO Supersession Revision Description
H 07 MAY 2013* 8409 Supersedes A, B, C,
D, E, F, G Revised layout for ease of navigation and locating information.
I 16 MAY 2014* 9492 I supersedes H Removed 0086 mark from manual.
J 15 JUL 2016 12020 J supersedes I Updated DH2, DH4, DH8 basket assembly part numbers to reect new part
numbers assigned.
K 25 OCT 2019 15074 K supersedes J Reformatted for consistency with other Helmer manuals.
Updated calibration instructions.
Added the Preventive Maintenance Schedule
* Date submitted for Change Order review. Actual release date may vary.

Helmer Scientic Plasma Thawing System Service Manual
360097-1/K ii
Contents
1 About this Manual................................................................................................ 3
1.1 Intended Audience ..........................................................................................3
1.2 Model References...........................................................................................3
1.3 Intended Use...............................................................................................3
1.4 Safety Symbols and Precautions ...............................................................................3
1.5 Avoiding Injury..............................................................................................3
1.6 Product Labels .............................................................................................4
2 InstallationandConguration ...................................................................................... 5
2.1 Remove Packing Materials ....................................................................................5
2.2 Lifting and Carrying the Plasma Thawer .......................................................................... 5
2.3 Install External Thermometer (Optional) .......................................................................... 5
3 Controls ........................................................................................................ 6
3.1 Chamber Heater ............................................................................................6
3.2 Active Alarms and Error Messages..............................................................................6
3.3 Temperature Alarm Setpoints ..................................................................................7
3.4 Temperature Controller Setpoints ............................................................................... 8
3.5 Level 1 Parameters and Values ................................................................................ 9
3.6 Level 2 Parameters and Values ............................................................................... 10
3.7 Level 3 Parameters and Values ............................................................................... 10
3.8 Level 4 Parameters and Values ................................................................................11
3.9 Plasma Thawer Setpoint ......................................................................................11
3.10 Sensor Calibration.......................................................................................... 12
4 Maintenance.................................................................................................... 13
4.1 Test the High Temperature Alarm .............................................................................. 13
4.2 Clean the Plasma Thawer....................................................................................13
4.3 Maintaining Water Cleanliness ................................................................................15
4.4 Lubricate and Service Internal Parts ............................................................................15
4.5 Supplies .................................................................................................16
5 Troubleshooting ................................................................................................ 17
5.1 Error Messages............................................................................................17
5.2 General Operation Problems ................................................................................. 18
5.3 Chamber Temperature Problems ..............................................................................19
5.4 Alarm Activation Problems ................................................................................... 20
6 Parts .......................................................................................................... 21
6.1 Front and Sides............................................................................................21
6.2 Top and Rear..............................................................................................22
6.3 Interior...................................................................................................23
6.4 Basket................................................................................................... 25
6.5 Accessories...............................................................................................26
7 Schematics .................................................................................................... 27
7.1 DH2.....................................................................................................27
7.2 DH4 and DH8 ............................................................................................. 28
Appendix A: Alarm Reference......................................................................................... 29
Appendix B: Warranty ............................................................................................... 30

Helmer Scientic Plasma Thawing System Service Manual
360097-1/K 3
1 About this Manual
1.1 Intended Audience
This manual is intended for use by end users of the plasma thawing system and authorized service technicians.
1.2 Model References
Generic references are used throughout this manual to group models that contain similar features. For example, “DH models”
refers to all models of that type (DH2, DH4, DH8). This manual covers all plasma thawing systems, which may be identied singly,
by their size, or by their “series” (DH).
1.3 Intended Use
Helmer plasma thawing systems are intended for thawing frozen blood products and other medical, biological, and
scientic products.
1.4 Safety Symbols and Precautions
Symbols and precautions found in this document
The following symbols are used in this manual to emphasize certain details for the user:
Task Indicates procedures which need to be followed.
Note Provides useful information regarding a procedure or operating technique when using Helmer
Scientic products.
NOTICE Advises the user against initiating an action or creating a situation which could result in damage to
equipment; personal injury is unlikely.
Symbols found on the units
The following symbols may be found on the plasma thawer or plasma thawer packaging:
Caution: Risk of damage to
equipment or danger to operator Refer to documentation
1.5 Avoiding Injury
Review safety instructions before installing, using, or maintaining the equipment.
♦ Before moving unit, ensure chamber water has been removed.
♦ Never physically restrict any moving component.
♦Avoid removing electrical service panels and access panels unless so instructed.
♦ Use supplied power cords only.
REQUIRED: Decontaminate parts prior to sending for service or repair. Contact Helmer Scientic or your distributor for
decontamination instructions and a Return Authorization Number.

Helmer Scientic Plasma Thawing System Service Manual
360097-1/K 4
1.6 Product Labels
Note
Service information varies depending on the model and power requirements.
This information appears on the product specication label, located on the left side of the plasma thawer.
C
A
B
SampleProductspecicationlabel
Label Description
A Model
BSerial number (SN)
CPower requirements

Helmer Scientic Plasma Thawing System Service Manual
360097-1/K 5
2 InstallationandConguration
2.1 Remove Packing Materials
Note
Keep the packaging materials for future use.
The plasma thawer is shipped with packing materials to ensure it is not damaged during shipping. Remove the packing materials
prior to operating the plasma thawer.
1. Remove screws holding drain port cover, slide cover outward, and re-secure screws
2. Retain drain port cover, and all other accessories
3. Unscrew knob from underside of chamber cover
4. Relocate knob to top of cover
Drain port cover. Chamber cover with knob in proper position (DH4 model shown).
2.2 Lifting and Carrying the Plasma Thawer
Never move plasma thawer while connected to power or with water in chamber.
Notes
• Do not lift by holding the basket(s), as this may damage the basket(s).
• Helmer recommends using two people when lifting the Plasma Thawer.
When lifting the plasma thawer, hold the ends of the base of the plasma thawer and lift. If the base is not accessible, hold the ends
of the storage frame and lift.
2.3 Install External Thermometer (Optional)
Install the external thermometer according to the manufacturer’s documentation. Refer to the Digital Thermometer Manual for more
information on the Helmer DT1 digital thermometer.

Helmer Scientic Plasma Thawing System Service Manual
360097-1/K 6
3 Controls
3.1 Chamber Heater
When the chamber heater is providing heat to the chamber, a green light illuminates on the temperature controller display. The light
may ash on and o to indicate that the heater is pulsing on and o to provide a minimal amount of heat to the chamber.
Temperature controller with chamber heater light (circled).
3.2 Active Alarms and Error Messages
If the temperature reaches the high temperature alarm setpoint or low temperature alarm setpoint, the temperature controller will
alternately display “-AL” and the chamber temperature. The red light on the temperature controller display also ashes. “E1” also
ashes on the cycle time indicator(s).
Temperature controller with a high temperature alarm. Alarm light is circled.
♦ If “E2” appears on the cycle time indicator, the basket lift-out system is malfunctioning.
♦ If “FAiL” alternately ashes on the temperature controller, there is an operational problem with the plasma thawer.

Helmer Scientic Plasma Thawing System Service Manual
360097-1/K 7
3.3 Temperature Alarm Setpoints
Notes
• Changing parameter values aects plasma thawer operation. Do not change parameter values unless instructed in product
documentation or by Helmer Technical Service.
• The low temperature alarm is not enabled, by default. If the low temperature alarm is enabled, follow your
organization’s regulations to determine the temperature setting. Ensure the low temperature alarm setpoint is no
greater than 30 ºC
The monitoring and control system has alarms which activate if the chamber temperature is too high (or too low, if the low
temperature alarm is enabled). The setpoints for these alarms may be viewed and/or changed using the temperature controller.
Temperature controller display.
The high temperature alarm setpoint (AL.hi) species the temperature at which the High Temperature alarm should activate. If the
temperature detected by the temperature control sensor is greater than or equal to this value, the alarm activates.
The low temperature alarm setpoint (AL.Lo) species the temperature at which the Low Temperature alarm should activate. If the
temperature detected by the temperature control sensor is less than or equal to this value, the alarm activates.
View or change parameter values:
Notes
• Default high alarm setpoint is 37.6 °C.
• Low alarm setpoint is disabled by default (setpoint is 0.0 °C).
• When setting alarm setpoints, maintain at least a 1.0 °C dierence above or below the plasma thawer setpoint.
• When there is no interaction for 60 seconds, the temperature controller exits program mode.
1. Enter Level 1 program mode by pressing and holding the UP and DOWN buttons simultaneously for approximately 3
seconds. “tunE” and “oFF” ash on the display.
2. Press and release the UP or DOWN buttons until the desired parameter ashes on the display. For the High Temperature
setting, select the “AL.hi” parameter. For the Low Temperature setting, select the “AL.Lo” parameter.
3. Press and hold the * button. Press the UP or DOWN buttons to change the parameter value.
4. Release all buttons to exit the parameter. New settings are saved.
5. Exit program mode by pressing and holding the UP and DOWN arrow buttons simultaneously for approximately
3 seconds, or the current chamber temperature is displayed.

Helmer Scientic Plasma Thawing System Service Manual
360097-1/K 8
3.4 Temperature Controller Setpoints
Temperature controller setpoints are programmed at the factory. Setpoints can be viewed and changed through the temperature
controller. Parameter values reside in 4 program levels.
Temperature controller display.
Values that are frequently changed during operation are listed below:
Parameter Program
Level Function
ZEro 3 Calibrate the temperature controller readout
AL.hi 1Set high temperature alarm value
AL.Lo 1 Set low temperature alarm value
View or change parameter values:
Notes
• Changing parameter values aects plasma thawer operation. Do not change parameter values unless instructed in
product documentation or by Helmer Technical Service.
• When there is no interaction for 60 seconds, the temperature controller exits program mode.
1. Enter Level 1 program mode by pressing and holding the UP and DOWN buttons simultaneously for approximately
3 seconds. “tunE” and “oFF” ash on the display.
2. Press and release the UP or DOWN buttons until the desired parameter ashes on the display. To access Level 2 or
Level 3 parameters, select the “LEVL” parameter.
3. Press and hold the * button, then press the UP or DOWN buttons to change the parameter value. To access Level 2
parameters, change the value for the “LEVL” parameter to 2. To access Level 3 parameters, change the value for the
“LEVL” parameter to 3.
4. Release all buttons to exit the parameter. New settings are saved. (If the “LEVL” parameter value is changed, the
temperature controller returns to the selected program level.)
5. Repeat steps 2 through 4 to access another program level, or to view or change parameter values in the selected level.
6. Access Level 4 parameters and navigate to Level 3 program mode.
7. Select the “UEr” parameter.
8. Press and hold the UP and DOWN buttons simultaneously for approximately 10 seconds. The “LOCK” parameter ashes
on the display.
9. Exit program mode by pressing and holding the UP and DOWN arrow buttons simultaneously for approximately
3 seconds, or the current chamber temperature is displayed.

Helmer Scientic Plasma Thawing System Service Manual
360097-1/K 9
3.5 Level 1 Parameters and Values
Notes
• Parameters are listed in order of appearance.
• SP1 refers to the chamber heater.
• SP2 refers to the temperature alarm.
• Temperature controller is programmed at the factory with a setpoint of 36.5 ºC.
Parameter Description Default Value
Autotune selection oFF
SP1 proportional band (gain) or hysteresis (in °C) 2.2
SP1 integral time/reset (in minutes) 2.0
SP1 derivative time/rate 10
SP1 derivative approach control 0.5
SP1 proportional cycle-time 0.5
SP1 oset (manual reset) 0.5
Lock main setpoint oFF
Ramp rate (if ramp is on) 0
Ramp selection oFF
Soak time selection --
SP2 low alarm setpoint (in °C) 0.0
SP2 high alarm setpoint (in °C) 37.6
SP2 hysteresis or proportional band (in °C) 0.1
SP2 mode selection (ON/OFF or proportional cycle-time) on.oF
Parameter level currently selected 1

Helmer Scientic Plasma Thawing System Service Manual
360097-1/K 10
3.6 Level 2 Parameters and Values
Parameter Description Default Value
Display of SP1 output power percentage (read-only) (read only)
Selection for manual control of power for SP1 oFF
SP1 power limit percentage 100
SP2 power limit percentage (cooling) 0
Main SP2 operating mode (alarm strategy) bAnd
Subsidiary SP2 mode nonE
Display resolution 0.1°
Full scale 45.0
Minimum scale 20.0
Input sensor type rtd
Units (°C/ °F) °C
Parameter level currently selected 2
3.7 Level 3 Parameters and Values
Parameter Description Default Value
SP1 output device type SSd1
SP2 output device type (read only) SSd2
Sensor burn-out protection type (upscale or downscale) uP.SC
Output mode (reverse or direct) 1r.2r
LED indicator modes for SP1 and SP2 (normal or inverted) 1n.2n
Sensor span adjust 0.0
Zero sensor error (calibration across full scale) (varies)
Selection for the control accuracy monitor oFF
Read control accuracy monitor results (variance) UAr°
Read autotune tuning cycle data Ct A
Software version (select this parameter to access Level 4 parameters) 392b
Functions reset nonE
Parameter level currently selected 3

Helmer Scientic Plasma Thawing System Service Manual
360097-1/K 11
3.8 Level 4 Parameters and Values
Parameter Description Default Value
Program security lock nonE
Derivative sensitivity 0.4
Display sensitivity (or direct display of input) 6
(read only)
Disable SP2 alarm annunciator oFF
Program mode auto-exit switch (returns display to normal mode if no
activity for one minute) Auto
3.9 Plasma Thawer Setpoint
The default setpoint is 36.5 °C. The temperature controller adjusts chamber temperature around the setpoint. When chamber
temperature is below setpoint, the controller activates the heater to warm the chamber.
Note
Do not change the setpoint to a value outside the temperature control range.
The current chamber temperature is displayed. The temperature may be dierent from the setpoint, especially if the chamber
temperature has not yet stabilized.
Temperature controller display.
Change the Plasma Thawer Setpoint
1. Press and hold the * button. The controller displays current setpoint value.
2. Press and hold the * button, then press the UP or DOWN buttons to increase or decrease setpoint in increments of 0.1 °C.
3. Release all buttons to exit the setpoint parameter. New settings are saved.

Helmer Scientic Plasma Thawing System Service Manual
360097-1/K 12
3.10 Sensor Calibration
Sensor calibration values are programmed at the factory. Values can be viewed and changed through the Temperature Controller.
TemperatureControllerOset
The temperature controller senses chamber temperature through a probe in the chamber. The chamber setpoint typically varies
from the measured temperature, so an oset value is used by the control system to compensate for the dierence.
♦ Value is factory-preset and varies for each unit
♦ Oset value can be changed from -10.0 °C to +10.0 °C
Temperature controller display.
Notes
• Do not change the control sensor oset unless instructed in product documentation or by Helmer Technical Service.
• If the variance is within acceptable limits for your organization, changing the oset value is optional.
• The temperature controller will exit program mode after 60 seconds of no interaction
DetermineTemperatureControllerOset
1. Fill the chamber and switch the power ON/OFF switch to ON.
2. Place an independent thermometer, calibrated and traceable per national standards in the chamber. Do not allow the
thermometer to touch the sides or bottom of the chamber.
3. Allow the chamber to stabilize for 30 minutes.
4. Observe the temperature displayed on the independent thermometer temperature for 10 minutes and determine
temperature range.
5. From the range, calculate the average temperature.
6. Remove the thermometer from the chamber.
7. Determine the change in value to reach desired setpoint.
Example Current setpoint is 36.5 ºC
Average temperature is 35.0 ºC
Oset adjustment value is -1.5 ºC
EnterNewOsetValue
1. Press and hold the UP and DOWN buttons simultaneously for approximately 3 seconds; “tunE” and “oFF” ash on
the display. The temperature controller is now in Level 1 program mode.
2. Press and release the UP or DOWN buttons until “LEVL” ashes on the display.
3. Press and hold the * button, then press the UP or DOWN buttons to change the parameter value to 3.
4. Release the *button.
5. Press and release the UP or DOWN buttons until “ZEro” ashes on the display.
6. Press and hold the * button, then press the UP or DOWN buttons to change the value to the calculated oset
adjustment value.
7. Release the *button.
8. Release all buttons to exit the parameter. New settings are saved. (If the “LEVL” parameter value is changed, the
temperature controller returns to the selected program level.)
9. Exit program mode by pressing and holding the UP and DOWN arrow buttons simultaneously for approximately
3 seconds. The current chamber temperature is displayed.

Helmer Scientic Plasma Thawing System Service Manual
360097-1/K 13
4 Maintenance
Maintenance tasks should be completed according to the following schedule.
Note
These are recommended minimum requirements. Regulations for your organization or physical conditions at your
organization may require maintenance items to be performed more frequently, or only by designated service personnel.
Task Frequency
Weekly Quarterly Annually As Needed
Clean the chamber and basket (DH2) or baskets (DH4 and
DH8).
ü
Clean the exterior. ü
Clean the fan (100 V DH8). ü
Lubricate moving parts. ü
Check temperature calibration for the temperature controller
readout. Recalibrate if necessary. ü
Test the high temperature alarm. ü
Check the bearings on each basket for wear. Replace if
necessary. ü
4.1 Test the High Temperature Alarm
Regularly test the High Temperature alarm to ensure it is working correctly.
Test the alarm:
Note
Testing the alarm requires a temporary change to the plasma thawer setpoint. Protect items in the plasma thawer from
extended exposure to adverse temperatures.
1. Verify the temperature controller display has been calibrated.
2. Identify the current settings for the plasma thawer setpoint and the High Temperature alarm setpoint.
3. Change the plasma thawer setpoint to a value at least 0.5 °C above the high temperature alarm setpoint.
4. Observe the chamber temperature reading on the temperature controller. The displayed temperature will increase slowly.
When the displayed temperature reaches the high alarm setpoint, the audible alarm will sound and “AL.hi” will ash on the
temperature controller. The baskets should also lift out of the chamber and “E1” should ash on both cycle time indicators.
5. Change the plasma thawer setpoint back to the original value. Allow the temperature to stabilize at the setpoint
before use.
4.2 Clean the Plasma Thawer
The following table describes the advantages and disadvantages of each type of water used in an open water bath system.
Water Type Advantages Disadvantages
Tap water ►Availability
►Accessibility
►Varying levels of purity
►Iron and sediment content
Distilled water ►Cleanliness
►Purity
►Availability
►Accessibility
Note
Do not use deionized water as it may be corrosive to the chamber and baskets.

Helmer Scientic Plasma Thawing System Service Manual
360097-1/K 14
Exterior
Clean the exterior with soap or mild cleaning agent and water. Disinfect using a mild disinfectant solution. Clean the vents as
needed to maintain airow and prevent the motors from overheating.
Chamber and Baskets
Notes
• Various factors can cause staining, discoloration, and rust spots on the chamber and baskets. These factors include
the type of water used, regularity of cleaning, and the usage environment.
• Although the chamber and basket are stainless steel, corrosive matter can adhere to the surfaces and crevices, causing
discoloration.
1. Conrm the basket(s) have been lowered into the chamber. Lower the basket(s) if necessary by pressing the LIFT OUT
button for each basket.
2. Press the AC ON/OFF button to power the plasma thawer OFF. Disconnect the plasma thawer from AC power.
3. Insert the end of the drain tube into a waste container or sanitary drain, then connect the drain line to the plasma thawer
by inserting the drain coupling into the drain port on the side of the plasma thawer.
4. Unscrew the nger knobs securing the basket(s) to the lift-out system, and remove the basket(s) from the lift-out system.
Basket installed on lift-out arm. Finger knob circled.
5. Remove the 2 V-shaped brackets from the rear wall of the chamber (optional).
6. Using a soft cloth or sponge and a disinfectant cleaner suitable for stainless steel, thoroughly clean the chamber walls and
basket(s). If stains or discoloration remain after general cleaning, use a stain, scale, or rust remover suitable for
stainless steel.
7. Reinstall the V-shaped brackets.
8. Reinstall the basket(s).
9. Reinstall the nger knobs to attach the basket(s) to the lift-out system.
10.Reconnect the plasma thawer to AC power. Press the AC ON/OFF button to power the plasma thawer ON.
Fan (100 V DH8)
Note
Cleaning the fan is applicable to 100 V DH8 models only.
The fan must be kept clean to maintain airow and prevent the agitation motors from overheating.
In environments where the plasma thawer is exposed to excessive lint or dust, the fan may need to be cleaned more frequently
than stated in the maintenance schedule.
Clean the fan:
1. Press the AC ON/OFF button to power the plasma thawer (and the fan) OFF.
2. Clean the fan using a soft brush and a vacuum cleaner.
3. Press the AC ON/OFF button to power the plasma thawer ON.

Helmer Scientic Plasma Thawing System Service Manual
360097-1/K 15
4.3 Maintaining Water Cleanliness
When the plasma thawer is not being used, place the chamber cover over the chamber to reduce contamination of the water.
Note
Do not use the chamber cover while a thaw cycle is in progress. When the thaw cycle is completed, the lift-out system
raises the basket(s) and pushes on the cover. This may push the cover o the plasma thawer and strain the lift-out motor.
Chamber cover in place (DH4 model shown).
Helmer CleanBath (400348-1) may be added to the water in the chamber to inhibit bacterial growth.
4.4 Lubricate and Service Internal Parts
Notes
• Do not press the LIFT OUT button if the basket is not attached to the lift-out system. The weight of the basket is
required for proper positioning of the rail and cabling.
• Lubricate the rails with lightweight oil. Do not use grease.
The bearings on the baskets should be checked regularly for wear. Signs of worn bearings include noisy or rough agitation, and
markings on the chamber walls where the bearings make contact with the chamber. Lubricate the rails and bearings according to
the maintenance schedule for optimal performance.
Bearing on the basket (DH4 model shown). Basket installed on lift-out arm. Finger knob circled.
Lubricate components:
1. Conrm the basket(s) have been raise from the chamber. Raise the basket(s) if necessary by pressing the LIFT OUT
button for each basket.
2. Press the AC ON/OFF button to power the plasma thawer OFF. Disconnect the plasma thawer from AC power.
3. Insert the end of the drain tube into a waste container or sanitary drain, then connect the drain line to the plasma thawer
by inserting the drain coupling into the drain port on the side of the plasma thawer.
4. Unscrew the nger knobs securing the basket(s) to the lift-out system, and remove the basket(s) from the lift-out system.
5. Place a maximum of 3 drops of lightweight oil on your nger, then spread the oil along the length of all 4 sides of each
lift-out rail. (Lubricating all 4 sides ensures the bearing is properly lubricated.)
6. Reinstall the basket(s).
7. Reinstall the nger knobs to attach the basket(s) to the lift-out system.
8. Press the AC ON/OFF button to power the plasma thawer ON. Reconnect the plasma thawer to AC power.
9. Press the LIFT OUT button(s) to lower the basket(s) into the chamber.

Helmer Scientic Plasma Thawing System Service Manual
360097-1/K 16
4.5 Supplies
♦ Overwrap bags, standard size (4 boxes of 250 bags per box): 400273-1
♦ Overwrap bags, large size (1 box of 250 bags): 400303-1

Helmer Scientic Plasma Thawing System Service Manual
360097-1/K 17
5 Troubleshooting
NOTICE
Review all safety instructions prior to troubleshooting.
5.1 Error Messages
Error Message Possible Cause Action
“E1” (high temperature
alarm) appears on both
cycle time indicators.
Temperature controller
has improper settings or is
faulty.
Verify plasma thawer setpoint is set below High Temperature alarm
setpoint, and the dierence is at least 1.0 °C. Replace controller if
necessary.
Connection between control
board and heater is faulty,
or a part is faulty.
Check power to heater. Replace heater or control board if
necessary.
Connection between control
board and heater triac is
faulty, or a part is faulty.
Check power to heater triac. Replace heater triac or control board if
necessary.
Connection between control
board and temperature
control sensor is faulty, or a
part is faulty.
Check connections from control board to temperature controller, and
from temperature controller to temperature control sensor. Secure
the connections if necessary. Replace temperature control sensor,
temperature controller, or control board if necessary.
Temperature has reached
high alarm setpoint.
Verify chamber has water. High Temperature alarm will activate
quickly if chamber is empty.
Verify plasma thawer setpoint is set below High Temperature alarm
setpoint, and the dierence is at least 1.0 °C.
“E2” (lift-out system
malfunction) appears on
one or both cycle time
indicators.
Loose connection or
faulty part is preventing
lift-out pulley from winding
properly.
Visually compare operation of faulty lift-out system with operational
lift-out system (DH8 models only). Verify there are no loose parts
blocking movement. Secure or tighten parts as necessary. Replace
lift-out cable or lift-out pulley if necessary.
Loose connection or faulty
part is preventing lift-out
motor from operating
properly.
Check connections from control board to terminal strip, and from
terminal strip to lift-out motor and lift-out motor capacitor. Secure
connections if necessary. Replace lift-out motor or capacitor if
necessary.
Fuse for lift-out motor has
opened. Verify the fuse has not blown on the circuit board. Replace fuse if
necessary.
“E2” (lift-out system
malfunction) appears on
one or both cycle time
indicators.
Loose connection or faulty
part is preventing basket
position from being sensed
correctly.
Check connections from control board to terminal strip, and from
terminal strip to microswitches. Secure connections if necessary.
Visually compare operation of faulty lift-out system with
operational lift-out system (DH8 models only). Check operation of
microswitches. Replace one or both microswitches if necessary.
Control board is faulty. If lift-out system for one basket is operating correctly, swap the
connections at P4 and P6 on control board (DH8 models only).
Press LIFT OUT button for basket for which the error
message appeared.
If error code appears on indicator for the other basket, control
board is working properly and problem is with another part in the
lift-out system.
If error code remains on the same indicator, even after connections
have been swapped, control board is faulty.
Bearing block is faulty. Contact Helmer Technical Service.
Lift-out system is
malfunctioning. Reset electronics by turning power OFF. Wait 10 seconds then
switch power ON. Press the LIFT OUT button. If error message
reappears, contact a qualied service technician.
“.nPt” and “FAiL”
(alternately ashing on the
temperature controller).
Connection between
temperature controller and
temperature control sensor
is faulty, or a part is faulty.
Check connections between temperature controller and temperature
control sensor. Secure connections if necessary. Replace
temperature control sensor or temperature controller if necessary.
“dAtA” and “FAiL”
(alternately ashing on the
temperature controller).
Memory error with the
control system. Reset electronics by turning power OFF. Wait 10 seconds then
switch power ON. If problem persists, contact a qualied service
technician.

Helmer Scientic Plasma Thawing System Service Manual
360097-1/K 18
5.2 General Operation Problems
Problem Possible Cause Action
Main power switch is on,
but nothing is working. Outlet connection is faulty. Verify power at the outlet. Repair original outlet or connect to a
dierent outlet if necessary.
Power cord is faulty. Check condition of the power cord. Replace if in poor condition.
Verify voltage through cord is appropriate. If not, replace power
cord.
Power connector is faulty. Verify connections between power cord and power connector are
secure.
Verify voltage through power connector is appropriate. If not,
replace power connector.
Circuit breaker is tripped. Verify all circuit breakers are seated. Push circuit breaker to reset.
Fuse for main power has
opened. On the circuit board, verify fuse has not opened. Replace fuse if
necessary.
Power switch on control
board is faulty. Verify control board is supplying power to other components.
Replace control board if necessary.
Main power switch is on,
but temperature controller is
not working.
Connection between control
board and temperature
controller is loose, or a part
is faulty.
Check connections between control board and temperature
controller. Secure connections if necessary. Conrm control board
is supplying power to temperature controller. Replace temperature
controller or control board if necessary.
Main power switch is on,
but fan is not running (100
V DH8).
Fan is faulty. Check fan connections. Verify correct voltage is being received.
Replace fan if necessary.
Basket does not lift out
or lower when LIFT OUT
button is pressed.
Connection in lift-out
system is loose, or a part
is faulty.
Review possible causes for error message “E2” and take
recommended actions.
Basket lifts out when LIFT
OUT button is pressed, then
lowers slightly and activates
an “E2” alarm.
Lift-out motor is faulty. Replace lift-out motor.
Basket does not agitate
during thawing process,
even though agitation is
enabled for the basket.
Loose connection or a faulty
part is preventing agitation
motor from operating
properly.
Check connections from control board to terminal strip, and from
terminal strip to agitation motor. Secure connections if necessary.
Replace agitation motor or capacitor if necessary. Replace agitation
switch if necessary.
Loose connection or a faulty
part is preventing basket
from agitating properly.
Visually compare operation of the faulty agitation system with
operational agitation system (DH8 models only). Verify there are
no loose parts blocking movement. Secure or tighten parts as
necessary. Replace agitation motor and gearbox if necessary.
Replace agitation cam if necessary.
Control board is faulty. On the circuit board, verify fuse has not opened. Replace fuse if
necessary.
If basket is still not agitating, control board is working properly and
problem is with another part in agitation system.
If basket exhibiting the agitation problem is now agitating, control
board is faulty.
If agitation system for one basket is operating correctly, swap the
connections at P4 and P6 on the control board (DH8 models only).
Verify both agitation switches are switched ON, then press CYCLE
START button for the basket exhibiting the agitation problem.
Basket does not lift out or
lower when the LIFT OUT
button is pressed.
Basket movement is
obstructed by something in
the chamber.
Conrm there are no obstructions in chamber.
Basket movement is
obstructed by something in
the lift-out system.
Check for debris on lift-out rail. Remove debris and lubricate rail if
necessary.
Cannot change values on
the temperature controller.
Temperature controller has
been locked out. Contact Helmer Technical Service.

Helmer Scientic Plasma Thawing System Service Manual
360097-1/K 19
Problem Possible Cause Action
Agitation is noisy or rough. Rails and bearings on
lift-out system are not
lubricated.
Conrm lift-out rails and bearings have been lubricated according to
the maintenance schedule. Lubricate if necessary.
Bearing on the basket is
worn.
Check for marks where bearing contacts chamber. Replace basket
bearing assembly if necessary.
Loose connection or a faulty
part is preventing basket
from agitating properly.
Visually compare operation of faulty agitation system with
operational lift-out system (DH8 models only). Verify there are
no loose parts blocking movement. Secure or tighten parts as
necessary. Replace agitation motor and gearbox if necessary.
Replace agitation cam if necessary. Replace lift-out rail if necessary.
Bearing block is faulty. Contact Helmer Technical Service.
Plasma thawer is connected
to power but will not turn on.
Power cord is loose. Verify power cord is connected securely to plasma thawer and outlet.
Tighten connections if necessary.
Verify outlet is operational and meets power requirements for the
plasma thawer. Repair original outlet or connect to a dierent outlet
if necessary.
Circuit breaker(s) have
tripped or are not seated
correctly.
Conrm circuit breaker(s) are seated. Push circuit breaker to reset if
necessary. If a reset is not possible, or breaker(s) trip again, contact
a qualied service technician.
Component is faulty or
internal connections are
loose.
Contact Helmer Technical Service.
Basket does not agitate,
even though agitation is
enabled for the basket.
Agitation switch was
accidentally turned o.
Conrm appropriate agitation switch on back of plasma thawer is
switched ON.
Basket movement is
obstructed by something in
the chamber.
Conrm there are no obstructions in chamber.
Component is faulty or
internal connections are
loose.
Contact Helmer Technical Service.
Chamber is draining more
slowly than usual. Drain is obstructed. Conrm there is no debris in chamber.
Backush drain to clear any debris in the internal tubing between
chamber and drain. To backush the drain, empty chamber by
whatever means necessary. Connect drain tube using coupling
valve. Backush drain by forcing water through opposite end of
drain tube into chamber.
Drain is leaking. Drain is faulty. Contact Helmer Technical Service.
5.3 Chamber Temperature Problems
Problem Possible Cause Action
Chamber temperature does
not stabilize at plasma
thawer setpoint.
Temperature controller
has improper settings or is
faulty.
Verify plasma thawer setpoint is set below High Temperature alarm
setpoint, and the dierence is at least 1.0 °C. Replace controller if
necessary.
Connection between control
board and heater is faulty,
or a part is faulty.
Check power to the heater. Replace heater or control board if
necessary.
Connection between control
board and heater triac is
faulty, or a part is faulty.
Check power to the heater triac. Replace heater triac or control
board if necessary.
Connection between control
board and temperature
control sensor is faulty, or a
part is faulty.
Check connections from control board to temperature controller, and
from temperature controller to temperature control sensor. Secure
connections if necessary. Replace temperature control sensor,
temperature controller, or control board if necessary.
Heater fuse has opened. On the circuit board, verify fuse has not opened. Replace fuse if
necessary.
Other manuals for QuickThaw DH2
1
This manual suits for next models
3
Table of contents
Other Helmer Laboratory Equipment manuals
Popular Laboratory Equipment manuals by other brands

Thermo Scientific
Thermo Scientific ULT-80 Installation & operation
Radiodetection
Radiodetection RD8000 user guide
Peak Scientific
Peak Scientific Precision Zero Air Series user manual
Izon
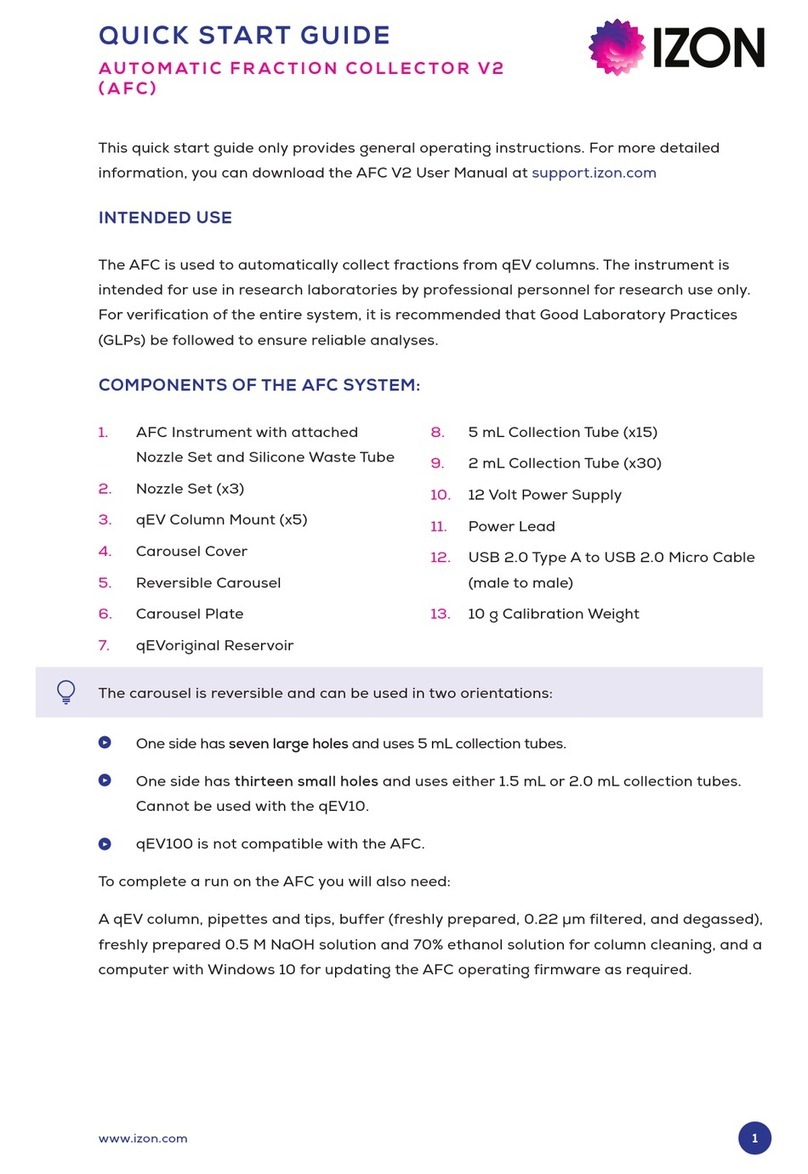
Izon AUTOMATIC FRACTION COLLECTOR V2 quick start guide
Cognionics
Cognionics Quick-20 Cleaning and care
Environmental Express
Environmental Express 35419-47 instruction manual
