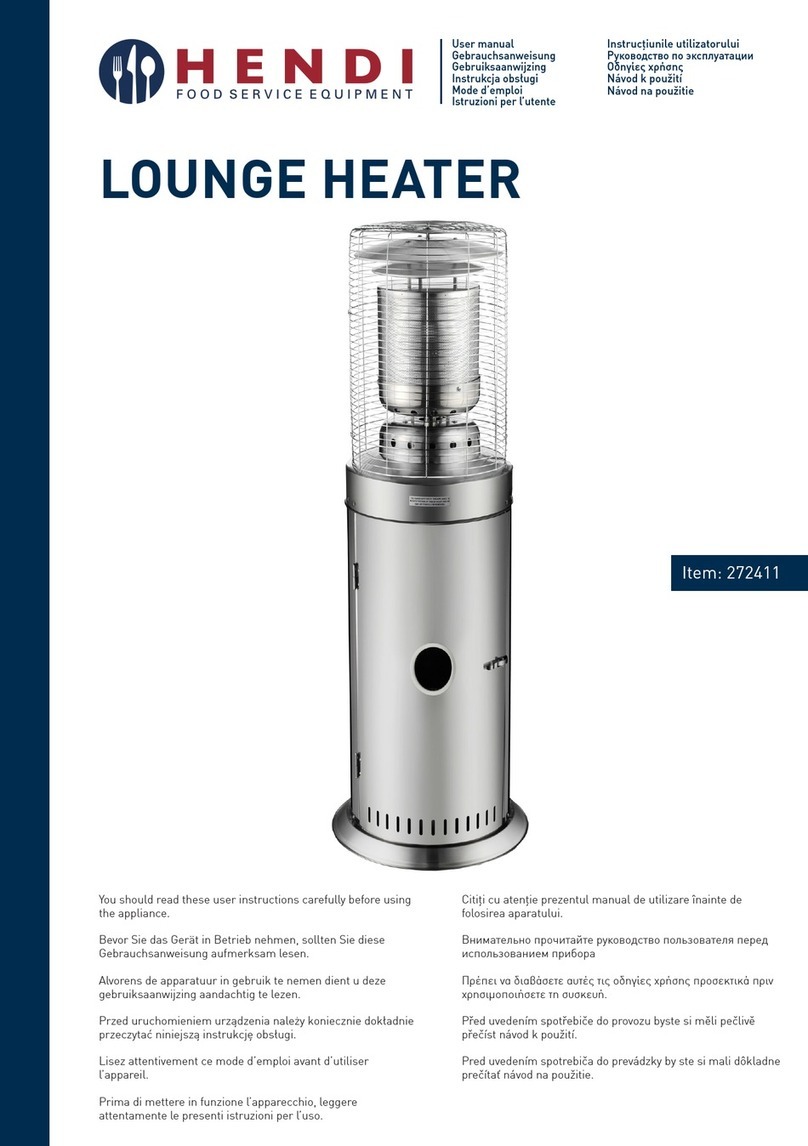
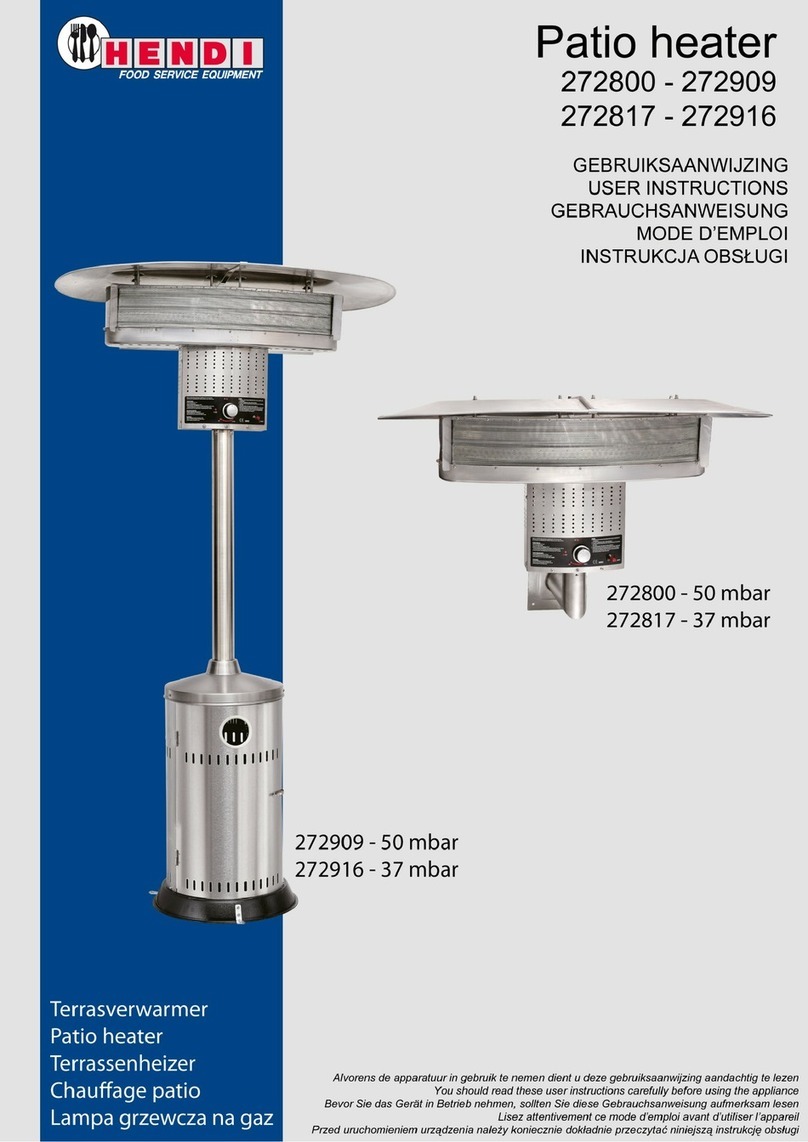
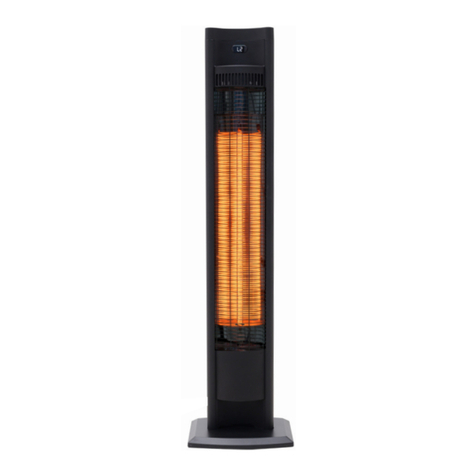
Hendi 272602 User manual

You should read this user manual carefully before
using the appliance
Bevor Sie das Gerät in Betrieb nehmen, sollten
Sie diese Gebrauchsanweisung aufmerksam lesen
Alvorens de apparatuur in gebruik te nemen dient
u deze gebruiksaanwijzing aandachtig te lezen
Przed uruchomieniem urządzenia należy koniecznie
dokładnie przeczytać niniejszą instrukcję obsługi
Lisez attentivement ce mode d’emploi avant d’utiliser
l’appareil .
Měli byste si přečíst tento návod k použití Před
použitím přístroje pečlivě.
Mali by ste si prečítať tento návod na použitie Pred
použitím prístroja starostlivo.
User instructions
Gebrauchsanweisung
Gebruiksaanwijzing
Instrukcja obsługi
Mode d’emploi
Pokyny pro uživatele
Návod na používanie
Item: 272602
272701
PATIO HEATER

2
Keep this manual with the appliance.
Diese Gebrauchsanweisung bitte beim Gerät aufbewahren.
Bewaar deze handleiding bij het apparaat.
Zachowaj instrukcję urządzenia.
Gardez ces instructions avec cet appareil.
Tyto pokyny uchovávejte společně se zařízením
Tento návod si odložte s prístrojom
Steenoven 21, NL-3911 TX Rhenen www.hendi.eu
Consumption / Verbrauch / Verbruik / Zuzycie
Consommation / Consumo / Consum / потребление
Set up / Auflegung / Inrichting / Przeznaczony na
Conçu pour / Configurare / Configurarea / Настройка
Serial no. / Serien nr. / Serie nr. / Nr. seryjny / N°de série
N° seriale / Număr serial / Серийный номер
Power / Belasting / Leistung / Moc nominaina
Puissance / Potenza / Putere / Мощность
Item / Artikel / Item / Artykuł / Article
Articolo / Articol / пункт
Category / Categorie / Kategorie / Kategoria
Catégorie / Categoria / Categorie / категория
3P
(propane)
[HS] 12,5 kW [HS] 12 kW
785 g/h 785 g/h
G31 - 50 mbar G31 - 37 mbar
NL/DE/AT/PL BE/FR/LU/GB/IE
0063CP7503
Country / Land / Land / Kraj / Payes
Paese / țară / страна
3P
(propane)
[HS] 13,5 kW
933 g/h
G30 - 50 mbar
AT
A n'utiliser qu'à l'extérieur des locaux.
Consulter la notice avant l'utilisation.
ATTENTION : des parties accessibles peuvent être très
chaudes. Eloigner les jeunes enfants.
Può essere utilizzato solo all'aperto.
Prima dell'uso leggere attentamente le istruzioni d'uso.
AVVERTENZE! I componenti del dispositivo possono essere molto caldi.
Assicurarsi che non ci siano bambini nelle vicinanze del dispositivo.
A se folosi doar spații deschise.
Citiți cu atenție instrucțiunile înainte de utilizarea aparatului.
AVERTISMENT: piesele accesibile pot fi foarte fierbinți.
A nu se lăsa la îndemâna copiilor.
Использовать на открытом воздухе. Перед использованием
устройства прочитайте, пожалуйста, руководство
по обслуживанию. ВНИМАНИЕ: Детали устройства могут быть
горячими. Убедитесь в том, что рядом с устройством нет детей.
272602 Patio Heater
3B/P
butane/
propane
( )
Use outdoors only.
Read the instructions before using the appliance.
WARNING: accessible parts may be very hot.
Keep young children away.
Nur im Freien verwenden"
Lesen Sie die Bedienungsanleitung vor Inbetriebnahme
des Gerätes. ACHTUNG: Zugängliche Teile können sehr
heiß sein. Kinder fernhalten.
Alleen buiten gebruiken.
Lees de instructies voor ingebruikname.
WAARSCHUWING: Aanraakbare delen kunnen erg heet zijn.
Houdt jonge kinderen op afstand.
Stosować tylko na wolnej przestrzeni.
Przeczytaj instrukcję przed użyciem urządzenia.
OSTRZEŻENIE: dostępne części urządzenia mogą być bardzo gorące.
Trzymaj dzieci z dala od urządzenia.
Steenoven 21, NL-3911 TX Rhenen www.hendi.eu
Consumption / Verbrauch / Verbruik / Zuzycie
Consommation / Consumo / Consum / потребление
Set up / Auflegung / Inrichting / Przeznaczony na
Conçu pour / Configurare / Configurarea / Настройка
Serial no. / Serien nr. / Serie nr. / Nr. seryjny / N°de série
N° seriale / Număr serial / Серийный номер
Power / Belasting / Leistung / Moc nominaina
Puissance / Potenza / Putere / Мощность
Item / Artikel / Item / Artykuł / Article
Articolo / Articol / пункт
Category / Categorie / Kategorie / Kategoria
Catégorie / Categoria / Categorie / категория 3P (propane)
[HS] 12,5 kW [HS] 12 kW
785 g/h 785 g/h
G31 - 50 mbar G31 - 37 mbar
NL/DE/AT/PL BE/FR/LU/GB/IE
Country / Land / Land / Kraj / Payes
Paese / țară / страна
3P (propane)
[HS] 13,5 kW
933 g/h
G30 - 50 mbar
AT
A n'utiliser qu'à l'extérieur des locaux.
Consulter la notice avant l'utilisation.
ATTENTION : des parties accessibles peuvent être très
chaudes. Eloigner les jeunes enfants.
Può essere utilizzato solo all'aperto.
Prima dell'uso leggere attentamente le istruzioni d'uso.
AVVERTENZE! I componenti del dispositivo possono essere molto caldi.
Assicurarsi che non ci siano bambini nelle vicinanze del dispositivo.
A se folosi doar spații deschise.
Citiți cu atenție instrucțiunile înainte de utilizarea aparatului.
AVERTISMENT: piesele accesibile pot fi foarte fierbinți.
A nu se lăsa la îndemâna copiilor.
Использовать на открытом воздухе. Перед использованием
устройства прочитайте, пожалуйста, руководство
по обслуживанию. ВНИМАНИЕ: Детали устройства могут быть
горячими. Убедитесь в том, что рядом с устройством нет детей.
272701 Patio Heater retractable
3B/P butane/
propane
( )
Use outdoors only.
Read the instructions before using the appliance.
WARNING: accessible parts may be very hot.
Keep young children away.
Nur im Freien verwenden"
Lesen Sie die Bedienungsanleitung vor Inbetriebnahme
des Gerätes. ACHTUNG: Zugängliche Teile können sehr
heiß sein. Kinder fernhalten.
Alleen buiten gebruiken.
Lees de instructies voor ingebruikname.
WAARSCHUWING: Aanraakbare delen kunnen erg heet zijn.
Houdt jonge kinderen op afstand.
Stosować tylko na wolnej przestrzeni.
Przeczytaj instrukcję przed użyciem urządzenia.
OSTRZEŻENIE: dostępne części urządzenia mogą być bardzo gorące.
Trzymaj dzieci z dala od urządzenia.
0063/16
0063CP7503

Dear Customer,
Thank you for purchasing this Hendi appliance. Please read this manual carefully before connecting the
appliance in order to prevent damage due to incorrect use. Read the safety regulations in particular very
carefully.
Safety regulations
• Incorrect operation and improper use of the ap-
pliance can seriously damage the appliance and
injure users.
• The appliance may only be used for the purpose
for which it was intended and designed. The man-
ufacturer is not liable for any damage caused by
incorrect operation and improper use.
• Keep the appliance and electrical plug away from
water and any other liquids. In the unlikely event
that the appliance should fall into water, imme-
diately pull the plug out of the socket and have
the appliance checked by a certified technician.
Not following these instructions could give rise to
life-threatening situations.
• Never try to open the casing of the appliance your-
self.
• Do not insert any objects in the casing of the ap-
pliance.
• Do not touch the plug with wet or damp hands.
• Regularly check the plug and cord for any damage.
Should the plug or cord be damaged have it/them
repaired by a certified repair company.
• Do not use the appliance after it has fallen or is
damaged in any other way. Have it checked and re-
paired, if necessary, by a certified repair company.
• Do not try to repair the appliance yourself. This
could give rise to life-threatening situations.
• Make sure the cord does not come in contact with
sharp or hot objects and keep it away from open
fire. To pull the plug out of the socket, always pull
on the plug and not on the cord.
• Make sure that no one can accidentally pull the
cord (or extension cord) loose or trip over the cord.
• Always keep an eye on the appliance when in use.
• Children do not understand that incorrect use of
electrical appliances can be dangerous. Therefore,
never let children use home appliances without
supervision.
• Always pull the plug out of the socket when the
appliance is not being used and always before
cleaning.
• Warning! As long as the plug is in the socket the
appliance is connected to the power source.
• Turn off the appliance before pulling the plug out
of the socket.
• Never carry the appliance by the cord.
• Do not use any extra devices that are not supplied
along with the appliance.
• Only connect the appliance to an electrical outlet
with the voltage and frequency mentioned on the
appliance label.
• Avoid overloading.
• Turn off the appliance after use by removing the
plug from the socket.
• Always remove the plug from the socket when fill-
ing or cleaning the appliance.
• The electrical installation must comply with the
applicable national and local regulations.
• This appliance is not intended for use by persons
(including children) with reduced physical, sensory
or mental capabilities, or lack of experience and
knowledge, unless they have been given supervi-
sion or instruction concerning use of the appliance
by a person responsible for their safety.
3
NLEN

4
EN
Patio heater safety warnings
The appliance must be installed in accordance with the instructions and local regulations
• Do not use this appliance indoors, as it may cause
personal injury or property damage.
• Do not store gas cylinder indoors.
• Do not obstruct the ventilation holes of the cylin-
der housing.
• Do not move this appliance when in operation.
• Do not move this appliance after it has been turned
off until the temperature has cooled down.
• Do not attempt to alter the appliance in any way.
• Do not use this appliance until all connections
have been leak tested.
• Do not paint the radiant screen, control panel or
top canopy reflector.
• This appliance must be installed and the gas cyl-
inder stored in accordance with the regulation in
force.
• Shut off the valve at the gas cylinder or the regula-
tor before moving the appliance.
• Use only the type of gas and the type of cylinder
specified by the manufacturer.
• Installation and repair should be done by a quali-
fied service person.
• In case of violent wind particular attention must be
taken against tilting of the appliance.
• To change the gas cylinder in a well ventilated
area, away from any inflammation sources.
• To check that the regulator seal is correctly fitted
and able to fulfill its function.
• To close the gas supply at the valve of the gas cyl-
inder or the regulator after use.
• In the event of gas leakage, the appliance shall not
be used or if alight, the gas supply shall be shut off
and the appliance shall be investigated and recti-
fied before it is used again.
• Checking the tubing or the flexible hose per month
and each time the cylinder is changed, if it shows
of cracking, splitting or other deterioration, it shall
be exchanged with 1.3m long and approved new
gas hose (recommended).
• The tubing or the flexible hose must be changed
within two years.
• The heater should be inspected before use and we
recommend annually by a qualified service per-
son. More frequent cleaning may be required as
necessary. It is imperative that control compart-
ment, burners and circulating air passageways of
the appliance be kept clean.
• Shut off and check heater immediately if any of the
following conditions exist:
- The smell of gas in conjunction with extreme
yellow tipping of the burner flames.
- Heater does not reach a proper temperature.
A temperature less than 5℃ will cause restricted
heat flow and the appliance will not work prop-
erly.
- The appliance starts making popping noises dur-
ing use (a slight popping noise is normal when
the appliance is extinguished).
• To store this appliance indoors is permissible, only
if gas cylinder is disconnected and removed from
the appliance.
• The regulator & hose assembly must be located
out of pathways where people may trip over it or
in area where the hose will not be subject to acci-
dental damage.
• Any guard or other protective device removed for
servicing the heater must be replaced before op-
erating the heater.
• Children and adults should be warned of the haz-
ards of high surface temperatures and should stay
away to avoid burns or clothing ignition.
• Young children and pets should be carefully super-
vised when they are in the area of the heater.
• Clothing or other flammable materials should not
be hung from the heater, or placed near the heater.
• Always maintain at least one meter clearance
from combustible materials

5
EN
Part List
Assembly parts supplied:
• 5pcs bolts M5 x 12 and 5pcs washers for rear panel of housing and base.
• 5pcs bolts M5 x 12 and 5pcs washers for rear panel of housing and housing lid.
• 3pcs bolts M5 x 12 and 3pcs washers for connection of post assembly.
• 4pcs bolts M5 x 12 and 4pcs washers for the post and housing lid.
• 3pcs wing nuts and 3pcs washers for reflector.
• 3pcs bolts M5 x 12 and 3pcs washers for main burner and the post.
• 6pcs bolts M5 x 8 and 6pcs washers for base stands and base.
• 2pcs bolts, 4pcs washers and 2pcs nuts for wheels assembly.
Patio heater part:
Item No Description
1 Reflector assembly
2 Burner screen
3 Lower tray of burner
4 Lower screen cone assembly
5 Post assembly
6 Housing lid
7 Rear panel of housing
8 Wheel
9 Base
10 Door
11 Hinge
12 Assembly Bolts M5x10
13 Washers M5
14 Big washers M6
15 Nut M6
16 Lock
17 Plastic cover
18 Inner pipe
19 Igniter
Figure 1 Figure 2

6
EN
Patio heater assembly
Assembly instructions
• Screwdriver / Adjustable Spanners / Wrenches
• Leak Detection Solution one part detergent and
three parts water
• Before assembly, make sure all protection packing
material must be moved.
• Assembling all nuts and bolts loosely at first.
Tighten all connections after completion of as-
sembly. This eases your work and increase the
stability of your appliance.
• Small deviations in equipment may occur. This is
no lack of quality but subject to improvements.
SETP 1: Screw rear panel of housing to the base with
5pcs bolts M5 x 12 and 5pcs washer. (Detail
Abb. A)
SETP 2: Push the housing lid over rear panel of
housing and place onto rear panel of hous-
ing. Screw together the housing lid and rear
panel of housing with 5pcs bolts M5x12 and
5pcs washers. (Detail Abb. B)
SETP 3: Fix the post assembly upwards onto the
housing lid with 4pcs bolts M5 x 12 and 4pcs
washers, then put plastic cover through the
post. (Detail Abb. D-1)Connect the post as-
sembly with 3pcs M5x12 screw and 3pcs flat
washer. (Detail Abb. D-2)
SETP 4: Fix one piece reflector to the central dome
with 1pc bolt M6*8, 1pcs cap screw, 1pcs
flat washer firstly. (Detail Abb. E-1).Connect
the second reflector part to the first one and
central dome with 3pc bolt M6x8, 3pcs cap
screw, 3pcs flat washer later. (Detail Abb.
E-2). Fix the third reflector part with 5pc
bolt M6x8, 5pcs cap screw, 5pcs flat washer
at last.. (Detail Abb. E-3)
SETP 5: Tighten inner gas pipe to main burner (See
Figure 1), Then fix main burner to the post
with 3 bolts M5x12 and 3pcs washers. (De-
tail Abb. F)
NOTE: DO NOT OVER TIGHTEN! REFER TO
LEAK TESTING ON PAGE 5.
SETP 6: Fix the door to housing. (See Figure 2 and
Detail Abb. F)

7
EN
Optional base stand
Base stand assembly parts: 6pcs bolts M5 x 8 and
6pcs washers for base stands and base.
Attach 3pcs stands to the base.
Buy suitable hook bolts or rawlbolts from your lo-
cal market to insert them into the ground or floor
through base stand holes for this appliance stability.
(See Figure 3)
Optional wheels
Wheels assembly parts: 2pcs bolts, 4pcs washers
and 2pcs nuts for wheels assembly.
Collect wheels parts together and fix wheels to the
base. (See Figure 4)
Operating instructions
Before first use and after every gas cylinder change, gas delivery system must be purged of air before ig-
niting! To do this, turn the control knob counter-clockwise to the pilot setting. Press knob in and hold for 1
minute before attempting ignition.
To light the pilot
• Check all connections prior to each use.
• Turn on main gas supply.
• Press to turn control knob counter-clockwise to
PILOT, see right photo.
• Hold knob depressed, press IGNITION button re-
peatedly until pilot flame is lit, then continue to
hold the knob depressed for 10 seconds until the
pilot remains it after releasing knob.
• If pilot fails to ignite or alight, press to turn knob
clockwise to OFF and repeat.
Figure 3
Figure 4

8
EN
To light the patio heater
• The pilot should be lit and the knob set to PILOT.
• Press the knob 3mm and turn anti-clockwise to
HIGH.
• When mesh glows lit, turn knob clockwise from
HIGH to LOW as needed.
Note: The burner may be noisy when initially
turned on. To eliminate excessive noise from the
burner, turn the control knob to the pilot position.
Then, turn the knob to the level of heat desired.
Re-lighting
Note: For your safety, Control Knob cannot be turned OFF without first depressing Control Knob in PILOT
position and then rotating it to OFF.
• Turn Control Knob to OFF.
• Wait at least 5 minutes, to let gas dissipate, before
attempting to re-light pilot.
• Repeat the “Lighting” steps
To extinguish
• Hold knob depressed & turn the knob clockwise
to ‘OFF’
• Close the valve of the gas cylinder or the regulator
after use.
• Allow this appliance to cool before moving.
Note: After use, some discoloration of the emitter
screen is normal.
Leak testing
NEVER USE A NAKED FLAME TO CHECK FOR LEAKS.
NEVER LEAK TEST WHILE SMOKING
The gas connections on this appliance are leak test-
ed at the factory prior to shipment.
This appliance needs to be periodically checked
for leaks and an immediate check is required if the
smell of gas is detected.
• Make a soap solution using 1 part of liquid
dish-washing soap to 3 parts water. The soap
solution can be applied with a soap bottle, brush,
or rag to the leak tested points shown in the figure
above.
• The valve of the gas cylinder should be in the OFF
position at this point of the leak test. Once the
soapy solution is applied to the gas connections,
the valve of the gas cylinder needs to be turned to
the ON position.
• Soap bubbles will begin to form in the soapy solu-
tion if a leak is present.
• In case of a leak, turn off the gas supply. Tighten
any leaking fittings, then turn the gas supply on
and recheck.
Leak Test Point

9
EN
Gas requirements
• The pressure regulator and hose assembly to be
used must conform to local standard codes.
• Never use a gas cylinder with a damaged body,
valve, collar, or foot ring.
• A dented or rusty gas tank may be hazardous and
should be checked out by a gas supplier.
• Never connect this appliance to an unregulated
gas source.
• When the appliance is not in use, turn the gas cyl-
inder OFF.
• Always perform a leak test on gas connections
whenever a cylinder is connected. If bubbles form
in the leak test solution, do not use. Never use a
flame to test for leaks.
Connecting to a gas cylinder
• Recommend to use 9kg gas cylinder or refer to
your gas supplier for suitable gas cylinder.
• Refer to your gas supplier for instructions on the
use of your gas cylinder.
• Only change gas cylinders outdoors or in a well
ventilated area away from naked flames and any
other source of ignition.
• The gas cylinder must always be used in an up-
right position.
• Close the heater control knob by turning fully
clockwise.
• Close the gas cylinder tap and then attach the reg-
ulator onto the gas cylinder.
• Tighten all connections firmly and with a spanner
where appropriate. The cylinder should be located
on the cylinder base.
• Check for leaks at all joints using soapy water. If
a leak is found, tighten the joint and then re-test.
Important safety rules
For use outdoors or in amply ventilated areas.
An amply ventilated area must have a minimum of
25% of the surface area open.
The surface area is the sum of the walls surface.
The use of this appliance in enclosed areas can be
dangerous and is PROHIBITED.
Children and adults should be aware of the high op-
erating temperatures of areas above the post when
operating this heater. Children should be carefully
supervised when in the vicinity of the heater.
NEVER hang anything, including clothes or any oth-
er flammable items, on this heater.
DO NOT operate this heater unless it is fully assem-
bled with its reflector in place.
Respect the minimum clearances from combustible
materials.
The length of the gas hose may not exceed 1,5 me-
ters.
Ceiling / Overhang
1 mtr
1 mtr
Wall

10
EN
Maintenance
To enjoy years of outstanding performance from
your heater, make sure you perform the following
maintenance activities on a regular basis:
• Keep exterior surfaces clean.
• Use warm soapy water for cleaning. Never use
flammable or corrosive cleaning agents.
• While washing your unit, be sure to keep the area
around the burner and pilot assembly dry at all
times. If the gas control is exposed to water in any
way, DO NOT try to use it. It must be replaced.
• Airflow must be unobstructed. Keep controls,
burner and circulation air passageways clean.
Signs of possible blockage include:
• Gas odor with extreme yellow tipping of flame.
• Heater does NOT reach the desired temperature.
• Heater glow is excessively uneven.
• Heater makes popping noises.
• Spiders and insects can nest in burner or orifices.
This dangerous condition can damage the heater
and render it unsafe for use. Clean burner holes
by using a heavy duty pipe cleaner. Compressed air
may help clear away smaller particles.
• Carbon deposits may create a fire hazard. If any
carbon deposits develop, clean dome and engine
with warm soapy water.
Note: in a salt-air environment (such as near the
sea), corrosion occurs more quickly than normal.
Frequently check the corroded areas and repair
them promptly.
Servicing
• Please consult your local dealer for servicing this
appliance and replacement of its parts. The ser-
vicing of the appliance shall be carried out only by
authorised personnel.
• Caution: do not use unauthorized parts or compo-
nents for this appliance, only use original equip-
ment replacement parts and components. The use
of unauthorized parts or components will void the
warranty and can create an unsafe condition.
Storage
Between uses:
Turn control knob OFF
Turn gas cylinder OFF
Store Heater upright in an area sheltered from di-
rect contact with inclement weather (such as rain,
sleet, hail, snow, dust and debris).
If desired, cover to protect exterior surfaces and to
prevent build up in air passages.
Note: Wait until heater is cool before covering.
During periods of extended inactivity or when trans-
porting:
Turn control knob OFF.
Disconnect gas cylinder and move to a secure, well
ventilated location outdoors. DO NOT store in a loca-
tion that will exceed 50°C.
Store heater upright in an area sheltered from direct
contact with inclement weather (such as rain, sleet,
hail, snow, dust and debris).
If desired, cover heater to protect exterior surfaces
and to prevent build up in air passages.
Note: Wait until heater is cool before covering
CAUTION: DO NOT USE UNAUTHORISED PARTS OR COMPONENT FOR THIS APPLIANCE.
ONLY USE ORIGINAL EQUIPMENT REPLACEMENT PARTS AND COMPONENTS.
To retract the heater (272701 only)
Retracting the heater makes storage much easier.
Loose the plastic screw (17) properly. Pull up the
main post vertically until it encounters housing lid.
Turn the main post clockwise and lower it until it has
reached the desired level. To lock the main post on
the desired level pull up the main post just a little
and turn it counter clockwise. Then lower it until the
main post stands on its screws. Tighten the plastic
screw to keep the heater stable.
Note: Mind your head. Wait until heater is cool be-
fore retracting.

11
EN
Troubleshooting
PROBLEM : AND THIS CONDITION EXISTS: THEN DO THIS:
Pilot won’t light
Cylinder valve is closed Open valve
Blockage in orifice or pilot tube Clean or replace orifice or pilot tube.
Air in the gas line
Open gas line and bleed it (pressing control
knob in) for not more than 1-2 minutes or
until you smell gas.
Low gas pressure Replace propane gas (disposable) cylinder
with a new cylinder
Igniter fails
Use match to light pilot (with match holder,
see picture**); obtain new igniter and
replace
Pilot won’t stay lit
Dirt build up around pilot Clean dir t from around pilot
Connection between gas valve and pilot
assembly is loose Tighten connection and perform leak test
Thermocouple is not operating correctly Replace thermocouple
Burner won’t light
Gas pressure is low Replace propane gas (disposable) cylinder
with a new cylinder
Blockage in orifice Clear blockage
Control knob is not in "ON” position Turn control knob to "ON" position
Burner flame is low
Note: Do not operate heater below 5°C
(40°F)
Gas pressure is low Replace propane gas (disposable) cylinder
with a new cylinder
Outdoor temperature is greater than 40˚F
and tank is less than 25% full
Replace propane gas (disposable) cylinder
with a new cylinder
Supply hose is bent or kinked Straighten hose and per for m leak test
on hose
Control knob is fully " ON"
Turn control knob to " OFF", let cool to
room temperature and check burner and
orifices for blockage
Emitter glows uneven
Note: Bottom 1 inch of emitter normally
does not glow
Gas pressure is low Replace propane gas (disposable) cylinder
with a new cylinder
Base is not on a level surface Place heater on a level surface
Heater is level Clean burner
Carbon build-up Dirt or film on reflector and emitter Clean reflector and emitter
Thick black smoke
Blockage in burner
Turn control knob to "OFF", let cool to room
temperature and remove blockage and
clean burner inside and outside.
If for some reasons your ignition fails to deliver a
spark, the heater can be started by inserting a lit
match using supplied match holder through the
burner hole (see left photo) while pushing the con-
trol knob in the “PILOT” position.
IN THE EVENT OF ANY PROBLEM, PLEASE ALWAYS CONSULT YOUR LOCAL DEALER.

12
EN
Warranty
Any defect affecting the functionality of the appli-
ance that becomes apparent within one year after
purchase will be corrected by free repair or replace-
ment provided the appliance has been used and
maintained in accordance with the instructions and
has not been abused or misused in any way. Your
statutory rights are not affected. If the appliance is
claimed under warranty, state where and when it
was bought and include proof of purchase (e.g. re-
ceipt).
In line with our policy of continuous product devel-
opment we reserve the right to change the product,
packaging and documentation specifications with-
out notice.
Discarding & Environment
At the end of the life of the appliance, please dispose
of the appliance according to the regulations and
guidelines applicable at the time.
Throw packing materials like plastic and boxes in
the appropriate containers.

Sehr geehrte Kundin, sehr geehrter Kunde,
wir danken Ihnen für den Kauf des Gerätes Hendi. Machen Sie sich bitte mit dieser Anleitung noch vor der
Inbetriebnahme des Gerätes vertraut, um Schäden durch die unsachgemäße Bedienung zu vermeiden. Den
Sicherheitsregeln ist besondere Aufmerksamkeit zu widmen.
Sicherheitsregeln
• Die unsachgemäße Bedienung des Geräts kann zur
schweren Beschädigung des Geräts sowie zu Verlet-
zungen führen.
• Das Gerät ist ausschließlich zu dem Zweck zu be-
nutzen, zu dem es hergestellt wurde. Der Hersteller
haftet nicht für Schäden, die auf unsachgemäße Be-
dienung des Geräts zurückzuführen sind.
• Den Kontakt des Gerätes und des Steckers mit Was-
ser oder einer anderen Flüssigkeit vermeiden. Den
Stecker unverzüglich aus dem Stecker ziehen und
das Gerät von einem anerkannten Fachmann prüfen
lassen, wenn das Gerät unbeabsichtigterweise ins
Wasser fällt. Bei Nichteinhaltung dieser Sicherheits-
vorschriften besteht Lebensgefahr.
• Nie eigenständig das Gehäuse des Gerätes zu öffnen
versuchen.
• In das Gehäuse des Gerätes keine Gegenstände ein-
führen.
• Den Stecker nicht mit nassen oder feuchten Händen
berühren.
• Den Stecker regelmäßig auf eventuelle Schäden hin
prüfen. Beschädigte Stecker oder Kabel von einer
zugelassenen Reparaturwerkstatt reparieren lassen.
• Das Gerät nicht mehr benutzen, wenn es herunterge-
fallen ist oder sonst wie beschädigt wurde. Das Gerät
von einer zugelassenen Reparaturwerkstatt prüfen
und gegebenenfalls reparieren lassen.
• Nicht versuchen, das Gerät eigenständig zu reparie-
ren. Dann besteht Lebensgefahr.
• Das Kabel von scharfen und heißen Gegenständen
sowie von offenem Feuer fernhalten. Beim Raus-
ziehen des Steckers stets am Stecker und nicht am
Kabel ziehen.
• Beachten Sie, dass das (Verlängerungs-) Kabel nicht
irrtümlicherweise gelöst wird und dass man nicht
darüber stolpern kann.
• Dieses Gerät darf ausschließlich benutzt werden für
das Ziel wofür es ursprünglich entwürfen ist.
• Das Gerät bei Bedienung stets überwachen.
• Kinder kennen die Gefahr der unsachgemäßen Be-
dienung elektrischer Geräte nicht. Kinder daher
niemals unbeaufsichtigt Haushaltsgerät bedienen
lassen!
• Den Stecker rausziehen wenn das Gerät nicht be-
nutzt wird und auch vor jeder Reinigung.
• Gefahr! Befindet sich der Stecker in der Steckdose,
so wird das Gerät mit Netzspannung versorgt.
• Das Gerät ausschalten, bevor Sie den Stecker abzie-
hen.
• Das Gerät nie am Kabel tragen.
• Keine zusätzlichen Hilfsmittel benutzen, die nicht mit
dem Gerät mitgeliefert wurden.
• Das Gerät darf nur an eine Steckdose angeschlossen
werden mit dem auf dem Typenschild angegebene
Spannung und Frequenz.
• Überlastung ist zu vermeiden.
• Das Gerät ist nach dem Gebrauch auszuschalten, in-
dem der Stecker aus der Steckdose herausgezogen
wird.
• Vor dem Nachfüllen oder Reinigen ist immer der Ste-
cker aus der Steckdose herauszuziehen.
• Die elektrische Anlage hat den nationalen und regio-
nalen Vorschriften zu entsprechen.
• Dieses Gerät eignet sich nicht für den Gebrauch
durch Personen (gilt auch für Kinder) mit geringe-
rer Motorik, Sensorik oder geistiger Fähigkeit oder
mangelhafter Erfahrung und Wissen, es sei denn, sie
werden bei dem Gebrauch des Gerätes beaufsichtigt
oder erhalten Anweisungen von einer Person, die für
ihre Sicherheit die Verantwortung trägt.
13
NLDE

14
DE
Terrassenheizers – sicherheitshinweise
Das Gerät muss gemäss der Anleitung und den örtlichen vorschriften installiert werden.
• Dieses Gerät nicht in Innenräumen verwenden, da
dies zu Personen- und Sachschäden führen kann.
• Gasflaschen nicht in Innenräumen lagern.
• Nicht die Lüftungsschlitze im Gasflaschengehäu-
se verdecken.
• Gerät nicht bewegen, wenn es in Gebrauch ist.
• Gerät nach dem Abschalten erst bewegen, wenn
es ausreichend abgekühlt ist.
• Keine Änderungen am Gerät vornehmen.
• Gerät nicht einsetzen, bis alle Anschlüsse auf
Leckagen getestet wurden.
• Radiatorgitter, Steuerung oder oberen Reflektor-
schirm nicht anstreichen.
• Dieses Gerät und die Gasflasche müssen entspre-
chend den geltenden Bestimmungen installiert
bzw. gelagert werden.
• Vor dem Transport des Geräts das Ventil der Gas-
flasche oder des Reglers schließen.
• Nur das Gas und die Gasflaschen verwenden, die
vom Hersteller empfohlen werden.
• Installation und Reparaturen dürfen nur von quali-
fiziertem Personal durchgeführt werden.
• Bei starkem Wind muss darauf geachtet werden,
dass das Gerät nicht kippt.
• Die Gasflasche nur in einem gut belüfteten Be-
reich außerhalb der Reichweite von entzündlichen
Substanzen austauschen.
• Bitte prüfen, ob die Reglerdichtung richtig sitzt
und einwandfrei funktioniert.
• Gaszufuhr nach Gebrauch am Ventil der Gasfla-
sche oder des Reglers schließen.
• Bei Gasleckagen darf das Gerät nicht benutzt wer-
den. Wenn es in Gebrauch ist, sofort die Gaszufuhr
unterbrechen und das Gerät prüfen und den Feh-
ler beheben, bevor es wieder in Gebrauch genom-
men wird.
• Einmal im Monat und jedes Mal, wenn die Flasche
gewechselt wird, die Leitungen und den flexiblen
Schlauch prüfen. Sind Risse oder andere Beschä-
digungen zu erkennen, diese mit einem neuen
1,3m langen zugelassenem Gasschlauch (emp-
fohlen) ersetzen.
• Die Leitungen und der flexible Schlauch müssen
innerhalb von zwei Jahren ausgewechselt werden.
• Wir empfehlen Ihnen der Heizstrahler vor Ge-
brauch und mindestens einmal im Jahr durch ei-
nen qualifizierten Techniker geprüft werden. Wenn
erforderlich, muss das Gerät häufiger gereinigt
werden. Es ist unerlässlich, den Steuerungskas-
ten, den Brenner und die Belüftungsöffnungen
des Gerätes sauber zu halten.
• Den Heizstrahler umgehend ausschalten und prü-
fen, wenn einer der folgenden Fälle eintritt:
- Gasgeruch in Verbindung mit extrem gelben
Spitzen der Brennerflamme.
- Heizstrahler erreicht nicht die korrekte Tempe-
ratur. Eine Temperatur unter 5°C führt zu einem
eingeschränkten Wärmefluss und das Gerät ar-
beitet nicht richtig.
- Das Gerät beginnt während des Einsatzes knal-
lende Geräusche zu machen (ein leises Knallen
ist normal, wenn das Gerät gelöscht wird).
• Eine Lagerung des Gerätes in Innenräumen ist nur
dann gestattet, wenn die Gasflasche vom Gerät
entfernt wird.
• Der Gasdruckregler und der Schlauch müssen
so platziert werden, dass Personen nicht über sie
stolpern und der Schlauch nicht beschädigt wer-
den können.
• Alle Schutz- oder weiteren Sicherheitsvorrichtun-
gen, die für Reparaturen vom Heizstrahler entfernt
wurden, müssen vor dem nächsten Gebrauch des
Heizstrahlers wieder montiert werden.
• Kinder und Erwachsene müssen über die Ge-
fahren hoher Oberflächentemperaturen gewarnt
werden und müssen sich in sicherer Entfernung
halten, damit es nicht zu Verbrennungen oder ei-
ner Entzündung von Kleidung kommt.
• Kleine Kinder und Haustiere müssen sorgfältig
beaufsichtigt werden, wenn sie sich im Bereich
des Heizstrahlers aufhalten.
• Kleidung und anderes entflammbares Materi-
al darf nicht an den Heizstrahler oder in dessen
Nähe gehängt werden.
• Stets einen Mindestabstand von ein Meter zu allen
entzündlichen Materialien wahren.

15
DE
Stückliste
Mitgelieferte montageteile:
• Schrauben M5x12 (5 Stück) und Unterlegscheiben (5 Stück) für die Montage der hinteren Gehäusewand und des Fußes.
• Schrauben M5x12 (5 Stück) und Unterlegscheiben (5 Stück) für die Montage der hinteren Gehäusewand und des Gehäusedeckels.
• Schrauben M5x12 (3 Stück) und Unterlegscheiben (3 Stück) für die Montage des Ständers.
• Schrauben M5x12 (4 Stück) und Unterlegscheiben (4 Stück) für die Montage
des Ständers und des Gehäusedeckels.
• Flügelmuttern (3 Stück) und Unterlegscheiben (3 Stück) für die Montage des Reflektors.
• Schrauben M5x12 (3 Stück) und Unterlegscheiben (3 Stück) für die Montage
des Hauptbrenners und des Ständers.
• Schrauben M5x8 (6 Stück) und Unterlegscheiben (6 Stück) für die Montage von Befestigungshaltern am Fuß.
• Schrauben (2 Stück), Unterlegscheiben (4 Stück) und Muttern (2 Stück) für die Montage der Räder.
Teile des Terrassenheizers:
Item No Bezeichnung
1 Reflektor-Bausgruppe
2 Brennergitter
3 Unterer Untersatz des Brenners
4 Unteres Kegelgitter
5 Ständer-Baugruppe
6 Gehäusedeckel
7 Hintere Gehäusewand
8 Rad
9Fuß
10 Tür
11 Türband
12 Montageschrauben M5x10
13 Unterlegscheiben M5
14 Große Unterlegscheiben M6
15 Mutter M6
16 Schloss
17 Kunststoffabdeckung
18 Innenrohr
19 Anzünder
Figure 1 Figure 2

16
DE
Montage des Terrassenstrahlers
Montageanleitung
• Benötigte Werkzeuge: Schraubenzieher / Universal-
schlüssel / Schraubenschlüssel.
• Lösung zur Dichtheitsprüfung: ein Teil Detergens und
drei Teile Wasser.
• Vor der Montage müssen alle Elemente der Schutzver-
packung entfernt werden.
• Zuerst alle Muttern und Schrauben ohne Anziehen mon-
tieren. Alle Verbindungen sind nach dem Zusammenbauen
des Gerätes anzuziehen. Solche Verfahrensweise erleich-
tert die Montage und verbessert die Stabilität des Gerätes.
• Das gelieferte Gerät kann sich etwas von dem in der
Anleitung vorgestelltem Gerät unterscheiden. Die even-
tuellen Unterschiede bedeuten keine niedrigere Qualität
sondern ergeben sich aus dem Prozess der ständigen
Verbesserung des Produktes.
SCHRITT 1: Befestigen Sie die hintere Gehäusewand am Fuß
des Gerätes mit M5x12-Schrauben (5 Stück) mit Unterleg-
scheiben (5 Stück) – Detail A
SCHRITT 2:
Setzen Sie den Gehäusedeckel auf die hintere
Gehäusewand auf. Schrauben Sie den Gehäusedeckel und die
hintere Gehäusewand mit M5x12-Schrauben (5 Stück) zusam-
men; verwenden Sie dabei die Unterlegscheiben – Detail B
SCHRITT 3: Befestigen Sie senkrecht auf dem Gehäusede-
ckel den Ständer mit M5x12-Schrauben (4 Stück) mit Unter-
legscheiben (4 Stück). Schieben Sie die Kunststoffabdeckung
auf den Ständer auf – Detail D-1. Bauen Sie den Ständer mit
Hilfe von M5x12-Schrauben (3 Stück) und Unterlegscheiben
zusammen – Detail D-2.
SCHRITT 4: Befestigen Sie den ersten Teil des Reflektors
an der Mittelkuppel zuerst mit Hilfe einer M6x8-Schraube,
einer Zylinderschraube (1 Stück) und einer Unterlegschei-
be – Detail E-1. Befestigen Sie den zweiten Teil des Reflek-
tors am ersten Teil und an der Mittelkuppel mit Hilfe von
M6x8-Schrauben (3 Stück), Zylinderschrauben (3 Stück) und
Unterlegscheiben (3 Stück) – Detail E-2. Befestigen Sie den
dritten Teil des Reflektors mit Hilfe von M6x8-Schrauben (5
Stück), Zylinderschrauben (5 Stück) und Unterlegscheiben (5
Stück) – Detail E-3.
SCHRITT 5: Montieren Sie das innere Gasrohr am Haupt-
brenner – siehe Abb. 1. Befestigen Sie den Hauptbrenner am
Ständer mit Hilfe von M5x12-Schrauben (3 Stück) mit Unter-
legscheiben (3 Stück) – Detail F.
ACHTUNG: NICHT MIT ÜBERMÄSSIG GROSSER KRAFT AN-
ZIEHEN! BEACHTEN SIE DIE INFORMATIONEN ÜBER
DIE DICHTHEITSPRÜFUNG AUF SEITE 5
SCHRITT 6: Befestigen Sie die Tür am Gehäuse - siehe Abb.
3 und Detail F.

17
DE
Befestigungshalter (Zusatzausstattung)
Teile zur Montage von Befestigungshaltern am Fuß:
Schrauben M5x8 (6 Stück) und Unterlegscheiben (6
Stück). Befestigen Sie die 3 Halter am Fuß.
Zur Verbesserung der Stabilität des Gerätes besor-
gen Sie sich geeignete Hakenschrauben oder Dübel
bei Ihrem lokalen Händler und drehen Sie diese
über die Bohrungen in Haltern in den Untergrund
oder in den Fußboden ein.
Räder (Zusatzausstattung)
Teile für die Montage von Rädern: Schrauben (2
Stück), Unterlegscheiben (4 Stück) und Muttern (2
Stück).
Bauen Sie die Räderteile zusammen und befestigen
Sie sie am Fuß – siehe Abb. 4.
Bedienungsanleitung
Vor dem ersten gebrauch und nach jedem wechsel der gasflasche muss die gaszufuhr entlüftet werden,
bevor das gerät neu angezündet werden kann. Dafür die steuerungsknöpfe gegen den uhrzeigersinn auf die
piloteinstellung drehen. Vor dem entzünden den knopf drücken und für 1 minute gedrückt halten.
• Vor Gebrauch alle Anschlüsse prüfen.
• Hauptgaszufuhr einschalten.
• Drücken Sie, um den Drehknopf gegen den Uhr-
zeigersinn auf PILOT schalten zu können, siehe
rechtes Foto.
• Halten Sie den Drehknopf gedrückt, drücken Sie
mehrmals den Zündungsknopf bis die Zündung-
flamme angezündet ist, dann fahren Sie mit dem
Drücken den Knopfes für 10 Sekunden fort bis die
Zündung noch bleibt, nachdem Sie den Knopf los-
lassen.
• Wenn die Zündung scheitert zu entflammen, drü-
cken Sie den Drehknopf im Uhrzeigersinn zu OFF
and wiederholen Sie den Vorgang.
Abb. 3
Abb. 4

18
DE
Um den Terassenwärmer zu entflammen
• Die Zündung sollte entzündet werden und der
knopf auf PILOT geschalten werden.
• Halten Sie den Knopf 3 mm gedrückt und drehen
Sie ihn gegen den Uhrzeigersinn zu HIGH.
• Wenn das Netz glüht, drehen Sie den Knopf im
Uhrzeigersinn von HIGH zu LOW wie Sie die Tem-
peratur wünschen.
Hinweis: Der Brenner kann laut sein, wenn er zum
ersten Mal angeschaltet wird. Um zuviel Lärm des
Brenners zu vermeiden, den Steuerknopf auf die
Pilot-Position stellen. Dann den Knopf auf die ge-
wünschte Temperatur stellen.
Erneutes anzünden
Hinweis: Zu Ihrer eigenen Sicherheit kann der Steuerknopf nicht auf OFF geschaltet werden, ohne zuvor
den Steuerknopf in der PILOT-Position gedrückt zu halten; anschließend auf OFF drehen.
• Steuerknopf auf OFF stellen.
• Vor dem erneuten Anzünden der Pilotflamme min-
destens 5 Minuten warten, um das Gas verfliegen
zu lassen.
• Die Anzündschritte wiederholen.
Löschen
• Knopf gedrückt halten & den Knopf dabei im Uhr-
zeigersinn auf OFF stellen.
• Nach Gebrauch das Ventil der Gasflasche oder des
Reglers schließen.
• Vor einem Transport das Gerät abkühlen lassen.
Hinweis: Nach Gebrauch ist eine Verfärbung des
Strahlerschirms normal.
Leckagetest
NIEMALS EINE FLAMME BENUTZEN, UM AUF LECKAGEN ZU PRÜFEN. NIEMALS BEIM LECKAGETEST
RAUCHEN.
Die Gasanschlüsse dieses Gerätes wurden vor dem
Verschicken im Werk auf undichte Stellen geprüft.
Dieses Gerät muss in regelmäßigen Anständen auf
Leckagen geprüft werden und es ist ein umgehen-
der Test erforderlich, wenn ein Gasgeruch festge-
stellt wird.
• Erstellen Sie eine Seifenlauge aus 1 Teil Spül-
mittel und 3 Teilen Wasser. Die Seifenlauge kann
mit einer Sprühflasche, einem Pinsel oder einem
Tuch auf die Leckagetestpunkte aufgetragen wer-
den, wie in der Abb. oben gezeigt.
• Zu diesem Zeitpunkt des Leckagetests muss das
Ventil der Gasflasche auf OFF stehen. Sobald die
Seifenlauge auf die Gasanschlüsse aufgebracht
wurde, muss die Gasflasche auf die Position ON
gestellt werden.
• Seifenblasen beginnen sich in der Seifenlösung zu
bilden, wenn eine undichte Stelle vorhanden ist.
Im Fall einer Leckage, die Gaszufuhr ausschalten.
Undichte Anschlüsse festziehen, anschließend die
Gaszufuhr wieder einschalten und erneut prüfen.
Leckagetestpunkt

19
DE
Zu verwendendes gas
• Der Druckregler und der Schlauch müssen den
örtlich geltenden Standardcodes entsprechen.
• Niemals eine Gasflasche mit einem beschädigten
Tank, Ventil, Manschette oder Fußring verwenden.
• Ein zerbeulter oder rostiger Gasbehälter kann ge-
fährlich sein und muss durch den Gaslieferanten
ausgetauscht werden.
• Niemals das Gerät an eine ungeregelte Gasquelle
anschließen.
• Wenn das Gerät nicht in Gebrauch ist, die Gasfla-
sche auf OFF stellen.
• Immer, wenn eine Flasche angeschlossen wird, an
den Gasanschlüssen einen Leckagetest durchfüh-
ren. Das Gerät nicht verwenden, wenn sich in der
Seifenlauge Blasen bilden. Niemals eine offene
Flamme für den Leckagetest verwenden.
Anschliessen einer gasflasche
• Wir empfehlen eine 9kg-Flasche oder wenden Sie
sich an Ihren Gaslieferanten für eine geeignete
Gasflasche.
• Fragen Sie Ihren Gaslieferanten bezüglich der Ver-
wendung der Gasflasche.
• Gasflaschen nur im Außenbereich wechseln oder
in einem gut belüfteten Bereich, außer Reichwei-
te von offenem Feuer und anderen entzündlichen
Substanzen.
• Die Gasflasche muss immer in aufrechter Position
verwendet werden.
• Schließen Sie den Wärmesteuerknopf durch voll-
ständiges Drehen im Uhrzeigersinn.
• Schließen Sie den Gasflaschenhahn und bringen
Sie anschließend den Regler an der Gasflasche
an.
• Alle Anschlüsse mit einem Schraubenschlüssel,
wo möglich, fest anziehen. Die Gasflasche muss
sich auf einem Fuß befinden.
• Mit Seifenlauge an allen Verbindungen auf Lecka-
gen prüfen. Ist eine undichte Stelle vorhanden, die
Verbindung nachziehen und den Test wiederholen.
Wichtige sicherheitshinweise
Benutzung nur draußen oder in ausreichend belüf-
teten Bereichen. Bei einem ausreichend belüfteten
Bereich muss mindestens 25% des Oberflächen-
bereichs offen sein. Der Oberflächenbereich ist die
Summe der Wandoberflächen.
Die Benutzung dieses Geräts in geschlossenen
Räumen kann gefährlich sein und ist VERBOTEN.
Kinder und Erwachsene müssen sich der hohen
Betriebstemperaturen derjenigen Bereiche bewusst
sein, die oberhalb der Säule liegen, wenn der Heiz-
strahler in Betrieb ist. Kinder müssen sorgfältig be-
aufsichtigt werden, wenn sie sich in der Nähe des
Heizstrahlers aufhalten.
NIEMALS Gegenstände, einschließlich Kleidung
oder andere entzündliche Gegenstände, an den
Heizstrahler hängen.
Diesen Heizstrahler NICHT BENUTZEN, wenn er
nicht vollständig mit dem Reflektorschirm montiert
ist. Mindestabstände von explosionsgefährdeten
Materialien wahren.
Die maximal zulässige Länge des Gasschlauchs be-
trägt 1,5 Meter.
Ceiling / Overhang
1 mtr
1 mtr
Wall

20
DE
WARTUNG
Um die exzellente Leistung Ihres Heizstrahlers über Jahre zu
erhalten, die folgenden Wartungsarbeiten regelmäßig durch-
führen.
• Außenflächen sauber halten.
• Zum Reinigen warme Seifenlauge verwenden. Niemals ent-
flammbare oder ätzende Reinigungsmittel benutzen.
• Wenn Sie Ihr Gerät reinigen, immer sicherstellen, dass der
Bereich um den Brenner und die Pilotflamme trocken ist.
Wenn die Gassteuerung in irgendeiner Weise Wasser aus-
gesetzt war, NICHT versuchen, sie zu benutzen. Sie muss
ersetzt werden.
• Die Luftzirkulation darf nicht eingeschränkt sein. Steuerung,
Brenner und Belüftungswege immer sauber halten. Anzei-
chen einer Blockade sind:
• Gasgeruch bei extrem gelben Spitzen der Flamme.
• Heizstrahler erreicht NICHT die gewünschte Temperatur.
• Heizstrahler glüht außerordentlich ungleich.
• Heizstrahler gibt knallende Geräusche von sich.
• Spinnen und Insekten können sich im Brenner oder in Aus-
buchtungen verstecken. Dieser gefährliche Zustand kann
den Heizstrahler beschädigen und ihn für eine sichere Ver-
wendung unbrauchbar machen. Brenneröffnungen mit ei-
nem effizienten Rohrreiniger säubern. Mit Druckluft kleinere
Partikel entfernen.
• Kohlenstoffablagerungen können zu einem Feuer führen.
Sollten sich Kohlenstoffablagerungen bilden, den oberen Teil
des Gerätes mit warmer Seifenlauge reinigen.
Hinweis: in einer Umgebung mit hohem Salzgehalt in der Luft
(am Meer) kann es schneller zu einer Korrosion kommen als
anderswo. Die korrosionsgefährdeten Bereiche regelmäßig
prüfen und sie umgehend reparieren.
Instandhaltung
• Lassen Sie sich bitte von Ihrem lokalen Händler wegen der
Instandhaltung der Gerätes und dem Austausch der Bauteile
beraten.
• Vorsicht: Verwenden Sie keine unerlaubten Bauteile oder
Komponenten für dieses Gerät, verwenden Sie nur originale
Bauteile und Komponenten für den Austausch. Das Verwen-
den von unerlaubten Bauteilen oder Komponenten wird die
Garantie ungültig machen und kann unsichere Bedingungen
verursachen.
Lagerung
Zwischen den einzelnen Tagen der Benutzung:
- Steuerknopf auf OFF stellen.
- Gasflasche auf OFF stellen.
- Heizstrahler in aufrechter Position in einem Bereich aufbe-
wahren, der keinen Witterungseinflüssen ausgesetzt ist (z. B.
Regen, Graupel, Hagel, Schnee, Staub und Unrat).
- Wenn gewünscht, das Gerät abdecken, um die Oberflächen
zu schützen und Verschmutzungen der Belüftung zu vermei-
den.
Hinweis: Erst abdecken, wenn der Heizstrahler abgekühlt ist.
Bei längerer Lagerung oder beim Transport:
- Steuerknopf auf OFF stellen.
- Gasflaschenanschluss entfernen und Gasflasche an einen si-
cheren, gut belüfteten Ort nach draußen stellen. NICHT in ei-
nem Bereich lagern, in dem die Temperatur 50°C übersteigt.
- Heizstrahler in aufrechter Position in einem Bereich aufbe-
wahren, der keinen Witterungseinflüssen ausgesetzt ist (z. B.
Regen, Graupel, Hagel, Schnee, Staub und Unrat).
- Wenn gewünscht, das Gerät abdecken, um die Oberflächen
zu schützen und Verschmutzungen der Belüftung zu vermei-
den.
Hinweis: Erst abdecken, wenn der Heizstrahler abgekühlt ist.
ACHTUNG: NUR ORIGINALTEILE ODER -KOMPONENTEN FÜR
DIESES GERÄT VERWENDEN.
NUR ORIGINALERSATZTEILE UND –KOMPONENTEN BENUT-
ZEN.
Um den Heizstrahler einzufahren (nur für 272701)
Das Einschieben des Heizers ermöglicht einfaches und schnel-
les Platzieren. Den Knopf Nr. 17 losdrehen. Den Ständer etwas
anheben, dann mit dem Uhrzeiger drehen. Nun können Sie den
Ständer auf die gewünschte Länge einstellen: Hierzu wieder
kurz anheben und dann gegen den Uhrzeiger drehen. Schließ-
lich den Ständer einsacken lassen bis er auf den Schrauben
ruht und die Kunststoff Schraube fest andrehen.
Hinweis: Kopf weg. Warten Sie mit dem einklappen bis her
Heizstrahler abgekühlt ist
This manual suits for next models
1
Table of contents
Languages:
Other Hendi Patio Heater manuals