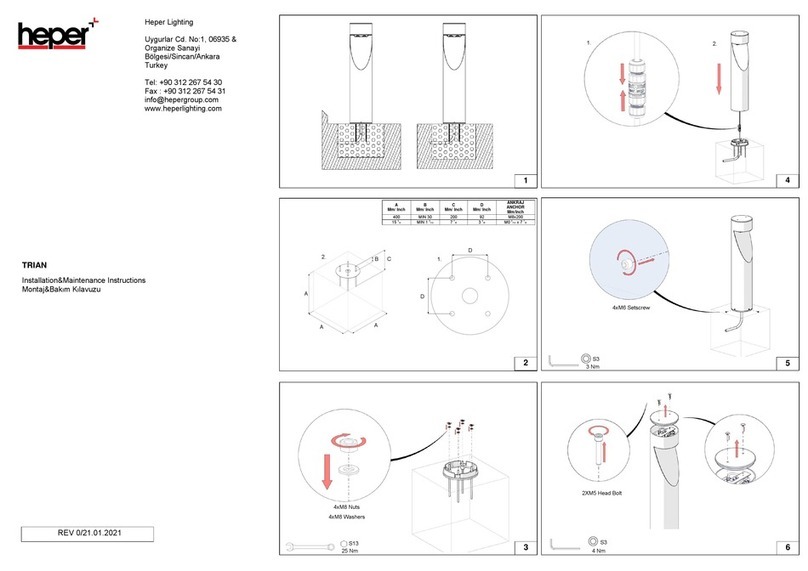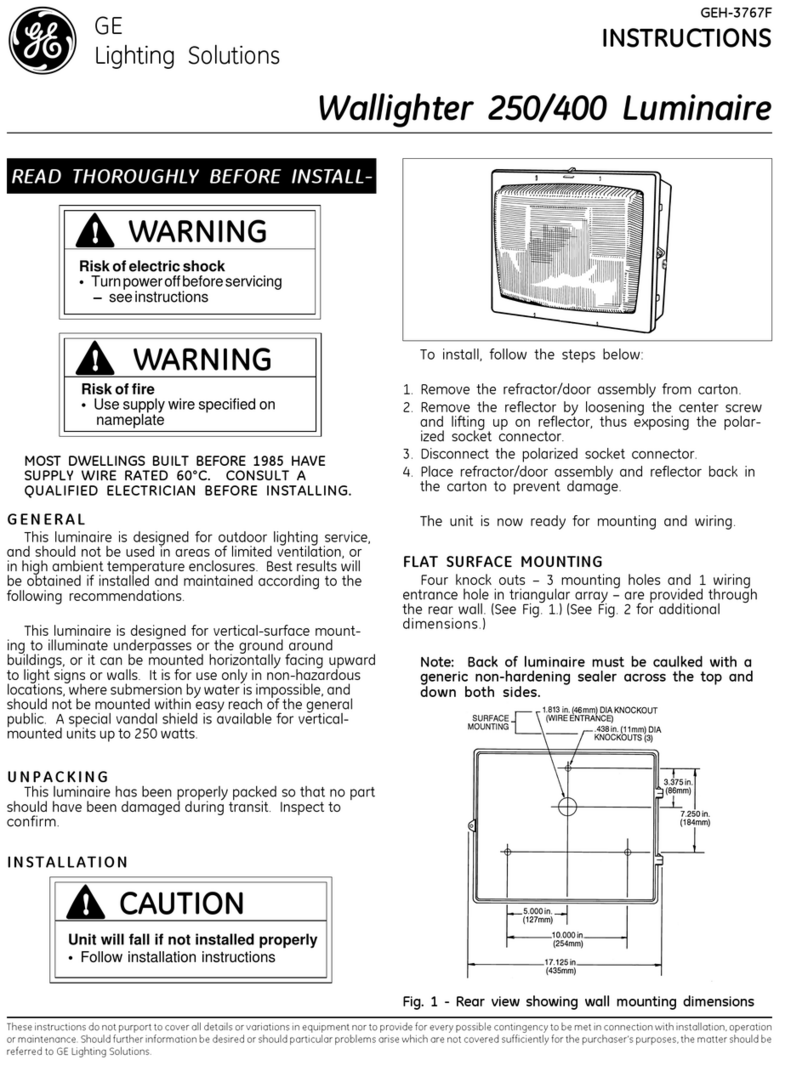
2XM6 Hex Socket Head Bolts
English
ASSEMBLY INSTRUCTIONS
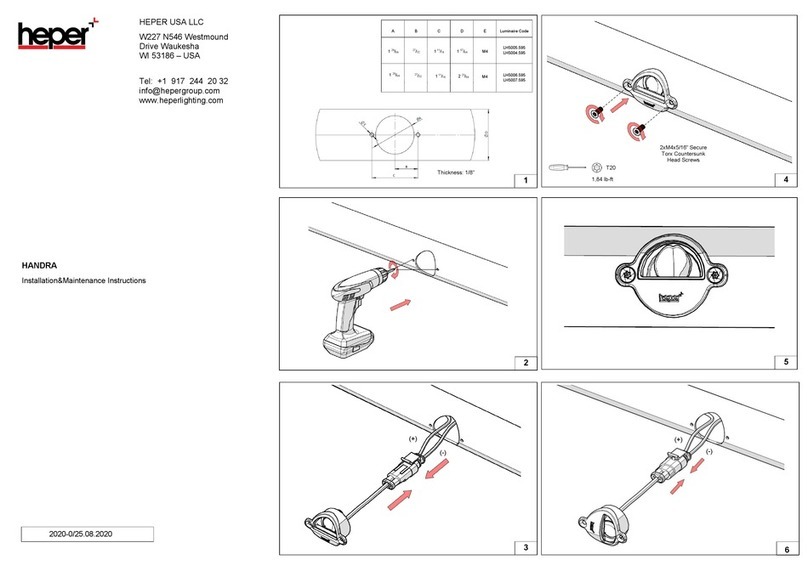
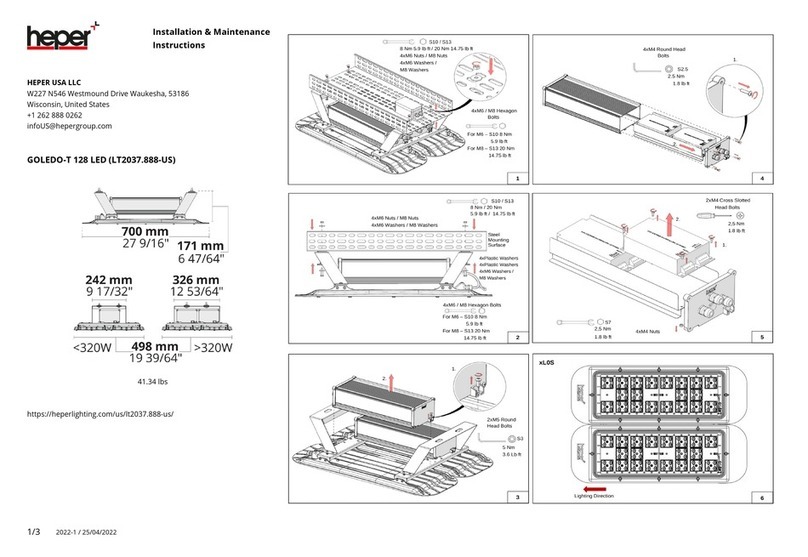
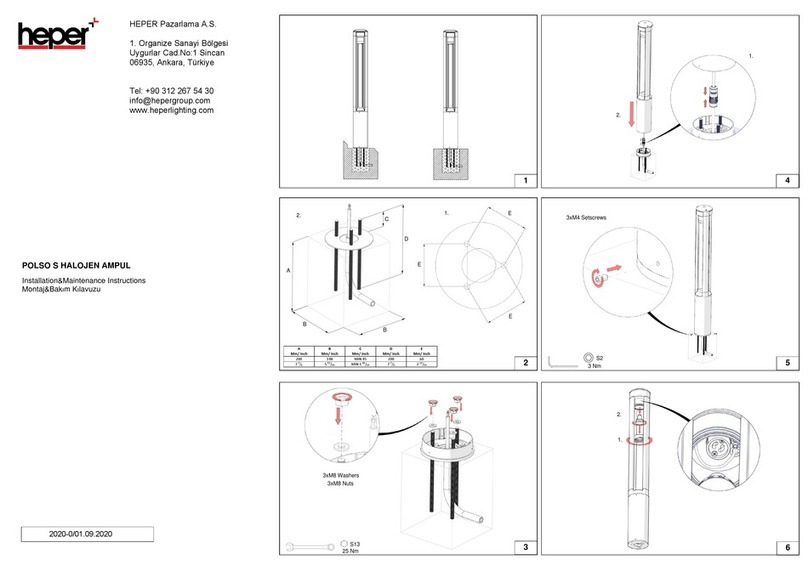
Mounting product to foundation:
1. The surface to which the light column will be mounted must be flat and level.
2. Concrete detail;
2.1. Utilize anchor bolt template to ensure alignment with base plate mounting pattern.
2.2. Install anchor bolt with minimum 2 14/16” projection above concrete.
2.3. Once anchor bolts are set, remove anchor bolt template and install 4
M12 leveling nuts one on each anchor bolt.
3. Place base product onto anchor bolts. Install 4 flat washers and secure with quantity of 4 M12
Nuts one set of washers and nuts per anchor bolt. Tighten to 59 lb-ft of torque.
4. Remove hand hole cover from light column by loosening triangular head bolt
(Triangle head tool supplied by manufacturer).
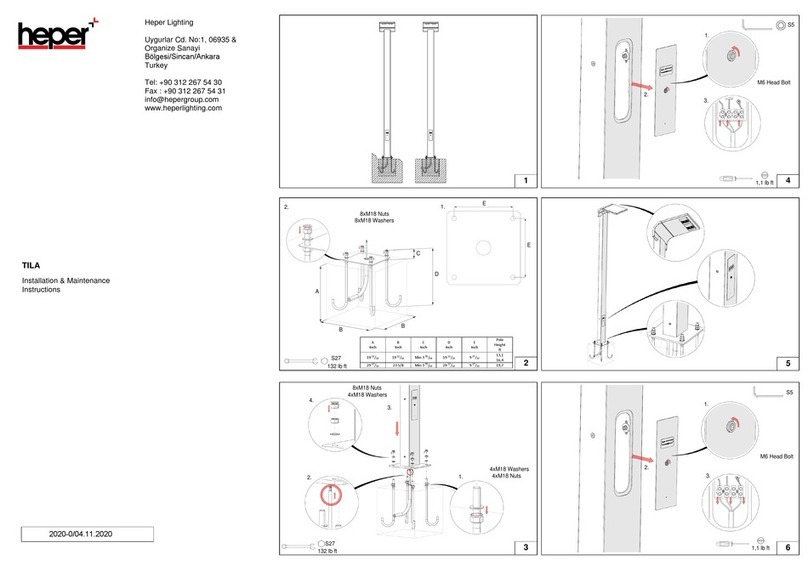
Making electrical connection;
Note: To avoid risk of electrocution, ensure power has been turned off at the supply before
installing or maintaining this product.
5.1. Remove 2 M6 Hex head bolts securing driver assembly to light column opposite the hand hole
cover.
5.2. Carefully remove driver assembly box from light column.
Note: Power connection has been made at the factory from the upper LED module and optic
chamber to the driver/splice box. Make certain those connections are not damaged.
6.1. Make certain to pull an appropriate length of supply power feed cable into the base of the light
column.
6.2. Remove 6 M3.5 countersunk phillips head screws holding driver/splice box cover in place
7.1. Utilize Greenlee punch to create appropriate size hole in driver/splice box for waterproof strain
relief to accommodate supply power feed cable. (Note: Greenlee punch and waterproof cable
strain relief and cable provided by others)
7.2. Feed power cable through strain relief (provided by others). Make all electrical
connections inside driver/splice box following all applicable local and National Electrical Codes.
8.1. Replace driver/splice box assembly in base of light column.
8.2. Complete by securing driver/splice box assembly using reverse of step 5.1. Tighten 2 M6 hex
head bolts to 3.7 lb-ft of torque.
9. Replace hand hole cover using reverse of procedure 4
Greenlee punch and
waterproof cable
strain relief and
cable provided by
others
Note:Product must be installed and serviced only by qualified electrician familiar with all local
and applicable electrical codes and the code compliant installation of the product itself.
•
•
To ensure secure connection, the luminaire
housing must be positioned precisely in relation to
the mounting plate.
Cleaning And Maintenance
Clean luminaire regularly with solvent-free cleaners
from dirt. Please do not do not clean the luminaire
with using high-pressure liquids.
IMPORTANT
