ARMATÜR
KODU
LUMINAIRE
CODE
MONTAJ TALİMATLARI
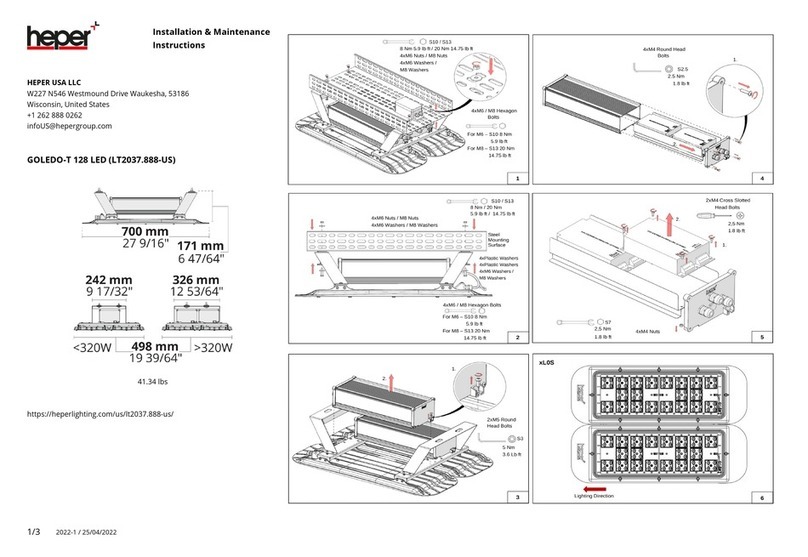
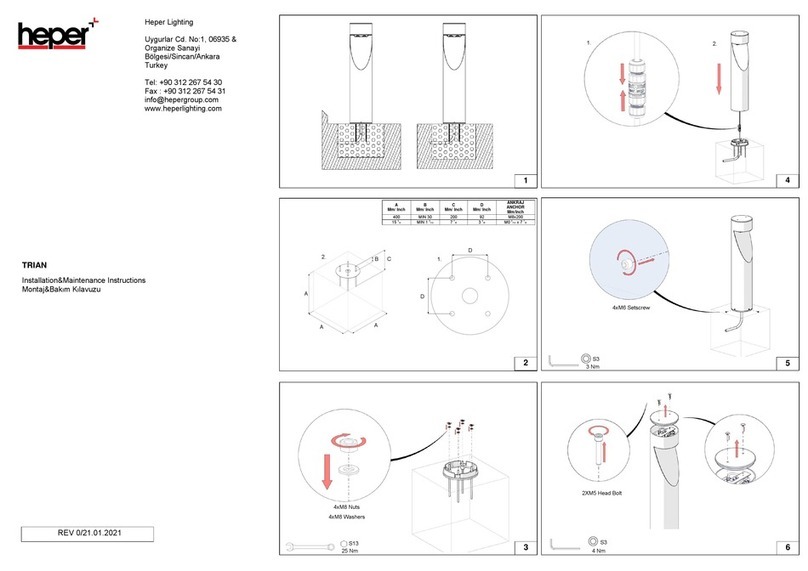
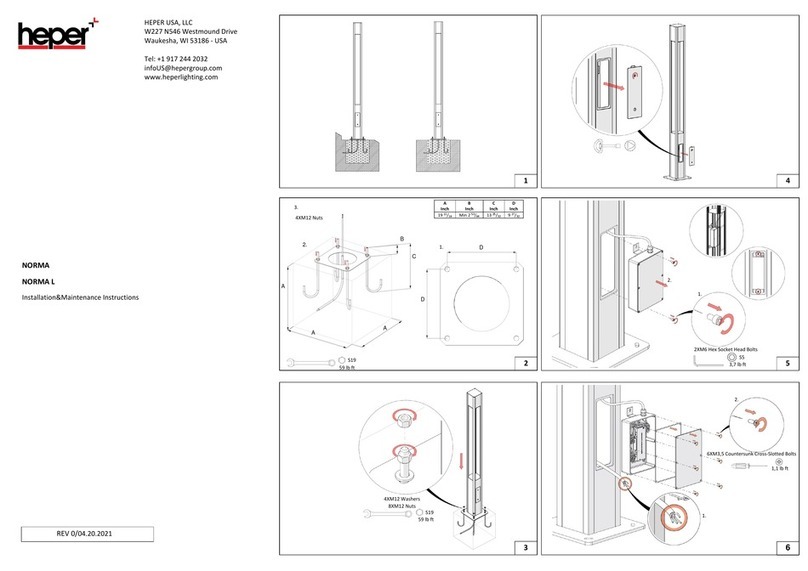
Bolardın zemine montajını yapmak için;
1. Bolardın montaj yapılacağı zemin düz olmalıdır.
2. Beton detayı;
2.1. Ürünün bağlantı deliklerini hizalamak için ankraj flanş plakası kullanılır. ( Delik Merkezi: 60
mm )
2.2. Ankraj saplaması, beton içerisine zeminden minimun 45 mm yukarıda olacak şekilde sabitlenir.
3. Ankraj flanş plakası yerine yerleştirildikten sonra altlarına düz pul koyularak somunlar
25Nm tork ile yerlerine sıkılır. ( 3 Adet, M8 Somun )
4. Bolardın sabitlenmesi;
4.1. Zeminden gelen kablo ile üründen çıkan kablo soket yardımıyla birbirine montajlanır.
Not: Kabloların birbirine bağlanmasına yarayan soket ürün ile birlikte gelmemektedir. Lütfen
ürüne uygun, minimum IP66 sertifikalı soket tedarik edininiz.
4.2. Bolard gövdesi, ankraj flanş plakası üzerine kablolara zarar vermeyecek şekilde oturtulur.
5. Bolard setskur cıvataları 3Nm sıkma torkuyla sıkılarak sabitlenir. ( 3 Adet, M4 Setskur )
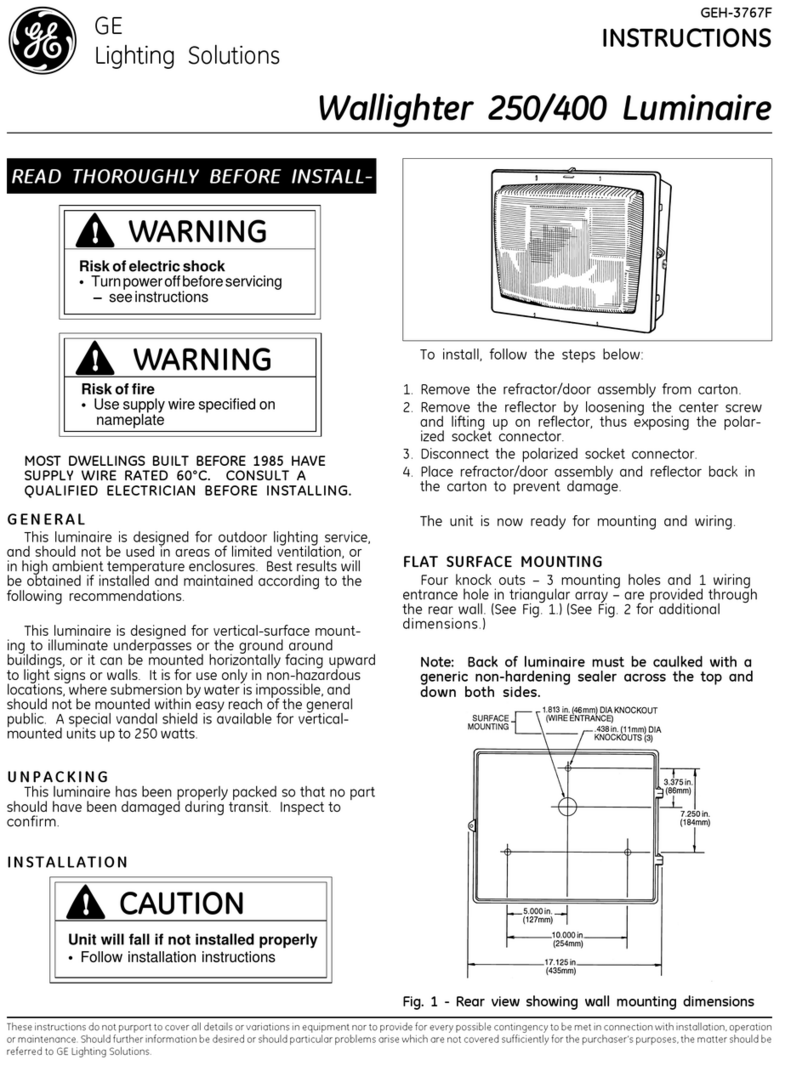
Halojen ampulün sökülmesi için;
6. Halojen ampul değişimi;
6.1. Ön kapak çevirilerek çıkartılır.
Not: Yerine takarken ön kapağın o-ringinin yerinde olduğundan ve oturduğundan emin ol.
6.2. Halojen ampul duydan çevirilerek çıkartılır.
Not: Yerine takarken çevirerek yerine takılır.
KURULUM VE BAKIM İÇİN UYARILAR
Güvenlik Uyarıları
•Bu armatürdeki ışık kaynağı sadece üretici, üreticinin yetkili servisi ya da kalifiye bir
teknisyen tarafından değiştirilebilir.
•Kurulum, bakım ve tamir işlemleri sırasında her zaman güç kapatılmalıdır.
•Eğer kurulumdan sonra başka biri tarafından değişim ya da tamir işlemleri yapılırsa bu
üreticiden ziyade bu işlemleri yapan kişi sorumluluğu altındadır.
•Sakatlanma, elektrik çarpması, yangın kazası, düşebilecek parçalardan oluşacak kazalarda
ölüm riskini azaltmak için kurulumdan önce bu kılavuza riayet edilmelidir.
•Kurulum
•LED ürünleri yüksek kalite elektronik parçalardır. Lütfen kurulum sırasında dikkatli ve yavaş
bir şekilde işlemleri tamamlayın.
Önemli
Güvenli kurulum için önce armatür içindeki haznenin düzgün yerleştirildiğinden emin olun.
Temizlik ve Bakım
•Armatürü düzenli olarak solventsiz malzemeler ile temizleyin. Temizleme sırasında yüksek
basınçlı sıvılarla işlem yapmamaya özen gösterin.
LED Modüllerin Değiştirilmesi
•LED modül gösterimi armatürün etiketinde not olarak düşülmüştür.
•Işık rengi ve ışık çıkışı HEPER modüllerine aittir. Başka bir modül kullanıldığında istenilen
değerler elde edilemeyebilir. Değişim standart ekipmanlarla yapılabilir.
ASSEMBLY INSTRUCTIONS
English
To install Bollard on the floor;
1. The floor on which the bolars will be mounted must be flat.
2. Concrete detail;
2.1. Anchor flange plate is used to align the connection holes of the product. (Hole Center: 60mm)
2.2. The anchor stud is fixed into the concrete at a minimum of 45 mm from the floor.
3. After the anchorage flange plate is placed, flat washers are placed under them and the nuts are
tightened with 25Nm torque. (3 Pieces, M8 Nuts)
4. Fixing the bollard;
4.1. With the cable from the floor and the cable from the product is connected with a socket.
Note: Socket is not provided with the product. Please obtain a socket with a minimum
IP66 certification suitable for the product.
4.2. The bollard body is placed on the anchor flange plate in a way that orientation does not
damage the cables.
5. Bollard setscrew bolts are fixed by tightening with 3Nm. (3 Pieces, M4 Setscrew)
To disassemble the halogen bulb;
6.Halogen bulb replacement;
6.1. The front cover is removed by twisting.
Note: Make sure that the o-ring of the front cover is in place and snapped when you replace it.
6.2. The halogen bulb is removed from the socket by turning it.
Note: While replacement, twisting is needed to assemble.
WARNINGS AND REMARKS FOR INSTALLATION
AND MAINTENANCE
Safety Instructions
•The light source contained in this luminaire shall only be replaced by the manufacturer or his
service agent or a similar qualified person. Always switch off the power prior to installation,
maintenance or repair activities.
•The manufacturer is then discharged from liability when damage is caused by improper use or
installation.
•
•
If any luminaire is subsequently modified, the persons responsible for the modification shall be
considered as manufacturer.
To reduce the risk of death, personal injury or property damage from fire, electric shock, falling
parts, cuts, abrasions and other hazards, please read all warnings and instructions included
with the luminaire, on the luminaire’s packaging and affixed to the luminaire itself..
Installatio
n
•
•
LEDs are high-quality electronic components! Please avoid contacting the light output opening
of the LED directly during installation or relamping.
IMPORTANT
To ensure secure connection, the luminaire housing must be positioned precisely in relation to
the mounting plate.
Cleaning And Maintenance
•Clean luminaire regularly with solvent-free cleaners from dirt. Please do not do not clean the
luminaire with using high-pressure liquids.
