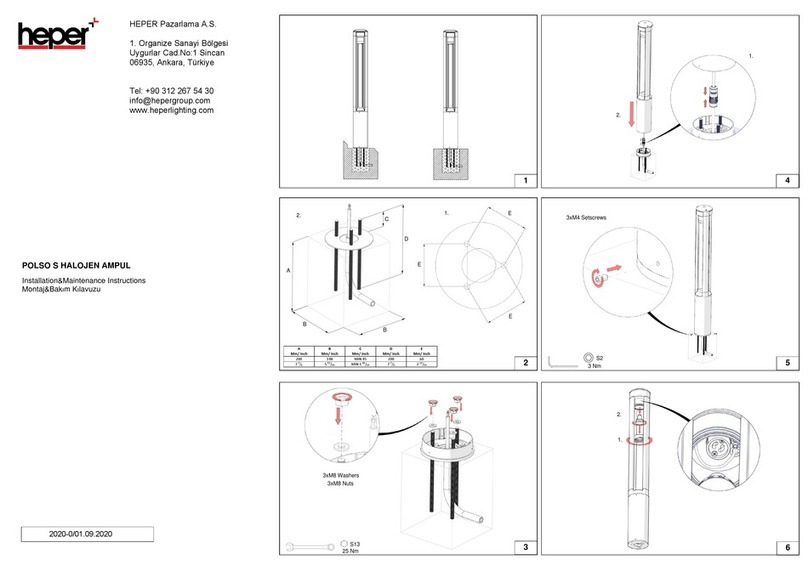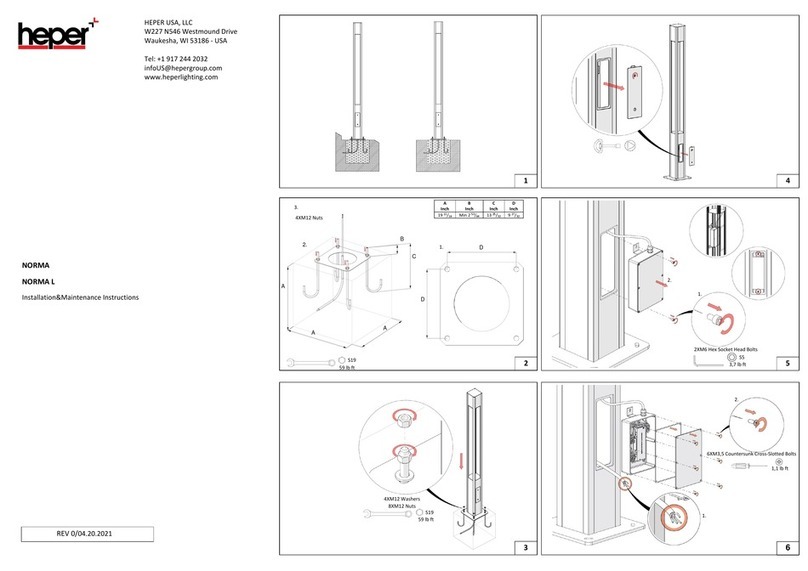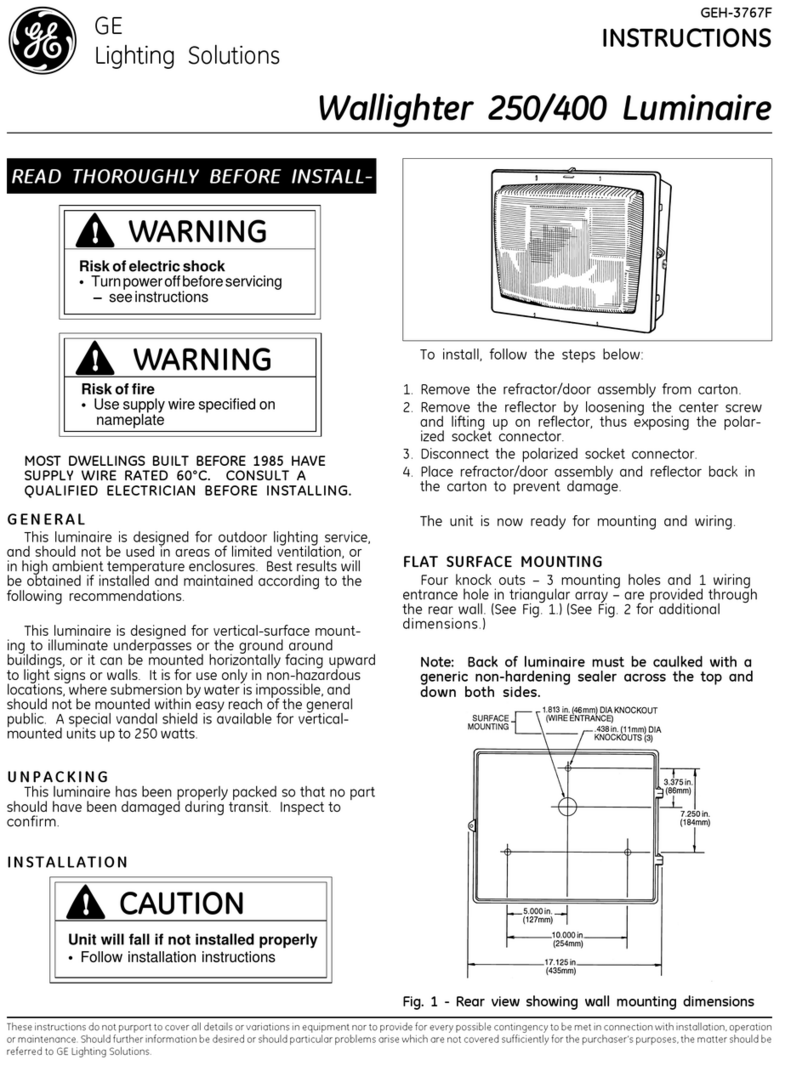
4. To connection main supply;
Note: The electrical connection coming to the product must be disconnect
before starting to this process.
4.1. The M6 bolt on the fuse cover is rotated approximately 90 degrees in the
direction of the arrow, it is free.
Note:Care should be taken not to drop the fuse cover.
4.2. The fuse cover is removed its place from on the pole.
4.3. The main supply cable is connected to the connector on the cardridge
group.
Note: After the connecting to the connector on the cardridge group, the fuse
cover is placed to its place of on the pole and M6 bolt is rotated approximately
90 degrees and it is fixed.
5.Image of product.
To change the LED driver;
Note:The electrical connection coming to the product must be disconnect
before starting to this process.
6. To removing the main supply connection;
6.1. The M6 bolt on the fuse cover is rotated approximately 90 degrees in the
direction of the arrow, it is free.
Note:Care should be taken not to drop the fuse cover.
6.2. The fuse cover is removed to its place from on the pole.
6.3. The main supply cable is connected to the connector on the cartridge
group.
Note: After connecting of the connector on the cartridge group, the fuse cover
is placed to its place on the pole and the fuse cover is fixed by rotating the M6
bolt 90 degrees in the opposite direction of the arrow.
7. The bolts that is to fix of cartridge group are removed. (2 pieces, M6 Imbus
Bolt)
Note1: The bolts are screwed with torque of 2,9 lb ft while they fix to its
places. Note2: Care should be taken not to damage the cartridge group when
it is free.
8. To separate of the cartridge group from pole;
8.1. The cartridge group is removed from the fuse cover.
Note:Care should be taken not to damage of the cartridge group.
8.2.The cable socket from the cartridge group to luminaire is removed. Note:
Make sure that the socket is fully seated when installing the socket after the
LED driver replacement.
9. To separate of the LED driver from cartridge group;
9.1. The cables from the LED driver to connector is removed.
Note1: The cables should be fix with torque of 1,1 lb ft when placing to its
place.
Note2: Care should be taken not to damage the LED driver.
9.2. The bolts that is fixed the LED driver to cartridge is removed. (4 pieces,
M4 cheese-head),( 4 pieces, M4 lock washer)
Note1: While mounting of LED driver to its places, lock washers are placed
under the bolts and bolts are fixed with 1,1 lb ft torque.
Note2: Care should be taken not to damage of the LED driver.
To change of the lighting module;
Note:T he electrical connection coming to the product must be disconnect
before starting to this process.
10. To remove of the lumianire back plate;
10.1. The bolts that is fix to luminaire back plate are removed. (8 pieces, M4
round head bolt)
Note: It is screwed to its place with torque of 2,2 lb ft.
10.2: The luminaire back plate is separated in the direction of the arrow.
11. To remove of the lighting module;
11.1. The bolts that is fix to lighting module are removed. ( M4 round head
bolt )
Note1: The bolts are screwed with torque of 3,6 lb ft while they fix to its places.
Note2: Care should be taken not to damage of the lighting module and
sockets.
11.2. The lighting module is separated from its place on the luminaire in the
direction of the arrow.
Note:Care should be taken not to damage of the lighting module and sockets.
11.3. The sockets are removed from inside the luminaire.
Note: Care should be taken not to damage of the lighting module and sockets.
12. The lighting module socket is removed.
Note: Care should be taken not to damage of the lighting module and sockets.
Make sure that the socket is fully seated when installing the socket during the
installation.
WARNINGS AND REMARKS FOR INSTALLATION
AND MAINTENANCE
Safety Instructions
•The light source contained in this luminaire shall only be replaced by the manufacturer or his
service agent or a similar qualified person. Always switch off the power prior to installation,
maintenance or repair activities.
•The manufacturer is then discharged from liability when damage is caused by improper use or
installation.
•
•
If any luminaire is subsequently modified, the persons responsible for the modification shall be
considered as manufacturer.
To reduce the risk of death, personal injury or property damage from fire, electric shock, falling
parts, cuts, abrasions and other hazards, please read all warnings and instructions included
with the luminaire, on the luminaire’s packaging and affixed to the luminaire itself..
Installatio
n
•
•
LEDs are high-quality electronic components! Please avoid contacting the light output opening
of the LED directly during installation or relamping.
IMPORTANT
To ensure secure connection, the luminaire housing must be positioned precisely in relation to
the mounting plate.
Cleaning And Maintenance
•Clean luminaire regularly with solvent-free cleaners from dirt. Please do not do not clean the
luminaire with using high-pressure liquids.

