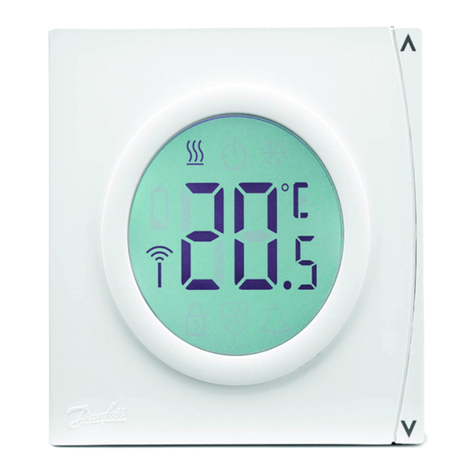
Herschel XLS User manual

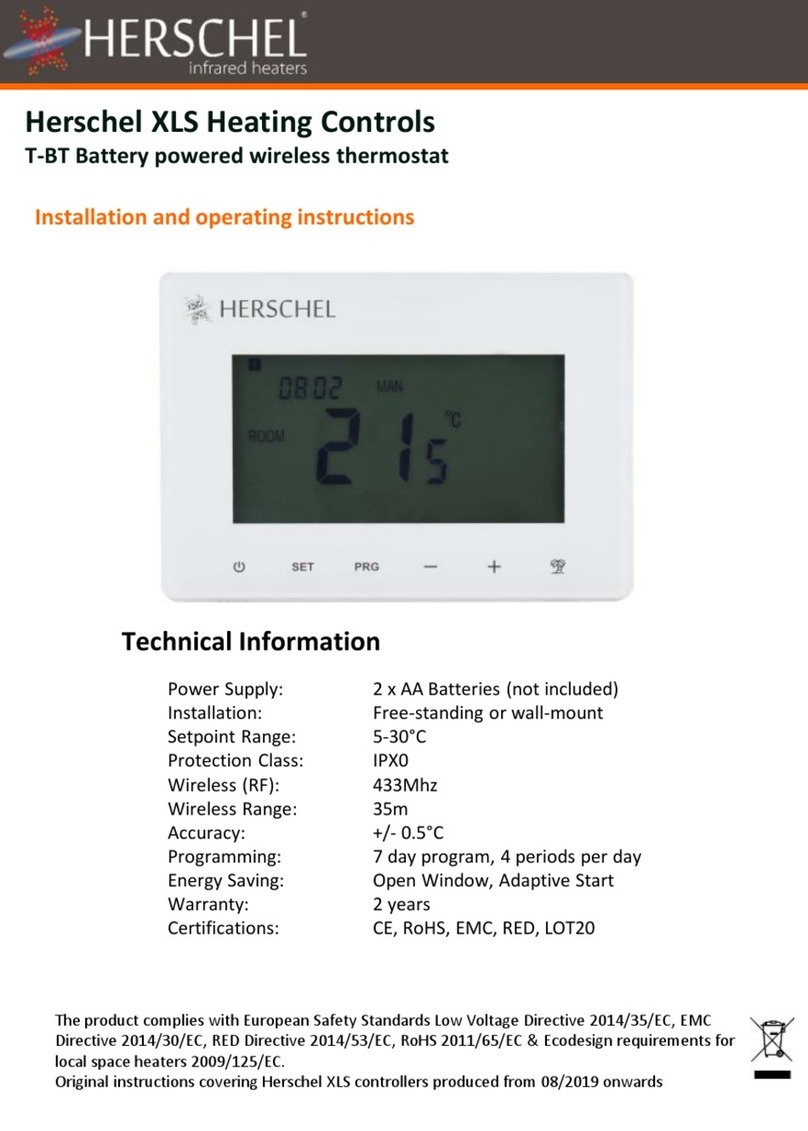
Herschel XLS Heating Controls
T-BT Battery powered wireless thermostat
Compliance
Hereby, Herschel Infrared Ltd declares that the radio equipment type T-BT Wireless
Thermostat is in compliance with Directive 2014/53/EU. The full text of the EU declaration of
conformity is available here.
Installation and operating instructions
Technical Information
Power Supply: 2 x AA Batteries (not included)
Installation: Free-standing or wall-mount
Setpoint Range: 5-40°C
Protection Class: IPX0
Wireless (RF): 433Mhz
Wireless Range: 35m
Accuracy: +/- 0.1°C
Hysteresis (control lag): +/- 0.5°C
Programming: 7 day program, 4 periods per day
Energy Saving: Open Window, Adaptive Start, Energy Monitoring
Warranty: 2 years
Certifications: CE, RoHS, EMC, RED, LOT20

T-BT Battery powered
wireless thermostat
T-BT Battery powered wireless thermostat
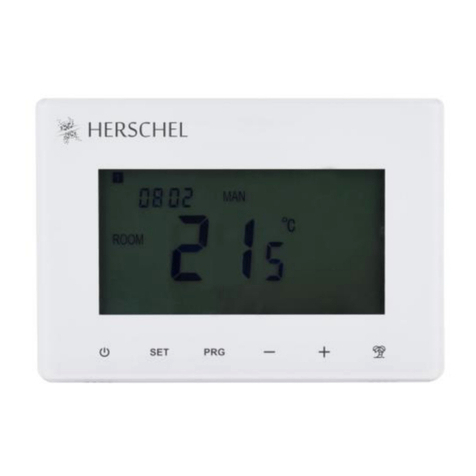
Herschel T-BT is a compact battery-powered thermostat control designed to work
exclusively with Herschel XLS heaters with their built-in SMART-R receiver.
T-BT features a manual temperature mode, a 7x1 day program mode and a holiday (or
Away) mode. All modes will operate your Herschel heater(s) by turning them ON if the
room temperature is lower than the desired temperature and will turn them OFF once the
desired temperature is reached or exceeded.
The T-BT is designed to be easy to operate and incorporates the latest energy-saving
features including Herschel’s open window technology and an adaptive start function
ensuring your room is always at the right temperature with the least energy use. There is
also a simple energy monitoring function that records recent consumption.
The T-BT can be paired to more than one heater meaning multiple heaters within the room
can be controlled with the same T-BT thermostat.
The T-BT is not wifi enabled and will not work with the Smartlife App.
Please read these instructions in conjunction with the Herschel XLS panel instructions.
This appliance is battery operated but must be installed outside of the splash zones in
bathrooms.
Display & Buttons
1. Day of week
2. Time
3. Temperature
4. Heating on symbol, Adaptive Start
Symbol, Window Open Enabled
Symbol, Window Open Alert
Symbol
5. Operating Modes
6. Holiday (Away) Days remaining
7. Program number being run
8. Power On / Off
9. SET button
10. PRG Program button
11. Minus ‘-’ button
12. Plus ‘+’ button
13. Holiday Mode

T-BT Battery powered
wireless thermostat
For free-standing use (for example placing on a shelf):
1. Gently open the T-BT case using a flat headed screw driver.
2. Insert 2 x AA Batteries (not supplied).
3. Place the front face of the T-BT over the rear casing ensuring the vents on the
rear casing are at the bottom (see diagram below) and snap shut.
Wall Mounting
1. Gently open the T-BT case using a flat headed
screw driver.
2. Use the rear of the casing as a template for
marking your mounting holes and drill the
holes.
3. Insert rawlplugs (not supplied).
4. Gently screw the rear casing of the T-BT onto
the wall. The vents in the rear casing must be
at the bottom. (See diagram below).
5. Insert 2 x AA Batteries & 1 x CR1220 lithium
battery (not supplied).
6. Place the front face of the T-BT over the rear
casing and snap shut.
T-BT can be wall-mounted or free-standing
Free Standing
If possible, position the T-BT at least 2m away from the Herschel XLS heater.

T-BT Battery powered
wireless thermostat
Pairing the T-BT with the Heater
1. Double press the Pairing button on the SMART-R box of the heater. The green
pairing status LED will start to flash and the heater is ready for pairing.
2. Ensure the batteries are installed in the T-BT, but that the power button on the
unit is switched off. “OF”is shown on the display.
3. Long-press the SET button on the T-BT and the word “PAIR”will flash on the
display.
4. When pairing has completed successfully, the green pairing status LED on the
SMART-R box will become a steady green and the word “PAIR”on the T-BT will
disappear.
5. You should not experience any difficulty in pairing, but in case you do, please
ensure the T-BT and Heater are within range of each other and try the above
process again.
6. Press the Power button on the T-BT to start using it to control the heater.
Setting Time & Calibration
Operating Instructions
1. Press the SET button on the T-BT for 3
seconds to enter the settings mode.
Day 1 of the week will begin to flash
on the display.
2. Use the + or - keys on the T-BT to set
the day of the week. (e.g. if 1is
Monday and today is Wednesday,
press + until 3 flashes in the display.)
3. Press SET again to advance to change the minutes and use the +or –keys to adjust.
4. Press SET again to advance to change the hour and use the + or –keys to adjust (it is
a24 hour clock).
5. Press SET again to Calibrate the temperature of the T-BT to match another
thermostat. Calibration is not usually necessary and we explain its use later. If you
need to Calibrate, perform this step here.
6. Press SET again to change the temperature scale from Celsius to Fahrenheit.
7. The T-BT automatically saves your changes as you enter them.

T-BT Battery powered
wireless thermostat
Selecting & using operating modes
Your Herschel Select XLS heater works most efficiently when it is set up to run
against a program controlled by the T-BT thermostat. This program will always
ensure your room reaches the temperature you want at the time you want it, each
day of the week.
Usually you will want to set up and run the unit in Program (PRG) mode. You can
always override the programmed set temperature to be higher or lower by using the
+or –keys to change the temperature and the T-BT will maintain this override
temperature until the next programmed period starts (when the next programmed
temperature will be set).
Selecting Manual (MAN) mode allows you to set and maintain a constant
temperature that does not vary with the time of day.
There is also a Holiday (HOL) mode which allows you to save energy by setting a
lower temperature while you are away. The HOL mode has a day-counter feature
allowing you to set the number of days you are away.
Selecting the Operating Mode
To select Manual or Programming modes, press the PRG button until the mode you
require is shown at the top of the display.
Manual Mode
Select the Manual mode by clicking the PRG button until MAN is shown on the
display.
Use the + or –buttons to set the temperature you want the T-BT to maintain in the
room. Note that the T-BT will maintain this temperature 24 x 7 until you switch to
another mode.
Program Mode
Mon - Fri Sat - Sun
Period 1 06:30 21°C 08:00 21°C
Period 2 08:00 18°C 10:00 18°C
Period 3 18:00 21°C 18:00 21°C
Period 4 22:30 16°C 23:00 16°C
The T-BT comes with the following
program defaults which you can
keep or change.
Programming the T-BT
To change the program defaults,
proceed as follows.

T-BT Battery powered
wireless thermostat
Set time & temperature for each day
Long-press PRG and the display will
change to enable input of the time and
temperature of the 4 periods for each day
of the week, starting with the first period
on day 1. Change the day of the week
using + or –buttons.
Press “PRG” again. The Time will flash at
the top left of the display.
Holiday Mode
Holiday (Away) mode allows you to set
a cooler fallback temperature to
maintain in the house to save energy
but avoid frozen water pipes. The
mode has a countdown timer in which
you can set up to 99 days away.
The T-BT will revert to a fixed 18˚C
setting when holiday mode completes.
Use + or –buttons to change the time.
Press PRG to advance to the temperature setting which will then flash.
Use + or –buttons to change the temperature. (This will not change Celsius or
Fahrenheit, only the set temperature digits).
Press PRG to advance to the next period.
Repeat the above steps to complete the 4 periods for each day. The next day will
automatically then be available to set.
For 7 days of the week this means a total of 28 programming steps.
After the final programming entry, the next click of PRG will return the unit to normal
operation.
To set the Holiday countdown timer, long press on the Holiday (Palm Tree) button on
the key pad. The “HOL” Mode is displayed and the set temperature will begin to flash.
Set the temperature to be maintained while you are away using the + and –keys.
Press the Holiday button again to adjust the number of days you are away using +
and –keys.

T-BT Battery powered
wireless thermostat
Press the Holiday button again to save and exit. The days number will count down
daily until your entered number of days has elapsed. The unit will return to a target
temperature of 18˚C at the end of the countdown period.
To quit an active holiday mode, press the “PRG”button and select Manual or program
modes.
Open Window Function
If the T-BT detects a temperature drop of more than 3°C within 15 minutes, the
controller will power-off the heater. “OF”will appear on the screen and the text
“Alarm! Open Window!” will be displayed. Pressing the Power button on the unit will
resume normal operation, or waiting for 30 minutes will also restore normal
operation.
Open Window detection will only work if the feature is activated and shown as an
Open Window icon on the display (see display schematic on page 2). To activate the
Open Window function, press “SET”and ‘+’ together for 3 seconds. To deactivate the
Open Window function, repeat the process.
Adaptive Start
Adaptive start is an intelligent energy-saving feature which will turn on the heating in
advance of the next scheduled time if the current temperature is more than 5°C
below the next target temperature. (This avoids wasteful loads on the heater).
Adaptive Start will only work if the feature is activated and shown as a Timer icon on
the display (see display schematic on page 2). To activate the Adaptive Start feature,
press “SET”and ‘-’together for 3 seconds. To deactivate, repeat the process.
Keypad Lock
To activate the keypad lock, press SET and Holiday Mode buttons together for 3
seconds. A shut padlock icon will appear on the screen. Press SET and Holiday Mode
buttons together again for another 3 seconds to deactivate the keypad lock.
Energy monitoring
The T-BT can monitor the energy consumption of the heaters paired with it.To set up
energy monitoring:
•Power off the thermostat
•Press and hold the “+” button until the “SET” digits flash on the screen.
•Adjust the number to match the total power (in kW) that this thermostat
connects to.(e.g. if more than one heater, add their power together). Click “Off”
again to store the figure.

T-BT Battery powered
wireless thermostat
Factory Settings
To restore to factory settings, power off the thermostat, press and hold the “Holiday”
button for 5 seconds until the screen starts to flash.
Calibration
Calibration is a process to alter the temperature of the T-BT up or down in order to
align the unit with another thermostat.
The T-BT can be calibrated 5°Cup or down from the default of 0 (no calibration). You
can calibrate in steps of 0.5°C.
Calibrating UP (i.e. +1 °C etc) means the T-BT will display a higher temperature than
the present one being shown. Use this when you think the T-BT is under-reading
compared with another thermostat.
Calibrating DOWN (i.e. - 1 °C etc) means the T-BT will display a lower temperature
than the present one being shown. Use this when you think the T-BT is over-reading
compared with another thermostat.
When adjusting the T-BT Time & Temperature settings using the SET button,
calibration is the final setting you can change. The default is 0. Use + or –keys to
adjust this figure up or down.
You can always check current consumption details by pressing the “-”and “+” button
together for 3 seconds. The display will show:
1. Heating hours
today
2. Energy
consumption
yesterday (in kW)
3. Energy
consumption today
(in kW).
2 Year Warranty
Register your product at the Help & FAQs section of your local Herschel website.
Within two years from date of purchase Herschel will repair or replace the T-BT where
the fault is due to defects in materials or workmanship. This warranty is for standard
domestic use only and excludes commercial uses. In the event of a warranty claim
please visit the Customer Service area of the Herschel Website and follow the
Warranty Claim process. You will need proof of purchase.
Note your serial number here.

Commandes de chauffage Herschel XLS
Thermostat sans fil à piles T-BT
Notice d'installation et d'utilisation
Informations techniques
Alimentation électrique: 2 piles AA (non incluses)
Installation: Pose libre ou montage murale
Gamme de points de consigne: 5-40°C
Classe de protection: IPX0
Sans fil (RF) : 433Mhz
Portée sans fil : 35m
Précision : +/- 0.1°C
Hystérésis (retard de régulation) : +/- 0.5°C
Programmation : Programme de 7 jours, 4 périodes par jour
Économie d'énergie: Fenêtre ouverte, démarrage adaptatif,
surveillance de l'énergie
Garantie: 2 ans
Certifications: CE, RoHS, EMC, RED, LOT20
Conformité
Par la présente, Herschel Infrared Ltd déclare que l'équipement radio de type thermostat
sans fil T-MT est conforme à la directive 2014/53/UE. Le texte intégral de la déclaration UE
de conformité est disponible à l'adresse Internet suivante: bit.ly/3DUe2wQ

T-BT Battery powered
wireless thermostat
Thermostat sans fil à piles T-BT
Herschel T-BT est un thermostat compact alimenté par batterie conçu pour fonctionner
exclusivement avec les radiateurs Herschel XLS avec leur récepteur SMART-R intégré.
Le T-BT dispose d'un mode de température manuel, d'un mode de programme 7x1 jours et
d'un mode vacances (ou absence). Tous les modes feront fonctionner votre (vos)
radiateur(s) Herschel en les mettant en marche si la température ambiante est inférieure à
la température désirée et les éteindront une fois la température désirée atteinte ou
dépassée.
Le T-BT est conçu pour être facile à utiliser et intègre les dernières fonctionnalités
d'économie d'énergie, notamment la technologie de fenêtre ouverte de Herschel et une
fonction de démarrage adaptative garantissant que votre pièce est toujours à la bonne
température avec une consommation d'énergie minimale.
Le T-BT peut être associé à plusieurs radiateurs, ce qui signifie que plusieurs radiateurs dans
la pièce peuvent être contrôlés avec le même thermostat T-BT.
Le T-BT n'est pas compatible wifi et ne fonctionnera pas avec l'application Smartlife.
Veuillez lire ces instructions en conjonction avec les instructions du panneau Herschel XLS.
Cet appareil fonctionne sur batterie mais doit être installé en dehors des zones
d'éclaboussures dans les salles de bains.
Affichage et boutons 1. Jour de la semaine
2. Heure
3. Température
4. Symbole de chauffage activé,
symbole de démarrage adaptatif,
symbole d'ouverturede la fenêtre
activée, symbole d'alerte
d'ouverture de la fenêtre
5. Modes de fonctionnement
6. Vacances (Away) Jours restants
7. Numéro de programme en cours
d'exécution
8. Marche / arrêt
9. Bouton SET
10. Bouton PRG Program
11. Bouton '-' (moins)
12. Bouton plus '+'.
13. Mode vacances

T-BT Battery powered
wireless thermostat
Pour une utilisation autonome (par exemple mise sur une étagère) :
1. Ouvrez doucement le boîtier du T-BT à l'aide d'un tournevis à tête plate.
2. Insérez 2 piles AA (non fournies).
3. Placez la face avant du T-BT sur le boîtier arrière en vous assurant que les
évents du boîtier arrière sont en bas (voir le schéma ci-dessous) et fermez-le.
Wall Mounting
1. Ouvrez doucement le boîtier du T-BT à l'aide
d'un tournevis à tête plate.
2. Utilisez l'arrière du boîtier comme gabarit
pour marquer vos trous de montage et percez
les trous.
3. Insérez les chevilles (non fournies).
4. Vissez doucement le boîtier arrière du T-BT
sur le mur. Les évents du boîtier arrière
doivent être en bas. (Voir schéma ci-dessous).
5. Insérez 2 piles AA & 1 x CR1220 batterie au
lithium (non fournies).
6. Placez la face avant du T-BT sur le boîtier
arrière et fermez-le.
T-BT peut être fixé au mur ou sur pied
Sur pied
Si possible, placez le T-BT àau moins 2 m du radiateur Herschel XLS.

T-BT Battery powered
wireless thermostat
Couplage du T-BT avec le radiateur
1. Appuyez deux fois sur le bouton de jumelage sur le boîtier SMART-R de l'appareil de chauffage. Le
voyant vert d'état d'appairage se met à clignoter et le radiateur est prêt à être appairé.
2. Assurez-vous que les piles sont installées dans le T-BT, mais que le bouton d'alimentation de
l'appareil est éteint. L'écran affiche "OF".
3. Appuyez longuement sur le bouton SET du T-BT et le mot "PAIR" clignote à l'écran.
4. Lorsque l'appairage a été effectué avec succès, la DEL verte d'état d'appairage de la boîte SMART-R
devient verte fixe et le mot "PAIR" sur le T-BT disparaît.
5. Vous ne devriez pas rencontrer de difficultés lors de l'appairage, mais si c'est le cas, assurez-vous
que le T-BT et l'appareil de chauffage sont à portée l'un de l'autre et réessayez le processus ci-
dessus.
6. Appuyez sur le bouton d'alimentation du T-BT pour commencer à l'utiliser pour contrôler l'appareil
de chauffage.
Réglage de l'heure et de l'étalonnage
Mode d'emploi
1. Appuyez sur le bouton SET du T-BT pendant 3
secondes pour accéder au mode de réglage. Le
jour 1 de la semaine se met à clignoter sur l'écran.
2. Utilisez les touches + ou -du T-BT pour régler le
jour de la semaine. (par exemple, si le jour 1 est le
lundi et qu'aujourd'hui est le mercredi, appuyez
sur la touche + jusqu'à ce que le chiffre 3 clignote
à l'écran).
3. Appuyez à nouveau sur SET pour avancer et changer les minutes et utilisez les touches + ou - pour les
régler.
4. Appuyez de nouveau sur SET pour avancer et changer l'heure et utilisez les touches + ou - pour la
régler (il s'agit d'une horloge de 24 heures).
5. Appuyez de nouveau sur SET pour calibrer la température du T-BT afin qu'elle corresponde à celle d'un
autre thermostat. L'étalonnage n'est généralement pas nécessaire et nous expliquons son utilisation
plus loin. Si vous devez procéder à l'étalonnage, effectuez cette étape ici.
6. Appuyez à nouveau sur la touche SET pour changer l'échelle de température l'échelle de température
de Celsius à Fahrenheit.
7. Le T-BT enregistre automatiquement vos modifications au fur et à mesure que vous les saisissez.

T-BT Battery powered
wireless thermostat
Sélection et utilisation des modes de fonctionnement
Votre chauffage Herschel Select XLS est plus efficace lorsqu'il est configuré pour
fonctionner selon un programme contrôlé par le thermostat T-BT.Ce programme garantit
que votre pièce atteindra toujours la température que vous souhaitez à l'heure que vous
souhaitez, chaque jour de la semaine.
En général, vous voudrez configurer et faire fonctionner l'unité en mode Programme (PRG).
Vous pouvez toujours augmenter ou diminuer la température programmée en utilisant les
touches + ou - pour modifier la température et le T-BT maintiendra cette température
jusqu'au début de la période programmée suivante (lorsque la température programmée
suivante sera définie).
La sélection du mode Manuel (MAN) vous permet de régler et de maintenir une
température constante qui ne varie pas en fonction de l'heure de la journée.
Il existe également un mode Vacances (HOL) qui vous permet d'économiser de l'énergie en
réglant une température plus basse pendant votre absence. Le mode HOL est doté d'un
compteur de jours qui vous permet de définir le nombre de jours d'absence.
Sélection du mode de fonctionnement
Pour sélectionner les modes Manuel ou Programmation, appuyez sur le bouton PRG
jusqu'à ce que le mode souhaité s'affiche en haut de l'écran.
Mode manuel
Sélectionnez le mode manuel en cliquant sur le bouton PRG jusqu'à ce que MAN s'affiche à
l'écran.
Utilisez les boutons + ou - pour régler la température que le T-BT doit maintenir dans la
pièce. Notez que le T-BT maintiendra cette température 24 heures sur 24 et 7 jours sur 7
jusqu'à ce que vous passiez à un autre mode.
Mode programme Lun - Ven Sam - Dim
Période 1 06:30 21°C 08:00 21°C
Période 2 08:00 18°C 10:00 18°C
Période 3 18:00 21°C 18:00 21°C
Période 4 22:30 16°C 23:00 16°C
Le T-BT est livré avec les programmes par
défaut suivants, que vous pouvez
conserver ou modifier.
Programmation du T-BT
Pour modifier les valeurs par défaut du
programme, procédez comme suit.

T-BT Battery powered
wireless thermostat
Régler l'heure et la température pour
chaque jour
Appuyez longuement sur PRG et l'affichage
change pour permettre la saisie de l'heure et
de la température des 4 périodes pour
chaque jour de la semaine, en commençant
par la première période du jour 1. Changez le
jour de la semaine à l'aide des boutons + ou -.
Appuyez à nouveau sur "PRG". L'heure
clignote dans le coin supérieur gauche de
l'écran.
Utilisez les boutons + ou - pour modifier l'heure.
Appuyez sur PRG pour passer au réglage de la température, qui clignote alors.
Utilisez les boutons + ou - pour modifier la température. (Cela ne changera pas les degrés
Celsius ou Fahrenheit, seulement les chiffres de la température réglée).
Appuyez sur PRG pour passer à la période suivante.
Répétez les étapes ci-dessus pour compléter les 4 périodes pour chaque jour. Le jour
suivant sera alors automatiquement disponible pour le réglage.
Pour 7 jours de la semaine, cela signifie un total de 28 étapes de programmation.
Après la dernière entrée de programmation, le clic suivant sur PRG ramènera l'unité en
fonctionnement normal.
Mode vacances
Le mode Vacances (Away) vous permet
de définir une température de repli plus
fraîche à maintenir dans la maison afin
d'économiser de l'énergie et d'éviter le
gel des conduites d'eau. Ce mode dispose
d'un compte à rebours dans lequel vous
pouvez régler jusqu'à 99 jours d'absence.
Le T-BT reviendra à un réglage fixe de
18˚C lorsque le mode vacances sera
terminé.
Pour régler le compte à rebours des vacances, appuyez longuement sur le bouton Holiday
(Palmier) du clavier. Le mode "HOL" s'affiche et la température réglée se met à clignoter.
Réglez la température à maintenir pendant votre absence à l'aide des touches + et -.
Appuyez à nouveau sur le bouton Holiday pour régler le nombre de jours d'absence à
l'aide des touches + et -.

T-BT Battery powered
wireless thermostat
Appuyez à nouveau sur le bouton Holiday pour enregistrer et quitter. Le nombre de jours va décompter
quotidiennement jusqu'à ce que le nombre de jours que vous avez entré soit écoulé. L'appareil
reviendra à une température cible de 18˚C à la fin de la période de décompte.
Pour quitter un mode vacances actif, appuyez sur la touche "PRG" et sélectionnez les modes manuel ou
programme.
Fonction de fenêtre ouverte
Si le T-BT détecte une baisse de température de plus de 3°C en 15 minutes, le contrôleur éteint le
chauffage. L'écran affiche "OF" et le texte "Alarme ! Ouvrez la fenêtre !" s'affiche. En appuyant sur le
bouton d'alimentation de l'appareil, le fonctionnement normal reprendra, ou en attendant 30 minutes,
le fonctionnement normal sera également rétabli.
La détection de fenêtre ouverte ne fonctionne que si la fonction est activée et affichée sous forme
d'icône de fenêtre ouverte sur l'écran (voir le schéma de l'écran à la page 2). Pour activer la fonction
Fenêtre ouverte, appuyez simultanément sur "SET" et "+" pendant 3 secondes. Pour désactiver la
fonction Open Window, répétez le processus.
Démarrage adaptatif
Le démarrage adaptatif est une fonction intelligente d'économie d'énergie qui active le chauffage avant
l'heure prévue si la température actuelle est inférieure de plus de 5°C à la température cible suivante.
(Cela évite les charges inutiles sur le chauffage).
Le démarrage adaptatif ne fonctionne que si la fonction est activée et affichée sous forme d'icône de
minuterie sur l'écran (voir le schéma de l'écran à la page 2). Pour activer la fonction de démarrage
adaptatif, appuyez simultanément sur "SET" et "-" pendant 3 secondes. Pour la désactiver, répétez le
processus.
Verrouillage du clavier
Pour activer le verrouillage du clavier, appuyez simultanément sur les boutons "SET" et "Holiday Mode"
pendant 3 secondes. Une icône de cadenas fermé s'affiche à l'écran. Appuyez à nouveau
simultanément sur les boutons SET et Holiday Mode pendant 3 secondes pour désactiver le verrouillage
du clavier.
Contrôle de l'énergie
Le T-BT peut surveiller la consommation d'énergie des appareils de chauffage qui lui sont associés. Pour
configurer la surveillance de l'énergie :
•Mettez le thermostat hors tension
•Appuyez sur le bouton "+" et maintenez-le enfoncé jusqu'à ce que les chiffres "SET" clignotent à
l'écran
•Ajustez le chiffre pour qu'il corresponde à la puissance totale (en kW) à laquelle ce thermostat est
relié. (par exemple, s'il y a plus d'un appareil de chauffage, additionnez leur puissance). Cliquez à
nouveau sur "Off" pour enregistrer le chiffre

T-BT Battery powered
wireless thermostat
Garantie de 2 ans
Enregistrez votre produit dans la section Aide et FAQ de votre site Web Herschel local.
Dans les deux ans à compter de la date d'achat, Herschel réparera ou remplacera le T-MT lorsque le défaut
est dû à des défauts de matériaux ou de fabrication. Cette garantie est pour un usage domestique standard
uniquement et exclut les utilisations commerciales. En cas de réclamation au titre de la garantie, veuillez
visiter la section Service client du site Web Herschel et suivre le processus de réclamation au titre de la
garantie. Vous aurez besoin d'une preuve d'achat.
Notez votre numéro de série ici.
Vous pouvez toujours vérifier les détails de la consommation actuelle en appuyant simultanément
sur les boutons "-" et "+" pendant 3 secondes. L'écran affiche :
1. Heures de chauffage
aujourd’hui
2. Consommation d'énergie
hier (en kW)
3. Consommation d'énergie
aujourd'hui (en kW).
Réglages d'usine
Pour rétablir les paramètres d'usine, éteignez le thermostat, appuyez sur le bouton " Holiday " pendant 5
secondes jusqu'à ce que l'écran commence à clignoter.
Étalonnage
L'étalonnage est un processus qui consiste à modifier la température du T-BT vers le haut ou vers le bas afin
d'aligner l'unité avec un autre thermostat.
Le T-BT peut être étalonné de 5°C vers le haut ou vers le bas à partir de la valeur par défaut de 0 (aucun
étalonnage). Vous pouvez calibrer par pas de 0,5°C.
L'étalonnage vers le HAUT (c'est-à-dire +1 °C, etc.) signifie que le T-BT affichera une température plus
élevée que la température actuelle. Utilisez cette fonction lorsque vous pensez que le T-BT affiche une
température inférieure à celle d'un autre thermostat.
L'étalonnage vers le bas (c'est-à-dire - 1 °C, etc.) signifie que le T-BT affichera une température inférieure à
la température actuelle. Utilisez cette option lorsque vous pensez que le T-BT affiche une température trop
élevée par rapport à un autre thermostat.
Lorsque vous réglez les paramètres d'heure et de température du T-BT à l'aide du bouton SET, l'étalonnage
est le dernier paramètre que vous pouvez modifier. La valeur par défaut est 0. Utilisez les touches + ou -
pour augmenter ou diminuer cette valeur.

Herschel XLS Heizungssteuerung
T-BT Batteriebetriebener kabelloser Thermostat
Montage- und Betriebsanleitung
Technische Information
Einhaltung
Hiermit erklärt die Herschel Infrarot AG, dass das Funkgerät Typ T-MT Funk-Thermostat der
Richtlinie 2014/53/EU entspricht. Der vollständige Text der EU-Konformitätserklärung ist
unter folgender Internetadresse abrufbar: bit.ly/3DUe2wQ
Stromversorgung: 2 x AA-Batterien (nicht enthalten)
Aufstellung: Freistehend oder Wandmontage
Sollwertbereich: 5-40°C
Schutzklasse: IPX0
Drahtlos (RF): 433MhzDrahtlose
Reichweite: 35m
Genauigkeit: +/- 0.1°C
Hysterese (Regelverzögerung): +/- 0.5°C
Programmierung: 7-Tage-Programm, 4 Perioden pro Tag
Energieeinsparung: Offenes Fenster, Adaptiver Start,
Energieüberwachung
Garantie: 2 Jahre
Zertifizierungen: CE, RoHS, EMC, RED, LOT20

T-BT Battery powered
wireless thermostat
T-BT Batteriebetriebener kabelloser Thermostat
Herschel T-BT ist eine kompakte, batteriebetriebene Thermostatsteuerung, die ausschließlich für den
Betrieb mit Herschel XLS-Heizungen mit integriertem SMART-R-Empfänger entwickelt wurde.
T-BT verfügt über einen manuellen Temperaturmodus, einen 7x1-Tage-Programmmodus und einen
Urlaubsmodus (oder Abwesenheitsmodus). Alle Modi betreiben Ihre(n) Herschel-Heizung(en), indem
sie EINGESCHALTET werden, wenn die Raumtemperatur niedriger als die gewünschte Temperatur ist,
und sie AUSSCHALTEN, sobald die gewünschte Temperatur erreicht oder überschritten wird.
Der T-BT ist einfach zu bedienen und verfügt über die neuesten Energiesparfunktionen wie die
Offene Fenstertechnologie von Herschel und eine adaptive Startfunktion, die dafür sorgt, dass Ihr
Raum immer die richtige Temperatur bei geringstem Energieverbrauch hat.
Der T-BT kann mit mehr als einer Heizung gekoppelt werden, d. h. mehrere Heizungen im Raum
können mit demselben T-BT-Thermostat gesteuert werden.
Das T-BT ist nicht WLAN-fähig und funktioniert nicht mit der Smartlife App.
Bitte lesen Sie diese Anleitung in Verbindung mit der Herschel XLS-Panel-Anleitung.
Dieses Gerät ist batteriebetrieben, muss jedoch außerhalb des Spritzbereichs in Badezimmern
installiert werden.
Display & Schaltflächen
1. Tag der Woche
2. Uhrzeit
3. Temperatur
4. Symbol "Heizung ein", Symbol
"Adaptiver Start", Symbol "Fenster
offen" aktiviert, Symbol "Fenster
offen" alarmiert
5. Betriebsmodi
6. Urlaub (Auswärts) Verbleibende Tage
7. Programmnummer, die ausgeführt
wird
8. Strom ein/aus
9. SET-Taste
10. PRG Programm-Taste
11. Minus '-' Taste
12. Plus '+' Taste
13. Urlaubsmodus

T-BT Battery powered
wireless thermostat
Bei freistehender Nutzung (z. B. auf einem Regal platzieren):
1. Öffnen Sie das T-BT-Gehäuse vorsichtig mit einem Flachkopfschraubendreher.
2. Legen Sie 2 x AA-Batterien (nicht mitgeliefert) ein.
3. Legen Sie die Vorderseite des T-BT über das hintere Gehäuse und achten Sie
darauf, dass sich die Lüftungsschlitze am hinteren Gehäuse unten befinden
(siehe Abbildung unten) und rasten Sie ein.
Wall Mounting 1. Öffnen Sie das T-BT-Gehäuse vorsichtig mit
einem Flachkopfschraubendreher.
2. Verwenden Sie die Rückseite des Gehäuses als
Schablone zum Anzeichnen Ihrer
Befestigungslöcher und bohren Sie die Löcher.
3. Dübel einsetzen (nicht im Lieferumfang
enthalten).
4. Schrauben Sie das hintere Gehäuse des T-BT
vorsichtig an die Wand. Die Lüftungsschlitze
im hinteren Gehäuse müssen unten sein.
(Siehe Diagramm unten).
5. Legen Sie 2 x AA-Batterien & 1 x CR1220
lithium batterie (nicht mitgeliefert) ein.
6. Legen Sie die Vorderseite des T-BT über das
hintere Gehäuse und lassen Sie es
zuschnappen.
T-BT kann an der Wand oder freistehend montiert werden
Freistehend
Positionieren Sie den T-BT nach Möglichkeit mindestens 2 m von der Herschel XLS-
Heizung entfernt.

T-BT Battery powered
wireless thermostat
Koppeln des T-BT mit der Heizung
1. Drücken Sie zweimal die Pairing-Taste auf der SMART-R-Box des Heizgeräts. Die grüne LED für den
Kopplungsstatus beginnt zu blinken und das Heizgerät ist bereit für die Kopplung.
2. Vergewissern Sie sich, dass die Batterien in den T-BT eingelegt sind, aber der Netzschalter am Gerät
ausgeschaltet ist. "OF" wird auf dem Display angezeigt.
3. Drücken Sie lang auf die SET-Taste des T-BT und das Wort "PAIR" blinkt auf dem Display.
4. Wenn das Pairing erfolgreich abgeschlossen wurde, leuchtet die grüne Pairing-Status-LED auf der
SMART-R-Box konstant grün und das Wort "PAIR" auf dem T-BT verschwindet.
5. Sie sollten keine Schwierigkeiten bei der Kopplung haben. Sollte dies dennoch der Fall sein, stellen Sie
bitte sicher, dass sich T-BT und Heater in Reichweite befinden und versuchen Sie den oben
beschriebenen Vorgang erneut.
6. Drücken Sie die Einschalttaste am T-BT, um das Heizgerät zu steuern.
Zeit und Kalibrierung einstellen
Bedienungsanleitung
1. Drücken Sie die SET-Taste auf dem T-BT für 3
Sekunden, um in den Einstellungsmodus zu
gelangen. Tag 1 der Woche beginnt auf dem
Display zu blinken.
2. Verwenden Sie die Tasten + oder - auf dem T-BT,
um den Wochentag einzustellen. (z. B. wenn 1
der Montag und heute der Mittwoch ist,
drücken Sie +, bis 3 im Display blinkt)
3. Drücken Sie erneut SET, um die Minuten zu ändern, und verwenden Sie die Tasten + oder - zum
Einstellen.
4. Drücken Sie erneut SET, um die Stunde zu ändern und verwenden Sie die Tasten + oder - zum
Einstellen (es handelt sich um eine 24-Stunden-Uhr).
5. Drücken Sie erneut SET, um die Temperatur des T-BT zu kalibrieren, damit sie mit einem anderen
Thermostat übereinstimmt. Die Kalibrierung ist in der Regel nicht notwendig und wird später erklärt.
Wenn Sie kalibrieren müssen, führen Sie diesen Schritt hier aus.
6. Drücken Sie erneut SET, um die Temperaturskala von Celsius auf Fahrenheit umzustellen.
7. Der T-BT speichert Ihre Änderungen automatisch, während Sie sie eingeben.
Other manuals for XLS
2
This manual suits for next models
1
Table of contents
Languages:
Other Herschel Thermostat manuals

Herschel
Herschel XLS User manual

Herschel
Herschel T-PL User manual

Herschel
Herschel T-MT User manual

Herschel
Herschel MD2 User manual

Herschel
Herschel MD1 User manual

Herschel
Herschel iQ T1 User manual

Herschel
Herschel T-MKS User manual

Herschel
Herschel T-PL User manual

Herschel
Herschel XLS User manual

Herschel
Herschel MD2 User manual