Hershey's L5768 User manual

The HERSHEY’S trademarks and trade dress are used under license.
Distributed by Focus Products Group International, LLC
www.westbend.com
HERSHEY’S HOT BEVERAGE MACHINE
Instruction Manual
Register this and other Focus Products Group International products through our
website: www.registerfocus.com.
Product registration is not required to activate warranty.
Important Safeguards...............................................................................................2
Before Using for the First Time ................................................................................3
Using Your HERSHEY’S Hot Beverage Machine ....................................................4
Cleaning Your HERSHEY’S Hot Beverage Machine ...............................................5
Hints and Tips ..........................................................................................................6
Recipes....................................................................................................................7
Warranty...................................................................................................................8
SAVE THIS INSTRUCTION MANUAL FOR FUTURE REFERENCE

English - 2
IMPORTANT SAFEGUARDS
To prevent personal injury or property damage, read and follow all instructions
and warnings.
When using electrical appliances, basic safety precautions should always be
followed including the following:
Read all instructions.
To protect against fire, electric shock and injury to persons, do not immerse cord,
plugs, or other electric parts in water or other liquids.
Close supervision is necessary when this appliance is used by or near children.
Scalding may occur if the lid is removed during the brewing cycle.
Do not touch hot surfaces. Use handles and knobs.
Always unplug the appliance from outlet when not in use and before cleaning.
Allow to cool before putting on or taking off parts and before cleaning.
Avoid contacting moving parts.
Do not operate this appliance with a damaged cord or plug, after the appliance
malfunctions or if the appliance is dropped or damaged in any manner. If you
experience any problems with your machine, unplug it immediately from the
electrical outlet. For service information see warranty page.
The use of accessory attachments not recommended by Focus Products Group
International may result in fire, electric shock, or injury to persons.
Do not use this appliance outdoors.
Do not let cord hang over the edge of a table or counter, or touch hot surfaces.
Do not let the cord come into contact with hot surfaces, including a stove.
Keep hands and utensils out of container to reduce the risk of injury to persons or
damage to the appliance.
Never add to container while the appliance is operating.
The container must be properly in place before operating the appliance.
Do not use appliance for other than intended use.
This appliance has a polarized plug (one blade is wider than the other). To reduce
the risk of electric shock, this plug is intended to fit into a polarized outlet only one
way. If the plug does not fit fully into the outlet, reverse the plug. If it still does not
fit, contact a qualified electrician. Do not attempt to modify the plug in any way.
A short power-supply cord is provided to reduce risks resulting from becoming
entangled in or tripping over a longer cord.
Longer, detachable power-supply cords or extension cords are available and may
be used if care is exercised in their use. While use of an extension cord is not
recommended, if you must use one, the marked electrical rating of the detachable
power-supply cord or extension cord should be at least as great as the electrical
rating of the appliance. If the appliance is of the grounded type, the extension
cord should be a grounding-type 3-wire cord. The cord should be arranged so that
it will not hang over the counter top or tabletop where it can be pulled by children
or tripped over.

English - 3
To disconnect, turn any control to “OFF,” then remove plug from wall outlet.
Do not move an appliance containing hot water, tea or other hot liquids.
Do not place the mixing container on the motor base while the motor is running.
Do not remove the mixing container from the motor base while the motor is
running.
Always allow the appliance to cool completely before disassembling and cleaning.
Do not run the motor while the mixing container is empty.
After running the motor continuously for one cycle, wait at least five minutes before
running another cycle.
Always operate this appliance with the lid in place.
Do not attempt to repair this appliance yourself.
For household use only.
SAVE THESE INSTRUCTIONS
BEFORE USING FOR THE FIRST TIME
Please check all packaging material carefully before discarding. Accessory
parts may be contained within the packaging material.
See “Cleaning your HERSHEY’S Hot Beverage Machine” section of this manual.
Note: Do not wash any parts in the dishwasher and do not immerse the motor base
or mixing container in water or any other liquid. This may permanently damage the
product and void the warranty.
Mixing Container
with Heating Base
Lid
⅓ cup Measuring
Scoop
Dispensing Valve
Motor Base
English - 4
USING YOUR HERSHEY’S HOT BEVERAGE MACHINE
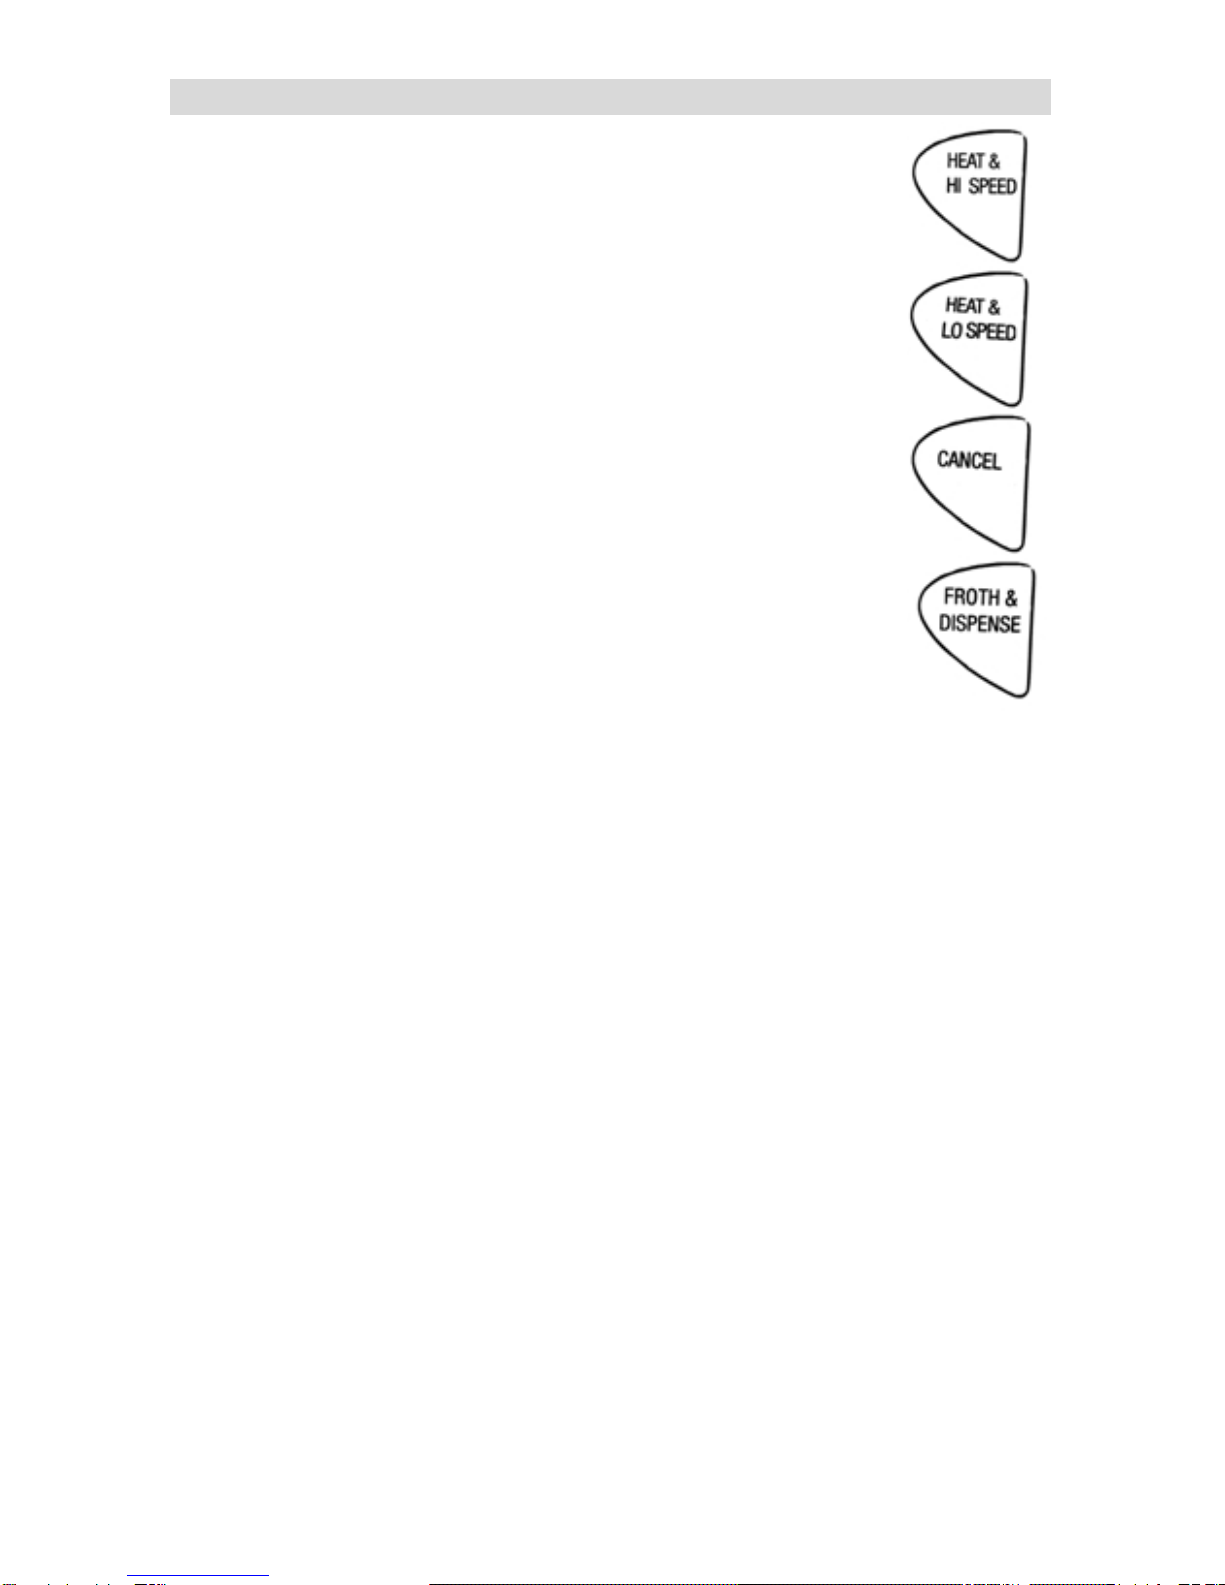
CONTROL BUTTONS:
HEAT & HI SPEED - Mixes and heats your drink at high speed. High
speed is perfect for creating frothy drinks.
HEAT & LO SPEED - Mixes and heats your drink at low speed. Low
speed is perfect for drinks that don’t need froth.
CANCEL - Stops any function. “CANCEL” can be pressed at any
point in the cycle to turn the appliance off. Buttons will flash red to
indicate that the appliance is still plugged in.
FROTH & DISPENSE - Stirs your drink at a high speed, without
adding heat, to mix and froth your drink for serving.
Note: After a button has been pressed to make a selection, the
indicator light will glow blue.
The measurements used below produce 60 ounces. Refer to the
Ingredients Chart to determine usage for alternate serving sizes.
1. Place mixing container on to the motor base.
2. Pour 60 ounces of water or milk into the mixing container. Note:
Do not fill the mixing container past the 60 ounce “Max Fill” line.
3. Add 1 cup of your favorite instant mix.
4. Place the lid on to the mixing container, making sure that the lid
covers the pour spout.
5. Plug the Hot Beverage Machine into a 120 volt, AC outlet only.
6. Press the “HEAT & HI SPEED” or “HEAT & LO SPEED” button. The selected
control button will glow blue and your Hot Beverage Machine will begin to mix
and heat. When the beverage reaches the “Perfect Temperature,” the appliance
will automatically go idle. As the beverage cools down, the appliance will
automatically reheat and remix back to the “Perfect Temperature.” The appliance
will remain on until “CANCEL” is pressed. “CANCEL” may be used at any time to
turn the appliance off. The control lights will flash red until the appliance is
unplugged or a selection is made. Selecting another speed setting will change
the operation and the selected control button will glow blue. Note: A full 60
ounces takes approximately 13 minutes to reach the “Perfect Temperature.”
7. Once the appliance automatically goes idle, place a cup underneath the
dispensing valve and press the “FROTH & DISPENSE” button. This setting will
mix the beverage while you dispense so that a rich layer of froth is dispensed into
your cup along with the hot drink.
8. Press down on the dispensing valve lever to dispense the hot drink into your cup
while the motor is mixing the beverage. After dispensing the beverage, select
HEAT & HI SPEED” or “HEAT & LO SPEED” if there is still liquid in the mixing
container or press the “CANCEL” button if less than 1 cup of beverage remains.
9. When the container has less than 1 cup of liquid remaining or is empty, press the
“CANCEL” button. Note: The appliance will remain on until you press “CANCEL.”
The control buttons will continue to flash red after “CANCEL” has been pressed,
indicating that the appliance is plugged in, but not in operation.

English - 5
INGREDIENTS CHART
CUPS
2
4
6
8
LIQUID Milk/Water
16oz.
32 oz.
48 oz.
60 oz.
POWDER MIX with Milk
4 tbsp.
8 tbsp.
12 tbsp.
16 tbsp.
POWDER MIX with Water
4 tbsp.
8 tbsp.
12 tbsp.
16 tbsp.
Note: Different instant cocoa, coffee, and tea mixes may vary from the quantities shown in this
chart. Use the quantities specified on the packaging of the instant hot drink mix for exact
measurements, or adjust to taste. You can use the included ⅓cup measuring scoop to
measure.
“PERFECT TEMPERATURE” FEATURE
The Hot Beverage Machine is designed to maintain the “Perfect Temperature.”
Once the beverage reaches the “Perfect Temperature,” the motor will stop running
and the mixing paddle will stop mixing, but the blue indicator light will still be lit. The
appliance is now idle but still on. As the beverage cools down, the appliance will
automatically reheat and remix back to the “Perfect Temperature.” THE
APPLIANCE WILL CONTINUE TO CYCLE ON AND OFF UNTIL THE “CANCEL”
BUTTON IS PRESSED. The control buttons can be pressed at any time to change
the mix settings.
A small amount of smoke and/or odor may occur upon heating due to the
release of manufacturing oils –this is normal.
Some minor expansion/contraction sounds may occur during heating and
cooling –this is normal.
CLEANING YOUR HERSHEY’S HOT BEVERAGE MACHINE
The Hot Beverage Machine should be cleaned after every use. Note: Do not wash
any parts in the dishwasher and do not immerse the motor base or mixing container
in water or any other liquid.
1. Unplug the appliance from the electrical outlet. Allow the entire appliance to
cool before cleaning.
2. Remove the mixing container from the motor base.
3. Pour out any unused portion of the hot drink mixture.
4. Add hot water and a couple drops of dish soap to the mixing container. Wash and
rinse. Note: For any difficult to remove build-up, use a nylon scrub pad. To
remove build-up around the edge of the mixing container and under the gasket,
use the corner of a nylon scrub pad. It may help to let hot, soapy water sit inside
the mixing container for a few minutes. Do not immerse the mixing container in
water or any other liquid.
5. Separate the lid and measuring scoop, remove and disassemble the dispensing valve
as described below. Wash lid, measuring scoop, and dispensing valve pieces in hot,
soapy water. Rinse and dry pieces thoroughly before reassembling.
6. Wipe the exterior of the motor base and mixing container with a soft, damp cloth.
7. Periodically sanitize mixing container and gasket. Place mixing container on the
motor base and add 4 cups of water and ¼ tsp. unscented bleach to the mixing
container. Put lid with scoop on mixing container, and run the appliance through a
complete cycle on “HEAT & HI SPEED.” After cycle, empty mixing container
through the dispensing valve and let air dry.
Table of contents
Languages:
Other Hershey's Kitchen Appliance manuals


