Hi-Lift 543532200 User manual

Meets applicable requirements of
ASME/ANSI B30.1 2004
AU/NZS 2693:2007
Instruction
Manual
Read this instruction manual before using the
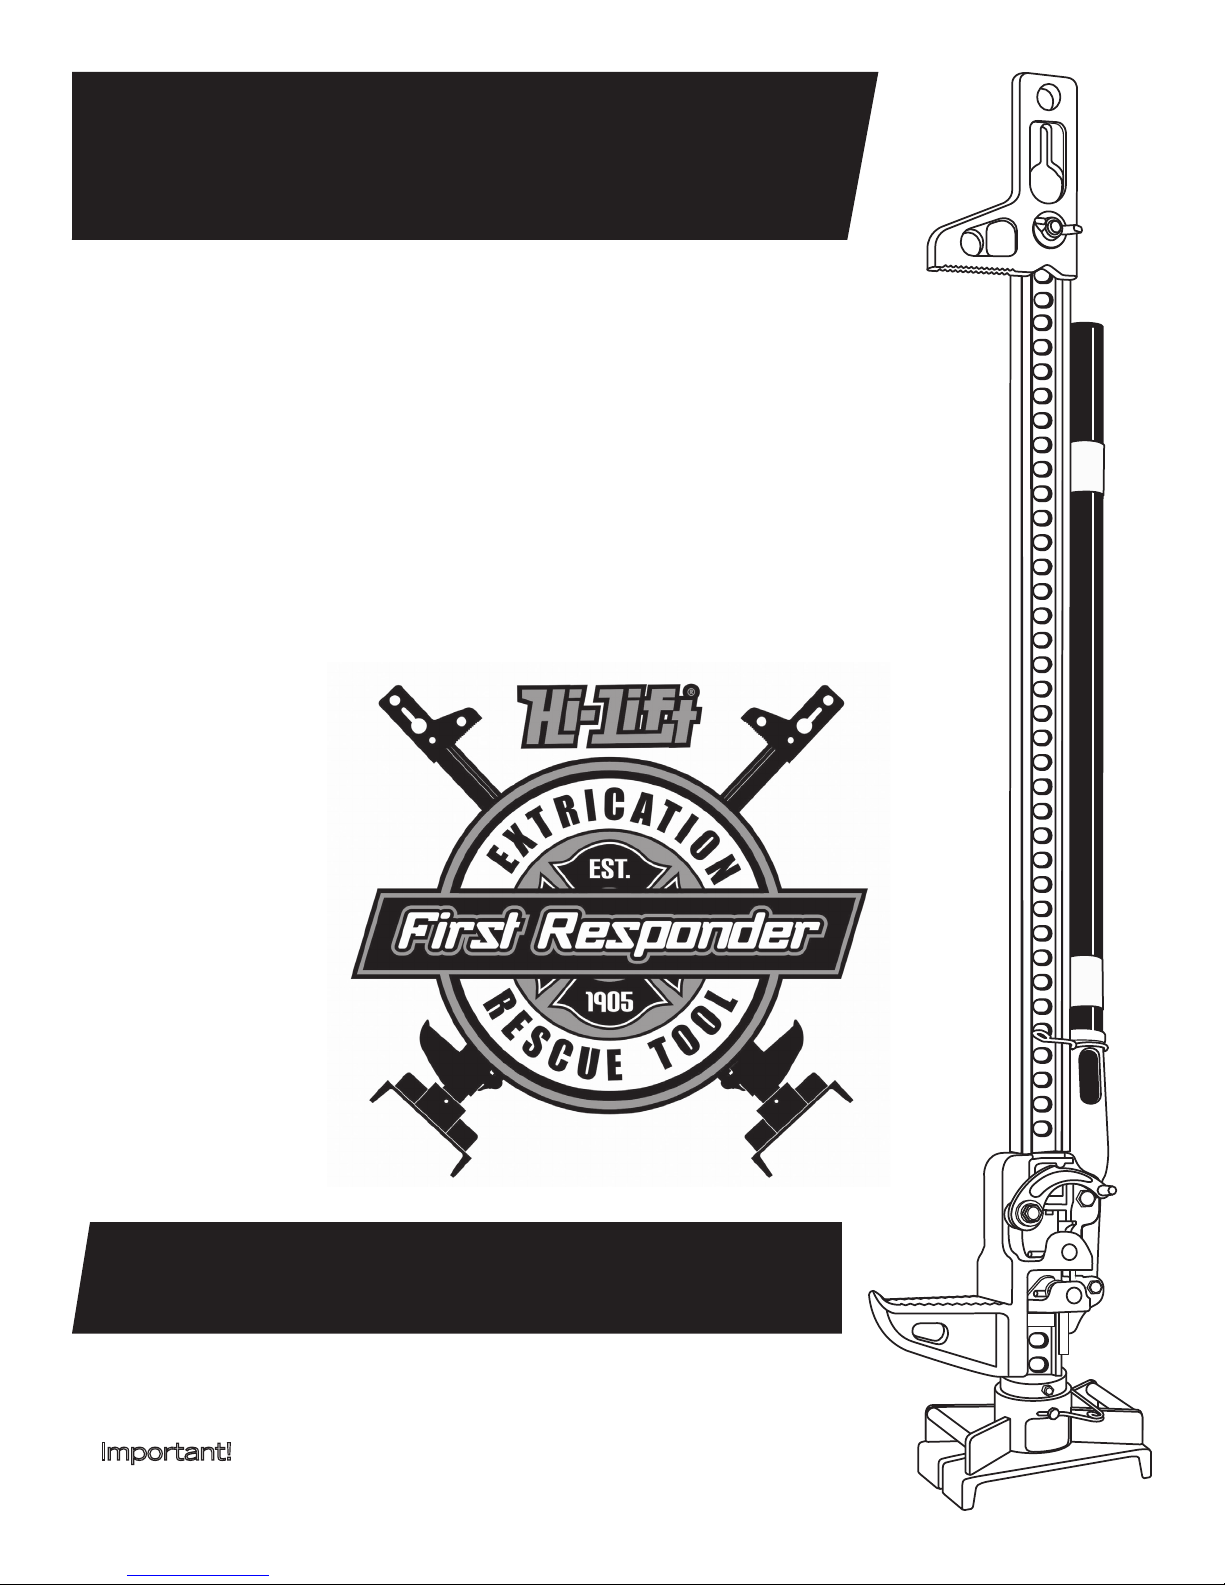
First Responder Jack.
Important! First Responder Jacks are designed to be oper-
ated by properly trained and clothed rescue personnel in
emergency or emergency training applications only.
Operation • Safety • Maintenance


Contents
First Responder Jack Components . . . . . . . . .1
Safety. . . . . . . . . . . . . . . . . . . . . . . . . . . . . . . . . . . . .3
Safety Symbols . . . . . . . . . . . . . . . . . . . . . . . . . . . . .3
Safety Warnings. . . . . . . . . . . . . . . . . . . . . . . . . . . . .4
Handle Safety Decal . . . . . . . . . . . . . . . . . . . . . . . . .5
General Safety. . . . . . . . . . . . . . . . . . . . . . . . . . . . . .6
Operation Instructions . . . . . . . . . . . . . . . . . . . . .7
Attaching and Using the First Responder Base . . . . . .7
Raising a Stationary Load. . . . . . . . . . . . . . . . . . . . . .9
Lowering a Stationary Load . . . . . . . . . . . . . . . . . . . 11
Clamping or Winching . . . . . . . . . . . . . . . . . . . . . . .12
Maintenance Instructions. . . . . . . . . . . . . . . . . . 14
Cleaning . . . . . . . . . . . . . . . . . . . . . . . . . . . . . . . . .14
Binding . . . . . . . . . . . . . . . . . . . . . . . . . . . . . . . . . .14
Storing the Jack. . . . . . . . . . . . . . . . . . . . . . . . . . . . 14
Inspection . . . . . . . . . . . . . . . . . . . . . . . . . . . . . . . 14
Lubrication . . . . . . . . . . . . . . . . . . . . . . . . . . . . . . .15
Repair. . . . . . . . . . . . . . . . . . . . . . . . . . . . . . . . . . .15
Parts ................................... 16
Specifications . . . . . . . . . . . . . . . . . . . . . . . . . . 18
Limited Warranty. . . . . . . . . . . . . . . . . . . . . . . . 19

Hi-Lift Jack Company
P.O. Box 228
Bloomfield, IN 47424-0228 USA
Toll Free: 800.233.2051
Direct: 812.384.4441
Fax: 812.384.4592
Web: http://firstresponder.hi-lift.com
To the Owner / User
Thank you for purchasing the First Responder Hi-Lift® Jack. With proper
use and care, your jack will give you years of dependable service. You can use
the First Responder Hi-Lift®Jack in many ways, including:
• Lifting stable loads.
• Winching loads.
• Clamping.
• Spreading.
• Raising vehicles or other loads (when properly chocked, blocked,
wedged and stabilized).
Store these instructions in the handle of your jack. Use only genuine Hi-Lift®
replacement parts. Using replacement parts not supplied by Hi-Lift®Jack
Company will make the jack unsafe for use and void the warranty.

1
Get to know the components of your jack before you begin use.
Winch / Clamp / Spreader Top clamp-clevis
Handle
Steel standard bar
Large runner
First responder base
Steel standard bar holes
Top clamp-clevis bolt & wing nut
Safety retainer pin
Pitman
Small runner
First Responder Jack Components
Rotating hub
Strap attachment bar
5/16 / 3/8 chain slot

2
Reversing latch
Handle clip spring
Handle socket
Shear bolt & nut
Cross pin
Pitman pin
Reversing switch cam bar
Cap screw with washer
Hex bolt & nut
Components · Running Gear
The following shows the parts associated with the running gear:
Climbing pin spring
Climbing pin
Cross pin
Climbing pin spring
Climbing pin

3
Safety
All users must read and understand the instructions and safety warnings in this manual and
the safety labels placed on the product before using the jack. Each user must use the jack
safely and maintain it properly.
If any users are not fluent in English, have someone read the instructions to them. Manuals
are also available in other languages upon request at no charge.
If you have any questions about using the jack safely or if you need a new label or manual,
see the contact information on the opposite page.
Important! First Responder Jacks are designed to be operated by properly trained and clothed
rescue personnel in emergency or emergency training applications only.
!
DANGER
The DANGER! safety symbol indicates a hazard or unsafe practice that
will
result in serious injury or death.
!
WARNING
Safety Symbols
The WARNING! safety symbol indicates a hazard or unsafe practice that
could
result in serious injury or death.
Safety · Warnings

4
Safety Warnings
!
DANGER
DO NOT USE THE JACK TO SUPPORT OR STABILIZE A LOAD. Using the jack to support or
stabilize a load may result in unexpected movement and result in serious injury, being crushed and
death. Always securely chock, wedge, and block (stabilize) the load to be lifted. Never place any
part of the body under a raised load without properly chocking and supporting the load (6 points
minimum).
Using the jack on curved or tubular vehicle bumpers will result in the vehicle slipping off the jack
and falling, causing serious injury or death. Use the Bumper Lift or Lift-Mate to lift most vehicles
with curved bumpers or plastic bumpers.
When using the jack as a winch:
Always use chains or tow straps that have a greater working load than the jack. If a chain or tow
strap breaks while winching, the load could shift or the chain or tow strap could snap back.
When used as a winch, the top clamp-clevis will support up to 5,000 lbs. (2273 kg). Going over
this limit will result in the top clamp-clevis bending or breaking, causing the load to move or the
chain or tow strap to snap back. This will result in serious injury or death.
When using the jack for clamping, the maximum clamping force of the top clamp-clevis is 5,000
lbs. (2,273 kg). If you exceed this limit, the top clamp-clevis could bend or break, resulting in seri-
ous injury or death.
Unexpected movement of the jack handle may result in the user being struck causing serious
injury or death. Always keep your head away from and out of the jack handle path of movement.
The jack handle may move rapidly when moving the reversing latch and cause serious injury or
death.
Always place the handle against the steel standard bar with the handle clip spring holding
it up before moving the reversing latch.
This will prevent the handle from moving up and down
rapidly. Securely hold on to the jack handle so your hands do not slip and ensure the handle is not
in the horizontal position when moving the reversing latch.
Important! During lifting and lowering, the weight of the load pushes
up
against the jack’s handle.
If your hands slip off the handle, or if the handle is horizontal when you move the reversing latch, it
may move up very quickly.
Attempting to lift more than one wheel at a time may result in tip over, unexpected movement and
serious injury or death. Always securely chock, wedge and block the load (six points minimum) to
avoid tip over.
The jack, while standing vertical and unsupported, may tip over and cause serious injury or
death. Always support the jack or lay it on it’s side when not in use.
This jack will not operate safely without proper lubrication. Using the jack without proper
lubrication will result in poor performance and damage to the jack. The jack is not self-lubricating,
inspect the jack before use and lubricate when necessary.
WARNING
!

5
Safety · Warnings
The following hazards or unsafe practices
will cause serious injury or death
DO NOT USETHE JACKTO SUPPORT OR STABILIZE
A LOAD. Using the jack to support or stabilize a
load may result in unexpected movement and
result in serious injury, being crushed and death.
Always securely chock, wedge, and block
(stabilize) the load to be lifted. Never place any
part of the body under a raised load without
properly chocking and supporting the load.
Using the jack on curved or tubular vehicle
bumpers will result in the vehicle slipping o the
jack and falling, causing serious injury or death.
Use the Bumper Lift or Lift-Mate to lift most
vehicles with curved bumpers or plastic bumpers.
When using the jack as a winch:
Always use chains or tow straps that have a
greater working load than the jack. If a chain or
tow strap breaks while winching, the load could
shift or the chain or tow strap could snap back.
When used as a winch, the top clamp-clevis will
support up to 5,000 lbs. (2273 kg). Going over this
limit will result in the top clamp-clevis bending or
breaking, causing the load to move or the chain
or tow strap to snap back. This will result in
serious injury or death.
When using the jack for clamping, the maximum
clamping force of the top clamp-clevis is 5,000
lbs. (2273 kg). If you exceed this limit, the
standard top clamp-clevis could bend or break,
resulting in serious injury or death.
Unexpected movement of the jack handle may
result in the user being struck causing serious
injury or death. Always keep your head away from
and out of the jack handle path of movement.
The jack handle may move rapidly when moving
the reversing latch and cause serious injury or
death. Always place the handle against the steel
standard bar with the handle clip spring holding
it up before moving the reversing latch. This will
prevent the handle from moving up and down
rapidly. Securely hold on to the jack handle so
your hands do not slip and ensure the handle is
not in the horizontal position when moving the
reversing latch.
Important! During lifting and lowering, the
weight of the load pushes up against the jack’s
handle. If your hands slip o the handle, or if the
handle is horizontal when you move the reversing
latch, it may move up very quickly.
Attempting to lift more than one wheel at a time
may result in tip over, unexpected movement,
and serious injury or death. Always securely
chock, wedge, and block (6 points minimum) to
avoid tip over.
Handle force required to raise 4,660 lbs. is 177
lbs. at 34”on the handle. Maximum rated load is
4,660 lbs. (2273 kg) up to 48”(121 cm), tested to
7,000 lbs. (3175 kg). Upper 12” of 60” jack is
rated to 2,660 lbs. (1209 kg) only, tested to 4,000
lbs. (1818 kg). If you overload the jack during
operation, the shear bolt will break. If the shear
bolt breaks, as it will at 7,000 lbs. (3175 kg), the
load should be supported, but the jack’s handle
will drop freely. Use a jack with a larger load
capacity to lower the load safely to the ground.
Do not replace the shear bolt with a bolt of
greater strength as this could cause the jack to
fail and drop the load. Always use a shear bolt
supplied by Hi-Lift Jack Company. Do not
replace the shear bolt while the jack is under
load.
The following hazards or unsafe practices
may cause serious injury or death
The jack, while standing vertical and
unsupported, may tip over and cause serious
injury or death. Always support the jack or lay it
on it’s side when not in use.
This jack will not operate safely without proper
lubrication. Using the jack without proper
lubrication will result in poor performance and
damage to the jack. The jack is not
self-lubricating, inspect the jack before use and
lubricate when necessary.
Important! First Responder Jacks are designed
to be operated by properly trained and clothed
rescue personnel in emergency or emergency
training applications only.
All users must read and understand the
instructions and safety warnings in the
instruction manual and on this product before
using the jack. Each user must use the jack
safely and maintain it properly.
If any users are not uent in English, have
someone read the instructions to them.
Manuals are also available in other languages
upon request at no charge.
If you have any questions about using the jack
safely, need a new label or manual contact:
Hi-Lift Jack Company
P.O. Box 228
Bloomeld, IN 47424-0228 USA
Toll Free: 800.233.2051
Direct: 812.384.4441
Fax: 812.384.4592
Web: http://rstresponder.hi-lift.com
The following hazards or unsafe practices
will cause serious injury or death
DO NOT USE THE JACK TO SUPPORT OR STABILIZE
A LOAD. Using the jack to support or stabilize a
load may result in unexpected movement and
result in serious injury, being crushed and death.
Always securely chock, wedge, and block
(stabilize) the load to be lifted. Never place any
part of the body under a raised load without
properly chocking and supporting the load.
Using the jack on curved or tubular vehicle
bumpers will result in the vehicle slipping o the
jack and falling, causing serious injury or death.
Use the Bumper Lift or Lift-Mate to lift most
vehicles with curved bumpers or plastic bumpers.
When using the jack as a winch:
Always use chains or tow straps that have a
greater working load than the jack. If a chain or
tow strap breaks while winching, the load could
shift or the chain or tow strap could snap back.
When used as a winch, the top clamp-clevis will
support up to 5,000 lbs. (2273 kg). Going over this
limit will result in the top clamp-clevis bending or
breaking, causing the load to move or the chain
or tow strap to snap back. This will result in
serious injury or death.
When using the jack for clamping, the maximum
clamping force of the top clamp-clevis is 5,000
lbs. (2273 kg). If you exceed this limit, the
standard top clamp-clevis could bend or break,
resulting in serious injury or death.
Unexpected movement of the jack handle may
result in the user being struck causing serious
injury or death. Always keep your head away from
and out of the jack handle path of movement.
The jack handle may move rapidly when moving
the reversing latch and cause serious injury or
death. Always place the handle against the steel
standard bar with the handle clip spring holding
it up before moving the reversing latch. This will
prevent the handle from moving up and down
rapidly. Securely hold on to the jack handle so
your hands do not slip and ensure the handle is
not in the horizontal position when moving the
reversing latch.
Important! During lifting and lowering, the
weight of the load pushes up against the jack’s
handle. If your hands slip o the handle, or if the
handle is horizontal when you move the reversing
latch, it may move up very quickly.
Attempting to lift more than one wheel at a time
may result in tip over, unexpected movement,
and serious injury or death. Always securely
chock, wedge, and block (6 points minimum) to
avoid tip over.
Handle force required to raise 4,660 lbs. is 177
lbs. at 34”on the handle. Maximum rated load is
4,660 lbs. (2273 kg) up to 48”(121 cm), tested to
7,000 lbs. (3175 kg). Upper 12” of 60” jack is
rated to 2,660 lbs. (1209 kg) only, tested to 4,000
lbs. (1818 kg). If you overload the jack during
operation, the shear bolt will break. If the shear
bolt breaks, as it will at 7,000 lbs. (3175 kg), the
load should be supported, but the jack’s handle
will drop freely. Use a jack with a larger load
capacity to lower the load safely to the ground.
Do not replace the shear bolt with a bolt of
greater strength as this could cause the jack to
fail and drop the load. Always use a shear bolt
supplied by Hi-Lift Jack Company. Do not
replace the shear bolt while the jack is under
load.
The following hazards or unsafe practices
may cause serious injury or death
The jack, while standing vertical and
unsupported, may tip over and cause serious
injury or death. Always support the jack or lay it
on it’s side when not in use.
This jack will not operate safely without proper
lubrication. Using the jack without proper
lubrication will result in poor performance and
damage to the jack. The jack is not
self-lubricating, inspect the jack before use and
lubricate when necessary.
Important! First Responder Jacks are designed
to be operated by properly trained and clothed
rescue personnel in emergency or emergency
training applications only.
All users must read and understand the
instructions and safety warnings in the
instruction manual and on this product before
using the jack. Each user must use the jack
safely and maintain it properly.
If any users are not uent in English, have
someone read the instructions to them.
Manuals are also available in other languages
upon request at no charge.
If you have any questions about using the jack
safely, need a new label or manual contact:
Hi-Lift Jack Company
P.O. Box 228
Bloomeld, IN 47424-0228 USA
Toll Free: 800.233.2051
Direct: 812.384.4441
Fax: 812.384.4592
Web: http://rstresponder.hi-lift.com
Handle Safety Decal
Important! Replace handle safety decal if damaged or removed.

6
General Safety
Training
• Read this manual before use. Do not allow anyone who has not read this manual, and/or does not
understand the requirements, use the jack.
•
Important! First Responder Jacks are designed to be operated by properly trained and clothed rescue
personnel in emergency or emergency training applications only.
Spectators
• Do not allow bystanders around the jack or under the load supported only by the jack.
Inspection
• Inspect the jack carefully before each use. Ensure the jack is not damaged, excessively worn, or missing
parts.
• Check the climbing pins to make sure that they are not worn or damaged.
• Check the steel standard bar to make sure that it is straight and that nothing is blocking the steel standard
bar holes.
• Do not use the jack unless it is in good clean working condition.
• Do not use the jack unless it is properly lubricated.
• Using a jack that is not in good clean working condition or properly lubricated may cause serious injury
(see
Lubrication
).
Chock, Wedge and Block - 6 Points Minimum (Stabilize)
A chock is for steadying an object and holding it motionless, or for preventing the movement of a wheel.
Chock both sides of wheels that will remain in contact with the ground.
When you block a load, you secure and support a load that is being lifted. The block(s) or stabilizer(s) should
have a weight capacity that is greater than the weight of the load which is being lifted. Blocks can be made of
wood, plastic or metal. Do not stack more than three blocks in the same direction.
If necessary, a wedge can be used in conjunction with blocks to support loads that are lifted between block
heights. Do not use the jack to support the load.
Chocks prevent movement
Cribbing to stabilize
the load
Safety · General

7
Operation Instructions
Attaching and Using the First Responder Base
Inadequate strength of the cribbing or blocking of the load being lifted may result in the load tip-
ping or slipping off the jack and falling, causing serious injury or death. The cribbing or blocking
must have equal or greater strength than the load being lifted.
Rotation of the steel standard bar and first responder base when under load may cause the
jack to fail and cause serious injury or death. Do not rotate the bar and base when the jack is
under a load. Safety retainer pin must be completely inserted and locked before any load is
lifted.
Use of the first responder base for winching when under load may cause the jack to fail and
cause serious injury or death. The first responder base is not rated for tension. Do not use the
first responder base for winching when under a load.
!
DANGER
Attaching the First Responder Base
Prior to lifting a load:
1. Check the rotating hub is securely attached to the standard bar.
2. Place the rotating hub into the first responder base and rotate the rotating hub to the desired position.
3. Align the holes in the hub and base. Insert the safety retaining pin through the holes.
4. Securely lock the safety retainer pin.
5. Check to make sure the safety retainer pin is securely engaged and locked before using.
Operation · Attaching and Using the First Responder Base
3
4
2
Rotating hub
Safety retaining pin
Standard bar

8
Using the First Responder Base
Follow these guidelines when using the first responder base:
• The chain slot is not designed for a chain smaller than 5/16 with a working load that exceeds the rating
of the jack.
• When using the jack in an elevated position (other than solid ground) tie backs, straps, or chains must
be used to prevent kick-out.
• When a chain is being used to support the jack the angle between the chain anchor and the standard
steel bar cannot be more than 45° degrees.
Operation · Attaching and Using the First Responder Base
Slot for 5/8 or 31/6 chain
45° degrees
maximum
Chains to prevent kick-out
Straps attached to
strap attachment bars
Jack secured with chain Jack secured with strap
Jack secured with strap and chain
Strap attachment bar

9
Operation Instructions
Raising a Stationary Load
DO NOT USE THE JACK TO SUPPORT OR STABILIZE A LOAD. Using the jack to support or
stabilize a load may result in unexpected movement and result in serious injury, being crushed
and death. Always securely chock, wedge, and block (stabilize) the load to be lifted (6 points
minimum). Never place any part of the body under a raised load without properly chocking and
supporting the load at a minimum of six points.
Using the jack on curved or tubular vehicle bumpers will result in the vehicle slipping off the
jack and falling, causing serious injury or death. Use the Bumper Lift or Lift-Mate to lift most
vehicles with curved bumpers or plastic bumpers.
Unexpected movement of the jack handle may result in the user being struck causing serious
injury or death. Always keep your head away from and out of the jack handle path of move-
ment.
The jack handle may move rapidly when moving the reversing latch and cause serious injury
or death. Always place the handle against the steel standard bar with the handle clip spring
holding it up before moving the reversing latch. This will prevent the handle from moving up
and down rapidly. Securely hold on to the jack handle so your hands do not slip and ensure the
handle is not in the horizontal position when moving the reversing latch.
Important! During lifting and lowering, the weight of the load pushes
up
against the jack’s han-
dle. If your hands slip off the handle, or if the handle is horizontal when you move the reversing
latch, it may move up very quickly.
Attempting to lift more than one wheel at a time may result in tip over, unexpected movement
and serious injury or death. Always securely chock, wedge and block the load (six points mini-
mum) to avoid tip over.
Handle force required to raise 4,660 lbs. is 177 lbs. at 34” on the handle. Maximum rated load
is 4,660 lbs. (2273 kg) up to 48” (121 cm), tested to 7,000 lbs. (3175 kg). Upper 12” of 60”
jack is rated to 2,660 lbs. (1209 kg) only, tested to 4,000 lbs. (1818 kg).
If you overload the jack during operation, the shear bolt will break. If the shear bolt breaks, as it
will at 7,000 lbs. (3175 kg), the load should be supported, but the jack’s handle will drop freely.
Use a jack with a larger load capacity to lower the load safely to the ground. Do not replace the
shear bolt with a bolt of greater strength as this could cause the jack to fail and drop the load.
Always use a shear bolt supplied by Hi-Lift Jack Company. Do not replace the shear bolt while
the jack is under load.
!
DANGER
Operation · Raising a Stationary Load

10
Important!
Keep the handle against the steel standard
bar with the handle clip spring holding it
when not in use.
1. Securely chock and stabilize the load to prevent it from rolling or shifting as you lift it (see General Safety:
Chock, Wedge and Block).
2. Place the jack’s base securely on a firm, level, and dry surface. If the jack cannot be placed on a firm, level
and dry surface then restrain the jack with a strap or chain.
3. Lift the reversing latch until it locks in the
up
position.
4. Pull the handle away from the steel standard bar, releasing the handle clip spring.
5. Grasp the handle or the handle socket and raise the lifting mechanism until the large runner is completely
and securely under the load.
3
6
2
4
5
Operation · Raising a Stationary Load
1
6. Grasp the handle firmly with both hands. Carefully pump the handle up and down to raise the load. Do not
use an extension or “cheater” bar on the handle.
The load will be raised on each
down
stroke of the handle. Watch the load and the jack carefully. Stop lift-
ing if either one starts to shift. Do not continue until it is safe to do so. When safe, stabilize and block the
load.
7. When the load is raised to the desired height, place the handle in the upright position clipped to the steel
standard bar.
8. Block, wedge and chock (minimum six points) the load securely.
9. Lower the load onto the blocks (see
Lowering a Stationary Load
).
10. Remove the jack from the stabilized load.
2
Jack unsupported, restrained with a strap
and chain.

11
The jack must have a load of 150 lbs. or more to lower step-by-step. Otherwise, the lifting mechanism will
slide down to the base plate,
dropping
your load. Ensure all bystanders are clear of the load being lowered.
1. Position the jack under the raised load and raise the stationary load (see
Raising a Stationary Load
).
2. Be sure the handle is in the upright position clipped to the steel standard bar
before
lowering the load.
3. Move the reversing latch to the
down
position.
4. Grasp the handle firmly with both hands. Carefully pump the handle up and down to lower the load.
5. The load will be lowered on each
up
stroke of the handle (refer to
Binding
if the jack binds).
6. As the jack is lowered (chase load with wedges), incrementally reduce the height of the cribbing under the
load.
Unexpected movement of the jack handle may result in the user being struck causing serious injury
or death. Always keep your head away from and out of the jack handle path of movement.
The jack handle may move rapidly when moving the reversing latch and cause serious injury or
death. Always place the handle against the steel standard bar with the handle clip spring holding
it up before moving the reversing latch. This will prevent the handle from moving up and down
rapidly. Securely hold on to the jack handle so your hands do not slip and ensure the handle is not
in the horizontal position when moving the reversing latch.
Important! During lifting and lowering, the weight of the load pushes
up
against the jack’s handle.
If your hands slip off the handle, or if the handle is horizontal when you move the reversing latch, it
may move up very quickly.
Lowering a Stationary Load
1
2
Operation · Lowering a Stationary Load
4
!
DANGER
3

12
Clamping or Winching
When using the jack as a winch:
Always use chains or tow straps that have a greater working load than the jack. If a chain or tow
strap breaks while winching, the load could shift or the chain or tow strap could snap back.
When used as a winch, the top clamp-clevis will support up to 5,000 lbs. (2273 kg). Going over
this limit will result in the top clamp-clevis bending or breaking, causing the load to move or the
chain or tow strap to snap back. This will result in serious injury or death.
When using the jack for clamping, the maximum clamping force of the top clamp-clevis is 5,000
lbs. (2,273 kg). If you exceed this limit, the top clamp-clevis could bend or break, resulting in seri-
ous injury or death.
Clamping
1. Loosen the top clamp-clevis bolt & nut
2. Adjust the top clamp-clevis for the desired winching, clamping, or spreading application. Re-tighten the
bolt.
Note: You can connect the top clamp-clevis anywhere along the steel standard bar to use the jack as a
clamp.
3. Operate the jack as you would for raising a load (see
Raising a Stationary Load
).
1
2
3
Operation · Clamping or Winching
!
DANGER
Adjust top-clamp clevis up
or down to desired position

Place d-ring shackle in
the top hole of the top-
clamp clevis
13
Winching
1
.
Make sure the top clamp-clevis is secure to the steel standard bar.
2. Install one end of a chain or tow strap securely to the object to be winched. Securely attach the other end
of the chain or tow strap to the top clamp-clevis of the jack.
Note: Use a shackle if the chain or tow strap will not fit through the top clamp-clevis of the jack.
3. Take another chain or tow strap and secure one end to a fixed, stable object. Attach the other end of the
chain or tow strap to the large runner on the jack (do not attach chain or shackle to bottom hole of the
large runner on the jack).
4. Operate the jack as you would for raising a load (See Raising a Stationary Load).
1
2
3
4
Operation · Clamping or Winching
Tip:
Use the Hi-Lift Off-Road Kit for items you need for winching
which includes custom winch attachments and a d-ring shackle.

14
Maintenance Instructions
If you use and maintain your First Responder Jack properly, it will give you many years of service. Follow
the maintenance instructions carefully to keep your jack in good working condition. NEVER PERFORM
MAINTENANCE ON THE JACK WHILE IT IS UNDER LOAD.
Cleaning
If the moving parts of the jack or the standard bar are clogged, use air pressure, water pressure, or a stiff
brush to clean. Use a non-flammable cleaning solvent or another good de-greaser to clean the jack. Remove
any existing rust, preferably with a penetrating lubricant.
Binding
If the climbing pins start to bind in the holes of the standard bar the jack will not operate properly and
safely. Rusty climbing pins, dirt, or worn bar can be causes of binding.
Clean and lubricate the lifting mechanism as indicated in the Lubrication section. Test the jack by lifting it
up without a load. If the binding continues, send it to our Factory Service for repair. If the jack binds while
under a load, use a jack with equal or larger load capacity to lower the load safely to the ground. After
unbinding the jack clean, lubricate and test as described at the start of this paragraph.
Storing the Jack
1. Place the handle in the upright clipped position against the steel standard bar.
2. Raise the reversing latch until it locks in the
up
position.
3. Store in the upright clipped position in a dry location, preferably indoors.
Tip:
If the jack is stored outdoors, consider using a Hi-Lift protective cover accessory.
Inspection
You should inspect the jack for damage, wear, broken or missing parts (e.g.: climbing pins) and functionality
before each use (see
General Safety: Inspection
). Follow lubrication and storage instructions for optimum
jack performance.
Maintenance Instructions

15
Steel Standard Bar: Keep
the front and back edges
lightly lubricated and free
from dirt and rust.
Pitman Pin: Damage to the
handle socket will occur if not
lubricated
Shear Bolt: Wear to the bolt will oc-
cur if not lubricated
Climbing Pins: Keep clean and lubri-
cated and free from dirt and rust
Springs: Keep clean and
lubricated and free from
dirt and rust.
Important!
Do not use motor oil
or grease to lubricate the jack.
Repair
If you need to repair your jack, use only genuine Hi-Lift parts. Using parts not supplied by Hi-Lift®Jack
Company will make the jack unsafe for use and void the warranty. Hi-Lift®will repair a damaged jack. Pack the
jack in a carton and send prepaid to the address below:
Hi-Lift®Jack Company
Factory Service Department
46 West Spring Street
Bloomfield, Indiana 47424
The repaired jack will be returned to you via USPS, UPS or Fed Ex.
Maintenance Instructions
Lubrication
Using the jack without proper lubrication will result in poor performance and damage to the jack. The jack is
not self-lubricating, inspect the jack before use and lubricate when necessary. After cleaning, lubricate the
jack using light penetrating oil, or a silicon or Teflon spray at the following points:
WARNING
!

16
Parts
1
2
3
4
5
6
7
8
9
10
11
13
14
15
16
17
18
19
22
12
24
Parts
20
23
21
This manual suits for next models
2
Table of contents