Hi Sharp ATR620H User manual

Thank you for purchasing our product.
Please read this user’s manual before using the product.
Change without notice
16 / 3 CH Analogue HD- Hybrid DVR
Quick Guide
Default User name / Password
User Name : admin
Password : 1 3456

CAUTION
Please read this user manual carefully to ensure that you can use the device correctly and safely
We do not warrant all the content is correct. The contents of this manual are subject to chan e
without notice
This device should be operated only from the type of power source indicated on the markin label.
The volta e of the power must be verified before usin . If not in use for a lon time, pull out the plu
from the socket
Do not install this device near any heat sources such as radiators, heat re isters, stoves or other
device that produce heat
Do not install this device near water. Clean only with a dry cloth
Do not block any ventilation openin s. And ensure well ventilation around the machine
Do not power off the DVR at normal recordin condition! The correct operation to shut off DVR is to
stop recordin firstly, and then select “shut-down” button at the ri ht of the menu bar to exit, and finally
to cut off the power.
This machine is indoor usin equipment. Do not expose the machine in rain or moist environment. In
case any solid or liquid et into the machine’s case, please cut off the power supply immediately, and
ask for qualified technicians to check the machine before restart
Refer all servicin to qualified service personnel. No any parts repaired by yourself without technical
aid or approval.

3
Main Features
• Real-time surveillance
• High resolution VGA output, HDMI output
• way audio
• 3G Mobile surveillance(iPhone/ iPad/ Android)
Compression with latest H. 64 video compression, better video quality and lower
compression rate.
Storage: 8 SATA HDD(FAT3 file system)
• Data back with USB thumb drive or USB external DVD burner. Each backup file size is
1 8MB.
• Adjustable record resolution, frame rate and quality
• WD1(960H)/AHD 7 0P+1080P/TVI7 0P+1080P/IP 7 0P+1080P
(support 8 IP camera input) record – 16CH only
• Multi-record mode: manual, schedule, sensor and motion record.
• HDD recycle record.
• Single or Multi channel playback
• Record file lock protection
• With 16 channel Audio input / 1 channel audio output
With 16 channel alarm inputs / 4 channel alarm output
• Motion detection
• Pre and Post event record
• Channel related trigger record
• PTZ control
Multi PTZ protocol support
Programmable 1 8 Preset points and 8 cruises
Related trigger preset point control
• Authority account setup (1 admin and 63 users account)
• USB mouse control
To use USB mouse to control on friendly GUI
• Playback search mode: by time or event
• Event log and search
• Support network function
Multi connection type: STATIC (Fixed IP), DHCP, PPPOE
Support DDNS、NAT (P P)
Support event trigger to send E-mail
Remote connection limitation
Auto bandwidth adjustment by network status
• Support network remote control
Remote record
Remote playback
Remote PTZ control
Remote configuration
Remote IE surveillance
Remote CMS control
Remote EMAP control
Remote camera color adjustment
Remote snapshot
Supports COC ( control over coaxial) function

4
1. 1. Front Panel Instructions
Notice: The pictures are only for reference; please make the object as the standard.
1.1 Front Panel
Label Function
LED indicator
Power Power indicator, when connection
HDD When HDD is writing and reading
Net When access to network
Backup When backup files and data
Play When playing video
REC When recording
Button
Audio/+ 1. Control voice . Increase the value in setup
PTZ/- 1. Enter PTZ mode in live . Decrease the value in
setup
MENU Enter menu in live
INFO Check system information data
Backup Enter backup mode in live
Search Enter search mode
Record manually
Play/Pause
Stop/Esc
Rewind
Fast forward
1-9 Input number 1-9 or choose camera
0/10+
Icon Description
16 ch 3 ch 16 ch
3 ch
1 Split display
4 Split display
4 Split display 9 Split display
9 Split display 16 Split display
5 Split display
36 Split display
Direction Change direction to select items
Multi-screen Change screen display mode like1/4/9/16 channel
Enter Confirm selection
USB USB port To connect external USB devices like USB flash,
USB HDD, USB VCD/DVD

5
1.2 Rear Panel Instructions
Rear Panel for 16 CH
Rear Panel for 3 CH
1.3 Remote Controller
It uses two AAA size batteries.
• Open the battery cover of the Remote Controller.
• Place batteries. Please take care of the polarity (+ and -).
• Replace the battery cover.
Remote Controller
Name
Descriptions
AC110/ 30 Power Input.
USB To connect external USB devices like USB mouse or USB
storage device.
LAN Network Port.
HDMI HDMI Port. Connect to high-definition display device.
VGA VGA Port. Connect to monitor.
E-SATA External HDD for backup
VIDEO IN 16 / 3 CH Video Inputs.(support AHD/TVI/Analogue)
AUDIO OUT Audio output, connect to the sound box.
AUDIO IN 16 CH Audio Input.
RS485 Connect to keyboard or speed dome; A is TX +; B is TX-.
ALARM IN 16 channel alarm inputs
ALARM OUT 4 channel alarm output
MIC IN Way Audio Micphone

6
Button
Function
Power Button Switch off—to stop DVR. Use it before turning off the
power
Record Button To record manually
-/-- /0-9 Digital Button Input number or choose camera
Fn1 Button Unavailable temporarily
Multi Button To choose multi screen display mode
Next Button To switch the live image
SEQ To enter into auto dwell mode
Audio To enable audio output in live mode
Switch To switch the output between BNC and VGA
Direction button To move cursor in setup or pan/title PTZ
Enter Button To confirm the choice or setup
Menu Button To enter into menu
Exit Button To exit the current interface
Focus/IRIS/Zoom/PTZ
To control PTZ camera. Move camera/zoom/IRIS/Focus
Preset Button To enter into preset setting in PTZ mode
Cruise Button To enter into cruise setting in PTZ mode
Track Button To enter into track setting in PTZ mode
Wiper Button To enable wiper function in PTZ mode
Light Button To enable light function in PTZ mode
Clear Button To return to the previous interface
Fn Button Unavailable temporarily
Info Button Get information about DVR like firmware version, HDD
information
To control playback. Play/Pause/Stop/Previous
Section/Next Section/Rewind/Fast Forward
Snap Button To take snapshots manually
Search Button To enter into search mode
Cut Button To set the start/end time for backup in playback mode
Backup Button To enter into backup mode
Zoom Button To zoom in the images
PIP Button To enter into picture in picture setting mode
3.Startup and Shutdown
Startup
Step1: Connect with the source power.
Step : The device will boot and the power LED would turn blue.
Step3 A WIZARD window will be pop-up
Shutdown
You can shut down the device by using IR remote controller and mouse.
By IR remote controller:
Step1: Press Power button, the shutdown window will appear, click OK, the unit will shut down after a while.
Step : Disconnect the power
By mouse:
Step1: Right click on the mouse, then select “Main Menu” the shutdown window will appear at the last
Step : Click OK. Then the unit will power off after a while.
Step3: Disconnect the power

7
4.Wizard setup
After the device starts, a setup wizard pops up. You can set up time,network and disk management.
Click device name box to popup a keyboard as follow:
It supports digits, alphabets and symbols as inputs. Click Shift button to input Capital letters and symbols; click
Shift button again to return.
The default HTTP port is 80. The default server port is 6036. You can check “Obtain an IP address
automatically‟ to acquire network information or input IP address, subnet mask, gateway, preferred/alternate
DNS server manually. This function is used to monitor DVR through internet
Click Next button. This will take you to the HDD management window.
Record stream
Step1: enter into system configurationrecord configurationrecord bit rate
When DVR receives the signals from camera, it will distinguish the signals (1080P/7 0P/WD1(960H)) and set
the resolution automatically.

8
Step : Set up rate, resolution, quality, encode and max bit stream.
Step3.: Select “All” to set the same settings for all channels.
Click “Apply” button to save the setting.
Note: if the rate value set is over hi h the maximum resources of the device, the value will be
adjusted automatically.
You can setup record frame rate and quality for each channel and change record resolution.
Adjustable parameter as following,
Resolution
Frame Rate
Quality
Encode
Max bit
rate
TVI 7 0P 1~ 5fps(PAL)/1~30fps(NTSC)
The higher the
value is, the
clearer the
recorded image is.
Six options:
lowest, lower, low,
medium, higher
and highest.
VBR and
CBR.
You shall adjust it
subject to the actual
network condition.
1536, 179 , 048,
4096, 51 0, 6144,
7168, 819 , 9 16,
10 40, 1 88 kbps
1080P 1-15(NTSC)/1-1 (PAL)
AHD 7 0P 1~ 5fps(PAL)/1~30fps(NTSC)
1080P 1-15(NTSC)/1-1 (PAL)
WD1
(960H)
960H 1~ 5fps(PAL)/1~30fps(NTSC)
IP 7 0P 1~ 5fps(PAL)/1~30fps(NTSC)
1080P
DD Wizard
You can check your HDD information through this tab. If your HDD was recently installed, select the HDD from
the list to format it.
Click on Exit to leave the wizard
You can check your HDD information through this tab. If your HDD was recently installed, select the HDD from
the list to format it. Click on Exit to leave the wizard
5.Lo in
You can login or log off the DVR system. Once logged off you cannot do any other operation except changing
the multi-screen display.
After you exit the wizard setup, you can login to the DVR.
Lo in
Notice: The default user name and password is “admin” and 123456”

9
1. Compatible USB drive after test.
Brand
Capacity
A-DATA 51 MB, 1G, GB
Transcend 4GB
Kingston GB
Toshiba GB
SanDisk 4GB
2. Compatible external USB CD/DVD writers after test
Brand
Model
LG GH 4NS90
3. Compatible HDD
Brand Model number Capacity
Western
Digital
1600AAJS FW:00L7A0 160GB
500AVVS FW:73M8B0 50GB
3 00AVVS 3 0GB
5000AVJS FW:63YJA0 500GB
5000AVVS FW:63M8B0 500GB
5000AAKS FW:00V1A0 500GB
5000BUDT ( .5") FW:63G8FY0 500GB
5000AUDX FW:63WNHY0 500GB
10EURS FW:630AB1 1TB
10EVDS FW:63U8B0 1TB
WD10PURX FW:64D85Y0 1TB
15EARS FW:00Z5B1 1.5TB
15EURS FW:63S48Y0 1.5TB
0EVDS FW:63T3B0 TB
0EARS FW:00S8B1 TB
001FASS FW:00U0B0 TB
WD 0PURX FW:64P6ZY0 TB
WD30PURX FW:64P6ZY0 3TB
WD40PURX FW:64GVNY0 4TB
WD40EURX FW:64WRWY0 4TB
WD60PURX FW:64LZMY0 6TB
HITACHI
HDS7 1616PLA380 160GB
HCT7 10 5SLA380 500GB
HCP7 5050GLA380 500GB
HDP7 5050GLA360 1TB
APPENDIX A
_
Compatible Devices

10
SEAGATE
ST500DM00 (SATA3) FW:KC44 500GB
ST31005 8AS FW:CC38 1TB
ST310005 4AS (SATA3) FW:JC4B 1TB
ST 000DL003 (SATA3) FW:CC3 , CC3C TB
ST3000VX00 FW:CV1 3TB
ST3000VX000 FW:SV35 3TB
ST6000VX0001 FW:VN0 6TB
TOSHIBA
HCS5C1050DLE630 FW:6 0DT01ABA050V 500GB
DT01ABA100 1TB
DT01ACA100 1TB
APPENDIX B _SPCIFICATION
Model
16ch Hybrid DVR
32
ch Hybrid DVR
Compression format H. 64 Main Profile
Video output VGA × 1, HDM I× 1
Video Input BNC × 16 BNC × 3
HDMI/VGA Resolution 19 0 × 1080/1 80 ×10 4/ 10 4 × 768 / 800 × 600
Record Resolution 7 0P (1 80 × 7 0) / 960H (960× 480)
TVI 7 0P 400FPS (PAL) , 480FPS (NTSC) 800FPS (PAL) , 960FPS (NTSC)
TVI 1080P 00FPS(PAL), 40FPS(NTSC)
400FPS(PAL), 480FPS(NTSC)
AHD 7 0P 400FPS (PAL) , 480FPS (NTSC) 800FPS (PAL) , 960FPS (NTSC)
AHD 1080P 00FPS(PAL), 40FPS(NTSC) 400FPS(PAL), 480FPS(NTSC)
960H 400FPS (PAL) , 480FPS (NTSC) 800FPS (PAL) , 960FPS (NTSC)
IP 7 0P 400FPS(PAL), 480FPS(NTSC)
N/A
IP 1080P
Audio Input RCA × 16
Audio output RCA × 1
ALARM IN Alarm in × 16
ALARM OUT Alarm out × 4
Record Mode Manual / Timer / Motion detection
Network Interface RJ45
PTZ control YES
Communication interface
RS485, USB .0 × (one for backup, another for USB mouse)
Disk info SATA × 8
Remote controller YES
Power Supply AC 110 / 30V
Temperature 0℃-50℃
Humidity 10%-90%
Other manuals for ATR620H
1
This manual suits for next models
1
Table of contents
Other Hi Sharp DVR manuals
Hi Sharp
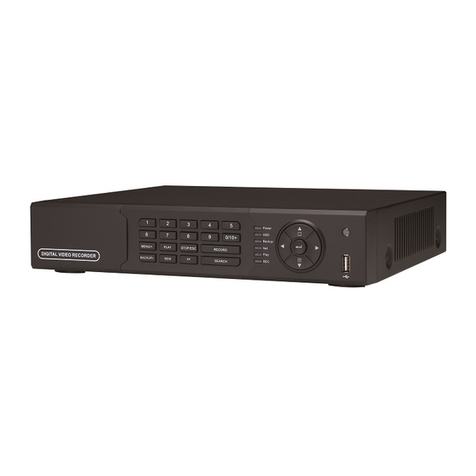
Hi Sharp DVR047-E User manual
Hi Sharp
Hi Sharp HS-AHR600 User manual

Hi Sharp
Hi Sharp 16 CH DVR User manual
Hi Sharp
Hi Sharp 16 Channel Digital Video Recorder User manual
Hi Sharp
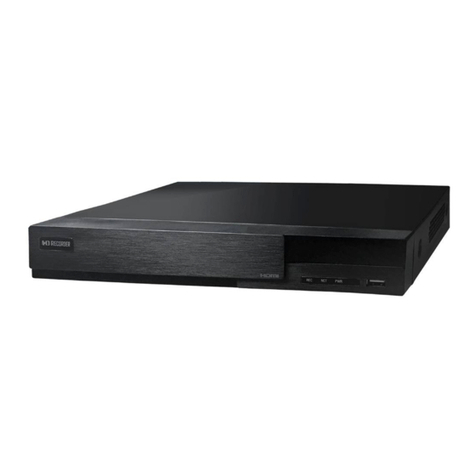
Hi Sharp NB6321 User manual
Hi Sharp
Hi Sharp HS-HC4311 User manual
Hi Sharp
Hi Sharp HS-DVR045 User manual
Hi Sharp
Hi Sharp ATR620H User manual
Hi Sharp
Hi Sharp Digital video recorder User manual

Hi Sharp
Hi Sharp HS-DH8000 User manual
