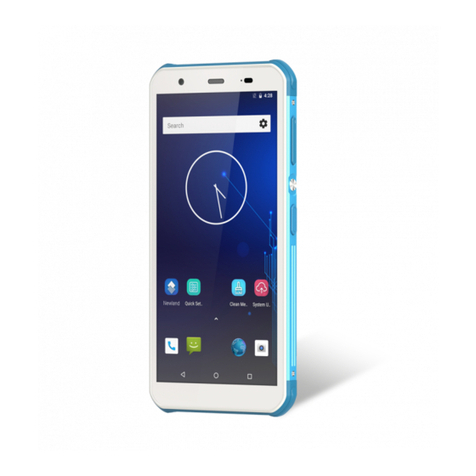
Hi-Target Qmini Series User manual

Qmini series industrial GIS data collector manual
- 1 -
Hi-Target
Qmini Series
Industry GIS Data Collector
Manual
Manual Revision
Revised
Date
Revised
Times
Specification
July/2010
1
Qmini Series Industrial GIS data collector manual
1.0 Version

Qmini series industrial GIS data collector manual
- 2 -
Catalogue
Chapter 1 Preface ................................................................3
1.1 Instruction.................................................................................................................... 4
1.2 Relative Information.................................................................................................... 4
1.3 Technical Support ........................................................................................................ 4
1.4 Your Suggestions ......................................................................................................... 4
Chapter 2 Summary ............................................................5
2.1 Instruction.................................................................................................................... 6
2.2 Product Features .......................................................................................................... 6
2.3 Usage and Notes .......................................................................................................... 7
Chapter 3 Qmini Series Introduction ................................8
3.1 Introduction ................................................................................................................. 9
3.2 Obverse of Qmini Series Industrial GIS Data Collector.............................................. 9
3.3 Reverse of Qmini Series Industrial GIS Data Collector .............................................. 9
3.4 Interface..................................................................................................................... 10
3.5 Touch Pen Appearance................................................................................................11
3.6 Battery ........................................................................................................................11
3.7 Data Cable ................................................................................................................. 12
3.8 Strap........................................................................................................................... 12
Chapter 4 Basic Operation................................................13
4.1 Introduction ............................................................................................................... 14
4.2 Keyboard ................................................................................................................... 14
4.3 Touch pen................................................................................................................... 14
4.4 3G card ...................................................................................................................... 15
4.5 MicroSD card ............................................................................................................ 16
4.6 Power-Supply system ................................................................................................ 17
4.7 Turn on or turn off Qmini Series industrial GIS data collector ................................. 19
4.8 Collect data................................................................................................................ 20
4.9 Application Function ................................................................................................. 21
Chapter 5 Technical Parameter .......................................22
5.1 Introduction ............................................................................................................... 23
5.2 Technical Parameters................................................................................................. 23

Qmini series industrial GIS data collector manual
- 3 -
Chapter 1 Preface
Chapter Instruction
■Instruction
■Relative Information
■Technical Support
■Your Suggestions
C
H
A
P
T
E
R
1

Qmini series industrial GIS data collector manual
- 4 -
1.1 Instruction
Welcome to use Hi-Target Qmini Series Industry GIS Data Collector manual. This manual is adapt
to Qmini1/Qmini3/Qnini3P, the manual introduce how to install ,set up and use the Industry GIS Data
Collector.
The Qmini series GIS Data Collector is a new generation GPS/GIS data collector. Hi-Target
suggests you read this manual carefully for your right using even if you used other Industry GIS Data
Collector product. If you do not familiar with Industry GIS Data Collector, please check Hi-Target website:
http://www.zhdgps.com
1.2 Relative Information
You can get the manual from the following: 1, the supplementary CD when purchasing Hi-Target
Qmini series equipment. You can get this manual from folder named Manual; 2, Download from Hi-Target
website, Go to “Download Section” -> “Products Manual” -> “GIS products”.
1.3 Technical Support
You can find “Technical Support”in Hi-Target website. You can contact our technical center or service
department through the phone showed in the “Service Instruction”.You can also send message to
“Technical Forum”and “Expert Evaluation”.We will reply to your question in time.
1.4 Your Suggestions
If you have any suggestions or comments on the manual, please login Hi-Target website, “Technical
Service” -> “Suggestions & Complaint”,send message to us.Your feedback will improve quality of our
manual greatly.

Qmini series industrial GIS data collector manual
- 5 -
Chapter 2 Summary
Chapter Introduction
■Instruction
■Product Features
■Usage and Notes
C
H
A
P
T
E
R
2

Qmini series industrial GIS data collector manual
- 6 -
2.1 Instruction
Qmini Series Industry GIS Data Collector owns completely navigation and GIS Data collection
functions, adopt physical buttons and touch screen operation way, supporting Chinese and English input.
Q mini adopts the industrial three-proof design. The specially reinforced structures can withstand the
forces when dropped onto the cement floor from the height of 1.5m. The water & dust proof standard
IP67 can give you a better support on your complex environmental requirements of the fieldwork.
Moreover, the supplied large volume Lithium battery can better satisfy your demands for all-day work.
Qmini adopts the all-in-one integration design. It integrates such functions as GPS, Windows
CE/Mobile system, digital camera, microphone, 3G communications (Only for Qmini3 and Qmini3P),
blue-tooth communications, large memory, USB/RS22 ports, SD card expansion, etc. Qmini Series
Industry GIS Data Collector is compatible with all current embedded GIS software platform. It
supplies second software package. And it can satisfy second development equipment of customer and
software provider.
Tips: This manual is for Qmini Series Industry GIS Data Collector,
product functions will be different according to different model,
please refer to technical parameters. Before using, we suggest
users firstly to check whether the package box is damaged, and
then open careful and check whether inner items matched with
the order list of their own. If there are some missing or damaging
cases exist for products and accessories, please contact with the
local distributor or Hi-Target Foreign Trade Dep. Immediately.
Please carefully read manual before carrying, handling and using!
2.2 Product Features
◆Industrial all-in-one integration design , Multi-Function
◆Serve as an industrial vehicle navigation GPS of the three-proof standard
◆Built-in digital camera, alone with image marking function , the software can automatically
realize the matching and annotation of the GPS coordinates and image information
◆Built-in Microphone , realizing the on-spot voice collection
◆Voice broadcasting function
◆Built-in Bluetooth, making wireless data transmission easily
◆Integrated industrial-level 3G wireless communications, realizing the data exchange between

Qmini series industrial GIS data collector manual
- 7 -
the management center and the mobile GPS terminal. The function is only available to Q mini3
and Qmini3P
2.3 Usage and Notes
Although Qmini Industry GIS Data Collector using chemical resistance agents and impact resistance
material, but still necessary taking care and maintenance is required for such a precise instrument.
Please store it in dry environment. In order to improve the stability and using cycle, please keep using out
of the extreme environment, such as humidity, high temperature, low temperature, corrosive liquid or
gases and so on.
Warning: The Industry GIS Data Collector must be used and stored
in the specified temperature. More details please refer to
Chapter 5: Technical Parameters
To ensure the quality of continuous tracking satellites and signals, surveying station's top should be
in open, while there should no any obstacle in space above 15 °altitude angle; in order to reduce all
kinds of electrical interference to the GNSS satellite signals. Besides, there should no strong electrical
interference around the station within about 200m range, such as the television tower, microwave
stations, high voltage transmission line. Also, in order to avoid or reduce the occurrence of multi-path
effect, stations should be away from terrain or geographical objects, which will strong effect electrical
signal, such as high-rise buildings, large area water, etc.

Qmini series industrial GIS data collector manual
- 8 -
Chapter 3 Qmini Series Introduction
Chapter Introduction
■Introduction
■Obverse side of Qmini Series Industrial GIS Data Collector
■Inverse side of Qmini Series Industrial GIS Data Collector
■Interface
■Touch Pen Appearance
■Battery
■Data Wire
■Strap
C
H
A
P
T
E
R
3

Qmini series industrial GIS data collector manual
- 9 -
3.1 Introduction
This chapter introduces the appearance, interface, battery, touch pen,data cable and other parts of
Qmini series industrial GIS Data Collector
3.2 Obverse of Qmini Series Industrial GIS Data Collector
Figure 3-1 shows the obverse of Qmini Series Industrial GIS Data Collector, Which including touch
screen, key board, microphone, protective cover and so on.
Figure 3-1 Obverse side of Qmini Series Industrial GIS Data Collector
Touch Screen: 3.5 inch upright screen, directly touch to operation, support Chinese and English
input.
Protective cover: wear prevention, anti-drop, anti-shock, avoid being scratched.
Key board: Direction key , enter key, escape key, power and other function keys.
Microphone: build-in microphone can be used for voice information collection on the spot.
3.3 Reverse of Qmini Series Industrial GIS Data Collector
Figure 3-2, shows the back of Qmini Series Industrial GIS Data Collector, which including camera,
battery, strap hole, speaker and so on.
Figure 3-2 Reverse of Qmini Series Industrial GIS Data Collector
Protective cover
Speaker
sp
Camera
Battery
Strap hole
Cap of pen
keyboard
Touch screen
microphone

Qmini series industrial GIS data collector manual
- 10 -
Camera: build-in digital camera can be used for collecting image information , Qmini3 and Qmini3 P
are equipped with a flash light, which can take photos in bad night.
Battery: build-in 7.6V, 2000mAh lithium battery.
Strap hole: it can prevent falling from connection button.
Speaker: broadcasting the status of equipment in real-time operation.
Tip: when water happens to go into speaker, it may appear silent or sound
hoarse and the sound will be back to normal after drying. The speaker
and the inner equipments are completely waterproof, therefore it won’t
affect to the performance of the instrument after water happens to go
into speaker. But please drying the speaker in time.
3.4 Interface
Figure 3-3 shows the location of interface for Qmini Series Industrial GIS Data Collector; Its
functions are Charging, data transferring ,SIM installation and SD cards for the Interface.
Figure 3-3 interface
Figure 3-4 interface ( inner )
SIM card slot: install SIM card
MicroSD card slot: install MicroSD card, maximum support 32GB
Charging interface: connect with charger for lithium's battery charging.
USD interface: connect with PC, data transfer.
For more installation steps please refer to the part of“chapter 4, Basic Operation”
Charging interface
MicroSD card slot
Data communication interface
通信接口
SIM card slot
Charging interface
MicroSD card slot
Data communication interface
SIM card slot

Qmini series industrial GIS data collector manual
- 11 -
Tip: When not in use, please cover the charging and USB interface by
rubber cover for the waterproof and dustproof.
3.5 Touch Pen Appearance
Figure 3-5 shows the touch pen of Qmini Series Industrial GIS data collector, which located upper
right corner of GIS data collector, and the length can be changeable according to the
requirements .(figure 3-6)
Figure 3-5 Touch Pen
Figure 3-6 Touch Pen
3.6 Battery
Figure 3-7, Figure 3-8, Obverse and inverse side of 2000mAh lithium battery.
Figure 3-7 Obverse of battery Figure 3-8 inverse of battery
Tip: To protect the environment, please do not throw the useless
lithium battery away optionally, please send it to professional
battery recycling organization.
SLC chip
Arrow heads
Raised Card bit

Qmini series industrial GIS data collector manual
- 12 -
3.7 Data Cable
Figure 3-9 data cable
Industrial GIS data collection device interface: to connect Qmini series industrial GIS data collector.
USD interface: connect with USB port of PC to download data.
Warning: To prevent damage the plug ,store the cable in good place after using without squeezing.
3.8 Strap
Due to smaller stature of Q mini, please put your hand through the strap to prevent falling during the
operation work.
Figure 3-10 Strap
USB interface
Data collector port

Qmini series industrial GIS data collector manual
- 13 -
Chapter 4 Basic Operation
Chapter Introduction
■Introduction
■Key board
■Touch Pen
■3G Card
■Micro SD card
■Power Supply System
■Turn on /off Qmini Series Industrial GIS Data Collector
■Data Acquisition
■Application
C
H
A
P
T
E
R
4

Qmini series industrial GIS data collector manual
- 14 -
4.1 Introduction
Hi-Target Qmini series GIS Data Collector’s main setting and operation can be achieved by touch
screen. Normal operation can be achieved by keyboard. Following briefly introduce the appearance and
function of the keyboard.
4.2 Keyboard
Figure 4-1, this is the Qmini series GIS Data Collector’s keyboard. It contains the Esc, Ent, F1 and
Direction button.
Figure 4-1 Keyboard
Esc: Shortly press after power on, indicate cancel or quit the current operation.
Ent: Enter
F1: Function key. Function is defined by the software. Please refer to the software manual.
Power on/off key: Hold this key one second, power on. Three seconds or above, power off.
Switch on/off backlight after power on.
Microphone: Built-in microphone can be used for voice message collecting.
Tips:IF you don't use Qmini series GIS Data Collector in work, please turn off the
backlight for saving power.It can protract the work time.
4.3 Touch pen
Place the touch pen
The touch pen is located at the top right corner. When you put it in, please gently press ,insure the
cat of pen is outside and parallel to the surface of collector.

Qmini series industrial GIS data collector manual
- 15 -
take out the touch pen
Gently dig,take out the touch pen
Figure 4-2 put the touch pen in Figure 4-3 take the touch pen out
Tips: Don’t use more power when taking it out or putting it in
4.4 3G card
3G card is currently used for the Qmini 3 and Qmini 3P
1.Install the 3G card
Gently dig the yellow protective cover of interface, there is an oblong open mouth as card socket.
Figure 4-4 installation diagram
2. Figure 4-4, there is a yellow button in the left of 3G card. Press it, and the 3 G card’s cassette will
be popup, take the card out, install the 3G card in the cassette. Listen to the sound which plastic spring
stuck. It shows that installing already. Figure 4-5.
Figure 4-5 installation diagram Figure 4-6 installation diagram
Yellow button

Qmini series industrial GIS data collector manual
- 16 -
3 .The metal side of 3G card's will be down, put the 3G in the open mouth, Figure 4-6.
4. Cover the protective cover, finish the installation.
Take out the 3G card
1、Gently dig the cover,Press the yellow button, the 3G card’s cassette will be popup, Figure 4-7.
2、Take out the cassette,there is a round,gently push the 3G card, see chart 4-8, take out the 3G
card.
Figure 4-7 disassembling diagram Figure 4-8 disassembling diagram
4.5 MicroSD card
Install the MicroSD card
1.Open the cover at the bottom, there is an oblong open mouth as MicroSD card socket.
Please noted the MicroSD card’s metal surface should upward.Plug the MicroSD's card to plughole
until the MicroSD is completely in the plughole.The edge of MicroSD is parallel to the card trough.
Figure 4-9 MicroSD card
2.Take out the MicroSD card
Firstly, push the card forward, the card will be popup half automatically.take MicroSD out
Tips: MicroSD card, there is other name. It is TF card. It is Small size of external flash
memory expansion card, usually use in Microphone and PDA. User note separating
from the ordinary card when purchasing. Normal card's size is larger than MicroSD's.
It doesn't fit the Qmini series GIS Data Collector. It supports the maximum 32G
memory MicroSD card.
MicroSD card metal side

Qmini series industrial GIS data collector manual
- 17 -
4.6 Power-Supply system
Battery’s installation and remove
Installation:
1. Obliquely plug two bulge of battery to the corresponding card trough.
See chart 4-10.
Figure 4-10 Install battery
2. Press the edge of plastic spring battery down until hearing the sound of plastic spring sticking.It
shows installing already.
Remove:
1. See chart 4-11, according to the direction to take out the battery
Figure 4-11 remove battery
2. Listen to the sound of gently dig plastic, take out the battery
Qmini series GIS Data Collector battery and charger's model
Power supply mode
Name
Model
2000mah lithium battery
BL-2000A
Lithium Battery charger
CL-2000A
Power
supply
Power supply
mode
lithium battery
Power
supply range
Minimum 6.5V、Maximum
8.4 V 6.5V-8.4V
Bulge

Qmini series industrial GIS data collector manual
- 18 -
Tips:Lithium battery usage time will decrease as the temperature decrease and charging time
increase.A new 2000 mAh lithium battery can work continuously from 8 to 10 hours.According to wireless
communication setting or different backlight status, continuous work time is more variational.This is
normal.
Charge
Please use the special chargers for charging in certain temperature range, and attain the certain
charging time. Specific use method and requirements: Charge should use special charger of Qmini series
GIS Data Collector at 10 ℃~ 40 ℃temperature range. Normally there is a certain power when using it
first should use the power up then recharge. with first three times should charge for 12 hours,after third
time should charge for 4 hours. If the battery often do not use, must charge once a month.
Figure 4-12 charging diagram
Figure 4-13 Charging diagram Figure 4-14 finish charging diagram
When charging the battery, click Start ->Setup -> Control Panel-> power, can check the remaining
battery real-time, if" remaining power "display 100%, but the" power "part display " charging ", beside the
battery icon in the taskbar display lightning symbol (Figure 4-13), that means the battery is not really fully
charged (see the blue part), unplug the charger, the remaining power may reduce to 85%. Only when the
"power" part display the "main battery" and no lightning symbol in taskbar battery icon is completely
fulfilled charged (see the red part in Figure 4-14).
Charger

Qmini series industrial GIS data collector manual
- 19 -
Tips: Due to testing the charging voltage, and charging voltage is higher than the real battery
voltage. Now it is charging in the last stage, and it is very important that the battery is full or not.
please be sure to complete the process of charging in order to ensure the operating time.
Warning: 1.Pls use the battery and charger supplied from factory, do not put it to the
fire or be short circuit with a metal electrode.
2, Please stop to use the battery if you found it is in heated deformation,
leakage, smelly or any other abnormal situation, please change the battery.
3、Please stop to use the battery if the using time is obviously short, means the
battery is aging, and please change the battery.
4.7 Turn on or turn off Qmini Series industrial GIS data collector
Turn on
1.Press“ ”1 second, industrial GIS data collector will go into BIOS screen, put off the button,
BIOS will automatically upload to Windows system, be patient to wait for about 10 seconds, such as
figure 4-15.
2. After uploaded, ,Windows system has been running, figure 4-16 is the WinCE system desktop
Figure 4-15 WinCE starting picture Figure 4-16 WinCE system desktop
Turn off
There are 2 ways to turn off Qmini Series industrial GIS data collector:
1. click "Start" menu in bottom left corner of WinCE system desktop, select "suspend " to turn off
Qmini series industrial GIS data collector.

Qmini series industrial GIS data collector manual
- 20 -
Figure 4-17 Turn off Qmini series industrial GIS data collector
2. Long press “ ”button for 3 seconds to turn off industrial GIS data collector.
4.8 Collect data
1. Install Microsoft ActiveSync
Double-click MSASYNC45.exe from the CD(Tools software \ Connect program\ActiveSync\), then
follow the instruction to finish installing. After installing, run the Microsoft ActiveSync in “Start menu” ->
“Program”. Setup”Allow to connect by USD”in the “Connect setup”.Figure 4-18
Figure 4-18 USB connecting setup
2. Hardware connect
Turn on the Qmini series industrial GIS data collector, go into Windows system, no need to open
Application program. Connect Qmini series industrial GIS data collector with small USB port cable, the
other USB plug connect to computer USB port. Such as figure 4-19.
Figure 4-19 data transmit connecting
Table of contents
Other Hi-Target Data Logger manuals
