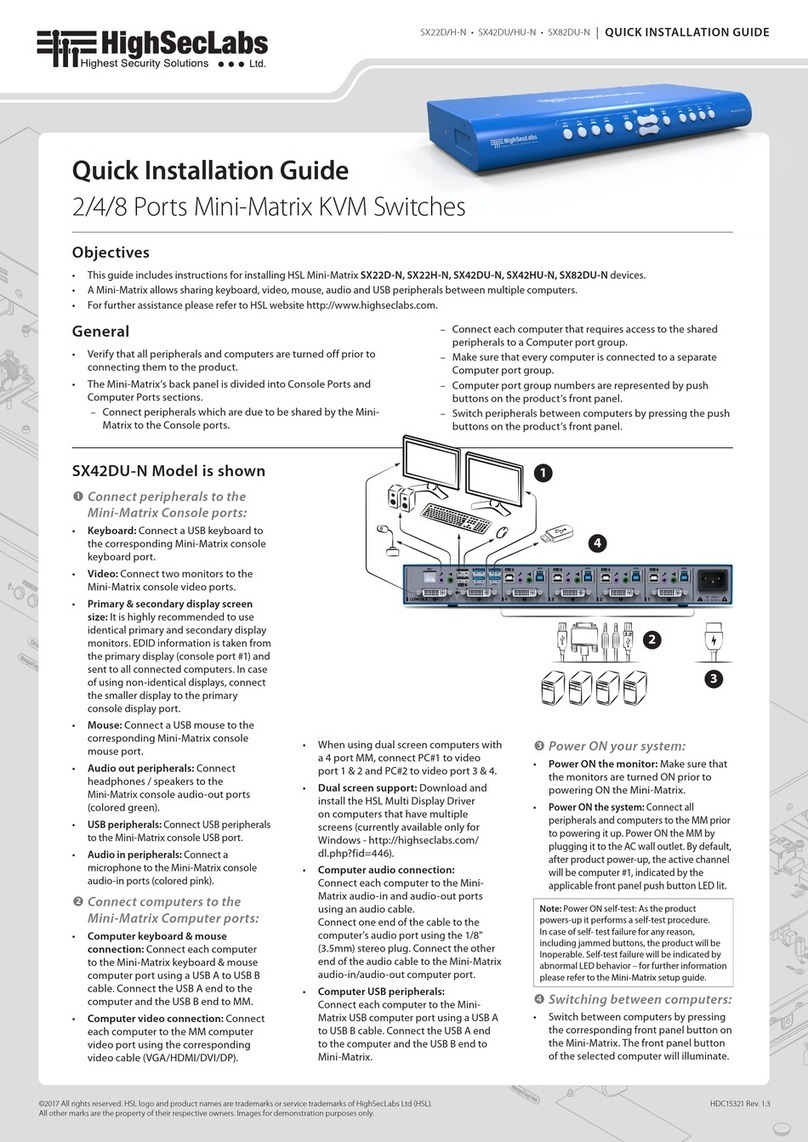
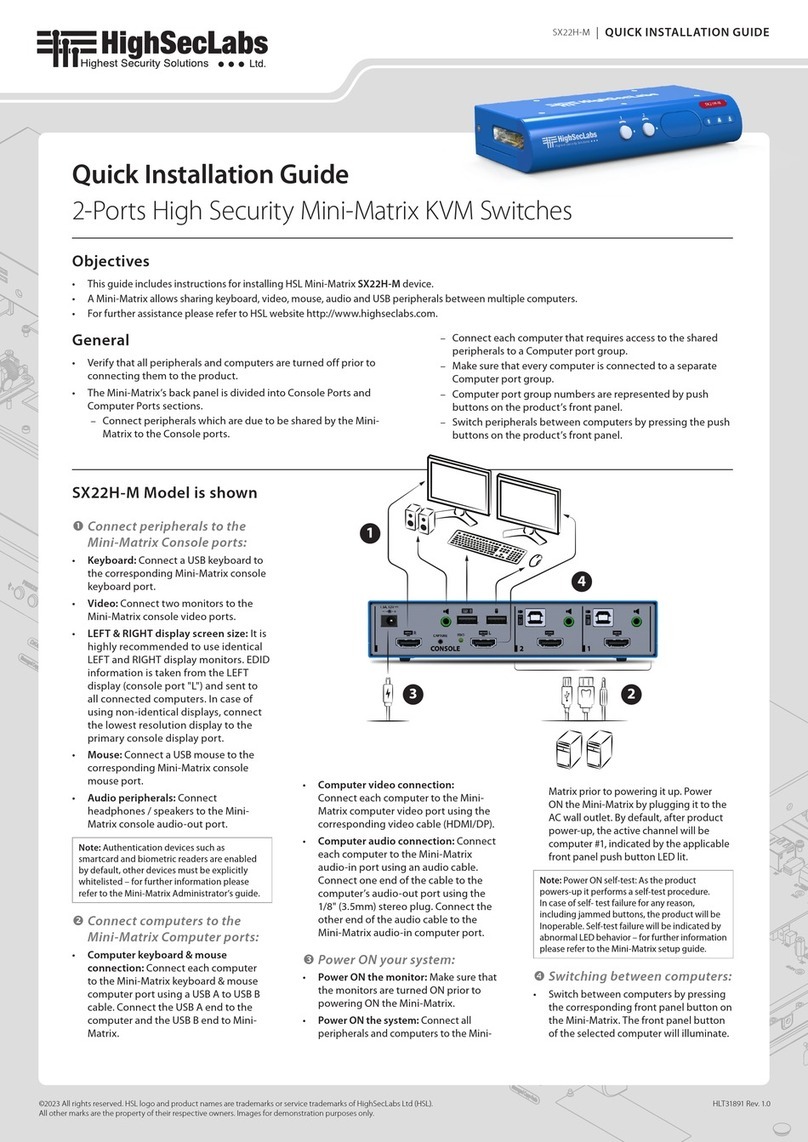
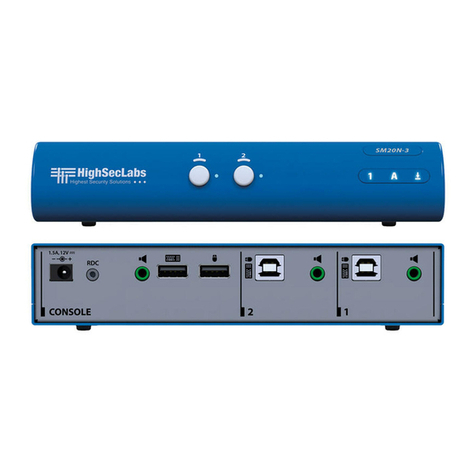
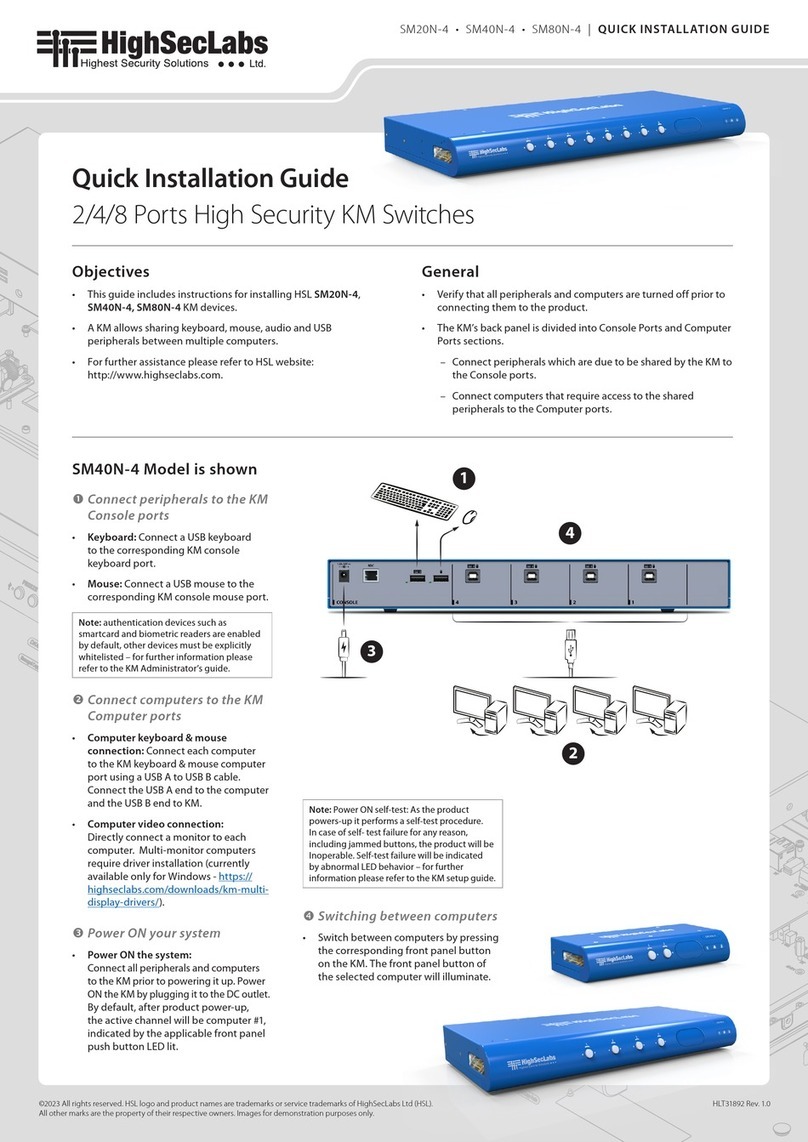
manuals.online logo
Brands
  1. Home
  2. •
  3. Brands
  4. •
  5. High Sec Labs
  6. •
  7. Switch
  8. •
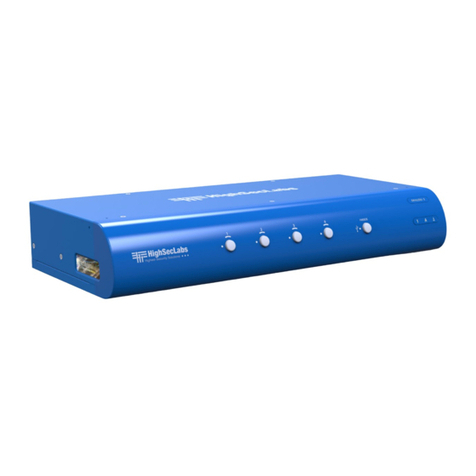
  9. High Sec Labs SC82PH-4 User manual

High Sec Labs SC82PH-4 User manual

SC82PH-4 SC162PH-4 | QUICK INSTALLATION GUIDE
©2019 All rights reserved. HSL logo and product names are trademarks or service trademarks of HighSecLabs Ltd (HSL).
All other marks are the property of their respective owners. Images for demonstration purposes only. HDC19963 Rev.1.0
Introduction
Thank you for purchasing this HSL Secure KVM Combiner. This KVM Combiner is designed for use in secure defense and intelligence environments
across wide security gaps.
Unlike a regular secure KVM switch which allows the user to view and interact with one of the connected computers at the time, this secure KVM
Combiner allows to view all connected computers on the same screen simultaneously and interact with both easily and intuitively.
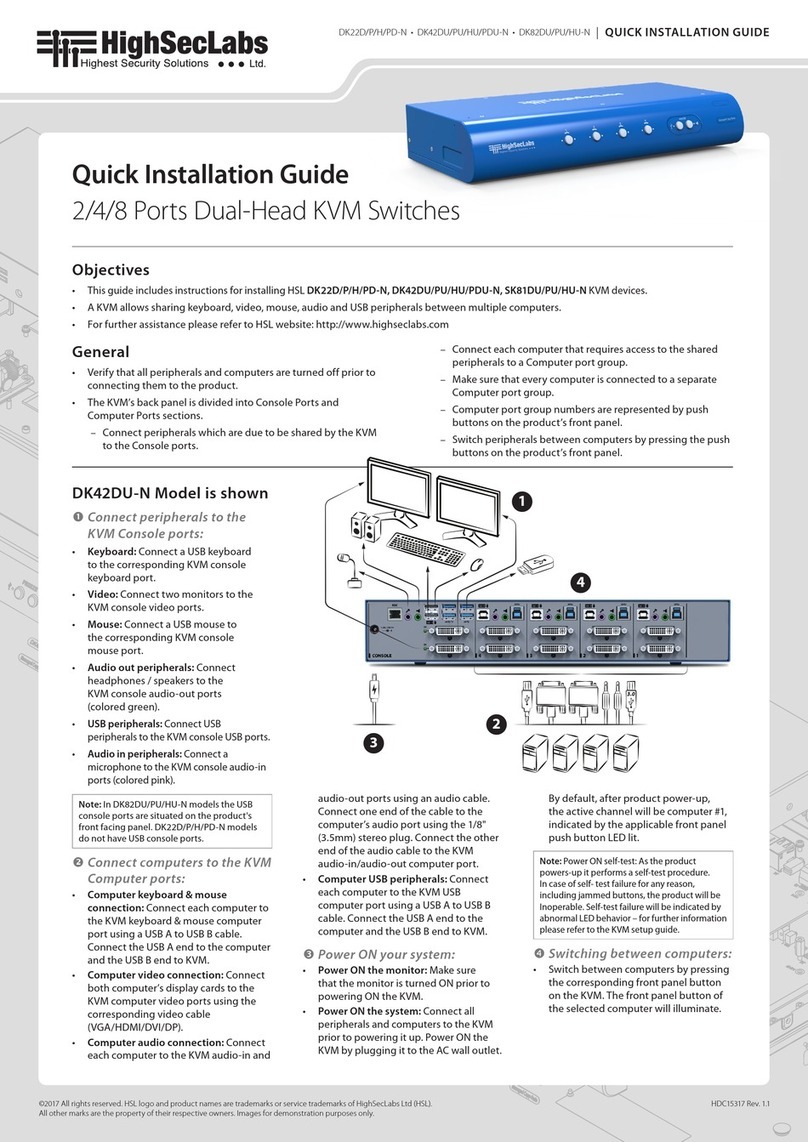
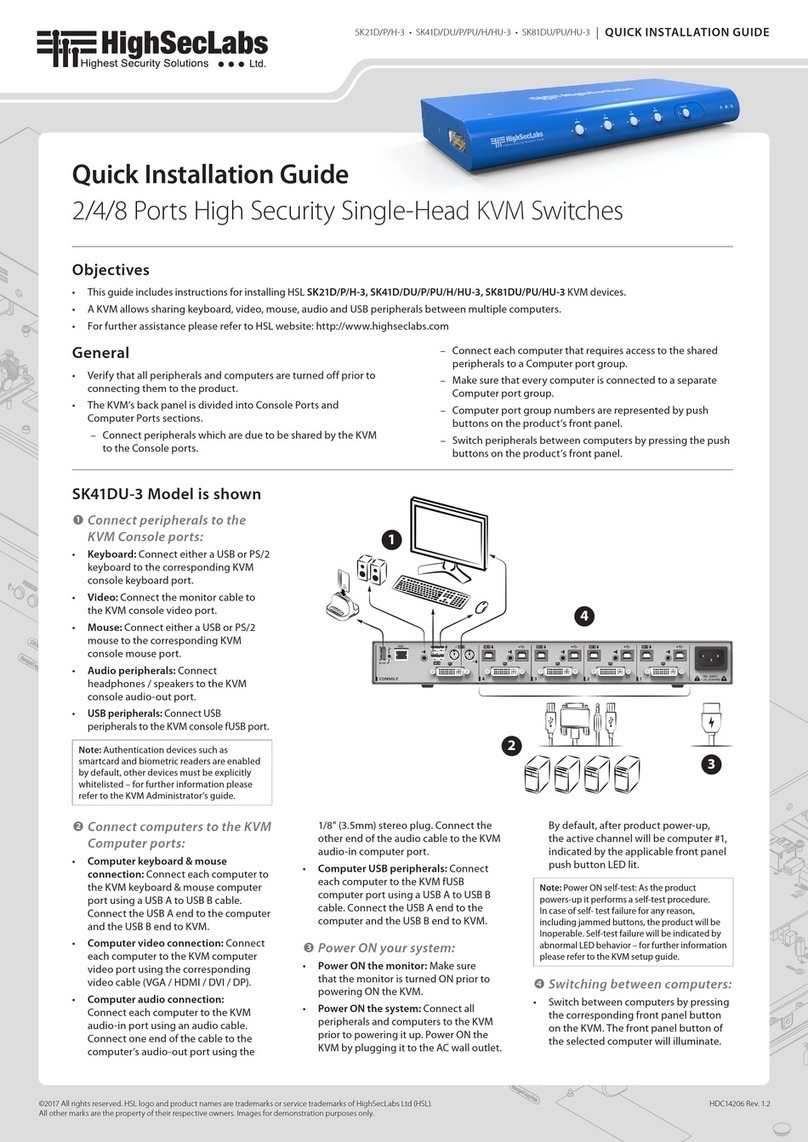
Quick Installation Guide
8/16 Ports High Security DP/HDMI KVM Combiner Switches
This guide includes instructions for installing and basic operation of HSL’s DP\HDMI KVM Combiner SC82PH-4, SC162PH-4 device.
For further assistance please refer to HSL website: http://www.highseclabs.com
Objectives
Installation Precautions:
Do not connect this product to computing devices that:
•Are TEMPEST computers
•Include telecommunication equipment
•Include frame grabber video cards
•Include special audio processing cards.
WARNING: Peripherals' Warning - For security reasons, this product
does not support wireless keyboards. It is recommended not to connect
a microphone or headset to the audio output port.
NOTE: In order to comply with the product’s Common Criteria
evaluation and to prevent unauthorized administrative access to the
product, the default administrator username and password must be
changed prior to first product use.
SC82PH-4 Model diagram is shown:
SC82PH-4 SC162PH-4 | QUICK INSTALLATION GUIDE
©2019 All rights reserved. HSL logo and product names are trademarks or service trademarks of HighSecLabs Ltd (HSL).
All other marks are the property of their respective owners. Images for demonstration purposes only. HDC19963 Rev.1.0
Installation:
•Verify that all peripherals and computers
are turned OFF prior to connecting them to
the product.
•Connect the computers and peripherals to
the HSL Combiner as shown in the above
diagram.
•The 8 and 16 ports combiners are designed
to be mounted in a rack hence will not be
in sight of the user. To control the
combiners use HSL’s AFP and AFP splitters
(included with the product) based on the
above system diagram.
•Power ON the monitors and the PCs:
Make sure that the monitors and the
connected PCs are turned ON prior to
powering ON the Combiner.
•Power ON the system: Power ON the
Combiner by plugging it to the AC wall
outlet and press the Power button (k) (for
16 ports connect two power cords to the
unit and press also the Secondary Power
Button –l.).
Boot time of the KVM Combiner is about
40-60 seconds
By default, after product power-up, the
active channel will be computer #1,
indicated by the applicable front panel
push button LED lit.
NOTE : HSL devices covered by this manual
include a special DP/HDMI connector, enabling
the user to use the product with both video
formats as input and output.
EDID Acquisition
The HSL KVM combiner has a fixed EDID file
which is transmitted to all connected PCs. At
no point will the actual connected display EDID
be transferred to the connected PCs.
SC82PH-4
SC162PH-4
AFP Splitter WX12N-4 AFP remote control WR80-3
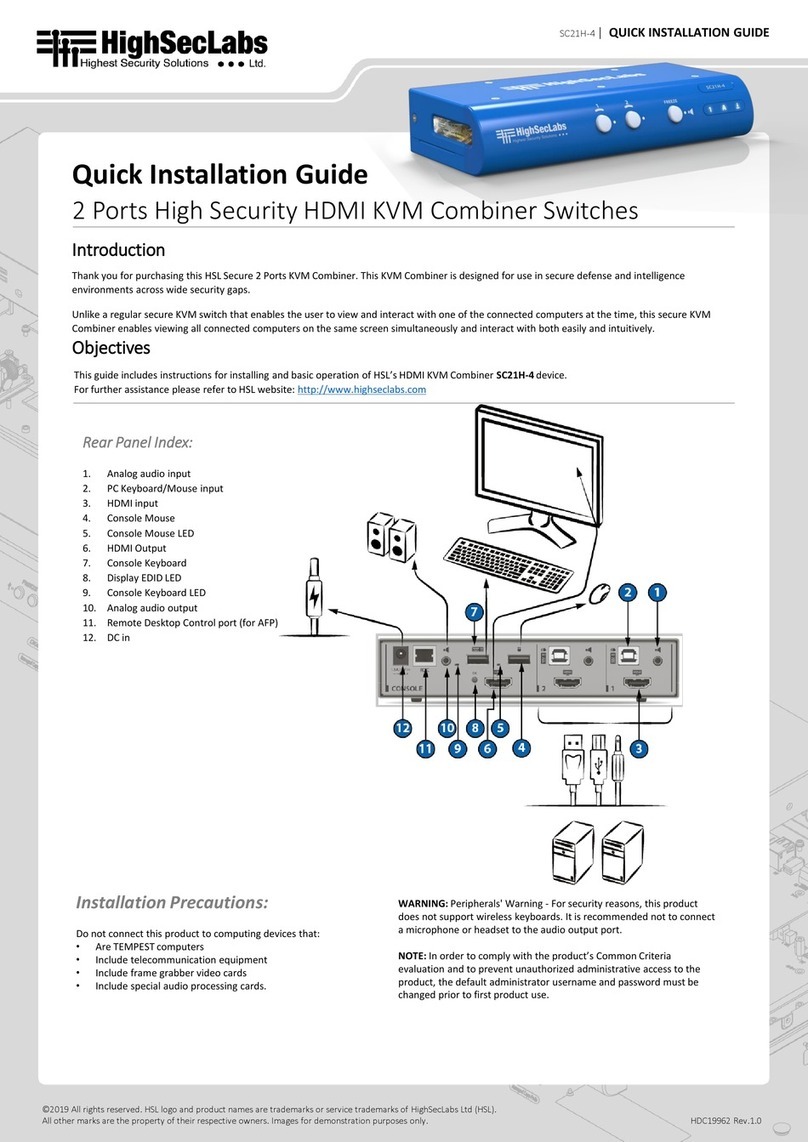
Index:
a. Primary HDMI Output
b. Secondary HDMI Output
c. DP/HDMI Inputs
d. USB-B PC Inputs
e. Console Keyboard/Mouse
USB
f. Console HID LEDs
(Keyboard/Mouse)
g. RDC input (for AFP)
h. Primary DC In
i. Secondary DC In
j. Primary Power LED
k. Primary Power Button
l. Secondary Power Button
m. Secondary Power LED
a
d
hi
f
c
k
jlm
l
g
Rear Panel LED Indications:
HID LEDs (rear panel):
•Off –no device detected
•Flicker –device rejected
•On- device approved
b
e
a
be
f
h
Notes
•Power ON Self-Test Procedure: As the product powers-up it
performs a self-test procedure. In case of self- test failure for any
reason, including jammed buttons, the product will be Inoperable
and self-test failure will be indicated by abnormal LED behavior. In
this case, please call
Technical Support and avoid using the
product.
For further information please refer to the product
administrator and setup guides.
g
SC82PH-4 SC162PH-4 | QUICK INSTALLATION GUIDE
©2019 All rights reserved. HSL logo and product names are trademarks or service trademarks of HighSecLabs Ltd (HSL).
All other marks are the property of their respective owners. Images for demonstration purposes only. HDC19963 Rev.1.0
Using the HSL Combiners:
HSL’s 8 Port and 16 Port KVM Combiners have
three layouts for presenting the sources on the
screen:
•Full screen –one of the 8 or 16 source
PCs is presented on the display in full
screen. To enter this mode, use the: “L
CTRL | L CTRL | f” keyboard shortcut.
•Quad: All channels are shown on the
connected display. To enter this
mode, use the: ”L CTRL | L CTRL | q”
keyboard shortcut.
•Scale –one channel in presented on
two thirds of the screen with rest of
the channels on it s right and under it.
To enter this mode, use the: “L CTRL |
L CTRL | s” kb short cut.
The HSL KVM Combiner also supports a second
display that can be used in clone or extend
modes.
To change between display modes, use the
following keyboard shortcuts:
•L CTRL |L CTRL |F11|s | 0–single
display (default)
•L CTRL | L CTRL | F11| s| 1–clone
display
•L CTRL | L CTRL |F11|s | 2–extended
display
Please see below a diagram of each mode of
operation on one and two displays:
8 and 16 Ports Full Screen layout
Single/Clone
In Extended mode –the second screen will
show the remaining 7 or 15 channels in Quad
Layout
8 Ports Quad Layout
Single/Clone
16 Ports Quad Layout
Single/Clone display mode:
•Each channel shown has a frame around it
to distinguish between the channel.
•To select a channel (map the mouse and KB
to it) use the connected AFP remote
control push buttons.
•As a secondary switching method, the user
can use CNS (curser navigation switching).
Cursor navigation switching is enabled by
default and requires the user to drag the
mouse while pressing and holding the left
CTRL key.
16 Ports Quad Layout Extended Display mode 8 - 8:
8 Ports Quad Extend Display 4-4
16 Ports Scale Layout Single/Clone display
in Extended mode the primary display will show one channel in Full
layout and the secondary in will show the other 15 in Quad
8 Ports Scale Layout Single/Clone display
in Extended mode the primary display will show one channel in Full layout
and the secondary in will show the other 7 in Quad
SC82PH-4 SC162PH-4 | QUICK INSTALLATION GUIDE
©2019 All rights reserved. HSL logo and product names are trademarks or service trademarks of HighSecLabs Ltd (HSL).
All other marks are the property of their respective owners. Images for demonstration purposes only. HDC19963 Rev.1.0
Safety and Regulatory Statements
Safety Symbols
One or more of the following symbols may be included in your
product documentation and/or on the product.
Instructions: This symbol is intended to alert the user to the
presence of important operating and maintenance
(servicing) instructions in the product user manual.
Dangerous Voltage: This symbol is intended to alert the user
to the presence of uninsulated dangerous voltage within the
product’s enclosure that may be of sufficient magnitude to
constitute a risk of electric shock to persons.
Power On: This symbol indicates the principal on/off switch
is in the ON position.
Power Off: This symbol indicates the principal on/off switch
is in the OFF position.
Protective Grounding Terminal: This symbol indicates a
terminal which must be connected to earth ground prior to
making any other connections to the equipment.
Safety Precautions
WARNING: To avoid a potentially fatal shock hazard and possible damage to
equipment, please observe the following precautions.
•Do not disable the power grounding plug. The grounding plug is
an important safety feature.
•Plug the power cord into a grounded (earthed) outlet that is
easily accessible at all times.
•Disconnect the power from the product by unplugging the
power cord from either the electrical outlet or the product. The
AC inlet is the main disconnect for removing power to this
product. For products that have more than one AC inlet, to
remove power completely, all AC line cords must be
disconnected.
•This product has no serviceable parts inside the product
enclosure. Do not open or remove product cover.
CAUTION: Some HSL products contain a lithium battery. This battery is not a
field replaceable item, and replacement should not be attempted by a user.
If errors occur when using the product and the battery is suspected, contact
HSL Technical Support.
WARNING: For Service Personnel Only - There is a risk of explosion if the
battery is replaced with an incorrect type. Dispose of used batteries
according to the manufacturer’s instructions.
This product is for use with other products that are Listed or
Certified by a Nationally Recognized Testing Laboratory (NRTL).
NIAP Protection Profile
This product is certified to the NIAP Protection Profile PSD version
4.0 certification for peripheral sharing switch devices.
Installation Precautions
Note: HSL Secure KVM Combiner Switches are protected with
Holographic Tamper-Evident Labels on the product’s enclosure to
provide a visual indication in case the enclosure has been opened or
compromised.
Security Vulnerability
If you are aware of a potential security vulnerability while installing
this product, contact Technical Support immediately by:
•Web form: www.highseclabs.com/support/case/
•Email: security@highseclabs.com
•Tel: +972-4-9591191/2
WARNING: Unit Enclosure Warning - If the unit’s enclosure appears
disrupted or if all LEDs flash continuously, remove the product from
service immediately and contact Technical Support.
Change Management
For change management tracking, perform a quarterly log check to
verify that the RFD was not improperly used to override the current
device policy by an unauthorized person.
This manual suits for next models

1

Other High Sec Labs Switch manuals

High Sec Labs SX22H-M User manual

High Sec Labs

High Sec Labs SX22H-M User manual

High Sec Labs SM20N-4 User manual

High Sec Labs

High Sec Labs SM20N-4 User manual

High Sec Labs SK 21D-N User manual

High Sec Labs

High Sec Labs SK 21D-N User manual

High Sec Labs SM20N-N User manual

High Sec Labs

High Sec Labs SM20N-N User manual

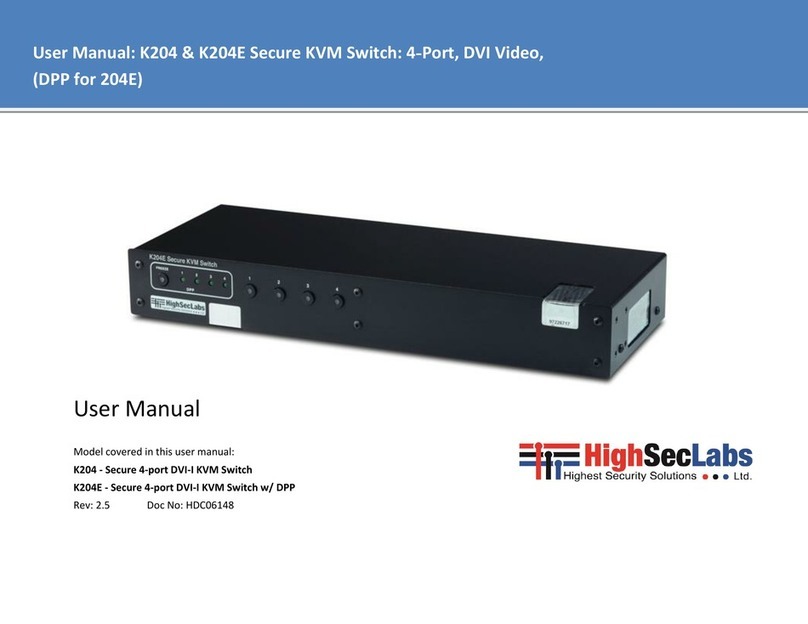
High Sec Labs K204 User manual

High Sec Labs

High Sec Labs K204 User manual

High Sec Labs Mini-Matrix SX22D-3 User manual

High Sec Labs

High Sec Labs Mini-Matrix SX22D-3 User manual

High Sec Labs K304 User manual

High Sec Labs

High Sec Labs K304 User manual

High Sec Labs Mini-Matrix SX22D-3 User manual

High Sec Labs

High Sec Labs Mini-Matrix SX22D-3 User manual

High Sec Labs SM40N-4 User manual

High Sec Labs

High Sec Labs SM40N-4 User manual

High Sec Labs SX82PHU-4T User manual

High Sec Labs

High Sec Labs SX82PHU-4T User manual

High Sec Labs SX42 U-3 Series User manual

High Sec Labs

High Sec Labs SX42 U-3 Series User manual

High Sec Labs SC42PHU-4 User manual

High Sec Labs

High Sec Labs SC42PHU-4 User manual

High Sec Labs K208E User manual

High Sec Labs

High Sec Labs K208E User manual

High Sec Labs SM20N-3 User manual

High Sec Labs

High Sec Labs SM20N-3 User manual

High Sec Labs SK81DU-3 User manual

High Sec Labs

High Sec Labs SK81DU-3 User manual

High Sec Labs SC21H-3 User manual

High Sec Labs

High Sec Labs SC21H-3 User manual

High Sec Labs DK22PH-4 User manual

High Sec Labs

High Sec Labs DK22PH-4 User manual

High Sec Labs SK21PH-4 User manual

High Sec Labs

High Sec Labs SK21PH-4 User manual

High Sec Labs SK21 N Series User manual

High Sec Labs

High Sec Labs SK21 N Series User manual

High Sec Labs SM20N-3 User manual

High Sec Labs

High Sec Labs SM20N-3 User manual

High Sec Labs K404F User manual

High Sec Labs

High Sec Labs K404F User manual

High Sec Labs Mini-Matrix SX22H-3 User manual

High Sec Labs

High Sec Labs Mini-Matrix SX22H-3 User manual

High Sec Labs Mini-Matrix SX42PH-4 User manual

High Sec Labs

High Sec Labs Mini-Matrix SX42PH-4 User manual

High Sec Labs DK22D-3 User manual

High Sec Labs

High Sec Labs DK22D-3 User manual

Popular Switch manuals by other brands

BayTech DS Series user manual

BayTech

BayTech DS Series user manual

Zektor HDMI5 user manual

Zektor

Zektor HDMI5 user manual

Intellinet 561792 instructions

Intellinet

Intellinet 561792 instructions

Goobay MS-506 quick start guide

Goobay

Goobay MS-506 quick start guide

Eaton QSA400 Series Instruction leaflet

Eaton

Eaton QSA400 Series Instruction leaflet

Ametek Magnetrol SOLITEL Installation and operating manual

Ametek

Ametek Magnetrol SOLITEL Installation and operating manual

nedis WIFIPS10 Series quick start guide

nedis

nedis WIFIPS10 Series quick start guide

Conrad 97 21 56 operating instructions

Conrad

Conrad 97 21 56 operating instructions

D-Link DGS-3630 SERIES reference guide

D-Link

D-Link DGS-3630 SERIES reference guide

GMI D1000 Series instruction manual

GMI

GMI D1000 Series instruction manual

IDT 89HPES24N3A user manual

IDT

IDT 89HPES24N3A user manual

Moeller T8-3-8212/E/HI12 installation instructions

Moeller

Moeller T8-3-8212/E/HI12 installation instructions

WAGO 852-1322 manual

WAGO

WAGO 852-1322 manual

Allen-Bradley Rockwell Automation ArmorBlock... installation instructions
Allen-Bradley

Allen-Bradley Rockwell Automation ArmorBlock... installation instructions

Penguin Edge RTM-ATCA-F140 quick start guide

Penguin

Penguin Edge RTM-ATCA-F140 quick start guide

Advantech EKI-9516P-HV user manual

Advantech

Advantech EKI-9516P-HV user manual

StarTech.com MSTCDP122HD quick start guide

StarTech.com

StarTech.com MSTCDP122HD quick start guide

Juniper EX4650 Series Hardware guide

Juniper

Juniper EX4650 Series Hardware guide

manuals.online logo
manuals.online logoBrands
  • About & Mission
  • Contact us
  • Privacy Policy
  • Terms and Conditions

Copyright 2025 Manuals.Online. All Rights Reserved.