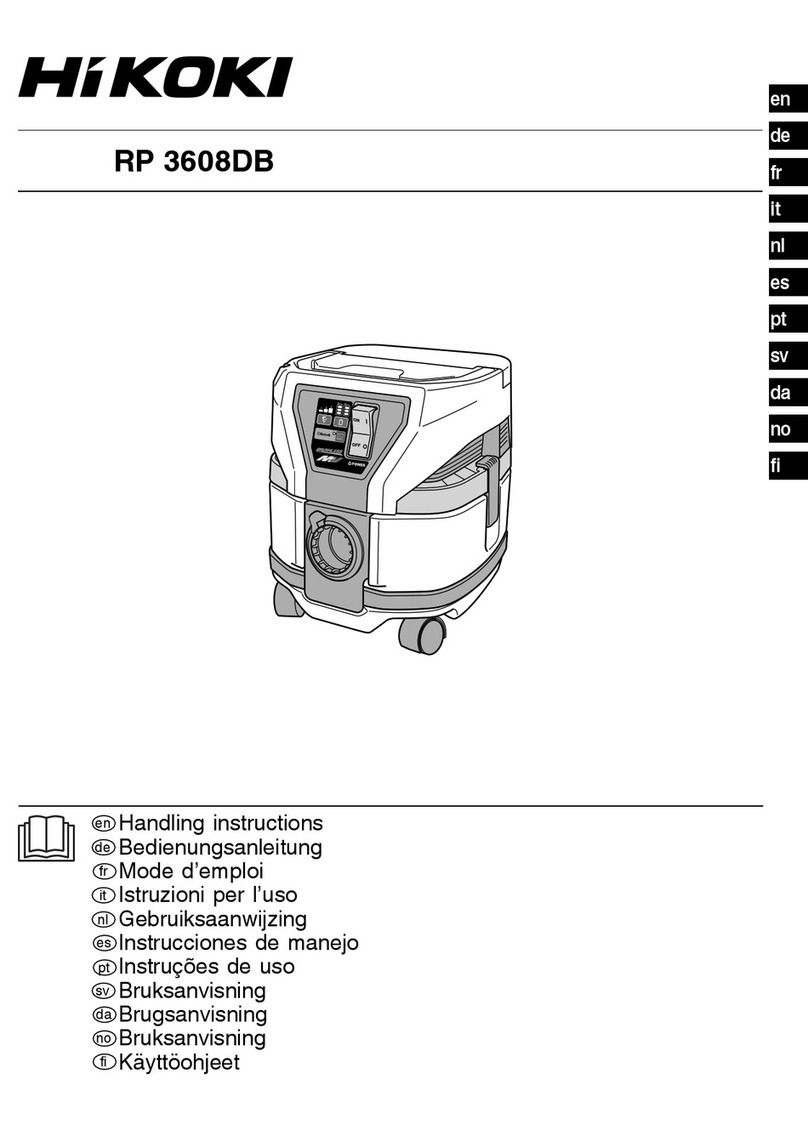
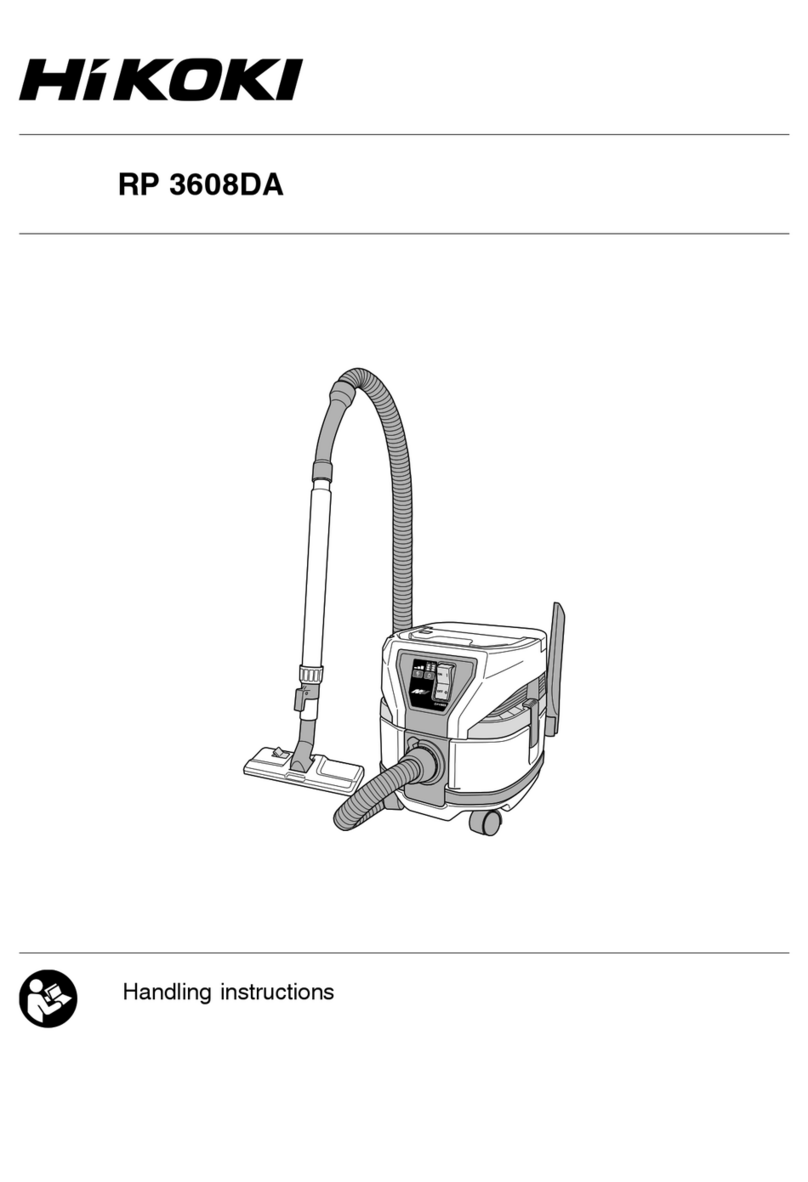
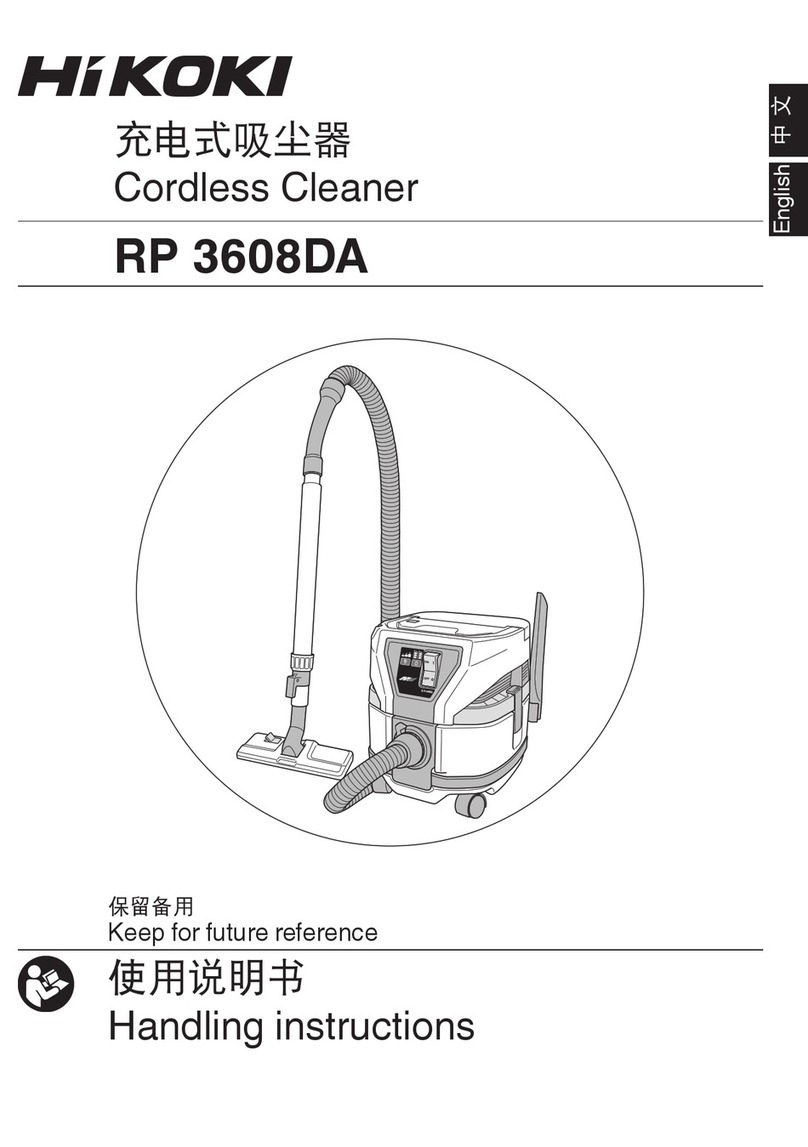
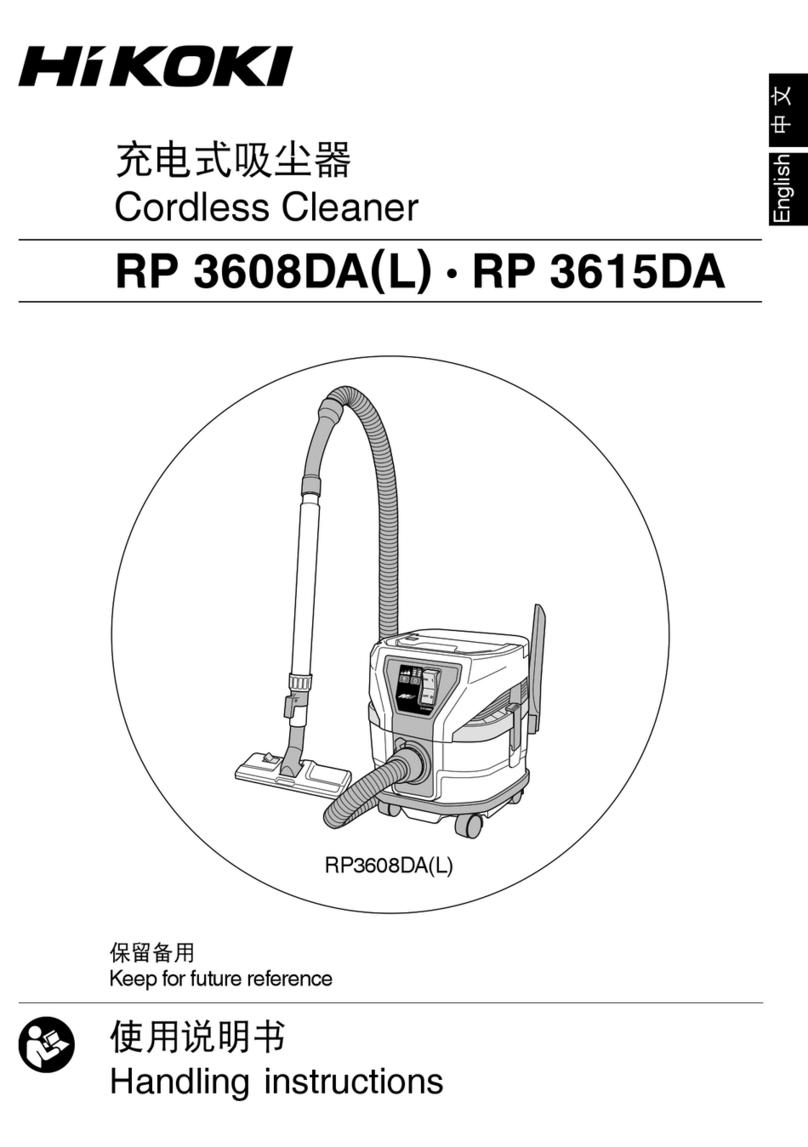
HIKOKI RP 3608DA User manual

RP 3608DA
Handling instructions
使用說明書
취급 설명서
Hướng dẫn sử dụng
คูมือการใชงาน
Petunjuk pemakaian
en
zh
ko
vi
th
id
ar
en
zh
ko
vi
th
id
ar
00BookRP3608DAAsia.indb100BookRP3608DAAsia.indb1 2019/07/258:36:172019/07/258:36:17

2
1
23
Ϩ
4
00BookRP3608DAAsia.indb200BookRP3608DAAsia.indb2 2019/07/258:36:182019/07/258:36:18

3
56
Ϩ
7
8
00BookRP3608DAAsia.indb300BookRP3608DAAsia.indb3 2019/07/258:36:202019/07/258:36:20

4
9
10
Ϩ
11
00BookRP3608DAAsia.indb400BookRP3608DAAsia.indb4 2019/07/258:36:222019/07/258:36:22

5
12 13 14
15 16
17
90°
00BookRP3608DAAsia.indb500BookRP3608DAAsia.indb5 2019/07/258:36:232019/07/258:36:23

6
18
19
ab
20
00BookRP3608DAAsia.indb600BookRP3608DAAsia.indb6 2019/07/258:36:252019/07/258:36:25

7
21
22
00BookRP3608DAAsia.indb700BookRP3608DAAsia.indb7 2019/07/258:36:262019/07/258:36:26

8
English
SAFETY PRECAUTIONS FOR THE
CORDLESS CLEANER
○In order to prevent accidents, such as fires, electric
shock, and injuries, be sure to follow the “Safety
Precautions” stated below.
○Before use, read all of the “Safety Precautions” and use
the appliance correctly according to the instructions.
○Be sure to keep this instructions manual in the place
where it can be consulted by the user at any time.
WARNING
1. Keep the workplace clean. Littered place or workbench
may cause accidents.
2. Pay attention to the situation around the workplace as
well. Make the workplace bright enough. Do not use the
appliance in places with inflammable liquid or gas.
3. Keep children away. Do not let other persons than the
operator touch the cleaner or the cord. Keep persons
other than the operator away from the workplace.
4. Use the cleaner suitable for the work. Use the appliance
only for the specified applications.
5. Do not handle the power cord roughly.
○Do not carry the charger with only the power cord or
pull the plug from the socket while holding the power
cord.
○Keep the power cord away from heat, oil and sharp
corners.
6. The cleaner should be maintained carefully.
Replacement of accessories should follow the
instructions manual. Regularly check the power cord
of the charger and ask your dealer for repairs in the
event of it being damaged. If an extension cord is used,
check it periodically, and when damaged, replace it.
7. In the following cases, switch offthe cleaner and turn
OFF the main power supply:
The cleaner is not used or it is sent for repair.
Accessories, such as a hose and a filter, are replaced.
Danger is expected.
8. Avoid sudden starting. Do not carry the appliance
which is connected to the power supply with your finger
placed on the switch. Confirm that the switch is off
before insert the battery.
9. Do the work with enough care. When you use the
cleaner, pay attention to the handling method, how to
do the work, the surrounding situation, etc. and perform
the operation in a cautious manner. When you do the
work at a distance from the cleaner, pay attention to the
operation condition of the cleaner. (abnormal sound,
dust blow off, emitting smoke, etc.) Exercise common
sense. Do not use the appliance when you are tired.
10. Check for any damaged part.
○Before use, check for any damages in the protective
cover or other parts and confirm whether the appliance
operates normally and performs specified functions.
○Check for any abnormalities in all places that may
affect the operation, the position adjustment and
clamping state of movable portions, damaged parts or
attachment state.
○Replacement and repair of damaged protective cover
and other parts should follow the provisions of the
handling instructions. If there are no such provisions
in the manual, please request repair from your local
retailer or authorized servicing agent.
○If the switch fails, please request repair from your local
retailer or authorized servicing agent. Avoid using the
cleaner which cannot be started or stopped by the
switch.
11. Contact the specialty store for repair of the cleaner.
○Since this cleaner conforms to the corresponding
safety standard, do not modify it.
○Be sure to request repair from your local retailer or
authorized servicing agent. Self-repair may cause
accidents or injuries.
12. This appliance can be used by children aged from 8
years and above and persons with reduced physical,
sensory or mental capabilities or lack of experience
and knowledge if they have been given supervision or
instruction concerning use of the appliance in a safe
way and understand the hazards involved. Children
shall not play with the appliance. Cleaning and user
maintenance shall not be made by children without
supervision.
PRECAUTIONS FOR USE OF THE
CORDLESS CLEANER
The precautions common to the cleaners have been
described. For the cleaners for electric tools, follow further
precautions described below:
WARNING
1. Prevent the appliance from sucking in the following:
○Generated spark during metal grinding or cutting.
○High temperature things, such as lighted cigarette.
○Inflammable substances (gasoline, thinner, benzine,
kerosene, paint, etc.), explosive substances
(nitroglycerine, etc.), combustible substances
(aluminum, zinc, magnesium, titanium, red
phosphorus, yellow phosphorus, celluloid, etc.)
○Sharp things, such as nail and razor.
○Wood chip, metal, stone, string, etc.
○Solidification materials, such as cement powder and
toner, and conductive fine dusts, such as metal powder
and carbon powder.
○Foaming liquids, such as oil, boiling water, chemical
fluid, and detergent. Liquids, such as water and oil.
May cause fires or injuries.
2. Set the filter correctly before use. Do not use the
appliance without the filter or with it set in a wrong
position, or do not use a torn filter. May cause failures,
such as motor burnout.
3. Do not use the appliance with its suction opening, air
inlet or exhaust opening obstructed. The temperature
of the motor may rise abnormally, causing troubles
such as deformation of parts or motor burnout.
4. Do not operate the appliance when its float is operating
or when its hose or suction mouth, etc. is clogged with
foreign matter. The temperature of the motor may rise
abnormally, causing troubles such as deformation of
parts or motor burnout.
5. Do not topple the appliance or do not use it on its side.
May cause electric shock or failures.
6. To prevent deformation or breakage of the appliance
due to toppling etc., the appliance should be moved
calmly. Breakage, crack, or deformation may cause
injuries.
7. When you drop or bump the appliance accidentally,
check for breakage, crack, or deformation in the
appliance. Breakage, crack or deformation may cause
injuries.
8. When the appliance is out of condition or emits
abnormal sound during use, immediately turn offthe
switch and request repair from your local retailer or
authorized servicing agent. If you continue to use the
appliance as it is, it may lead to injuries.
9. This appliance is only used indoors. Never use it
outdoors. Insulation deterioration may cause electric
shock or electrical fire.
00BookRP3608DAAsia.indb800BookRP3608DAAsia.indb8 2019/07/258:36:262019/07/258:36:26
9
English
10. Do not use the product if the tool or the battery terminals
(battery mount) are deformed.
Installing the battery could cause a short circuit that
could result in smoke emission or ignition.
11. Keep the tool’s terminals (battery mount) free of swarf
and dust.
○Prior to use, make sure that swarf and dust have not
collected in the area of the terminals.
○During use, try to avoid swarf or dust on the tool from
falling on the battery.
○When suspending operation or after use, do not leave
the tool in an area where it may be exposed to falling
swarf or dust.
○Wipe clean any dust, dirt, water or other liquid which
may collect on the battery connector.
Doing so could cause a short circuit that could result in
smoke emission or ignition.
CAUTION ON LITHIUM-ION BATTERY
To extend the lifetime, the lithium-ion battery equips with
the protection function to stop the output.
In the cases of 1 to 3 described below, when using this
product, even if you are pulling the switch, the motor may
stop. This is not the trouble but the result of protection
function.
1. When the battery power remaining runs out, the motor
stops.
In such a case, charge it up immediately.
2. If the tool is overloaded, the motor may stop. In this
case, release the switch of tool and eliminate causes of
overloading. After that, you can use it again.
3. If the battery is overheated under overload work, the
battery power may stop.
In this case, stop using the battery and let the battery
cool. After that, you can use it again.
Furthermore, please heed the following warning and
caution.
WARNING
In order to prevent any battery leakage, heat generation,
smoke emission, explosion and ignition beforehand,
please be sure to heed the following precautions.
1. Make sure that swarf and dust do not collect on the
battery.
○During work make sure that swarf and dust do not fall
on the battery.
○Make sure that any swarf and dust falling on the power
tool during work do not collect on the battery.
○Do not store an unused battery in a location exposed to
swarf and dust.
○Before storing a battery, remove any swarf and dust
that may adhere to it and do not store it together with
metal parts (screws, nails, etc.).
2. Do not pierce battery with a sharp object such as a
nail, strike with a hammer, step on, throw or subject the
battery to severe physical shock.
3. Do not use an apparently damaged or deformed
battery.
4. Do not use the battery in reverse polarity.
5. Do not connect directly to an electrical outlets or car
cigarette lighter sockets.
6. Do not use the battery for a purpose other than those
specified.
7. If the battery charging fails to complete even when a
specified recharging time has elapsed, immediately
stop further recharging.
8. Do not put or subject the battery to high temperatures
or high pressure such as into a microwave oven, dryer,
or high pressure container.
9. Keep away from fire immediately when leakage or foul
odor are detected.
10. Do not use in a location where strong static electricity
generates.
11. If there is battery leakage, foul odor, heat generated,
discolored or deformed, or in any way appears abnormal
during use, recharging or storage, immediately remove
it from the equipment or battery charger, and stop use.
12. Do not immerse the battery or allow any fluids to flow
inside. Conductive liquid ingress, such as water, can
cause damage resulting in fire or explosion. Store your
battery in a cool, dry place, away from combustible and
flammable items. Corrosive gas atmospheres must be
avoided.
CAUTION
1. If liquid leaking from the battery gets into your eyes,
do not rub your eyes and wash them well with fresh
clean water such as tap water and contact a doctor
immediately.
If left untreated, the liquid may cause eye-problems.
2. If liquid leaks onto your skin or clothes, wash well with
clean water such as tap water immediately.
There is a possibility that this can cause skin irritation.
3. If you find rust, foul odor, overheating, discolor,
deformation, and/or other irregularities when using the
battery for the first time, do not use and return it to your
supplier or vendor.
WARNING
If a conductive foreign matter enters in the terminal of
lithium ion battery, the battery may be shorted, causing
fire. When storing the lithium ion battery, obey surely the
rules of following contents.
○Do not place conductive debris, nail and wires such as
iron wire and copper wire in the storage case.
○To prevent shorting from occurring, load the battery in
the tool or insert securely the battery cover for storing
until the ventilator is not seen.
REGARDING LITHIUM-ION BATTERY
TRANSPORTATION
When transporting a lithium-ion battery, please observe
the following precautions.
WARNING
Notify the transporting company that a package contains a
lithium-ion battery, inform the company of its power output
and follow the instructions of the transportation company
when arranging transport.
○Lithium-ion batteries that exceed a power output of
100Wh are considered to be in the freight classification
of Dangerous Goods and will require special
application procedures.
○For transportation abroad, you must comply with
international law and the rules and regulations of the
destination country.
○If the BSL36B18 is installed in the power tool, the power
output will exceed 100 Wh and the unit will be classified
as Dangerous Goods for freight classification.
Wh
Power Output
2 to 3 digit number
00BookRP3608DAAsia.indb900BookRP3608DAAsia.indb9 2019/07/258:36:272019/07/258:36:27

10
English
USB DEVICE CONNECTION
PRECAUTIONS (UC18YSL3)
When an unexpected problem occurs, the data in a USB
device connected to this product may be corrupted or lost.
Always make sure to back up any data contained in the
USB device prior to use with this product.
Please be aware that our company accepts absolutely no
responsibility for any data stored in a USB device that is
corrupted or lost, nor for any damage that may occur to a
connected device.
WARNING
○Prior to use, check the connecting USB cable for any
defect or damage.
Using a defective or damaged USB cable can cause
smoke emission or ignition.
○When the product is not being used, cover the USB
port with the rubber cover.
Buildup of dust etc. in the USB port can cause smoke
emission or ignition.
NOTE
○There may be an occasional pause during USB
recharging.
○When a USB device is not being charged, remove the
USB device from the charger.
Failure to do so may not only reduce the battery life
of a USB device, but may also result in unexpected
accidents.
○It may not be possible to charge some USB devices,
depending on the type of device.
NAMES OF PARTS (Fig. 1 – Fig. 21)
Vacuum switch Terminal
Name plate Battery number
Dust button Latch
Operation panel Button
Remaining battery
indicator switch
Hose
(id 38 mm × 1.5 m long)
Remaining battery
indicator lamp Head
Battery number Handle
Mode display lamp Filter
Mode change-over
switch Filter cage
Suction opening Filter seam
Caster Suction opening
(Inside of the tank)
Tank Mouth of the tank
Clamp Filter packing
Tool box (2XC only) Zoom pipe
Suction opening /
Exhaust opening Master nozzle
Charge indicator
lamp Screw ring
Battery Dust exhaust
opening
Clamp lever Power tool
Battery guard Adapter (Optional
Accessory)
Groove Joint (Optional
Accessory)
Dust collection
adapter (Optional
Accessory)
Fix
Power tool Hook bolt
Paper filter Pipe hanger
Suction hole Pipe holder
Cardboard Crevice nozzle
Fold Remaining battery
indicator lamp
Bend Rubber cover
Stopper USB port
Rubber packing USB cable
Lever Plastic bag
Release
SYMBOLS
WARNING
The following show symbols used for the machine.
Be sure that you understand their meaning before
use.
RP3608DA: Cordless Cleaner
To reduce the risk of injury, user must read
instruction manual.
Always wear eye protection.
Always wear hearing protection.
Never stand on the cleaner.
Warning
Switching ON
Switching OFF
Disconnect the battery
Prohibited action
Mode selection switch
Eco mode
Standard mode
Turbo mode
Remaining battery indicator switch
Lights ;
The battery remaining power is over 75%.
00BookRP3608DAAsia.indb1000BookRP3608DAAsia.indb10 2019/07/258:36:272019/07/258:36:27

11
English
Lights ;
The battery remaining power is 50% – 75%.
Lights ;
The battery remaining power is 25% – 50%.
The battery remaining power is less than 25%.
Recharge the battery soonest possible.
Battery
Lights ;
The battery remaining power is over 75%.
Lights ;
The battery remaining power is 50% – 75%.
Lights ;
The battery remaining power is 25% – 50%.
Lights ;
The battery remaining power is less than 25%.
Blinks ;
The battery remaining power is nearly empty.
Recharge the battery soonest possible.
Blinks ;
Output suspended due to high temperature.
Remove the battery from the tool and allow it
to fully cool down.
Blinks ;
Output suspended due to failure or
malfunction. The problem may be the battery
so please contact your dealer.
NOTE
(1) To prevent the battery power consumption caused by
forgetting to turn offthe LED light, the light goes off
automatically in about 2 minutes.
(2) Check the cleaner’s remaining battery indicator after
switching offthe main unit.
STANDARD ACCESSORIES
(1) Hose (id 38 mm × 1.5 m long) .....................................1
(2) Zoom pipe ...................................................................1
(3) Crevice nozzle.............................................................1
(4) Master nozzle..............................................................1
(5) Battery (BSL36A18)* ...................................................2
(6) Charger (UC18YSL3)*.................................................1
(7) Battery cover* .............................................................2
(8) Tool box*......................................................................1
Standard accessories are subject to change without
notice.
* (NN) specifications is excluded.
SELECTING ACCESSORIES
The accessories of this machine are listed on page 81.
Optional accessories are subject to change without notice.
APPLICATIONS
○General cleaning in workplaces and others.
○Collection of fine dusts generated during grinding,
cutting or drilling of concrete or wood using power tools.
○Suction of liquid such as water spilt on the floor.
SPECIFICATIONS
1. Power tool
Model
Item RP3608DA
Rated voltage 36 V
Motor DC motor
Application Wet and Dry type
Max. Airflow 3.5 m3/min
Max. Vacuum 20.1 kPa
Details-Dry 8 L
Details-Wet 6 L
Battery available for this
tool* Multi volt battery
Dimensions (W × D × H)
331 mm × 369 mm × 382 mm
Weight 10.4 kg (BSL36A18 x 2pcs.)
* Existing batteries (BSL3660/3626X/3626/3625/3620,
BSL18.... and BSL14.... series) cannot be used with this
tool.
2. Battery
Model BSL36A18
Voltage 36 V / 18 V (Automatic Switching*)
Battery capacity 2.5 Ah / 5.0 Ah
(Automatic Switching*)
Available cordless
products** Multi volt series, 18 V product
Available charger Sliding charger for lithium ion
batteries
* The tool itself will automatically switch over.
** Please see our general catalogue for details.
UNPACKING
Carefully unpack the power tool.
CHARGING
Before using the power tool, charge the battery as follows.
1. Connect the charger’s power cord to the
receptacle.
When connecting the plug of the charger to a
receptacle, the charge indicator lamp will blink in red
(At 1- second intervals).
2. Insert the battery into the charger.
Firmly insert the battery into the charger as shown in
Fig. 2 (on page 2).
3. Charging
When inserting a battery in the charger, the charge
indicator lamp will blink in blue.
When the battery becomes fully recharged, the charge
indicator lamp will light up in green. (See Table 1)
(1) Charge indicator lamp indication
The indications of the charge indicator lamp will be
as shown in Table 1, according to the condition of the
charger or the rechargeable battery.
00BookRP3608DAAsia.indb1100BookRP3608DAAsia.indb11 2019/07/258:36:302019/07/258:36:30

12
English
Table 1
Indications of the charge indicator lamp
Charge
indicator
lamp
(RED /
BLUE /
GREEN /
PURPLE)
Before
charging
Blinks
(RED)
Lights for 0.5 seconds. Does not light
for 0.5 seconds. (offfor 0.5 seconds) Plugged into power source
While
charging
Blinks
(BLUE)
Lights for 0.5 seconds. Does not light
for 1 second. (offfor 1 second) Battery capacity at less than 50%
Blinks
(BLUE)
Lights for 1 second. Does not light
for 0.5 seconds. (offfor 0.5 seconds) Battery capacity at less than 80%
Lights
(BLUE)
Lights continuously Battery capacity at more than 80%
Charging
complete
Lights
(GREEN)
Lights continuously
(Continuous buzzer sound: about 6
seconds)
Overheat
standby
Blinks
(RED)
Lights for 0.3 seconds. Does not light
for 0.3 seconds. (offfor 0.3 seconds)
Battery overheated. Unable to
charge. (Charging will commence
when battery cools)
Charging
impossible
Flickers
(PURPLE)
Lights for 0.1 seconds. Does not light
for 0.1 seconds. (offfor 0.1 seconds)
(Intermittent buzzer sound: about 2
seconds)
Malfunction in the battery or the
charger
(2) Regarding the temperatures and charging time of the rechargeable battery
The temperatures and charging time will become as shown in Table 2.
Table 2
Charger UC18YSL3
Battery
Type of battery Li-ion
Temperatures at which
the battery can be
recharged
-10°C – 50°C
Charging voltage V 14.4 18
Charging time,
approx. (At 20°C)
BSL14.... series BSL18.... series Multi volt
series
(4 cells) (8 cells) (5 cells) (10 cells) (10 cells)
min.
BSL1415S
:
15
BSL1415
:
15
BSL1415X
:
15
BSL1420
:
20
BSL1425
:
25
BSL1430C
:
30
BSL1430
:
20
BSL1440
:
26
BSL1450
:
32
BSL1460
:
38
BSL1815S : 15
BSL1815 : 15
BSL1815X : 15
BSL1820 : 20
BSL1825 : 25
BSL1830C : 30
BSL1830 : 20
BSL1840 : 26
BSL1850 : 32
BSL1860 : 38
BSL36A18 : 32
BSL36B18 : 52
USB Charging voltage V 5
Charging current A 2
NOTE
The recharging time may vary according to the ambient
temperature and power source voltage.
4. Disconnect the charger’s power cord from the
receptacle.
5. Hold the charger firmly and pull out the battery.
NOTE
Be sure to pull out the battery from the charger after
use, and then keep it.
Regarding electric discharge in case of new
batteries, etc.
As the internal chemical substance of new batteries
and batteries that have not been used for an extended
period is not activated, the electric discharge might be
low when using them the first and second time. This is a
temporary phenomenon, and normal time required for
recharging will be restored by recharging the batteries
2 – 3 times.
00BookRP3608DAAsia.indb1200BookRP3608DAAsia.indb12 2019/07/258:36:312019/07/258:36:31

13
English
How to make the batteries perform longer.
(1) Recharge the batteries before they become completely
exhausted.
When you feel that the power of the tool becomes
weaker, stop using the tool and recharge its battery. If
you continue to use the tool and exhaust the electric
current, the battery may be damaged and its life will
become shorter.
(2) Avoid recharging at high temperatures.
A rechargeable battery will be hot immediately after
use. If such a battery is recharged immediately after
use, its internal chemical substance will deteriorate,
and the battery life will be shortened. Leave the battery
and recharge it after it has cooled for a while.
CAUTION
○If the battery is charged while it is heated because it
has been left for a long time in a location subject to
direct sunlight or because the battery has just been
used, the charge indicator lamp of the charger lights
for 0.3 seconds, does not light for 0.3 seconds (offfor
0.3 seconds). In such a case, first let the battery cool,
then start charging.
○When the charge indicator lamp flickers (at 0.2-second
intervals), check for and take out any foreign objects in
the charger’s battery connector. If there are no foreign
objects, it is probable that the battery or charger is
malfunctioning. Take it to your authorized Service
Center.
○Since the built-in micro computer takes about
3 seconds to confirm that the battery being charged
with UC18YSL3 is taken out, wait for a minimum of
3 seconds before reinserting it to continue charging. If
the battery is reinserted within 3 seconds, the battery
may not be properly charged.
PRIOR TO OPERATION
WARNING
Before use, check the following. 1 to 2 should be
checked before insert the battery.
1. Confirm that the vacuum switch is OFF. (Fig. 3)
If, without knowing that the vacuum switch is ON, the
battery is inserted, the appliance will start suddenly,
causing unexpected accidents. The vacuum switch will
be turned on by pushing “ON” and it will be turned offby
returning it to “OFF”. Be sure to check that the vacuum
switch is OFF.
2. Order of use for batteries
When two batteries are installed, the battery with the
least remaining power is used first until it is empty.
Once empty, use is automatically switched over to the
other battery.
Use is still possible with a single installed battery.
NOTE
When there is no more remaining power in a battery,
immediately recharge the battery for convenient use
later.
3. Check the filter
Referring to “2. Attaching the Filter” the filter should be
correctly attached.
CAUTION
Water absorption amount will severely decline if the
standardly equipped cloth filter is repeatedly used to
absorb liquid.
Use the separately sold nylon filter when repeatedly
absorbing large amounts of water.
4. Inserting the battery (Fig. 4)
As you pull on the clamp lever, open the battery guard.
Next, match the battery with the unit’s groove and
firmly press the battery in until you hear a click.
CAUTION
Do not touch the terminals. Doing so may result in
cutting your hand on the terminals or other unexpected
injury.
5. Removing the battery (Fig. 4)
When removing the battery from the unit, press the
latches on both sides and slide the battery upwards to
pull it out.
6. Switch operation (Fig. 5)
During operation, the suction power will change each
time the mode selection switch is pressed.
HOW TO USE
CAUTION
Do not use the head top as a footstool or do not sit on
it. Otherwise the appliance begins to move suddenly,
causing an injury.
NOTE
Handle the hose with care. Do not bend the hose by
force, or do not trample it, or do not pull it to move the
cleaner. Moreover, do not put away the hose as it is
bent. Otherwise troubles such as its deformation may
be caused.
1. Connecting the hose (Fig. 6)
Press the attached hose into the suction opening of the
tank until it clicks and connect it. When removing the
hose, pull out the hose while pushing the button of the
suction opening.
2. Attaching the filter (Fig. 7)
WARNING
○Be sure to attach the filter. (cloth filter or filter for dusts)
Otherwise the motor will be damaged.
○When you collect fine dusts, such as siding powder and
stone powder, use the optional paper filter.
○Since it is a filter for dry and wet suction, do not remove
it when you suck up liquids, such as water.
NOTE
If the filter is wet, leave it to dry out of direct sunlight.
Using the filter when wet will conspicuously reduce the
suction power.
(1) Check that the filter packing is put on the mouth of the
tank.
(2) Check that the filter cage is on the bottom of the filter.
3. Attach the zoom pipe, master nozzles, etc.
When it is used as a cleaner (Fig. 8)
Connect in order of Hose (id 38 mm × 1.5 m long),
zoom pipe and Master nozzle. Connection is done
by pressing in the direction of the arrow. The suction
mouth for crevices can also be attached depending on
the application.
4. Connect power tools (Fig. 9)
Connect in order of Hose (id 38 mm × 1.5 m long) and
Adapter or Joint (D) (Optional Accessory). Connection
is done by pressing in the direction of the arrow.
NOTE
(1) When you switch ON the unit after switching it OFF, the
mode change-over switch will revert to its state prior to
being switched OFF.
The unit will revert to mode [2] when set at [3].
(2) Depending on the operating environment, the main
unit’s temperature protective function may activate and
switch offthe unit.
Shouldtheunitswitchoff,refer toTROUBLESHOOTING
(Page 16).
5. Filter cleaning (Fig. 10)
CAUTION
If the tank is filled with dusts, the suction power
declines. Dump dusts as early as possible when they
reach the half of the tank height.
When the suction power declines during use, remove
dusts in the following procedure:
00BookRP3608DAAsia.indb1300BookRP3608DAAsia.indb13 2019/07/258:36:312019/07/258:36:31

14
English
NOTE
Since the filter cleaning device operates when the
suction power declines to some extent, it also operates
in the following cases:
○When the suction mouth at the tip of the hose is closed.
○When the hose is clogged with foreign matter.
To clean the filter using a strong air flow:
(1) Pull out the zoom pipe on the tip of the hose.
(2) Block offthe tip of the hose with your hand and turn
the power switch ON. Next, press the dust button on
the top of the head for approximately one second and
release the button. Repeat three times and the suction
power should recover.
If the suction power is not recovered, the tank is almost
filled with dusts. Dump dusts in the tank.
6. Dump dusts (Fig. 11)
WARNING
○Be sure to turn offthe vacuum switch and disconnect
the battery.
○Put on a dust mask.
○If the appliance is pushed on its side while the tank
contains liquid, the liquid will get inside the motor
or switch region, causing an electric shock or motor
failure.
CAUTION
○Do not impact the tank, the filter, or the head. Otherwise
they will be deformed or damaged.
○Although it is based on the amount of suction of dusts
and liquids, dump dusts and liquids in the tank at least
once a day and keep the appliance, the filter, etc. clean.
Otherwise suction power fall, motor failure, bad smell
or rusting may be caused.
○Do not hold the clamps when you dump dusts in the
tank. Otherwise the clamps may be damaged.
NOTE
○When removing the plastic bag filled with dust from the
tank, make sure the bag does not become caught on
parts inside the tank.
○Empty the plastic bag regularly so that it does not
become excessively filled with dust.
○Do not tilt the tank with accessories (Zoom pipe,
Master nozzle, etc.) inserted in the head or in the tank.
Otherwise any part may be damaged.
(1) Remove the clamps (2 pieces) and raise the handle of
the head.
(2) Lightly striking the inner side of the filter several times,
remove dusts attached to the filter.
(3) Tilt the tank and dump dusts.
(4) Attach the filter, the filter cage, the head, and the clamp
in the initial positions.
7. Transportation and storage
(1) How to use the handle (Fig. 12)
When carrying or moving the appliance, hold the
handle of the head part. When you do not use the
handle, put it in the head part.
(2) Fixation and release of the caster (Fig. 13)
By lowering the lever of the caster with the brake, the
rotation of the wheel is fixed. When releasing the fixed
wheel, raise the lever. When moving with the appliance
on a vehicle, fix the caster to retain the appliance.
However, when you move the appliance, check that the
caster is released, or the caster will be damaged.
(3) Tool box assembly (Fig.14)
(4) Storing the appliance during breaks (Fig. 15)
Anytime you stop work or take a break from cleaning,
you can quickly store the unit by hooking the zoom pipe
to the pipe holder (the hole at the top of the unit) so that
it stands.
(5) When the appliance is stored (Fig. 16)
After removing the suction opening and hose, hook the
zoom pipe to the pipe holder so that it stands. Store the
master nozzle, crevice nozzle and battery in the tool
box.
NOTE
When the attachments are stored in the appliance, do
not apply any excess force to the attachments.
8. Attaching the plastic bag (Optional) (Can be used
without a plastic bag)
WARNING
Be sure to turn offthe appliance and remove the
battery.
(1) Detach two clamps, pull up the head by the handle and
remove it from the tank. (Fig. 7)
Remove the filter and the filter cage inside the tank.
(2) Insert the plastic bag between the inside of the tank
and the bag guide.
Insert the bag first along the bottom of the bag guide
and then on both sides. (Fig. 22)
(3) After spreading the plastic bag along the inside of the
tank, draw the end of the plastic bag outside the tank.
Following the directions on page 13 “Attaching the
filter”, insert the filter and the filter cage.
At this point attach the filter so that the plastic bag is
secured by the packing of the filter. (Fig. 22)
NOTE
The edge of the plastic bag on the air intake should not
extend out of the top of the tank. (See Fig. 22)
If all of the edge of the plastic bag extends out of the top
of the tank, the air intake will be blocked, obstructing
dust collection.
9. How to attach the paper filter (Optional) (Fig. 17)
WARNING
○Be sure to turn offthe appliance and remove the
battery.
○When using a paper filter, use it in combination with the
standard cloth filter.
If the paper filter gets torn, dust may get inside the motor,
causing abnormal noise or fire due to overheating.
CAUTION
When using a paper filter, avoid sucking in liquids such
as water or wet dust, as this may lead to tearing of the
filter.
(1) Open the paper filter horizontally so that the suction
hole in the paper filter is over the top of the tank.
(2) Before attaching the filter to the appliance, bend the
two folds in the cardboard approx. 90° in the direction
of the arrow.
(3) Match the suction hole in the paper filter with the
suction opening of the appliance. Insert the filter in
the direction of the arrow as shown in the illustration,
so that the cardboard of the paper filter goes past the
stopper on the suction opening.
FLOAT MECHANISM
This appliance is equipped with a float mechanism to
prevent water from entering in the motor when it sucks
in more than a specific quantity of water. When the float
operates not to suck in water, turn offthe switch promptly
and throw away water in the tank.
WARNING
○With the float working, do not continue operation.
Otherwise the temperature of the motor may rise
abnormally causing troubles such as deformation of
parts or motor burnout.
○Avoid sucking in foaming liquid such as detergent or
foams. Before the float works, foams may spurt from
the air outlet. If you continue to use the appliance as it
is, it will lead to electric shock or failure.
00BookRP3608DAAsia.indb1400BookRP3608DAAsia.indb14 2019/07/258:36:312019/07/258:36:31

15
English
ABOUT REMAINING BATTERY
INDICATOR
Remaining battery power can be verified with either the
battery or with the cleaner itself. (Fig. 18)
NOTE
○The reading for the remaining battery power may differ
on the battery from that of the cleaner.
○Use the remaining batter power as a guideline since
the readings may somewhat differ due to surrounding
temperature or battery feature.
HOW TO RECHARGE USB DEVICE
(UC18YSL3)
(1) Select a charging method
○Charging a USB device from a electrical outlet (Fig. 19-a)
○Charging a USB device and battery from a electrical
outlet (Fig. 19-b)
(2) How to recharge USB device (Fig. 20)
(3) When charging of USB device is completed (Fig. 21)
MAINTENANCE AND INSPECTION
WARNING
○For inspection and maintenance, be sure to turn offthe
vacuum switch and disconnect the battery.
○Do not work with wet hands. May cause electric shock
or injuries.
1. Maintenance of filter
NOTE
○Since a filter is a consumable, we recommend you to
prepare spares.
○The cloth filter should simply be tapped even if it is
considerably clogged. Strong brushing will shorten its
life.
○Do not hurl a filter. May break its resin part.
A clogged filter will decrease the suction power
remarkably. Tap the inner side of the filter to drop off
dusts regularly.
2. Inspecting the mounting screws
Regularly inspect all mounting screws and ensure that
they are properly tightened. Should any of the screws
be loose, retighten them immediately. Failure to do so
could result in serious hazard.
3. Maintenance of the motor
The motor unit winding is the very “heart” of the power
tool.
Exercise due care to ensure the winding does not
become damaged and/or wet with oil or water.
4. Inspection of terminals (tool and battery)
Check to make sure that swarf and dust have not
collected on the terminals.
On occasion check prior, during and after operation.
CAUTION
Remove any swarf or dust which may have collected on
the terminals.
Failure to do so may result in malfunction.
5. Check for Dust
Dust may be removed with a soft cloth or a cloth
dampened with soapy water. Do not use bleach,
chlorine, gasoline or thinner, for they may damage the
plastics.
6. Storage
Storing in a place below 40°C and out of the reach of
children.
NOTE
Storing lithium-ion batteries.
Make sure the lithium-ion batteries have been fully
charged before storing them.
Prolonged storage (3 months or more) of batteries with
a low charge may result in performance deterioration,
significantly reducing battery usage time or rendering
the batteries incapable of holding a charge.
However, significantly reduced battery usage time may
be recovered by repeatedly charging and using the
batteries two to five times.
If the battery usage time is extremely short despite
repeated charging and use, consider the batteries
dead and purchase new batteries.
CAUTION
In the operation and maintenance of power tools, the
safety regulations and standards prescribed in each
country must be observed.
Important notice on the batteries for the HiKOKI
cordless power tools
Please always use one of our designated genuine
batteries. We cannot guarantee the safety and
performance of our cordless power tool when used
with batteries other than these designated by us, or
when the battery is disassembled and modified (such
as disassembly and replacement of cells or other
internal parts).
NOTE
Due to HiKOKI’s continuing program of research and
development, the specifications herein are subject to
change without prior notice.
00BookRP3608DAAsia.indb1500BookRP3608DAAsia.indb15 2019/07/258:36:312019/07/258:36:31

16
English
TROUBLESHOOTING
Use the inspections in the table below if the tool does not operate normally. If this does not remedy the problem, consult
your dealer or the HiKOKI Authorized Service Center.
1. Power tool
Symptom Possible cause Remedy
Tool doesn’t run No remaining battery power Charge the battery.
Battery isn’t fully installed. Push in the battery until a click is heard.
Concrete dust is accumulated on the
terminals of the battery installation
compartment as well as on the battery
sliding grooves.
Clean offthe accumulated concrete dust
with a dry cloth.
Suction power is weak.
Fails to suck in dust.
The tank is full of dust or water. Dispose of the dust or water.
After that, remove any dust attached to
the filter.
Filter is clogged. Conduct air blow dusting or remove the
dust attached to the filter.
The filter is not installed.
(Not set in place)
Check to see if the filter is properly set.
Plastic bag is incorrectly installed. Properly install the plastic bag.
Dust leaks from the vent. Filter is not installed.
Filter is improperly installed.
Properly install the filter.
Filter is damaged. Replace the damaged filter.
Tool suddenly stopped Tool was overburdened Get rid of the problem causing the
overburden.
The battery and/or the unit is overheated. Let the battery and/or the unit cool down.
Attachments such as the
connection adapter or joint
-can’t be attached
-fall off
The shape or the dimensions of an
attachment part does not match.
Check the model in use and make sure
to use the designated accessories and
attachments listed in this document or in
our catalogue.
Battery cannot be installed Attempting to install a battery other than
that specified for the tool.
Please install a multi volt type battery.
00BookRP3608DAAsia.indb1600BookRP3608DAAsia.indb16 2019/07/258:36:312019/07/258:36:31

17
English
2. Charger
Symptom Possible cause Remedy
The charge indicator lamp
rapidly flickers purple, and
battery charging doesn’t
begin.
The battery is not inserted all the way. Insert the battery firmly.
There is foreign matter in the battery
terminal or where the battery is attached.
Remove the foreign matter.
The charge indicator lamp
blinks red, and battery
charging doesn’t begin.
The battery is not inserted all the way. Insert the battery firmly.
The battery is overheated. If left alone, the battery will automatically
begin charging if its temperature
decreases, but this may reduce battery
life. It is recommended that the battery be
cooled in a well-ventilated location away
from direct sunlight before charging it.
Battery usage time is short
even though the battery is
fully charged.
The battery’s life is depleted. Replace the battery with a new one.
The battery takes a long
time to charge.
The temperature of the battery, the
charger, or the surrounding environment is
extremely low.
Charge the battery indoors or in another
warmer environment.
The charger’s vents are blocked, causing
its internal components to overheat.
Avoid blocking the vents.
The cooling fan is not running. Contact a HiKOKI Authorized Service
Center for repairs.
The USB power lamp
has switched offand the
USB device has stopped
charging.
The battery’s capacity has become low. Replace the battery with one that has
capacity remaining.
Plug the charger’s power plug into an
electric socket.
USB power lamp does not
switch offeven though the
USB device has finished
charging.
The USB power lamp lights up green to
indicate that USB charging is possible.
This is not a malfunction.
It is unclear what the
charging status of a USB
device is, or whether its
charging is complete.
The USB power lamp does not switch off
even when charging is complete.
Examine the USB device that is charging
to confirm its charging status.
Charging of a USB device
pauses midway.
The charger was plugged into an electrical
socket while the USB device was being
charged using the battery as the power
source.
This is not a malfunction.
The charger pauses USB charging for
about 5 seconds when it is differentiating
between power sources.
A battery was inserted into the charger
while the USB device was being charged
using a power socket as the power source.
Charging of the USB
device pauses midway
when the battery and the
USB device are being
charged at the same time.
The battery has become fully charged. This is not a malfunction.
The charger pauses USB charging for
about 5 seconds while it checks whether
the battery has successfully completed
charging.
Charging of the USB
device doesn’t start when
the battery and the USB
device are being charged
at the same time.
The remaining battery capacity is
extremely low.
This is not a malfunction.
When the battery capacity reaches a
certain level, USB charging automatically
begins.
00BookRP3608DAAsia.indb1700BookRP3608DAAsia.indb17 2019/07/258:36:312019/07/258:36:31

18
中國語
11. 聯繫專賣店以維修清潔機。
○ 本清潔機符合相應的安全標準,因此請勿對其進
行改造。
○ 務必向當地零售商或授權服務代理商要求維修。
自行修理可能會導致事故或受傷。
12. 8 歲以上的兒童以及體弱、感官能力欠佳或精神
耗弱者,或缺乏經驗和知識者,若在有人以安全
的方式監督或指示有關使用該設備,並了解所涉
及的危害的情況下,可以使用本設備。兒童不得
玩耍本設備。未經監督的兒童不得進行清潔和用
戶維護。
充電式清潔機使用注意事項
清潔機的一般注意事項已進行說明。對於用於電動
工具的清潔機,請遵循以下進一步的注意事項:
警告
1. 防止本設備吸入以下物品:
○ 金屬研磨或切削時產生的火花。
○ 高溫物品,如點燃的香煙。
○ 易燃物質(汽油、稀釋劑、揮發油、煤油、油漆
等),爆炸性物質(硝化甘油等),可燃物質(鋁、
鋅、鎂、鈦、紅磷、黃磷、賽璐珞等)
○ 尖銳物品,如釘子和剃刀。
○ 木屑、金屬、石頭、繩子等
○ 水泥粉末和調色劑等固化物,以及金屬粉末、碳
粉等導電性微粉塵。
○ 發泡液體,如油、沸水、化學液和清潔劑。液體,
如水和油。可能引起火災或受傷。
2. 使用前請正確設置濾網。請勿在沒有濾網的情況
下使用本設備,或將濾網放在錯誤的位置,且不
要使用已扯破的濾網。否則可能會導致故障,例
如馬達燒壞。
3. 請勿在吸入口、進氣口或排氣口被擋住的情況下
使用本設備。馬達溫度可能異常升高,引起部件
變形或馬達燒壞等問題。
4. 當浮子正在運作或者軟管或吸嘴等被異物堵塞
時,請勿操作本設備。馬達溫度可能異常升高,
引起部件變形或馬達燒壞等問題。
5. 請勿使本設備倒塌或側放使用本設備。否則可能
會造成觸電或故障。
6. 為防止因倒塌等原因而導致設備變形或破損,應
平穩地移動本設備。破損、裂縫或變形可能會導
致受傷。
7. 當您意外掉落或撞擊本設備時,請檢查設備是否
有破損、裂縫或變形。破損、裂縫或變形可能會
導致受傷。
8. 如果設備在使用過程中出現故障或發出異常聲
音,請立即關閉開關並向當地零售商或授權服務
代理商要求維修。如果您繼續按原樣使用本產品,
可能會導致受傷。
充電式清潔機安全注意事項
○ 為了防止火災、觸電、受傷等事故,請務必遵守
下述的「安全注意事項」。
○ 使用前,請閱讀所有「安全注意事項」,並按照
說明正確使用本產品。
○ 請務必將本使用說明書放在用戶可以隨時查閱的
地方。
警告
1. 保持工作場所清潔。雜亂的場所或工作台可能會
導致事故。
2. 注意工作場所周圍的情況。保持工作場所足夠明
亮。請勿在有易燃液體或氣體的地方使用本產品。
3. 使兒童遠離本產品。不要讓操作人員以外的其他
人接觸本清潔機或電源線。使操作人員以外的人
遠離工作場所。
4. 將本清潔機用於適合的作業。僅將本設備用於指
定的用途。
5. 請勿粗暴地使用電源線。
○ 請勿僅用電源線搬運充電器,或握住電源線從插
座中拔出插頭。
○ 使電源線遠離熱源、油脂和尖銳的角。
6. 應仔細維護本清潔機。更換配件應遵循使用說明
書。定期檢查充電器的電源線,並在其發生損壞
時要求經銷商進行維修。如果使用延長線,請定
期檢查,當其損壞時請將其換新。
7. 在下列情況下,請關閉清潔機並關閉主電源:
不使用清潔機或將其送修時。
更換如軟管和濾網等的配件。
否則有發生危險的可能。
8. 避免突然啟動。請勿在設備連接到電源且手指放
在開關上的狀態下搬運本設備。裝入電池前確認
開關已關閉。
9. 進行作業時請充分小心。使用清潔機時,請注意
操作方法、作業方法、周圍環境等,並謹慎操作。
當您在距離清潔機一定距離的地方工作時,請注
意清潔器的運作狀態。(異音、灰塵吹落、冒煙等)
請以常識判斷。疲勞時請勿使用本設備。
10. 檢查是否有任何損壞部件。
○ 使用前,請檢查保護蓋或其他部件是否有任何損
壞,並確認設備是否正常運行並執行指定的功能。
○ 檢查可能影響運作的所有位置是否有異常,可動
部分的位置調整和夾緊狀態、損壞部件或安裝狀
態。
○ 更換和修理損壞的保護罩和其他部件應遵守操作
說明的規定。如果說明書中沒有此類規定,請向
當地零售商或授權服務代理商要求維修。
○ 如果開關出現故障,請向當地零售商或授權服務
代理商要求維修。避免使用開關無法啟動或停止
的清潔機。
00BookRP3608DAAsia.indb1800BookRP3608DAAsia.indb18 2019/07/258:36:312019/07/258:36:31

19
中國語
9. 本產品僅為室內用。切勿在戶外使用。絕緣劣化
可能導致會觸電或電氣火災。
10. 如果工具或電池端子(電池座)變形,請勿使用
本產品。
安裝電池可能會造成短路,從而導致冒煙或起火。
11. 保持工具的端子(電池座)沒有削屑和灰塵。
○ 使用前請確認端子區域沒有堆積削屑和灰塵。
○ 使用過程中盡量避免工具上的削屑或灰塵掉落在
電池上。
○ 暫停操作或使用後,請勿將工具留在可能暴露於
有掉落削屑或灰塵的區域。
○ 拭淨可能積聚在電池連接器上的灰塵、污垢、水
或其他液體。
否則可能會造成短路,從而導致冒煙或起火。
鋰離子電池使用注意事項
為延長使用壽命,鋰離子電池備配停止輸出的保護
功能。
若是在使用本產品時發生下列 1 至 3 的情況,即使
按下開關,馬達也可能停止。這並非故障,而是啟
動保護功能的結果。
1. 在殘留的電池電力即將耗盡時,馬達會停止。
在這種情況下,請立即予以充電。
2. 若工具超過負荷,馬達亦可能停止。在這種情況
下,請鬆開工具的開關,試著消除超過負荷的原
因。之後您就可以再度使用。
3. 若電池在過載工作情況下過熱,電池電力可能會
中止。
在這種情況下,請停止使用電池,讓電池冷卻。
之後您就可以再度使用。
此外,請留心下列的警告及注意事項。
警告
為事先防止電池發生滲漏、發熱、冒煙、爆炸及起
火等事故,請確保留意下列事項。
1. 確保電池上沒有堆積削屑及灰塵。
○ 在工作時確定削屑及灰塵沒有掉落在電池上。
○ 確定所有工作時掉落在電動工具上的削屑和灰塵
沒有堆積在電池上。
○ 請勿將未使用的電池存放在曝露於削屑和灰塵的
位置。
○ 在存放電池之前,請清除任何可能附著在上面的
削屑和灰塵,並請切勿將它與金屬零件(螺絲、
釘子等)存放在一起。
2. 請勿以釘子等利器刺穿電池、以鐵錘敲打、踩踏、
丟擲電池,或將其劇烈撞擊。
3. 切勿使用明顯損壞或變形的電池。
4. 使用電池時請勿顛倒電極。
5. 請勿直接連接電源插座或汽車點煙器孔座。
6. 請依規定方式使用電池,切勿移作他用。
7. 如果已過了再充電時間,電池仍無法完成充電,
請立即停止繼續充電。
8. 請勿將電池放置於高溫或高壓處,例如微波爐、
烘乾機或高壓容器內。
9. 發現有滲漏或異味時,請立即將電池遠離火源處。
10. 請勿在會產生強烈靜電的地方使用。
11. 如電池出現滲漏、 異味、發熱、褪色或變形,或
在使用、充電或存放時出現任何異常,請立即將
它從裝備或電池充電器拆下,並停止使用。
12. 請勿將電池浸入任何液體,或讓任何液體流入電
池內。若水等具有傳導性的液體滲入,可能會造
成損壞,進而導致火災或爆炸。將電池存放在陰
涼、乾燥的地方,遠離可燃及易燃物品。必須避
免腐蝕性氣體環境。
注意
1. 若電池滲漏出的液體進入您的眼睛,請勿搓揉眼
睛,並以自來水等乾淨清水充分沖洗,立刻送醫。
若不加以處理,液體可能會導致眼睛不適。
2. 若液體滲漏至您的皮膚或衣物,請立即以自來水
等清水沖洗。
上述情況可能會使皮膚受到刺激。
3. 若初次使用電池時發現生銹、異味、過熱、褪色、
變形及或其他異常情況時,請勿使用並將該電
池退還給供應商或廠商。
警告
若具有導電性的異物進入鋰離子電池的端子,可能
會造成短路,進而引發火災。請在存放電池時遵循
以下事項。
○ 請勿將導電物品,如鐵釘、鐵絲等金屬絲,銅線
和電線放入儲存箱內。
○ 為了防止發生短路,將電池裝入工具內或確實壓
下電池蓋儲存電池,直至遮住通風孔為止。
關於鋰離子電池的運輸
運輸鋰離子電池時,請遵守以下注意事項。
警告
安排運輸時,請通知運輸公司包裹中含有鋰離子電
池,告知該電池之輸出功率,並按照運輸公司的指
示。
○ 輸出功率超過 100Wh 的鋰離子電池被視為貨物
分類中的危險物品,將需要特殊的申請程序。
○ 對於國外的運輸,必須遵守國際法規則和目的國
法規。
○ 如果 BSL36B18 安裝在電動工具中,則功率輸出
將超過 100 Wh,且本機將被歸類為貨運分類的
危險貨物。
00BookRP3608DAAsia.indb1900BookRP3608DAAsia.indb19 2019/07/258:36:322019/07/258:36:32

20
中國語
Wh
輸出功率
2至3位數
連接 USB 裝置的注意事項
(UC18YSL3)
發生未預期的問題時,連接到本產品的 USB 裝置內
的數據可能會損壞或丟失。使用本產品之前,請務
必將 USB 裝置內的所有數據進行備份。
請注意,本公司對任何存儲於 USB 裝置內已損壞或
丟失的數據以及任何可能發生於連接裝置的損害,
恕不負任何責任。
警告
○ 使用前,請檢查連接的 USB 電纜是否有缺陷或損
壞。
使用有缺陷或損壞的 USB 電纜可能會導致冒煙或
起火。
○ 產品不使用時,請用橡膠蓋蓋住 USB 端口。
USB 端口堆積灰塵可能會導致冒煙或起火。
註
○ USB 充電期間有可能偶爾停頓。
○ 當 USB 裝置未被充電時,請從充電器取出 USB
裝置。
若未進行此動作,不僅可能減少 USB 裝置的電池
壽命,並可能導致意外事故的發生。
○ 根據裝置的類型,可能無法對某些 USB 裝置進行
充電。
各部位名稱(圖 1– 圖 21)
真空開關 水箱
銘牌 夾具
集塵按鈕 工具箱(僅 2XC)
操作面板 吸入口 / 排氣口
電池剩餘量指示燈
開關 充電指示燈
電池剩餘量指示燈 電池
電池編號 夾桿
模式顯示燈 電池護蓋
模式變換開關 凹槽
吸入口 端子
腳輪 電池編號
閂扣 濾紙
按鈕 吸入孔
軟管
( 內徑 38mm ×
1.5 m 長 )
紙板
頭 折疊處
握把 彎曲處
過濾器 制動裝置
濾網架 橡膠襯墊
濾網縫 止動桿
吸入口
(水箱內側) 鬆開
水箱口 固定
濾網襯墊 掛鉤螺栓
伸縮管 管吊架
主噴嘴 管托架
螺絲環 縫隙噴嘴
集塵排氣口 電池剩餘量指示燈
電動工具 橡膠罩
適配器(選購配件) USB 端口
接頭(選購配件) USB 電纜
集塵適配器(選購
配件) 塑膠袋
電動工具
符號
警告
以下為使用於本機器的符號。請確保您在使用前
明白其意義。
RP3608DA: 充電式清潔機
使用前請詳讀使用說明書。
始終佩戴眼部保護裝置。
始終佩戴聽力保護裝置。
切勿站在清潔機上。
警告
00BookRP3608DAAsia.indb2000BookRP3608DAAsia.indb20 2019/07/258:36:322019/07/258:36:32
Other manuals for RP 3608DA
3
Table of contents
Languages:
Other HIKOKI Vacuum Cleaner manuals

HIKOKI
HIKOKI RP 3608DB User manual

HIKOKI
HIKOKI R 18DSAL User manual

HIKOKI
HIKOKI R 12DA User manual

HIKOKI
HIKOKI RP 3615DA User manual

HIKOKI
HIKOKI R 36DA User manual

HIKOKI
HIKOKI RP 18DA User manual

HIKOKI
HIKOKI R 18DC User manual

HIKOKI
HIKOKI R 18DA User manual

HIKOKI
HIKOKI RP 3608DA User manual

HIKOKI
HIKOKI R 10DAL User manual