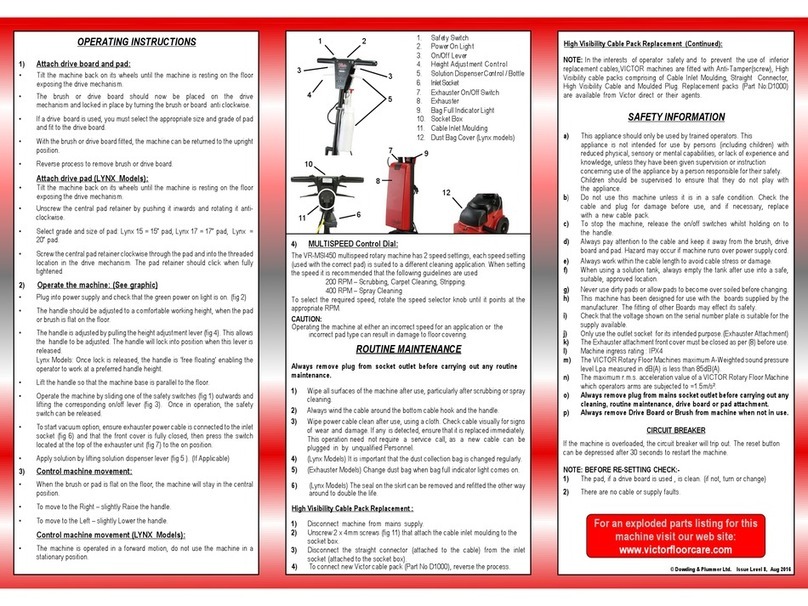
Hillyard Trident BU1500 User manual

Single disc machine - Monocepillos - Monobrosses
Use and Maintenance manual
Manual de uso y mantenimiento
Manuel d’utilisation et d’entretien
TRANSLATED FROM ORIGINAL INSTRUCTION - DOC. 10075110 Ver. AA - 10-2017


3
ENGLISH....................................................................................4
ESPAÑOL..................................................................................18
FRANÇAIS..................................................................................32
ENESFR
3

4
CONTENTS
CONTENTS.......................................................................................................................4
SYMBOLS USED IN THE MANUAL ................................................................................5
PURPOSE AND CONTENT OF THE MANUAL...............................................................5
TARGET GROUP..............................................................................................................5
STORING THE USE AND MAINTENANCE MANUAL.....................................................5
ON DELIVERY OF THE APPLIANCE ..............................................................................5
INTRODUCTORY COMMENT ..........................................................................................5
IDENTIFICATION DATA....................................................................................................6
TECHNICAL DESCRIPTION ............................................................................................6
INTENDED USE................................................................................................................6
SAFETY ............................................................................................................................6
SERIAL NUMBER PLATE ................................................................................................6
TECHNICAL DATA............................................................................................................6
GENERAL SAFETY REGULATIONS...............................................................................7
SYMBOLS USED ON THE APPLIANCE........................................................................10
GETTING TO KNOW THE APPLIANCE ........................................................................10
HANDLING THE PACKED APPLIANCE....................................................................10
HOW TO UNPACK THE APPLIANCE .......................................................................10
HOW TO MOVE THE MACHINE...............................................................................10
HOW TO TRANSPORT THE APPLIANCE................................................................10
HANDLEBAR COMPONENTS ..................................................................................10
HANDLEBAR ADJUSTMENT - WORK POSITION ...................................................11
PAD ASSEMBLY.........................................................................................................11
SUCTION BAG ASSEMBLY ......................................................................................11
PREPARING TO WORK .................................................................................................12
MANOEUVRABILITY OF THE APPLIANCE..............................................................12
WORK.........................................................................................................................13
AT THE END OF THE WORK.........................................................................................13
PERFORM ALL MAINTENANCE OPERATIONS IN SEQUENCE..................................14
PERIODIC MAINTENANCE........................................................................................14
TROUBLESHOOTING.................................................................................................15
BU1500 ELECTRICAL SYSTEM DIAGRAM...............................................................16
DISPOSAL ......................................................................................................................17
ENGLISH
4
4
IT
EN

5
Warning symbol:
Carefully read the sections marked with this symbol and observe the indications, for the safety of the operator and the
appliance.
Explosion risk symbol:
indicates that the battery may explode in certain conditions, if not handled in accordance with the directives indicated in
the manufacturer's manual.
Covered place symbol:
the operations preceded by this symbol must always be carried out in a dry, covered area.
Warning symbol that the carriage is moving:
Indicates that the packed product should be handled with suitable lifting means that comply with the legal requirements.
Open book symbol with an "i":
Indicates the need to consult the instruction manual.
The descriptions contained in this document are not binding. The company therefore reserves the right to make any
modications at any time to elements, details, or accessory supply, as considered necessary for reasons of improvement or
manufacturing/commercial requirements. The reproduction, even partial, of the text and drawings contained in this document
is prohibited by law.
The company reserves the right to make any technical and/or supply modications. The images are shown as a
reference only, and are not binding as to the actual design and/or equipment.
Open book symbol:
Tells the operator to read the manual before using the appliance.
Protective gloves symbol:
Always wear protective gloves, to avoid the risk of serious injury to your hands.
SYMBOLS USED IN THE MANUAL
PURPOSE AND CONTENT OF THE MANUAL
TARGET GROUP
STORING THE USE AND MAINTENANCE MANUAL
ON DELIVERY OF THE APPLIANCE
INTRODUCTORY COMMENT
The aim of this manual is to provide customers with all the information needed to use the appliance in the safest, most appropriate and most
autonomous way. It includes information concerning technical aspects, safety, operation, appliance downtime, maintenance, spare parts and
scrapping. Operators and qualied technicians must read the instructions in this manual carefully before carrying out any operation on the
appliance. If in doubt about the correct interpretation of instructions, contact your nearest Customer Service Centre to obtain the necessary
clarications.
This manual is aimed at operators and qualied technicians
responsible for appliance maintenance. Operators must not perform
operations that should be carried out by qualied technicians. cannot
The Use and Maintenance Manual must be stored in its special pouch close to the appliance, protected from liquids and anything
else that could compromise its legibility.
When the machine is delivered to the customer, an immediate
check must be performed to ensure all the material mentioned in
the shipping documents has been received, in addition to verifying
that the equipment has not been damaged during transportation. If
Any type of equipment can only work properly and effectively if used
correctly and kept in full working order by performing the maintenance
operations described in the attached documentation. You should
therefore read this instruction manual carefully, consulting it again
if difculties should arise while using the machine. If necessary,
be held liable for damages resulting from failure to comply with this
prohibition.
this is the case, the carrier must ascertain the extent of the damage
at once, informing our customer service ofce. It is only by prompt
action of this type that the missing material can be obtained, and
compensation for damage successfully claimed.
remember that our assistance service (organised in collaboration
with our dealers) is always available for advice or direct intervention.
55
IT
EN

6
IDENTIFICATION DATA
For technical assistance or to request replacement parts, always give the model, the version and serial number written on the serial number
plate.
TECHNICAL DESCRIPTION
INTENDED USE
SAFETY
SERIAL NUMBER PLATE
This appliance has been built for the professional cleaning of indoor hard vinyl oors, to be carried out by following the instructions. The
appliance must only be used for this purpose.
This appliance was designed and built to be used by a qualied
operator to clean smooth, compact ooring in the commercial,
residential and industrial sectors, in proven safety conditions.
Operator cooperation is paramount for accident prevention. No
accident prevention programme can be effective without the full
co-operation of the operator who is directly responsible for machine
operation. The majority of occupational accidents that happen both
in the workplace or whilst moving are caused by failure to respect
The serial number plate is located on the lower part of the machine
chassis, and indicates the general characteristics of the appliance,
in particular the appliance's serial number. The serial number is a
very important piece of information and should always be provided
together with any request for assistance or when purchasing spare
parts.
The appliance is only suitable for use in indoor - or at least covered
- areas.
ATTENTION: The appliance is not suitable for use in the rain,
or under jets of water.
the most basic safety rules. An attentive, careful operator is most
effective guarantee against accidents and is fundamental in order to
implement any prevention programme.
6
6
IT
EN
TECHNICAL DATA U/M BU1500
Working width in 20
Brush rotations rpm 1500
Brush motor power W 1100
Brush motor voltage V 120
Brush motor frequency Hz 50 / 60
Maximum gradient with full load % 2
Rear wheel diameter in 3,94
Machine length in 24
Machine height at motor in 11,8
Machine height at shaft in 49,6
Machine width in 21,45
Machine service weight (without solution tank) lb 95
Length of power supply cable yd 16,4

DANGER:
• To reduce the risk of re, electric shock or injury, read and follow all safety and
warning instructions before use. This Vacuum Cleaner is designed to be safe
when used for cleaning functions as specied. In the event of damage to electrical
or mechanical components, it is necessary to repair the vacuum cleaner and / or
accessory concerned at a competent service center or the manufacturer prior to use
to avoid further damage to the appliance or injury physical to the user.
• Before connecting the appliance to the power outlet, check that the electrical data
on the nameplate corresponds to those of the power supply. The appliance must
only be powered by alternating current and with a voltage equal to that indicated on
the serial number plate.
• The power cord outlet must be earthed.
• The power supply cable supplied with the appliance must be used for the aforesaid
appliance and not for other appliances.
• Check for damage to the connection line and the power plug before each use. If the
line is damaged contact a technician immediately to restore the correct operation.
• Connect the appliance only to an electrical connection installed by an electrical
installer in accordance with IEC 60364-1.
• Never touch the power plug with wet hands.
• Be careful that the power cord or extension cord will not be damaged by passing,
crushing, pulling or the like. Protect the cable from heat and contact with sharp oils
or edges.
• Regularly make sure that the power cord is not damaged, for example with cracks
or aging. If a damage is detected, the cable must be replaced before reusing the
appliance.
• Water splash protection and mechanical resistance must also be ensured even after
the cable or cable extension joints have been replaced.
• Do not clean the appliance with a hose or high pressure water jet (risk of short
circuits or other electrical faults).
CAUTION:
The insertion transient causes a temporary voltage drop.
Under unfavorable network conditions, other equipment may be damaged.
These damages are expected if the network impedance is less than 0.15Ω.
CONNECTION TO THE ELECTRIC TAKING
7
GENERAL SAFETY REGULATIONS
The regulations below must be carefully followed in order to avoid harm to the
operator and damage to the appliance.
77
IT
EN

8
WARNING:
• This appliance should not be used by people (including children) with reduced
physical, sensorial and mental capabilities, or by people without any experience
or knowledge, unless they have been controlled and instructed in the use of the
appliance by people responsible for their safety. Children must be supervised to
ensure they do not play with the appliance.
• Carefully read the labels on the appliance. Do not cover them for any reason and
replace them immediately if they become damaged.
• The appliance must always be stored and used in a closed place.
• The appliance must be only used by authorised, trained personnel.
• Do not use the appliance on surfaces with an inclination greater than the one shown
on the serial number plate.
• Always make sure that the work surfaces, oors and ramps, are able to withstand
the weight of the appliance.
• The appliance is not suitable for cleaning rough or uneven oors. Do not use the
appliance on slopes.
• In the event of danger, quickly remove the power cable plug from the mains socket.
• For all maintenance interventions, switch off the machine and disconnect the power
cable from the socket.
• To prevent unauthorised use of the machine, the power supply should be interrupted,
switch off the appliance and pull out the power cable from the socket.
• Children must be supervised to ensure they do not play with the device.
• When using the appliance, pay attention to other people and especially to children.
• The appliance must only be powered with a voltage and a frequency equal to that
shown on the serial number plate.
• When left unattended, the appliance must be protected from unintentional
movements.
• Do not approach the machine with clothes that can get entangled, AVOID the use of
scarves, shawls, wraps and loose clothing.
• Avoid working over pieces of rope, wire, cables: these can be caught in the brush
and create friction.
WARNING:
• The appliance must not be used or kept outdoors, in damp conditions or directly
exposed to rain.
• The appliance must be stored in a closed area with a temperature between -13°F
and +131°F.
• Conditions of use: room temperature between 32°F and 104°F, with relative humidity
between 30 and 95%.
8
8
IT
EN

9
• The machine is not suitable for cleaning carpets or textile oors.
• Polishing operations should only be carried out in areas where the passage
of unauthorised persons is prohibited. Signal the presence of work areas with
suitable signs.
• The socket for the machine power cable must have a prescribed earth connection.
• Avoid damaging the machine power cable by crushing or bending it, or by applying
stress.
• Attention: do not let the power cable come into contact with the rotating brush.
• The appliance does not cause harmful vibrations.
• If the appliance is used in dangerous areas (for example, gas stations), the
relative safety norms should be observed. The appliance must never be used in
environments with a potentially explosive atmosphere.
• Do not place any liquid containers on the appliance.
• In the event of a re, use a powder extinguisher. Do not use water.
• Adapt the speed to the adhesion conditions.
• Avoid using the brushes while the appliance is at a standstill, so as not to damage
the oor.
• Do not knock against shelving or scaffolding, where there is a danger of falling
objects. The operator must always be equipped with the appropriate safety devices
(gloves, shoes, helmet, goggles, etc.).
• If the appliance does not work properly, check this is not caused by failure to
carry out routine maintenance. Otherwise, ask for intervention of the authorised
technical assistance centre.
• If you need to replace any components, request the ORIGINAL spare parts from
an Authorised dealer and/or Retailer.
• Restore all electrical connections after any maintenance interventions.
• Have the appliance checked by an authorised technical assistance centre every
year.
• When disposing of consumable materials, observe the laws and regulations in
force. When, after years of valuable work, your appliance needs to be nally
decommissioned, dispose of the materials contained in it appropriately, bearing in
mind that the appliance is made of fully recyclable materials.
• If the power supply cable gets damaged, the appliance must be stopped if it is
operating. Disconnect the plug from the power supply, and have the cable replaced
immediately by an authorised service centre.
• Before using the appliance, check that all the hatches and covers are positioned
as shown in this Use and Maintenance Manual.
• Only use the discs supplied with the device, or those specied in the Instruction
Manual. The use of other discs could compromise safety levels.
99
IT
EN

10
Appliance's earth symbol:
Indicates the earth connection point of the appliance's electric system.
Maximum gradient symbol:
Indicates the maximum gradient.
SYMBOLS USED ON THE APPLIANCE
GETTING TO KNOW THE APPLIANCE
HANDLING THE PACKED APPLIANCE
Since the packaging elements (plastic bags, staples, etc.) are
a potential source of danger, they should not be left within the
reach of children, disabled persons, etc.
The overall weight of the appliance with packaging is 99,2lb
(weight of empty machine plus packaging).
The dimensions of the package are as follows:
HOW TO UNPACK THE MACHINE
1.The machine is xed inside the box by means of reinforcements; remove them and set them
aside for future transport.
2.Remove the outer packaging.
3.Use a chute to get the machine down from the pallet, pulling it backwards.
4.Keep the pallet for any future transport needs.
WARNING: if the product is delivered in cardboard
containers, handle the packed product with suitable
lifting means that comply with the legal requirements.
.
HOW TO MOVE THE MACHINE
1.Check that the solution tank is empty (optional)
2.Remove the pad holder from the base (see corresponding chapter
“DISASSEMBLING THE BRUSH”)
3.Position the single brush on the pallet by means of a chute
4.Insert the cardboard box and the previously kept supports
HANDLING AND TRANSPORTATION OF THE MACHINE
To handle the machine safely, proceed as follows:
1.Check that the solution tank (optional) is empty
2.Rotate the handlebars to the rest position (see chapter HANDLEBAR ADJUSTMENT)
and x them in this position
3.Tilt the machine, by putting a foot into the rear of the base body, so only the rear
wheels touch the ground and the machine can move freely.
HANDLEBAR COMPONENTS
The handlebar components are identied as follows:
1.Main switch control lever
2.Handlebar tilt adjustment lever
3.Man present push-button
10
10
IT
EN
X%
U/M BU1500
Ain 27,2
Bin 22,8
Cin 48,4

11
HANDLEBAR ADJUSTMENT – WORK POSITION
Before you start working with the machine, you will need to nd the correct work position. To do this,
press the tilt adjustment lever, release it until your arms are slightly bent and as low as possible, while
keeping the back straight and the legs slightly apart.
When working the operator is behind the machine.
PAD ASSEMBLY
To insert the brush:
1.Make sure the power supply cable is unplugged from the mains socket
2.Make sure that the handlebar is in rest position (vertical compared with the machine)
3.Tilt the machine until bringing the handlebars down to the ground, by putting a foot into the rear of
the base body
4.Use the supplied handle (1) to loosen the male center lock (2) by turning it counter clockwise.
5.Place the pad onto the pad holder (3).
6.Keep the pad in position with one hand, screw the male center lock and then lock it using the handle.
SUCTION BAG ASSEMBLY (VERSIONS V)
To insert the suction bag:
1.Make sure the power supply cable is unplugged from the mains socket
2.Make sure that the handlebar is in rest position (vertical compared with the machine)
3.Lift the bag cover (1) up
4.Insert the collection bag (2) into the suction coupling (3) having care not to damage the cardboard
support of the bag.
5.Ret the cover making sure that the bag is completely inside without being squashed by the cover’s
rims
WARNING: you are advised to always wear
protective gloves, to avoid the risk of serious injury to
your hands
11 11
IT
EN

12
MANOEUVRABILITY OF THE MACHINE
PREPARING TO WORK
12
12
IT
EN
1.Make sure the power supply cable is not damaged
2.Plug the power supply cable of the machine into the mains socket
3.Bring the handlebar into work position by acting on the release lever
The rst time an operator uses the machine, he/she should become familiar with the movements to
be imparted to the shaft in order to be condent enough with the directionality of movement of the
machine, and should therefore not operate the machine near people or obstacles.
Work in slow movements to the right and left, possibly moving back so that the operator always
stands on an area of the oor yet to be cleaned up.
Keep the power supply cable behind the operator, taking care not to operate the machine in its
vicinity in order not to damage it.
Do not insist too much on the same area so as to avoid damaging the oor, also in function of the
type of brush or abrasive oor pad chosen.
In operation, the machine moves to the right by slightly lifting the handlebars.
In operation, the machine moves to the left by slightly lowering the handlebars.

13
WORK
AT THE END OF WORK
WARNING: you are advised to always
wear protective gloves, to avoid the risk of
serious injury to your hands
13 13
IT
EN
1.At this point, by pressing the man present push-button and activating the main switch control lever (1),
the machine can operate at full efciency
2.Drive the machine with the disc rotating from left to right or in reverse
3.Immediately afterwards, drive the machine in a similar way but in reverse, so that about one quarter of
the working width overlaps the previous one
At the end of the work, and before carrying out any type of maintenance, perform the following
operations:
1.Disconnect the plug from the mains socket
2.Wrap it onto the rear brackets
3.Operate the handlebar adjustment lever (1) and set the column at rest
4.Move the machine indoors, in an area where it cannot cause any damage to people or surrounding
property, but where it can also be protected against the accidental fall of objects. In addition, do not park
the machine in open places or on sloping oors
5.Remove the pad (for brush removal refer to the section ‘PAD REMOVAL’ below)
6.Lift the bag cover (1) up
7.Take the collection bag (2) out of the suction coupling (3) having care not to damage the
cardboard support of the bag and to prevent dirt inside of the bag from coming out.
8.Ret the new collection bag and the cover making sure that the bag is completely inside
without being squashed by the cover’s rims

14
WARNING: This operation must be carried
out using gloves to protect against contact
with dangerous solutions.
WARNING: Have the rear and side wheels
adjusted by a qualied technician to avoid
irreparable damages to the machine.
PERFORM ALL MAINTENANCE OPERATIONS IN SEQUENCE
PERIODIC MAINTENANCE
14
14
IT
EN
DISASSEMBLING THE BRUSHES-PAD HOLDER
1.Make sure the power supply cable is unplugged from the mains socket
2.Check that the handlebars are in the rest position
3.Tilt the machine until bringing the handlebars down to the ground, by putting a foot into the rear
of the base body
4.Use the supplied handle to loosen the male center lock by turning it counter clockwise
5.Remove the pad from the pad holder
6.Screw the male center lock by turning it counter clockwise and lock it with the handle
REAR - SIDE WHEEL ADJUSTMENT
Check the rear (1) and side (2) wheels adjustment to ensure the machine works perfectly.

15
TROUBLESHOOTING
15 15
IT
EN
THERMAL CUT-OUT
The machine is equipped with the following electrical protection systems, thermal cut-out (1), located
off the handlebars, to protect the motor. In the event of malfunctioning, check a thermal cut-out has not
intervened. If the motor overheats, its thermal cut-out intervenes to block the electricity supply. Wait a few
minutes until it has cooled down, then press the specic trip unit button to reactivate the power supply
and motor operation.
THE MACHINE VIBRATES OR OSCILLATES
In case the machine vibrates or oscillates during its operation, or has been sitting in rest position for too
long, with the pad still inserted, replace it as soon as possible.
MOTOR BRUSH WEAR INDICATOR
The machine is provided with a red warning light which indicates the base motor brushes are worn out.
When it is on contact a COMAC technician as soon as possible to replace the brushes.

16
BU1500 ELECTRICAL SYSTEM DIAGRAM
16
16
IT
EN
POSITION COMPONENT NAMES
1 Cut-out 16A
2 Operating switch 20A
4Network lter
5Rectier
6 Motor winding
7 Thermal probe
8 Thermal alarm Led
9 115V, 60Hz motor
10 Plug 16A
POSITION COMPONENT NAMES
1 Cable 3x1.5x15 metres + plug -1-
2 Cable 3x1.5x1600 -2-
3 Brown cable 1.5x150 -3-
5 Yellow/green cable 1.5x140 -5-
ABRR CABLE
BK Black
BU Blue
BN Brown
RD Red
WH White
GY Grey
GNYE Yellow-green
GN Green
YE Yellow

17
DISPOSAL
17 17
IT
EN
To dispose of the machine, take it to a demolition centre or an authorised collection centre.
Before scrapping the machine, it is necessary to remove and separate the following materials and
then send them to the appropriate collection centres, in accordance with the currently effective
environmental hygiene regulations:
•brushes
•lter
•electric and electronic parts*
•plastic parts (tanks and handlebars)
•metal parts (levers and frame)
(*) In particular and in order to scrap the electric and electronic parts, contact your area distributor.
PROBLEM POSSIBLE CAUSE SOLUTION
THE APPLIANCE DOES NOT SWITCH ON
The power cable extension is not connected
to the mains socket.
Check that the plug on the extension cable
has been inserted into the mains supply
socket.
The power cable extension is not connected
to the appliance's power cable.
Check that the plug on the cable of the
appliance has been inserted into the socket
on the extension cable.
The electrical specications of the appliance
should correspond to the electrical
specications of the power supply network.
Make sure that the electrical specications
of the appliance correspond to the electrical
specications of the power supply network,
check the technical information on the serial
number plate.
Extension cable damaged. Check the extension cable is not damaged,
and if it is, replace it.
Overheating of the brush head motor.
Make sure that the thermal breaker on the
back of the handlebar has not tripped. If it
has, wait a few minutes until it has cooled
down, then press the specic circuit breaker
button to reactivate the power supply and
motor operation
INSUFFICIENT DETERGENT SOLUTION
ON THE PAD HOLDER
The amount of detergent in the solution tank
is insufcient for the work that needs doing.
Make sure that the amount of detergent
solution in the solution tank is sufcient for
the work to be carried out, and if necessary
ll the solution tank.

ÍNDICE
ÍNDICE ............................................................................................................................18
SIMBOLOGÍA UTILIZADA EN EL MANUAL..................................................................19
OBJETIVO Y CONTENIDO DEL MANUAL....................................................................19
DESTINATARIOS............................................................................................................19
CONSERVACIÓN DEL MANUAL DE USO Y MANTENIMIENTO .................................19
RECEPCIÓN DE LA MÁQUINA .....................................................................................19
ADVERTENCIA PREVIA.................................................................................................19
DATOS DE IDENTIFICACIÓN ........................................................................................20
DESCRIPCIÓN TÉCNICA...............................................................................................20
USO INDICADO - USO PREVISTO................................................................................20
SEGURIDAD...................................................................................................................20
PLACA DE LA MATRÍCULA...........................................................................................20
DATOS TÉCNICOS.........................................................................................................20
NORMAS GENERALES DE SEGURIDAD.....................................................................21
SIMBOLOGÍA UTILIZADA EN LA MÁQUINA................................................................24
CONOCIMIENTO DE LA MÁQUINA...............................................................................24
DESPLAZAMIENTO DE LA MÁQUINA EMBALADA.................................................24
DESEMBALAJE DE LA MÁQUINA............................................................................24
CÒMO TRANSPORTAR LA MÁQUINA....................................................................24
MOVIMIENTO Y TRANSPORTE DE LA MAQUINA..................................................24
COMPONENTES MANILLAR....................................................................................24
REGULACIÒN MANILLAR ........................................................................................25
MONTAJE TAMPÒN..................................................................................................25
MONTAJE BOLSA ASPIRACIÒN (VERSION V).......................................................25
TRABAJO..................................................................................................................26
AL FINALIZAR EL TRABAJO........................................................................................27
MANTENIMIENTO ..........................................................................................................28
REALIZAR TODAS LAS OPERACIONES DE MANTENIMIENTO EN SECUENCIA 28
REGULACIÒN RUEDAS TRASERAS - LATERALES................................................28
PROTECCIONES TERMICA’S.................................................................................. 29
ESQUEMA INSTALACIÒN ELECTRICA BU1500......................................................30
ELIMINACIÒN............................................................................................................31
ESPAÑOL
1818
18
IT
ES

Símbolo de advertencia:
Leer atentamente las secciones precedidas por este símbolo respetando estrictamente lo que indican, para la seguridad
del operador y de la máquina.
Símbolo de peligro de explosión:
Indica que la batería, si no es tratada según las directivas indicadas en el manual de fabricante, puede explotar en
determinadas condiciones.
Símbolo de lugar cubierto:
Los procedimientos precedidos del siguiente símbolo deben ser realizados rigurosamente en un lugar cubierto y seco.
Símbolo de advertencia carros en movimiento:
Indica desplazamiento del producto embalado con carros de transporte adecuados conformes con las disposiciones
legales.
Símbolo del libro abierto con la i:
Indica que se deben consultar las instrucciones de uso.
Las descripciones contenidas en esta publicación no se consideran vinculantes. Por tanto, la empresa se reserva el derecho de aportar en
cualquier momento las eventuales modicaciones en órganos, detalles, suministros de accesorios, que considere conveniente para una
mejora o debido a cualquier exigencia de carácter constructivo o comercial. La reproducción, incluso parcial, de los textos y de los diseños
contenidos en esta publicación está prohibida por la ley.
La empresa se reserva el derecho de aportar modicaciones de carácter técnico y/o de equipamiento. Las imágenes deben
considerarse una simple referencia y no son vinculantes en términos de diseño y equipamiento.
Símbolo de libro abierto:
Indica al operador que debe leer el manual de uso antes de utilizar la máquina.
Símbolo guantes de protección:
Indica al operador que siempre debe llevar guantes de protección para evitar lesiones graves en las manos.
SIMBOLOGÍA UTILIZADA EN EL MANUAL
OBJETIVO Y CONTENIDO DEL MANUAL
DESTINATARIOS
CONSERVACIÓN DEL MANUAL DE USO Y MANTENIMIENTO
RECEPCIÓN DE LA MÁQUINA
ADVERTENCIA PREVIA
Este manual tiene el objetivo de suministrar al cliente toda la información
necesaria para utilizar la máquina de la manera más adecuada,
autónoma y segura posible. El mismo contiene información acerca de
los aspectos técnicos, la seguridad, el funcionamiento, el período de
inactividad de la máquina, el mantenimiento, las piezas de repuesto
Este manual está dirigido tanto al operador como a los técnicos
cualicados encargados del mantenimiento de la máquina. Los
operadores no deben realizar las operaciones reservadas a los
El Manual de Uso y Mantenimiento debe conservarse en un lugar
cercano a la máquina, dentro del sobre correspondiente, protegido
En el momento de la recepción de la máquina, es indispensable
asegurarse inmediatamente de haber recibido todo el material
indicado en los documentos de expedición y, además, de que
la máquina no haya sufrido daños durante el transporte. En la
Todas las máquinas pueden funcionar bien y trabajar
provechosamente tan solo con usarlas correctamente y manteniendo
su plena eciencia, que se obtiene siguiendo el mantenimiento
descrito en la documentación anexa. Por lo tanto solicitamos que
se lea cuidadosamente este manual de instrucciones y volver a
y el desguace. Antes de efectuar cualquier operación en la máquina,
los operadores y los técnicos cualicados deben leer atentamente las
instrucciones contenidas en el presente manual. En caso de dudas
sobre la interpretación correcta de las instrucciones, solicitar al centro
de asistencia más cercano las aclaraciones necesarias.
técnicos cualicados. no responderá por daños derivados de la
inobservancia de esta prohibición.
de líquidos y todo lo que puede afectar su legibilidad.
armativa, hágase constatar por el transportista el daño sufrido,
avisando al mismo tiempo nuestro departamento de asistencia
clientes. Sólo actuando tempestivamente será posible obtener el
material que falta y la indemnización del daño.
leerlo cada vez que durante el empleo de la máquina ocurriesen
dicultades. En caso de necesidad, recordamos que nuestro servicio
de asistencia, que está organizado en colaboración con nuestros
concesionarios, queda siempre a disposición para eventuales
consejos o intervenciones directas.
1919 19
IT
ES

DATOS DE IDENTIFICACIÓN
Para la asistencia técnica o para solicitar partes de recambio, citar siempre el modelo, la versión y el número de matrícula que se encuentra
en la correspondiente placa de matrícula.
DESCRIPCIÓN TÉCNICA
USO INDICADO - USO PREVISTO
SEGURIDAD
PLACA DE LA MATRÍCULA
Esta máquina ha sido construida para la limpieza profesional de pavimentos duros y vinílicos para supercies internas, que debe realizarse
siguiendo las instrucciones. La máquina debe usarse sólo para esta nalidad.
Esta máquina se ha diseñado y fabricado para la limpieza de
pavimentos lisos y compactos, en locales comerciales, civiles e
industriales, en condiciones de seguridad vericada, por parte de
un operador cualicado.
Para evitar accidentes, la colaboración del operador es esencial.
Ningún programa de prevención de accidentes puede ser ecaz sin
la colaboración total de la persona directamente responsable del
funcionamiento de la máquina. La mayor parte de los accidentes que
ocurren en una empresa, en el trabajo o en los traslados, se deben
La placa de matrícula se encuentra en la parte inferior del chasis de
la máquina y contiene las características generales de la máquina,
en particular, su número de serie. El número de serie es una
información muy importante que se debe comunicar en cualquier
pedido de asistencia o compra de repuestos.
La máquina es apta para ser usada exclusivamente en ambientes
cerrados o cubiertos.
ATENCIÓN: La máquina no es apta para usar bajo la lluvia o
chorros de agua.
al incumplimiento de las reglas de prudencia más elementales.
Un operador atento y prudente es la mejor garantía contra los
accidentes y resulta indispensable para completar cualquier
programa de prevención.
2020
20
IT
ES
TECHNICAL DATA U/M BU1500
Anchura de trabajo in 20
Rotaciones de cepillo rpm 1500
Cepillo de potencia del motor W 1100
Tensión del motor del cepillo V 120
Frecuencia del motor del cepillo Hz 50/60
Gradiente máximo con carga completa % 2
Diámetro de la rueda trasera in 3,94
Largo de la máquina in 24
Altura de la máquina en el motor in 11,8
Altura de la máquina en el eje in 49,6
Ancho de la máquina in 21,45
Peso del servicio de la máquina (sin tanque
de solución) lb 95
Longitud del cable de suministro de energía yd 16,4
Table of contents
Languages:
Other Hillyard Floor Machine manuals
Hillyard
Hillyard TRIDENT T26 SC PLUS User manual

Hillyard
Hillyard TRIDENT T26SC PLUS User manual
Hillyard
Hillyard TRIDENT EX20 User manual

Hillyard
Hillyard TRIDENT XM13SC User manual
Hillyard
Hillyard TRIDENT EX12 User manual
Hillyard
Hillyard Trident EX8 User manual
Hillyard
Hillyard TRIDENT EX7 User manual
Popular Floor Machine manuals by other brands

Nilfisk-Advance
Nilfisk-Advance SW 750 Service manual

Triple S
Triple S Ace 26T1 user guide
Viper
Viper AS4325B Instructions for use

Crescent
Crescent SC8000 troubleshooting guide
WOLFF
WOLFF OMEGA Series Translation of the original manual

NINJA WARRIOR
NINJA WARRIOR Century 400 1200 PSI NWCU1312N 10070700 operating instructions

