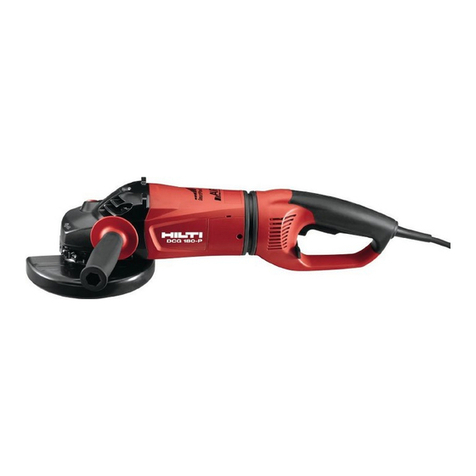
Hilti DG150 User manual

DG150
Bedienungsanleitung 1–10
Operating instructions 11–20
Moded’emploi 21–30
*371747*
371747
D
GB
F

1

3
2
21
22
24
26
27
29
28
25
23

11
It is essential that the operating
instructions are read before the
tool is operated for the first time.
Always keep these operating
instructions together with the tool.
Ensure that the operating instruc-
tions are with the tool when it is
given to other persons.
DG150 grinder with DPC20
Operating controls and
component parts of the DG150
On/offswitch
Sidehandle
Guardassemby
Adjustingscrew
Clampinglever
Indicatorlamp (LED)
Supplycord plug
Speedcontrol switch(settings 1and 2)
Sidehandle fasteningscrew
Clampingband
Wrench
Clampingnut
Diamondcup wheel
Lamellarseal, small
Clampingflange
Lamellarseal, large
Retainingring
Spindle
Circlip
Guardlower section
21
Guardupper sectionwith hoseconnector
22
Spindlelockbutton
Operating controls and component parts of the
DPC20
23
Indicatorlamp (LED)
24
Supplycord
25
Guiderib
26
Carrying handle
27
Supplycord holder
28
Electricsocket withcover
29
Lockinglug
1. General information
Thesenumbers referto the tool’soperatingcontrols
orindicators.
These numbers refer to the corresponding illustra-
tions.Theillustrationscanbe found onthefold-outcov-
erpages.Keepthesepages open whilestudyingtheoper-
atinginstructions.
In these operating instructions, the DG150 with the
DPC20 isreferred toas «thetool».
Location of identification data on the tool
The type designation and serial number can be found
onthe type plateonthe tool.Makea noteofthisdata in
youroperating instructionsand always referto itwhen
making an enquiry to your Hilti representative or ser-
vice department.
Type:
Serial no.:
Type:
Serial no.:
Contents Page
1.General information 11
2.Description 12
3.Toolsand accessories 13
4.Technicaldata 13
5.Safety precautions 14
6.Before use 16
7.Operation 17
8.Care andmaintenance 18
9.Troubleshooting 18
10.Disposal 19
11.Warranty 20
12.Declaration ofconfirmity See cover

12
1.1 Indication of danger
WARNING
Usedtodraw attentiontoa potentially dangeroussituationwhich could leadtoserious personalinjury orfatalacci-
dent.
CAUTION
Used to draw attention to a potentially dangerous situation which could lead to minor personal injury or damage
to the equipment or other property.
NOTICE
Usedtodraw attentiontoan instruction orotheruseful information. Itisnot usedtoindicatedangerous situations
or situations that could lead to damage to the equipment or other property.
1.2 Pictograms
2. Description
TheDG150 is anelectrically-powereddiamondgrindingtool forusebytradesmenin theconstructionindustryfor
grindingmineral materials.TheDG 150canbe operatedonly in conjunctionwith theDPC20 which,together, thus
forma system.
Items supplied
1 DG150 grinder
1 DPC20 powerconditioner
1 Clampingflange
1 Clampingnut
1 Wrench
1 Protectivegoggles
1 Operatinginstructions
Obligation signs
Warning signs
General
warning Warning:
electricity Warning:
avoid hand
injuries
Warning:
hot surface Wear eye
protection Safety helmet
must be worn Wear ear
protection Wear protective
gloves
Read the
operating
instructions
before use.
Wear breathing
protection Wear protective
clothing

13
4. Technical data
DG150 DPC20
Nominalvoltage 100V 110 V 120V 220 V 230V 240 V
Nominalcurrent 15A 16 A 15A 9.6 A 9.2A 8.8 A
Powerinput 1500W 1760 W 1800W 2100 W 2100W 2100 W
Poweroutput 1070W 1260 W 1285W 1500 W 1500W 1500 W
Mainsfrequency 50/60Hz 50/60 Hz 60Hz 50/60Hz 50 Hz 50Hz
No-loadspeed atsetting no.1 4700 r.p.m.
No-loadspeed atsetting no.2 6600 r.p.m.
Weight 4.1kg 3.8kg 3.8 kg 3.8kg 3.4 kg 3.4kg 3.4 kg
Dimensions(l×w×h) 46×25×23cm 27×22×15cm
Electricalprotection class Protectionclass IIZ(double insulated)
Interferenceimmunity as perEN 55014-2
Radioand televisioninterference suppression as per EN 55014-1
Noise and vibration information (in accordance with EN 50144)
TypicalA-weighted soundpower level(LWA) 88 dB(A)
TypicalA-weighted emissionsound
pressurelevel (LpA) 101 dB(A)
Typicalweighted vibrationat thegrip 4.0 m/s2
Other significant characteristics of the appliance
Timetostop afterswitching off ≤2sec.
Thermaloverload protection
Restartsafety interlock
Rightoftechnicalchanges reserved
3. Diamond cup wheels and accessories
Hilti item
Diamond cup wheels Use/material
DG-CW150/6″A1 Grinding highly abrasive materials such as screed and similar mineral
materials
DG-CW150/6″B1 Grinding to remove coatings with a maximum layer thickness of 3 mm from
concreteand similarmineral materials
DG-CW150/6″C1 Grinding concrete and similar mineral materials of medium hardness and
mediumabrasiveness
DG-CW150/6″C10 Grinding concrete
DG-CW150/6″C2 Grinding concrete and similar very hard and highly abrasive mineral materials
DG-CW150/6″D1 Fine finishing of concrete and similar mineral material surfaces
Lamellarseals One largelamellar sealand onesmall lamellarseal
Retainingring Retaining ringfor attachingthe largelamellar sealto thedust hood
DG150 toolbox Carrying case
VCD50L Dry-type vacuumcleaner
Clampingflange forDG150 Special quick-stopcompatible clampingflange tobe usedexclusively
forfitting HiltiDG-CW 150/6″diamond cupwheels
Clampingnut forDG150 SpecialM13 clampingnut forfitting HiltiDG-CW 150/6″
diamondcup wheels

14
5. Safety precautions
5.1 Basic safety information
In addition to the safety precautions listed in the indi-
vidual sections of these operating instructions, the fol-
lowingpoints mustbe strictlyobserved at all times.
5.2 Correct use
The DG150 may be operated only in conjunction with
theDPC20.TogetherwiththeHiltiVCD50Landthecor-
responding DG-CW 150/6" diamond cup wheels, the
DG150forms averyadvantageouselectrically-powered,
hand-held grinding system that releases a minimum of
dust. In order to ensure optimum dust extraction, an
industrial vacuum cleaner in good working condition
mustbe usedat alltimes. Toensure safeoperation, the
DG150may beusedonlytogetherwithoriginal Hilti cup
wheels.TheDG150isdesignedexclusivelyfordrygrind-
ing on the surface of concrete or similar mineral mate-
rials and for removing thin coatings, with a maximum
thicknessof 3mm, fromthese materials.
Thelocallyapplicablehealthregulations and corresponding
safety precautions must be observed and implemented
at all times while grinding coated or uncoated mineral
materialswith theDG150.
Do not, under any circumstances, use the tool in any
way other than as described in the operating instruc-
tions.
5.3 Incorrect use (misuse)
●The tool is not suitable for grinding metals, wood or
othermaterials notlisted atparagraph 5.2.
●The tool is not suitable for use with diamond cutting
discs, abrasive cutting or grinding discs, wire brushes
orotherinserttoolsnotapprovedforuse(seesection3).
●Thetool isnot suitablefor wetgrinding.
●Donot clampthe toolin avice.
●Grinding materials containing asbestos is not per-
missible.
●Materialscontainingsubstanceshazardousto health
may be ground only after consultation with the local
authority responsible for safety at work and in accor-
dancewiththelocally applicable regulationsconcerning
safetyat work.
●Diamondcupwheels,clampingflanges and clamping
nuts not listed in section 3 "Diamond cup wheels and
accessories"may notbe used.
5.4 State of the art
●The tool is designed and manufactured according to
thestate ofthe art.
●Thetoolanditsancillaryequipment may presenthaz-
ards when used incorrectly by untrained personnel or
notas directed.
5.5 Proper arrangement and organisation of the work-
place
●Work from a safe stance and remain in balance at all
times.
●Whenworkingoutdoors,the use ofrubberglovesand
non-slipshoes isrecommended.
●Avoidunfavourablebody positions.
●Ensurethat theworkplace iswell lit.
●Objectswhichcouldcauseinjury shouldberemoved
fromthe workingarea.
●Keepotherpersons,childrenin particular,outsidethe
areaaffected(toolandsupply cord) whileyouarework-
ing.
●Grindingoffprojectingobjectssuch as nailsandscrews
etc. is not permissible. Such objects must be removed
carefullybefore beginninggrinding.
●Do not wear loose clothing, loose long hair and jew-
ellery whichcould becomecaught upin movingparts.
●Alwaysleadthesupplycord, extension cordandextrac-
tionhose awayto therear whenworking.
●Takecaretoavoidtrippingoverthe supply cord,exten-
sioncord orextraction hose.
●Donotexposethe tool torainorsnowand do notuse
itin dampor wetareas or wherethere isa riskof fire or
explosion.
●Avoid a high dust concentration by ensuring that the
workplaceis wellventilated.
●The side handle must be fitted to the tool at all times
whenin use.
●Keepthegripsdry,cleanandfree fromoilandgrease.
●Thetool mustbe heldby bothhands whenin use.
●Useclamps ora viceto secureloose workpieces.
●Takecareof thecup wheels.Youwill workmore effi-
ciently and more safely if the cup wheels are kept clean
andsharp(segmentsunpolished). Observe themainte-
nance regulations and instructions on changing cup
wheels.
●Takecareto avoid concealed electric cables,gas and
water pipes. Check the working area, e.g. using a metal
detector.
●Sparks may fly when grinding. Take care to ensure
that flying sparks do not present a hazard to other per-
sons. Due to the risk of fire, grinding must not be car-
ried out in the vicinity of inflammable materials (within
thearea offlying sparks).
●Forincreasedpersonalsafety,theuseofaground fault
interrupter / residual current device (30 mA) is recom-
mendedundercertaincircumstances,e.g.invery damp
conditions or where large quantities of conductive dust
areproduced.

15
5.6 Information on emissions
5.6.1 Dust
CAUTION
Grindingmay producehazardous dust.
●Before starting work, find out to which dangerous
materialclassthe grindingdustproducedbelongs. Use
thetoolinconjunction with anindustrialvacuumclean-
er with an officially approved safety classification and
which complies with the local dust protection regula-
tions.
●When grinding, the industrial vacuum cleaner used
must be equipped with a filter suitable for the applica-
tion.
●Conductive dust may collect inside the tool when
grinding conductive materials. This may have a nega-
tive effect on the insulation of the tool and cause elec-
tric shocks. As a result, tools used for this application
must be checked by a technical specialist or Hilti
service departmentatleast everysixmonths toensure
integrityofthe insulationandto check forpossibleaccu-
mulation of conductive dust or other conductive sub-
stances.
5.7 General hazards presented by the tool
●Operate the tool only as directed and only when it is
infaultless condition.
●Unplug the supply cord when the tool is not in use
(e.g. during pauses between work), before cleaning or
maintenanceand whenchanging cupwheels.
●Neverleave thetool unsupervised.
●Whennotinuse,the tool mustbestoredinadryplace,
lockedup orout ofreach ofchildren.
●Operatethetoolonly together withitsrespectivesafe-
tyequipment.
●Donotoverloadthetool. The tooloperatesmoreeffi-
ciently and more safely within its given performance
range.
●Donot usethetool forpurposesfor whichit was not
intended (e.g. attaching drill bits or similar, fitting saw
bladesfor cuttingwood, etc.).
●Avoid unintentional starting. Do not keep your finger
onthe on / off switchwhile carrying the toolwhen con-
nectedto themains supply.
●Checktheconditionof the cupwheelbeforeitis used.
●Useonlytheoriginalaccessories or itemsofadditional
equipment listed in the operating instructions. The use
ofothercupwheelsor accessories maypresentariskof
injury.
●Followtheinstructionsgivenby Hilti whenfittingand
usingcup wheels.
●Testnewcupwheels byallowingthemtorunatmax-
imumspeed forat least30 secondsbefore use.
●Damaged cup wheels of cup wheels that run out of
round(vibration) mustnot beused.
●Donotsubjectcupwheels to impactsandkeepthem
freefrom grease.
●-CAUTION- The tool continues to run for approx. 2
secondsafter switchingoff.
●Do not attempt to brake the rotating cup wheel by
applyinglateral pressure.
5.7.1 Mechanical hazards
●Donotleavewrenchesetc. attached tothetool.Before
switching on, check that wrenches and adjusting tools
havebeen removed.
●Check whether parts have suffered damage and that
allmovingpartsfunctionfaultlessly without sticking.All
parts must be fitted correctly and fulfil all of the condi-
tionsnecessary toensurefaultlessoperationofthe tool.
●Useonly originalHilti cupwheels.
●Themounting holeinthe cupwheelmust fitthecen-
tring collar of the clamping flange without play. Do not
use reducers or adaptors. Before switching on, check
thatthe cupwheel isfitted correctlyand freeto rotate.
●Alwaysswitchoffthetool and unplugthesupplycord
beforefitting orremoving thecup wheel.
●Observe the direction of rotation arrow when fitting
thecup wheel.
5.7.2 Electrical hazards
●Protectyourselffromelectric shocks. Avoidbody con-
tactwith earthedobjects, e.g.pipes andradiators.
● Check the condition of the tool including the supply
cordandextensioncordas well astheplugconnections.
Do not operate the tool if damage is found, if the tool is
notcomplete orif itscontrols cannotbe operatedfault-
lessly.
●Nevercarry thetool bythe supplycord.
●Grip the plug and not the cable when pulling it out of
thesocket.
●Do not expose the supply cord to heat, oil or sharp
edges.
●Donottouchthe supply cordintheeventof it becom-
ingdamagedwhileworking.Disconnect the supplycord
plugfrom thesocket.
●Disconnectthesupplycord plug fromthesocketwhen
thetoolisnotin use, beforemaintenance,beforechang-
ing cup wheels and before adjusting the position of the
guardor sidehandle.
●When working outdoors, use only extension cords
that are approved and correspondingly marked for this
application.
●Check the tool for any damage. All parts of the tool
must be checked carefully to ensure correct, faultless
functionalitybefore furtheruse.
●Damagedswitchesmustbereplaced at aHiltiservice
centre. Do not use the tool if it cannot be switched off
andon properly.

16
●If necessary, have the tool repaired by an electrical
specialist(Hilti servicedepartment).
●To avoidrisk ofaccident, useonly originalHilti spare
parts.
●Insert the supply cord plug in the socket only when
thetool isswitched off.
●- WARNING - Donotdisconnectthe plug oftheDG150
fromthe powerunit DPC20 underload.
5.7.3 Thermal hazards
●Thediamondcupwheel, parts oftheguardorthe tool
(gearingsection)may becomehotduringoperation. To
avoidburns,donot touch thesepartswiththebare hands.
Wearsafetygloves.
5.8 Requirements to be met by users, installation and
maintenance personnel
5.8.1 Requirements to be met by users
●Thetool isintended forprofessional use.
●Thetoolmaybeoperated, servicedandrepairedonly
by authorised, trained personnel. This personnel must
beinformedofanyspecial hazards thatmaybeencoun-
tered.
●Alwaysconcentrateonthejob you aredoing.Proceed
carefully and do not use the tool if your full attention is
noton thejob.
5.8.2 Personal protective equipment
●Alwaysweareyeprotection, a safetyhelmet,earpro-
tection, safety gloves, breathing protection and protec-
tiveclothing whengrinding.
●Wearkneeprotectors whenworking onfloors.
●Wearsturdyshoes orboots.
5.8.3 Protective equipment
●Connectthe toolto theindustrial vacuumcleaner.
●Unlessstatedotherwiseintheoperating instructions,
damaged protective equipment and parts must be cor-
rectlyrepairedorreplaced at anaccreditedservicework-
shop.
●Forsafetyreasons,thetool may beoperatedonlywhen
theguard andwhen safetygloves areworn.
●The guard may be adjusted only when the tool has
beenswitched offand thesupply cordunplugged.
6. Before use
Itisessentialthat the safetyprecautionsprintedinthese
operatinginstructions areread andobserved.
- WARNING -
■Theguardis usedina partly open
positionfor working closetoedges.
■Therotatingcup wheelpresentsa
risk of serious injury.
■Work carefully when the guard is
openandclose itagainwhen you
havefinishedworking attheedge.
6.1 Guard
–WARNING–Thetool maybeused onlywith theguard
fitted.
Adamagedorincomplete guard mustbereplacedimme-
diately.
6.1.1 Adjusting the guard
The extraction hose connector can be brought into the
mostfavourablepositionfor working byrotatingtheentire
guard.
Rotating the guard
1. Switchthe tooloff.
2. Disconnectthe supplycord plugfrom thesocket.
3. Openthe clampinglever.
4. Rotatethe guard.
-NOTE- When the extraction hose connector comes
into contact with the opened lever, the guard can be
rotatedfurther bymoving itdownwards.
5. Closethe clampinglever.
6.1.2 Adjusting the guard to the work surface
1. Switchthe tooloff.
2. Disconnectthe supplycord plugfrom thesocket.
3. Laythe tooldown onthe cupwheel.
4. Openthe clampinglever.
5. Rotatetheguardandadjust it totheoptimumheight.
-NOTE- For optimum dust extraction while grinding,
thelamellarsealshouldbe almost incontactwiththe
worksurface (gap0 ...1 mm).
6. Closethe clampinglever.
6.1.3 Adjusting the guard for working close to edges
The opening in the lower section of the guard can be
rotateduntil partof thecup wheel isexposed. Thisis of
advantage,for example,when grindingclose toa wall.
- CAUTION -
■Thecup wheel orpartsof theguard
may become hot during use.
■Theseparts may burnyourhands.
■Wear safety gloves when chang-
ingthecup wheeloradjusting the
guard.

17
-NOTE- More dust may escape from the guard when
workingat edges.
Adjusting the guard
1. Switchthe tooloff.
2. Disconnectthe supplycord plugfrom thesocket.
3. Openthe clampinglever.
4. Rotate the upper and lower sections of the guard in
opposing directions until they are in a suitable posi-
tion.
5. Closethe clampinglever
-NOTE-Theguardengages perceptiblyintheclosed,
normalposition.
-NOTE- If the guard is not held securely when the lever
isclosed,tightentheclamping band byturningtheadjust-
ingscrew ina clockwisedirection.
If the guard cannot be moved when the lever is open,
releasetheclampingband by turningtheadjustingscrew
ina counter-clockwisedirection.
6.2 Side handle
6.2.1 Using and adjusting the side handle
Forsafetyreasons,the side handlemustalwaysbeused.
Itcanbeadjustedin two axesuntilinthemostfavourable
workingposition:
–Twoangled positionsfor rightor left-handeduse
–Pivoted forwards / back in increments
1. Switchthe tooloff.
2. Disconnectthe supplycord plugfrom thesocket.
3. Releasethe sidehandlebyturningtheclampingscrew
ina counter-clockwise direction.
4.Bring theside handleinto thedesired position.
5. Tighten the clamping screw by turning it in a clock-
wisedirection.
6.3 Diamond cup wheel
●The tool must always be switched off and the supply
cord plug disconnected before manipulating the cup
wheelin anyway.
●Press in the spindle lockbutton (only when rotation
hasstopped).
●When changing the cup wheel, clean all cup wheel
mountingparts.
●UseonlyoriginalHilti diamond cupwheels,clamping
flangesand clampingnuts.
6.3.1 Fitting the diamond cup wheel
1. Place the clamping flange on the spindle, with the
O-shapedrecessunderneath,ensuringthat it engages
securely. A
2.Placethecupwheel on thecenteringcollaroftheclamp-
ing flange. B
3. Screw on the clamping nut in a clockwise direction
andtighten itby handor withthe wrenchagainst the
resistanceof themotor /gearing.
6.3.2 Removing the diamond cup wheel
1. Pressin the spindlelockbuttonandholditinthis posi-
tion.
2.Releasetheclamping nut byturningitwiththe wrench
ina counter-clockwisedirection.
3.Release thespindle lockbutton.
4.Remove thediamond cupwheel.
6.3.3 Changing the speed setting
Thetool providestwo differentspeed settings.
Recommendation
SettingI: 4700r.p.m.
Usethissettingforgrinding soft mineralmaterialssuch
aspaintcoatingson cement rendering.Atthisspeedset-
ting, dust extraction performance is improved and the
tool can be guided more easily for removing coatings
fromsoft materials.
Setting II: 6600 r.p.m.
Usethissettingforgrinding hard mineralmaterialssuch
asconcrete, screed orrockin ordertoobtain fullgrind-
ingperformance.
7. Operation
Itisessentialthatthe safety precautionsprintedinthese
operatinginstructions areread andobserved.
-CAUTION-
■Grindingmayproduce hazardous
dust.
■The dust produced by grinding
may be damaging to the lungs
and eyes.
■Use a dust extraction system,
wear a safety helmet, breathing
protection and eye protection.
-CAUTION-
■The tool and the grinding opera-
tion emit noise.
■Excessive noise may damage the
hearing.
■Wear ear protection.
7.1 Switching the tool on
1. Connectthe hosebetween thetool and theindustrial
vacuumcleaner.
2.Connecttheelectriccable between theDG150andthe
DPC20.
3.Connect theDPC 20to themains supply.
4.Lift thetool awayfrom thework surface.

18
5.Pushtheon / offswitchforwardtothe ON (I)position.
Theswitch engagesin theON (I)position.
After a power cut, the tool can be restarted by moving
theon/offswitch to theOFF(0)positionandthento the
ON(I) position.
7.2 Testing new diamond cup wheels
Allow the tool to run for at least 30 seconds under no
load. The diamond cup wheel should not be used if it
vibrates.Donotsubject diamond cupwheelstoimpacts
andkeep themfree fromgrease.
7.3 Grinding
●Never operate the tool without its protective equip-
ment.
●Useonly HiltiDG-WC 150/6″diamond cupwheels.
●Apply moderate pressure, appropriate to the materi-
albeingground. Move thetoolfromsideto sideanddo
notpress thediamond cupwheel intothe material.
● Thediamondcupwheelmayoverheatandsuffer dam-
age when grinding particularly hard mineral materials,
e.g.concretecontainingahigh proportion ofhardaggre-
gates.Shouldthisoccur, thegrindingoperationmustbe
interrupted and the diamond cup wheel allowed to cool
fora shorttime withthe toolrunning underno load.
●Slower progress may indicate that the diamond cup
wheel has lost cutting power (segments have become
polished). The segments can be resharpened by grind-
ing an abrasive material (Hilti sharpening plate or abra-
sivesand-lime block).
7.4 Switching the tool off
1. Press the on / off switch. When released, the switch
returnsto theOFF position.
2.Disconnect thesupply cordfrom thesocket.
3.Ifanindustrial vacuum cleanerisused,disconnectthe
hosebetween thetool andthe vacuumcleaner.
8. Care and maintenance
Disconnectthesupplycordplug from thesocketbefore
manipulating the DG 150 or DPC 20 (making adjust-
ments,cleaning,etc.).Theventilation slots inthemotor
housingmustbeunobstructed and keptcleanatalltimes.
If possible, use compressed air to blow dust out of the
motor at regular intervals (approx. every four weeks).
Do not use metal objects for cleaning. Under extreme
conditions, conductive dust may collect inside the tool
when grinding mineral materials. This may have a neg-
ativeeffect onthe tool’s protectiveinsulation.
8.1 Replacing the guard’s lamellar seal
Replace the guard's lamellar seal at least each time the
cupwheel ischanged.
-NOTE- Disassembly/assemblyof the sealpartscanbe
facilitatedbyrotatingthe parts oftheguardinrelation to
eachother.
Disassembly
1. Alwaysswitchthe tooloffandunplugthesupply cord
before making adjustments to the tool or changing
parts,etc.
2. Usea screwdriver topressthethreelugs of theretain-
ingring overthe edgeof theguard.
3. Removethe largelamellarsealfromtheretaining ring.
4. Release the small lamellar seal by pressing with a
screwdriverinthetwoslots on theoutsideoftheguard.
Assembly
1. Cleanthe locatinggrooves toremove large dustpar-
ticles.
2. Press thesmalllamellarsealintotheguide in theguard
untilit engages.
3. Placethe largelamellarsealinthegroove intheretain-
ingring.
4.Presstheretaining ring withthelamellarsealover the
edgeof theguard untilit engages.
8.2 Repairs
Thetool requiresno maintenance.
The tool has been manufactured and tested with great
care.Nevertheless,inthe event ofafaultdeveloping,the
toolshouldbereturned to aHiltiservicecentrefor repair.
Thetoolmaybe repaired bytrainedelectricalspecialists
only.
9. Troubleshooting
9.1 DG 150 indicator lamp (LED)
Overheatingofthetoolis indicated bythelampblinking
red. The lamp continues to blink for the duration of the
fault,irrespective ofthe switchposition.
In the event of the lamp blinking red, switch the tool off
andallow itto cooluntil thered lampno longerblinks.
9.2 DPC 20 indicator lamp (LED)
Indicatorstatus:
a) Greenlamp lightscontinuously
Thisindicatesthat theDPC20 is readyforoperation.
TheDPC20is connected tothemainssupplyand indi-
catesno malfunctions.This isthe normalstatus.
b)Green blinking
This may occur with 100 V to 120 V versions when
under load. This indicates that the mains voltage is
toolow.TheDG150reactsby achieving significantly
lowerperformance.
c)Red blinking
Thelampblinksredwhen the DPC20reactstoirreg-
ularities such as too high or too low current, voltage
or temperature, etc. The indicator changes to green
whentheproblemhas been rectified.Thepowerout-
put fuses should be checked if the indicator contin-
uesto blinkred.

19
No indication
TheDPC 20 isreceivingno powerfromthe mainssup-
ply.Thiscould becausedby themainssupply itself, the
supplycord or extensioncableor afaultin theDPC20.
Itis not immediatelypossibleto determinewhetherthe
indicatoritself isdefective.For this reason,the DPC 20
shouldbe checked together with theDG 150at regular
intervals, at least every six months, by a trained spe-
cialist or at a Hilti service centre.
10.Disposal
Most of the materials from which Hilti power tools are manufactured can be recycled. The materials must be cor-
rectlyseparatedbeforetheycan be recycled.Inmanycountries,Hiltihasalready made arrangementsfortakingback
yourold electrictools forrecycling. Pleaseask yourHilti customerservice department or Hilti sales representative
forfurther information.
Shouldyou wish to return theelectric toolyourself toa disposalfacility forrecycling, proceed as follows: Disman-
tle the tool as far as possible without the need for special tools. Use absorbent paper to wipe oily parts clean and
collectany oil thatrunsout. Thispapershould alsobedisposedof correctly. On no account should oil be allowed
to enter the waste water system or find its way into the ground.
Part / assembly Main material Recycling
Toolbox Plastic Plastics recycling
Motor housing Plastic Plastics recycling
Motor (rotor, stator) Steel, copper, plastic Scrap metal
Fan Plastic Plastics recycling
Bearing plate Magnesium alloy Scrap metal
Electronics Plastic, electronic parts Plastics recycling / electronics scrap
Gear housing Magnesium alloy Scrap metal
Flange Magnesium alloy Scrap metal
Internal gearing parts Steel Scrap metal
Side handle Plastic Plastics recycling
Guard Plastic Plastics recycling
Cup wheel mount Steel Scrap metal
Grip Plastic Plastics recycling
Electric conductors Plastic, copper Plastics recycling / scrap metal
Power conditioner housing Plastic Plastics recycling
Heat sink Aluminium Scrap metal

20
11. Warranty
Hiltiwarrantsthattheproduct supplied isfreeofdefects
in material and workmanship. This warranty is valid as
longasthetoolis operated andhandledcorrectly,cleaned
and serviced properly and in accordance with the Hilti
operatinginstructions,allwarranty claims aremadewith-
in 12 months from the date of sale (invoice date), and
thetechnicalsystemismaintained. This meansthatonly
originalHilticonsumables,componentsand spare parts
maybe usedwith theproduct.
Thiswarrantyprovidesthefree-of-charge repair orreplace-
ment of defective parts only. Parts requiring repair or
replacementas aresult of normalwear andtear are not
coveredby thiswarranty.
Additionalclaims are excluded, unless stringent nation-
al rules prohibit such exclusion. In particular, Hilti is
not obligated for direct, indirect, incidental or conse-
quential damages, losses or expenses in connection
with,or by reason of, theuseof, or inability to usethe
toolfor any purpose. Implied warranties ofmerchantability
orfitness for a particular purpose arespecificallyexclud-
ed.
For repair or replacement, send the tool and/or related
parts immediately upon discovery of the defect to the
addressofthelocalHilti marketing organisationprovid-
ed.
This constitutes Hilti’s entire obligation with regard to
warrantyand supersedesall prioror contemporaneous
comments and oral or written agreements concerning
warranties.

12. Konformitätserklärung
Bezeichnung: Diamantschleifgerät
Typenbezeichnung: DG150
Konstruktionsjahr: 2001
Wir erklären in alleiniger Verantwortung, dass dieses
Produkt mit den folgenden Richtlinien und Normen
übereinstimmt: 98/37 EG, 89/336/EWG, 73/23 EWG,
EN 292,EN 55014-1, EN55014-2, EN 61000-3-2, EN
61000-3-3
Hilti Corporation
Dr. Andreas Meyer Dr. Martin Gödickemeier
Head of Diamond Systems Head of Diamond System Development
Business Unit Business Unit
July 2001 July 2001
12. EC declaration of conformity
Designation: Diamondgrinder
Typedesignation: DG150
Yearof design: 2001
We declare, on our sole responsibility, that this product
complies with the following standards or standardisa-
tion documents: 98/37 EC, 89/336/EEC, 73/23 EEC,
EN 292,EN 55014-1, EN55014-2, EN 61000-3-2, EN
61000-3-3
12. Déclaration de conformité
Désignation: Meuleuseau diamant
Modèle: DG150
Annéede conception: 2001
Nousdéclarons sous notreseuleet uniqueresponsabi-
lité que ce produit est conforme aux directives et nor-
mes suivantes: 98/37 EC, 89/336/EEC, 73/23 EEC, EN
292, EN 55014-1, EN 55014-2, EN 61000-3-2, EN
61000-3-3.

Hilti Corporation
FL-9494 Schaan
Tel.:+423/2342111
Fax: +423/2342965
www.hilti.com
Hilti = registered trademark of Hilti Corp., Schaan W 2608 0901 00-Pos. 1 1 Printed in Liechtenstein © 2001
Right of technical and programme changes reserved S. E. & O.
371747A
*371747*
Other manuals for DG150
6
Table of contents
Other Hilti Grinder manuals

Hilti
Hilti DCG 180-D User manual

Hilti
Hilti DEG 125-D User manual

Hilti
Hilti DG150 User manual

Hilti
Hilti AG 6D-22-150 User manual

Hilti
Hilti DCG 700-P User manual

Hilti
Hilti DCG 180-D User manual

Hilti
Hilti AG 4S-A22 User manual

Hilti
Hilti AG 6D-22-150 User manual

Hilti
Hilti DGH 130 User manual

Hilti
Hilti GDG 6--A22 User manual

Hilti
Hilti NURON AG 4S-22-125 User manual

Hilti
Hilti DCG 230-DB User manual

Hilti
Hilti DCG 180-D User manual

Hilti
Hilti DAG 450-S User manual

Hilti
Hilti AG 100-8 (S/D) User manual

Hilti
Hilti DCG 180-P User manual

Hilti
Hilti AG 125-A22 User manual

Hilti
Hilti AG 700-14 User manual

Hilti
Hilti AG 4S-22 User manual

Hilti
Hilti AG 125-15DB User manual