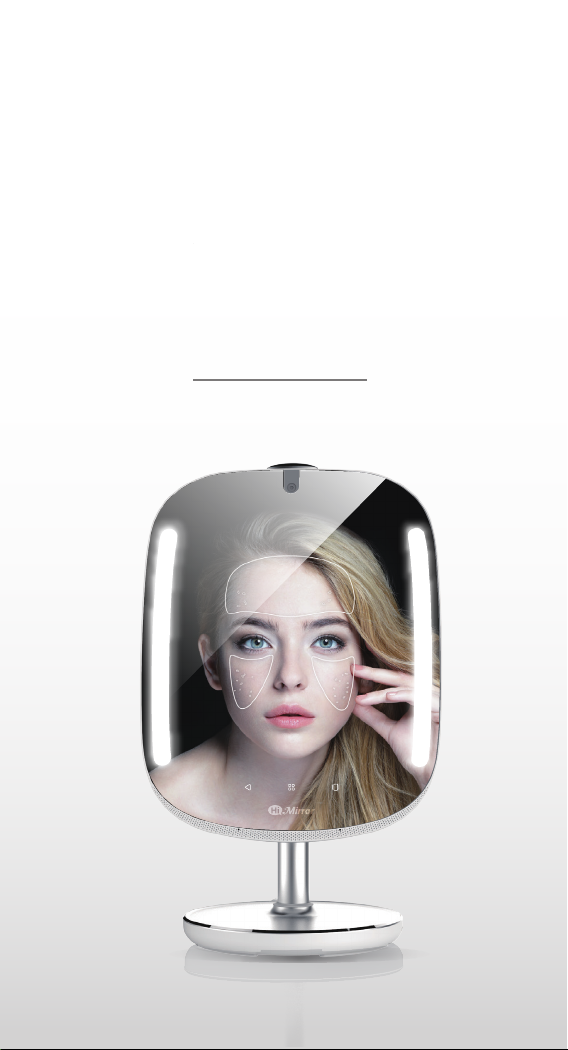
HiMirror Mini User manual
User Manual
HiMirror Mini

User Manual
Initial Setup
Main Menu
Control Panel
Log in
Sign Out
Skin Analyzer
HiSkin
Body and Fitness
Beauty Box
Make Up Light
Settings
Product Warranty Card
Accessory
Index
P. 2
P. 6
P.11
1
P.11
P.12
P.13
P.14
P.16
P.19
P.22
P.25
P.26
P.27
P.32
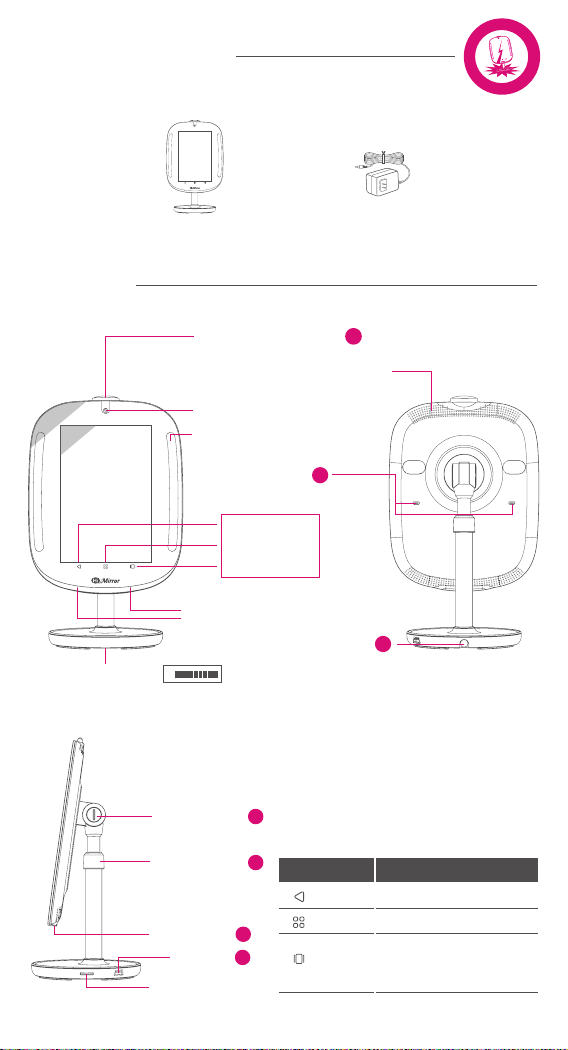
PACKAGE CONTENTS
OVERVIEW
4
5
Power Button
USB Port
SD Card Slot
W
A
R
N
I
N
G
!
F
R
A
G
I
L
E
• 13" mirror size with 10.1" TFT LCD touch panel
2
5
Power Jack
High Sensitivity Microphone
Micro USB Port x2
High Resolution Camera
Camera Cover Button
Ambient Makeup Light
Serial Number
SN
High Performance Speaker
Touch Key
Menu
Back
Mirror / Light
13"
10.1"
1
3Slotted Screw
Retaining Ring 3
Back to previous page
Bring up the menu
Back
Functions
Menu
Mirror /
Light
Touch Key
Switch between Mirror
mode and ambient
makeup light
2
Power AdapterHiMirror Mini

BEFORE YOU START
Children under the age of 13 are not permitted to create a HiMirror account.
Please ensure HiMirror Mini is placed on a flat and even surface.
You must have a WiFi network available and
have your HiMirror Mini installed within its range.
HiMirror Mini must be within range of your WiFi network
Note:
1.
2.
GETTING STARTED
1. Connect HiMirror Mini to a power outlet using the power adapter.*
2. Push and hold the power button for at least 3 sec. to turn on HiMirror Mini.
3. Push to open the camera cover.
4. Follow the on-screen instructions to complete setup.
*Note: HiMirror Mini must be plugged into a power outlet at all times.
3
Power Jack –
Connect HiMirror Mini to a power outlet
using the provided power adapter.
Power Jack
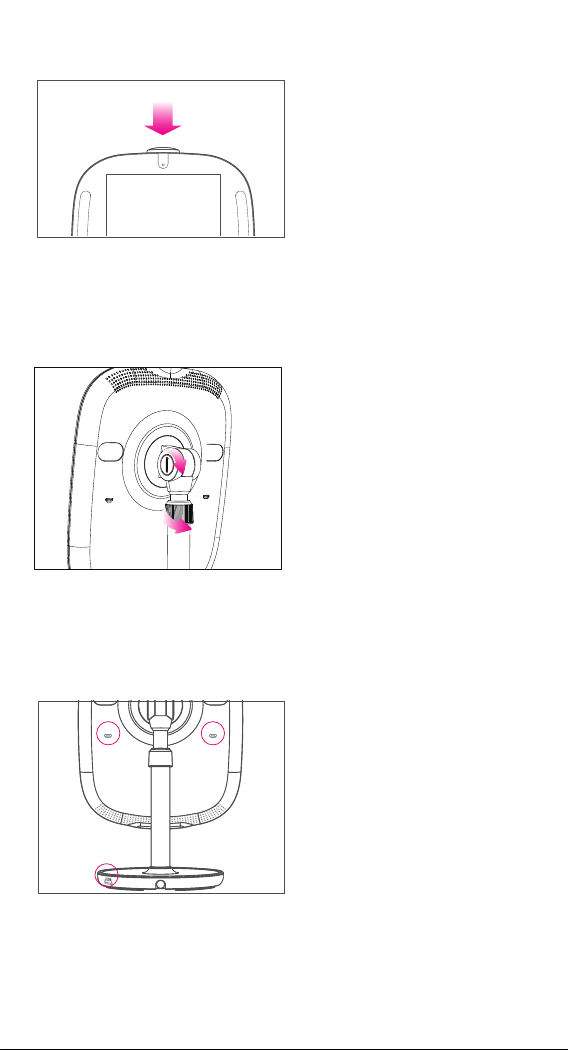
Slotted Screw –
Rotate the slotted screw clockwise
with a coin to fasten the hinge when
it gets loose.
Retaining Ring –
Rotate the retaining ring
counterclockwise to unlock the rod
and adjust the height of the panel,
and rotate it clockwise to lock again.
USB Port –
Connect with HiMirror Mini supported
peripheral devices.
Micro USB Port –
Connect with HiMirror Mini supported
peripheral devices.
4
Camera Cover Button –
Push to cover / uncover the camera.
Slotted Screw & Retaining Ring
Micro USB Port & USB Port
Camera Cover Button

OPTIMAL ENVIRONMENT CONDITIONS
Temperature / Humidity
Operation: 41°~95°F(5°~35°C); 30~80% RH
Storage & Transportation: -4°~140°F(-20°~60°C); 0~95% RH
Power Consumption
Power Input: 100-240V~50/60Hz, 1.0A
Power Adapter: 12V, 36W
For best results, make sure that the light sources around your HiMirror Mini
are even and your face is not partially shadowed. Please refer to the following
instructions when the light source is not adequate for HiMirror Mini.
Light Source
Strong backlight, such as a large window.
Suggestion: Close the blinds or curtains.
Uneven indoor lighting, such as a light
source shining on one side of your face.
Suggestion: Adjust the light’s direction,
or turn the light off.
Multiple light sources.
Suggestion: Leave only the light source in
front of you and turn the other lights off.
5
6
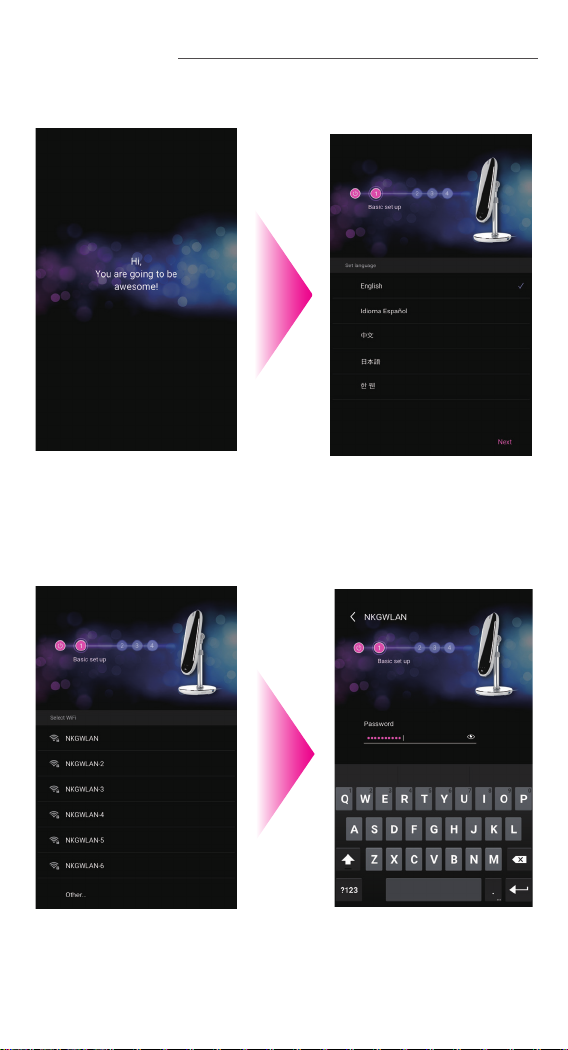
INITIAL SETUP
Steps to set up your HiMirror Mini
Start up.
1Select Language.
2
Select WiFi you want to
connect to.3Type your WiFi Password
and press enter. Press
Next to continue.
4

7
Select your time zone
and press Next.
5
If you have an existing
HiMirror account, please
select Sign in with your
existing account. If not,
please select Register.
6
If you have an existing HiMirror account
Read and check to
agree the term of use.
Press Confirm and
proceed to continue.
7Please type in your
email address and
password to login.
8

8
If you do not have an existing HiMirror Account
Read and check to
agree the term of use.
Press Confirm and
proceed to continue.
7Please follow the
instruction on screen to
enter email address.
8
Press enter and enter
the password.
9Enter your name.
10
9
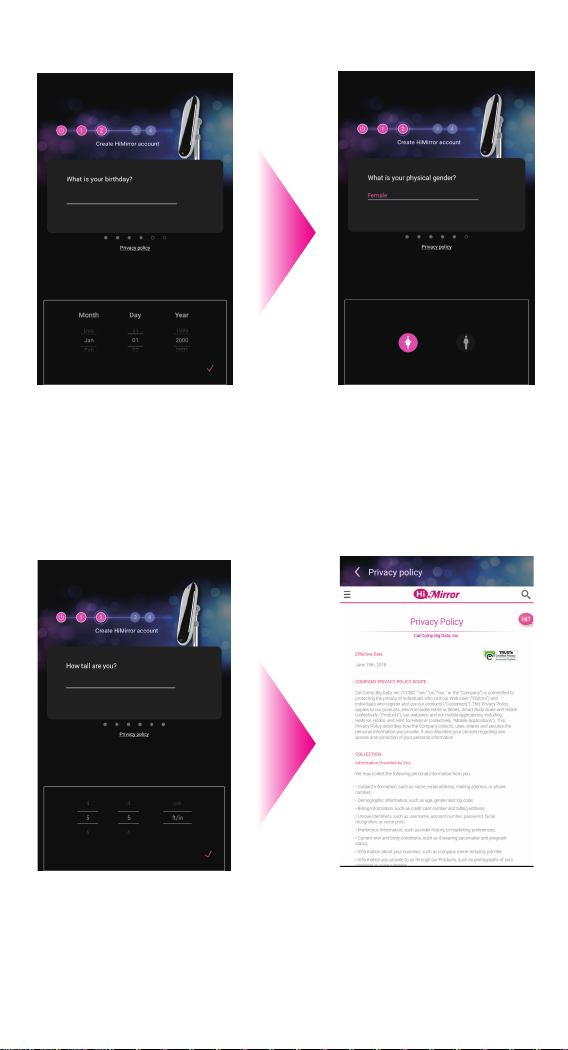
Enter your birthday.
11 Enter your gender.
12
Enter your height. Press
on the tick to proceed.
13 Please press on privacy
policy button if you want
to know the privacy
policy for HiMirror.
14

10
Please say “HiMirror”
until all the check mark is
checked. You can skip
this process by pressing
set later. You won’t be
able to login via your
voice until you have setup
your voice recognition.
Please uncover your
camera protective cover
as instructed on screen.
11 Please look straight
into the screen to
record your facial
recognition data.
12
Create your facial recognition data voiceprint
13 You’re all set! Please
go through the tutorial
to learn more about
HiMirror Mini. Swipe
left to move forward.
When you are done.
Press Enjoy to start.
14
11
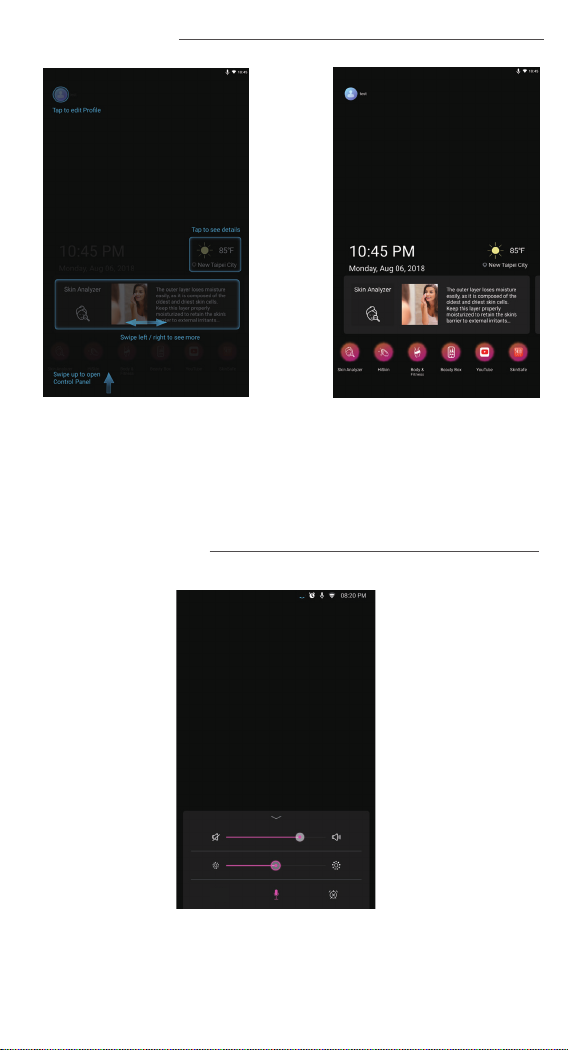
MAIN MENU
Select the functions you will like to use – Skin analyzer, HiSkin , Body&
Fitness, BeautyBox. To use HiSkin function, you must purchase HiSkin
device (Sold separately). To use Body & Fitness function, you must
purchase Smart Body Scale (Sold separately). Press on the weather
info to get the detailed today weather information.
CONTROL PANEL
The system sound, screen brightness, microphone
and alarm can be set from control panel.

12
LOG IN
To log in , please press the top left button and press Log in to log in to
pre-registered user account. When the user sign out, HiMirror is in
guest mode. Only limited functions are available and all measurements
will not be recorded.
To login, please use the facial recognition or voice
print to login.

13
SIGN OUT
Press on the top left to
sign out.
1Press Sign Out to sign
out of this user account.
The HiMirror will be in
guest mode.
2
14
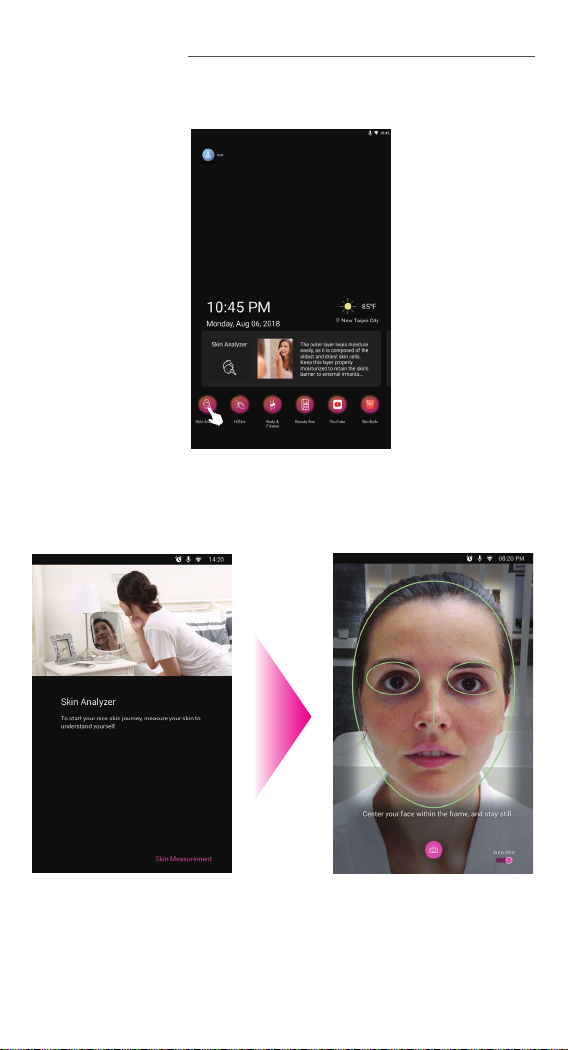
SKIN ANALYZER
Press on Skin Analyzer
to start measurement.
1Align your face
according to the
instruction on screen.
Retake your photo if
instructed.
2

15
Your skin analyzer
summary is shown here.
Select individual concern
to see more details.
3The Time lapse film will
show how your skin
progress over time.
Press “Remove this
record” remove the last
record from the system.
4
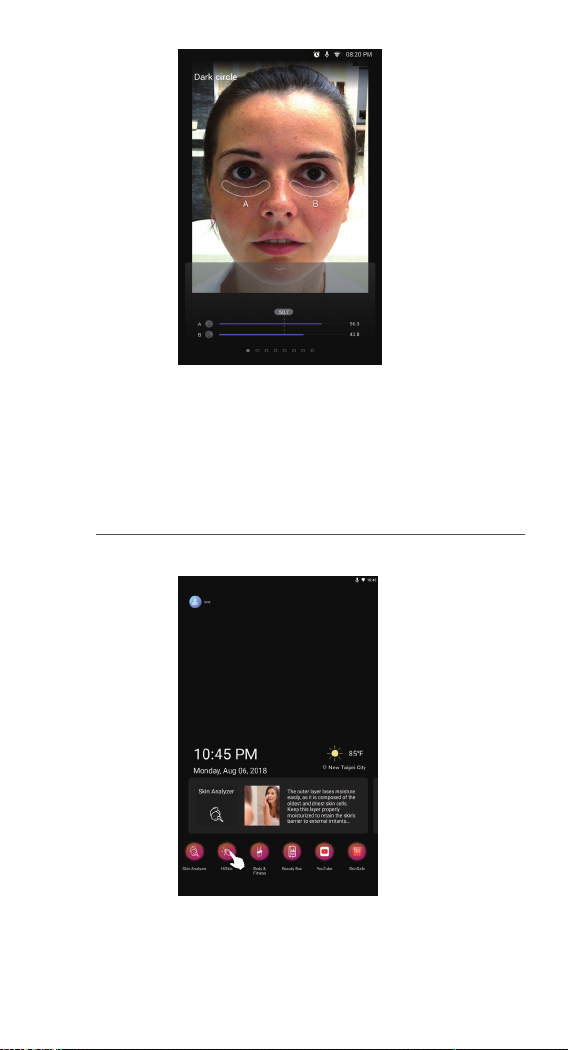
Press on particular skin
concern to see more
details. Each skin concern
includes your scoring over
the time, select the time
frame below to see your
skin condition trend.
6
5Press the date tab to see
the dates where a
measurement has been
done in skin analyzer.
16
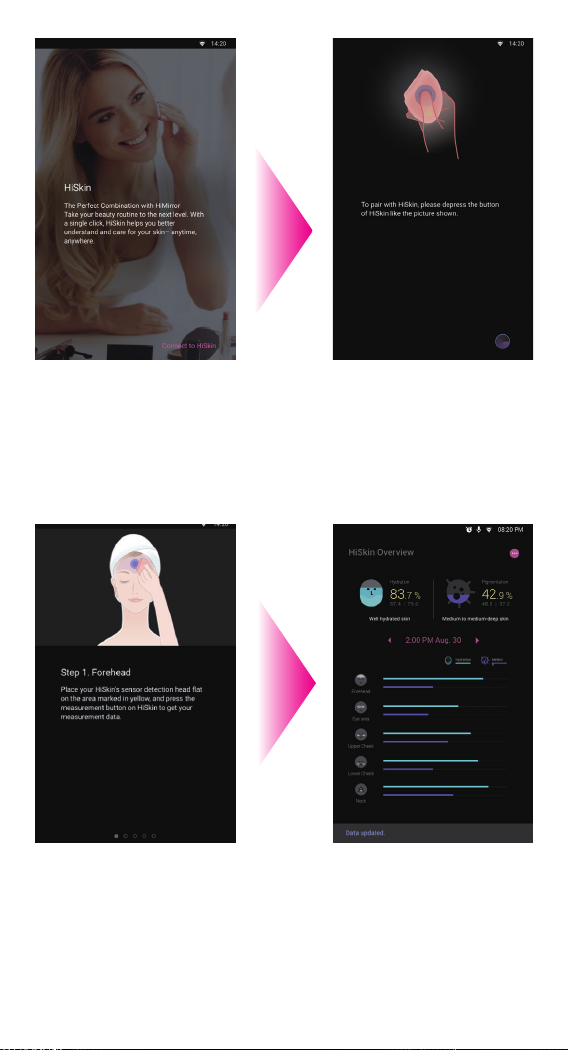
HiSKIN
* Network connection is required in order to use HiSkin.
Press on the face to see the details on your pictures,
swipe left/right to select another skin concern.
17
Select HiSkin function in
main menu. Press Connect
to HiSkin to proceed.
1Press the button on your
HiSkin to connect it to
HiMirror Mini.
2
Follow the instruction and
place your HiSkin on the
locations as instructed.
3Once completed, you will
see your skin hydration
and pigmentation level
overview. Details please
refer to your HiSkin quick
start guide.
4
18
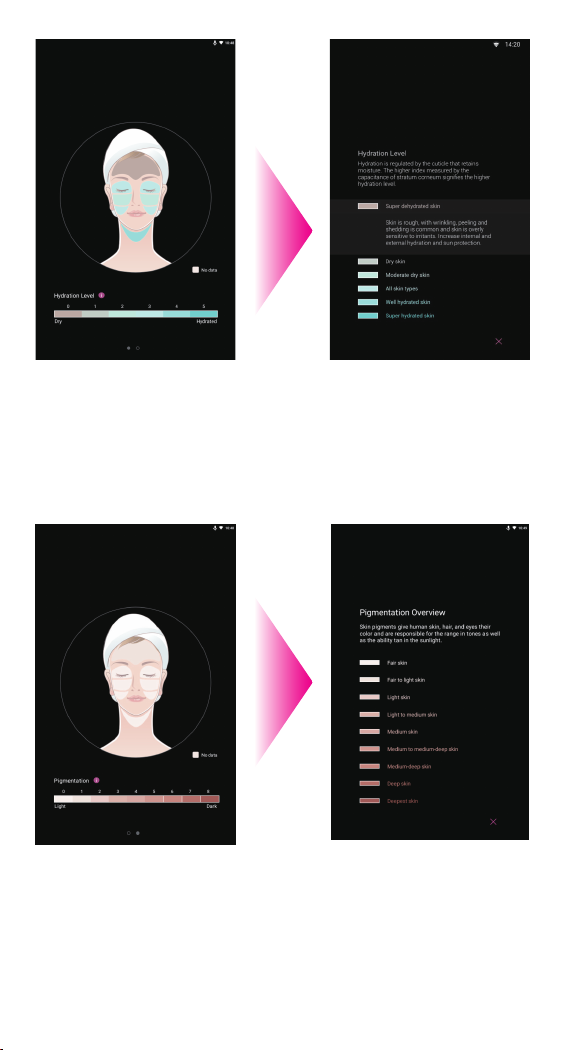
Press the Hydration button
to see your face hydration
level on each section.
Press “ i ” to see the
explanation for the
different hydration levels.
5Press the hydration level
to see the description of
the skin hydration level
and tips for better skin.
Press “x” to return to
previous page.
6
Press Pigmentation
button to show your face
pigmentation level on
each section. Click ”i” to
see the explanation for
each skin pigmentation.
7Press each skin
pigmentation to see the
description of each
pigmentation level as
well as tips for skin care.
8
19
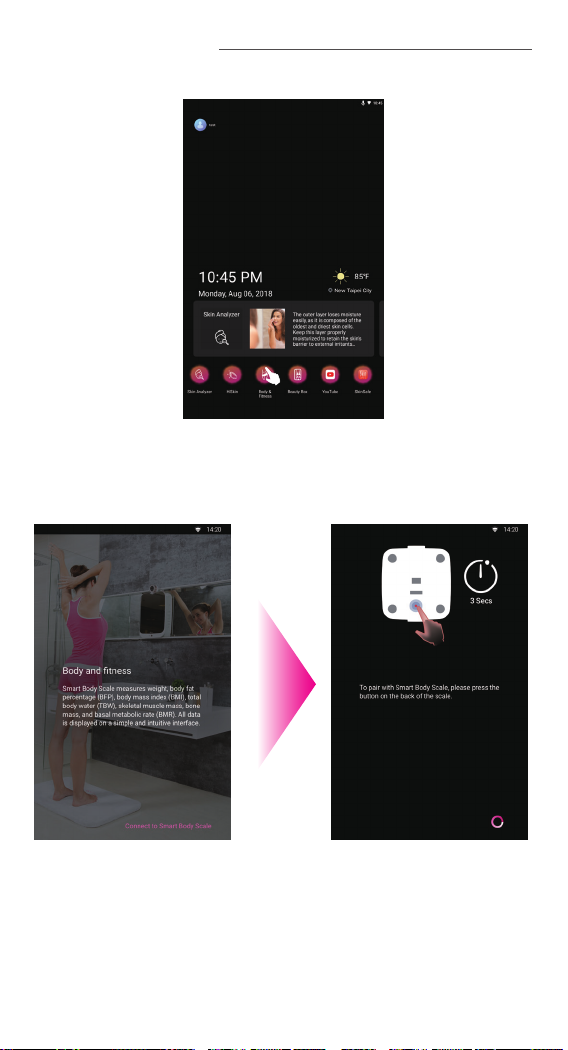
BODY AND FITNESS
Select Body and Fitness
in main menu. Press
connect to Smart Body
Scale to proceed.
1Press the connect button
on the bottom of your
Smart Body Scale to
connect to HiMirror Mini.
2
Other manuals for Mini
2
Table of contents
Other HiMirror Personal Care Product manuals


Popular Personal Care Product manuals by other brands


Hans Dinslage
Hans Dinslage SANITAS SMA 70 Instructions for use

Vulpes Electronics
Vulpes Electronics Vulpini Welcome guide

Makita
Makita DCX201 instruction manual

Laica
Laica NE1001 Instructions and warranty

Vitek
Vitek VT-2215 PK Manual instruction

American Standard
American Standard Regalyn Wall-Mount Lavatory 4869.004 Specification sheet