ACTICHECK THE ASSURE User manual
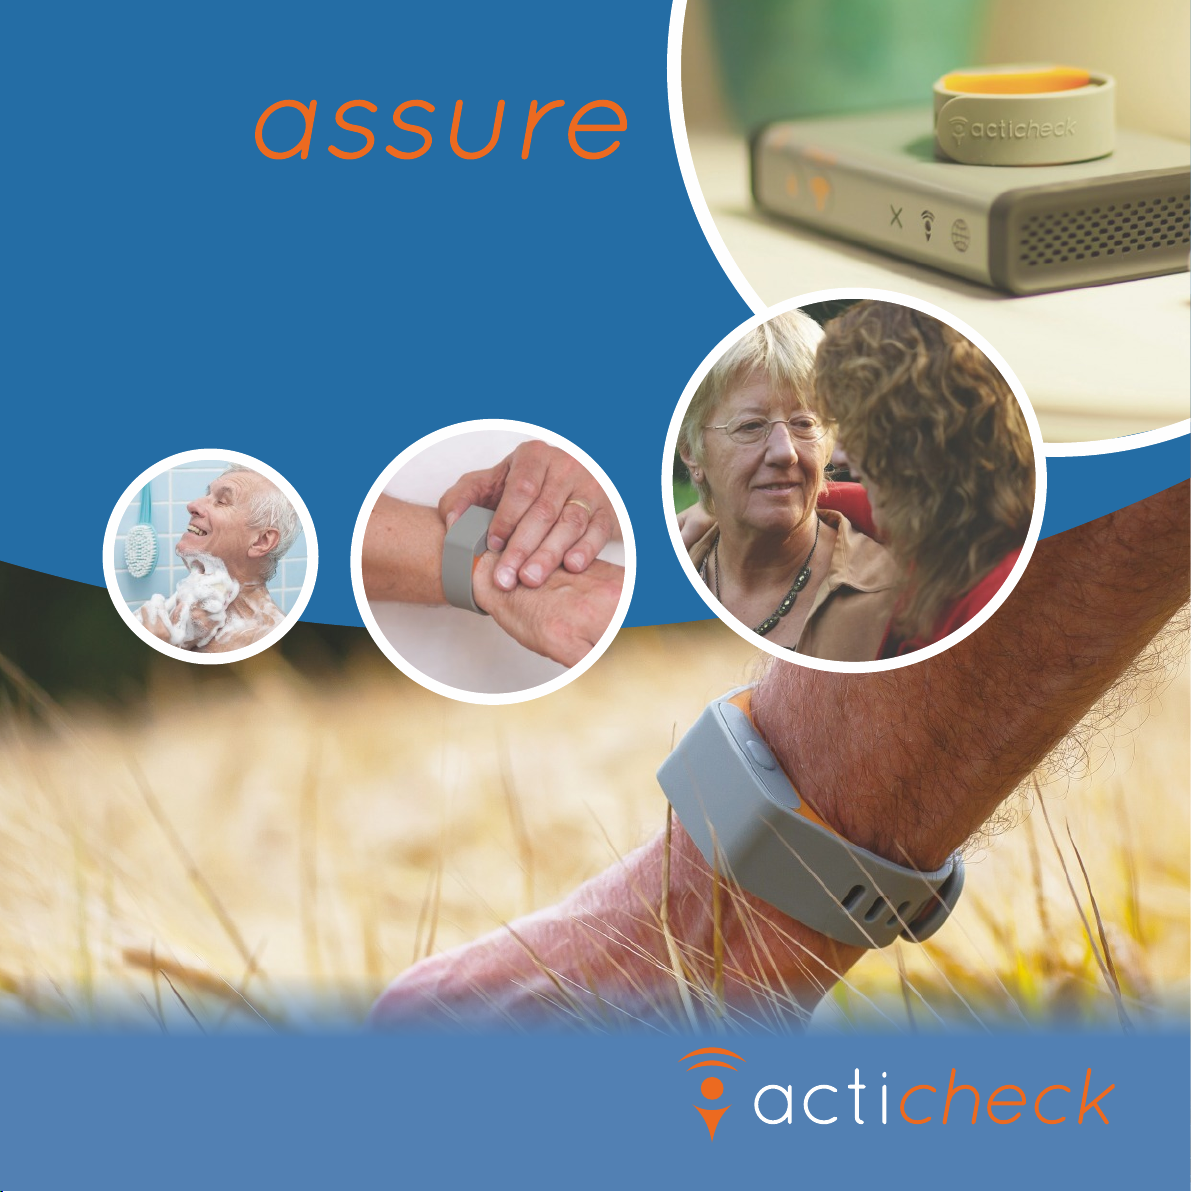
Life-saving
wristband
User guide
the

Welcome to your
At Acticheck we created the to enable people to get help even when they
couldn’t get to a phone; ultimately helping people live life with more confidence.
The is a simple to use life-saving wristband created for anyone who
spends a significant amount of time alone; solo seniors, lone workers, solo sports
people and those with a condition that might make them vulnerable.
We designed the to be waterproof and to have a one year battery life so
it can be worn all the time, as you never know when you’ll need it. The
system gives you an award-winning, comfortable wristband that can alert your
chosen family, friends, neighbours and even an optional response centre.
The wristband links to a base station to give resilient home & garden
coverage and can link to a smartphone app so you can have coverage wherever
your phone has a signal.
We have a great combination of ways to call for help. A simple squeeze will send
an SOS, but we can also monitor for severe falls and our unique checks -
for which you set the time(s) of day you would like the wristband to buzz and
simply by pressing a single button confirm that all is well - are ideal for confirming
you are up in the morning and OK before bed.
Please take the time to read the rest of this guide as it will help you to make the
most of your system.
We hope the helps you live with confidence.

3

4
5
The
The life-saving wristband is designed to be worn all the time and fit in with
a modern lifestyle.
The wristband is made from medical grade silicone and should be worn as snugly
as is comfortable. It carries a ‘puck’ which is monitoring for activity, signs of a
severe fall and whether it is being worn. The puck has easy to press buttons on
either side. Pressing both buttons with a simple squeeze initiates a call for help
whilst minimising false alarms. To confirm you are OK just press either button.
The wristband is comfortable to wear, waterproof and has a one year
battery life – once you put it on there is no reason to take it off. We regularly
review your battery life and will be in touch in good time to arrange replacement
of your puck to ensure continuous protection.
The wristband can also link through a smartphone app (see page 24) but
smartphones should not be used in place of a base in a fixed location as their
coverage is less reliable.
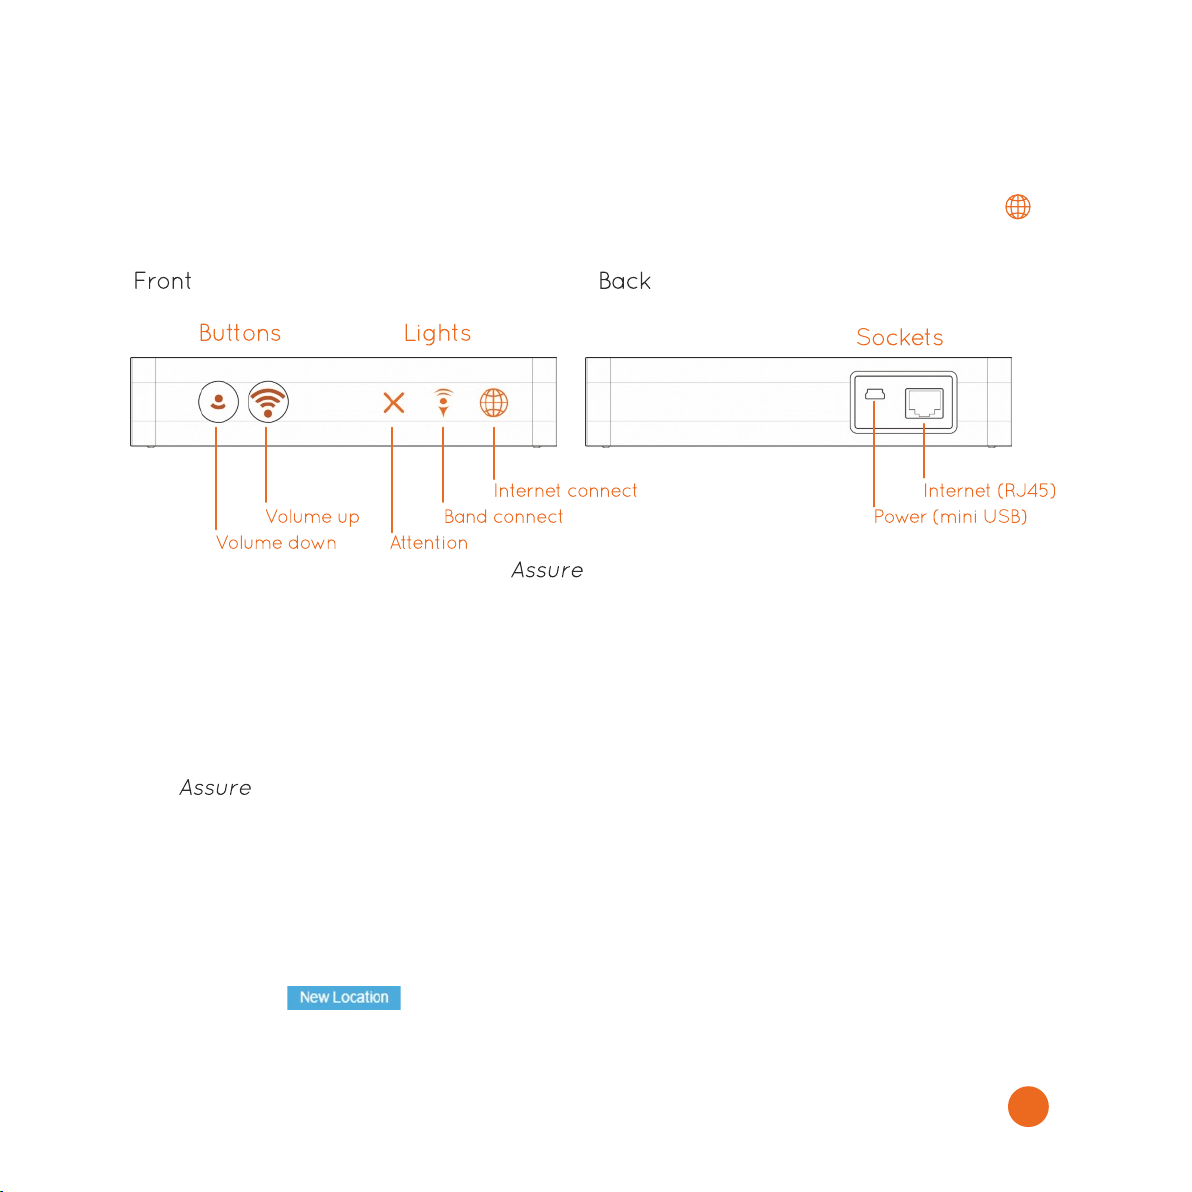
The base
The base passes messages from your wristband to the Acticheck server
and provides excellent home and garden coverage. It has been designed for
reliability, simplicity and elegance.
With your system you will also find:
1 x Internet cable
1 x Power/charging cable
1 x Wall plug
1 x User Guide (this!)
3 x Responder invitations

checks
The simple way to confirm the wearer is up in the morning and OK before bed.
Choose suitable times during the day for the wristband to buzz (if it is being
worn). The wearer acknowledges they are OK by pressing a single button or, if
activated, by shaking the wristband. If the buzz goes unacknowledged, we will try
twice more over a four minute period before triggering the pre-alert checks.
IMPORTANT: This only works when the wristband has a live connection through a
base station or smartphone. It should not be used as the sole mechanism for
remembering medicines. The timing of check should be set at least twenty
minutes before you want the first one to occur. More than two checks a
day may reduce battery life.
A button press on the wristband in the 10 minute confirmation window before an
check is scheduled will confirm the wearer is OK and cancel the check.
How the calls for help
6
Your has three alert triggers and two
warning notifications.
SOS calls
This is when the user initiates the alert with a
simple squeeze of the wristband.
Place a thumb on a button on one side and
forefinger on the other and gently squeeze
together until you are aware of a click. The
wristband will confirm the alert with a discrete
buzz.
Fall monitor
The system can be set to detect signs of a
severe fall. If this is set and there is an impact
followed by very low levels of movement we will
start the pre-alert checks (see page 9).

Outcomes of checks
There are four possible outcomes to a check.
1. If the wearer confirms they don’t want help the alert is cancelled; an event
notification will show on the activity chart.
2. If we can’t connect with the wristband we email administrators to let them
know.
3. If the wristband is reporting it is not being worn we email administrators to
let them know.
4. If the wristband is reporting it is being worn but there is no response from
the wearer an alert will be raised.
The system has two additional warning notifications that generate emails
to selected responders.
warning
The base reports its temperature at regular intervals. If you position it
somewhere which is representative of the general household temperature and
tell us which hours are important to you we will send an email if the wearer is at
home but the temperature is below the set comfort zone.
You can also turn on the ‘Frost protection alert’ which will email anyone
authorised as an administrator to let them know the building is in danger,
whether or not the wearer is at home.
Lost connection warning
The base sends a message every 15 minutes and if there is a power cut,
internet outage or an accidental unplugging and we don’t hear from the base for
45 minutes we will email all administrators to let them know.
If you have a cellular base there is a 20hour back-up battery which significantly
reduces the likelihood of lost connections.
No communication with wristband warning
If we have no contact from the wristband overnight and the wearer has not been
marked in MY BAND as absent, we send a message to all administrators.
7

8

Pre-alert checks
The system gives you two opportunities to cancel the alert; if you do not
respond to either the full alert is initiated.
Band buzz
Whenever the wristband buzzes this is confirmation that an alert is about to start
and an invitation for you to confirm you do not need help. If you don‘t confirm
within 10 seconds there will be an automated check call (see below). If it is
programmed to do so, the base will also sound as another indicator that an alert
sequence is in process.
In MY BAND you can set the option to ‘shake to cancel’. If you shake the wristband
(perform a waving action) within a period of 3 seconds after the band has
buzzed, this will confirm you are OK and will cancel an ‘I’m OK’ or fall alert.
You can always confirm you are OK by pressing a single button.
Automated check call
The phone number(s) that have been verified in Settings - Phone numbers will be
called and a voice message will prompt you to press ‘1’ on your telephone keypad
or to say ‘cancel’ if you do NOT need help.
If the wristband is connected via the smartphone app for the particular alert we
will only call the smartphone.
9

10
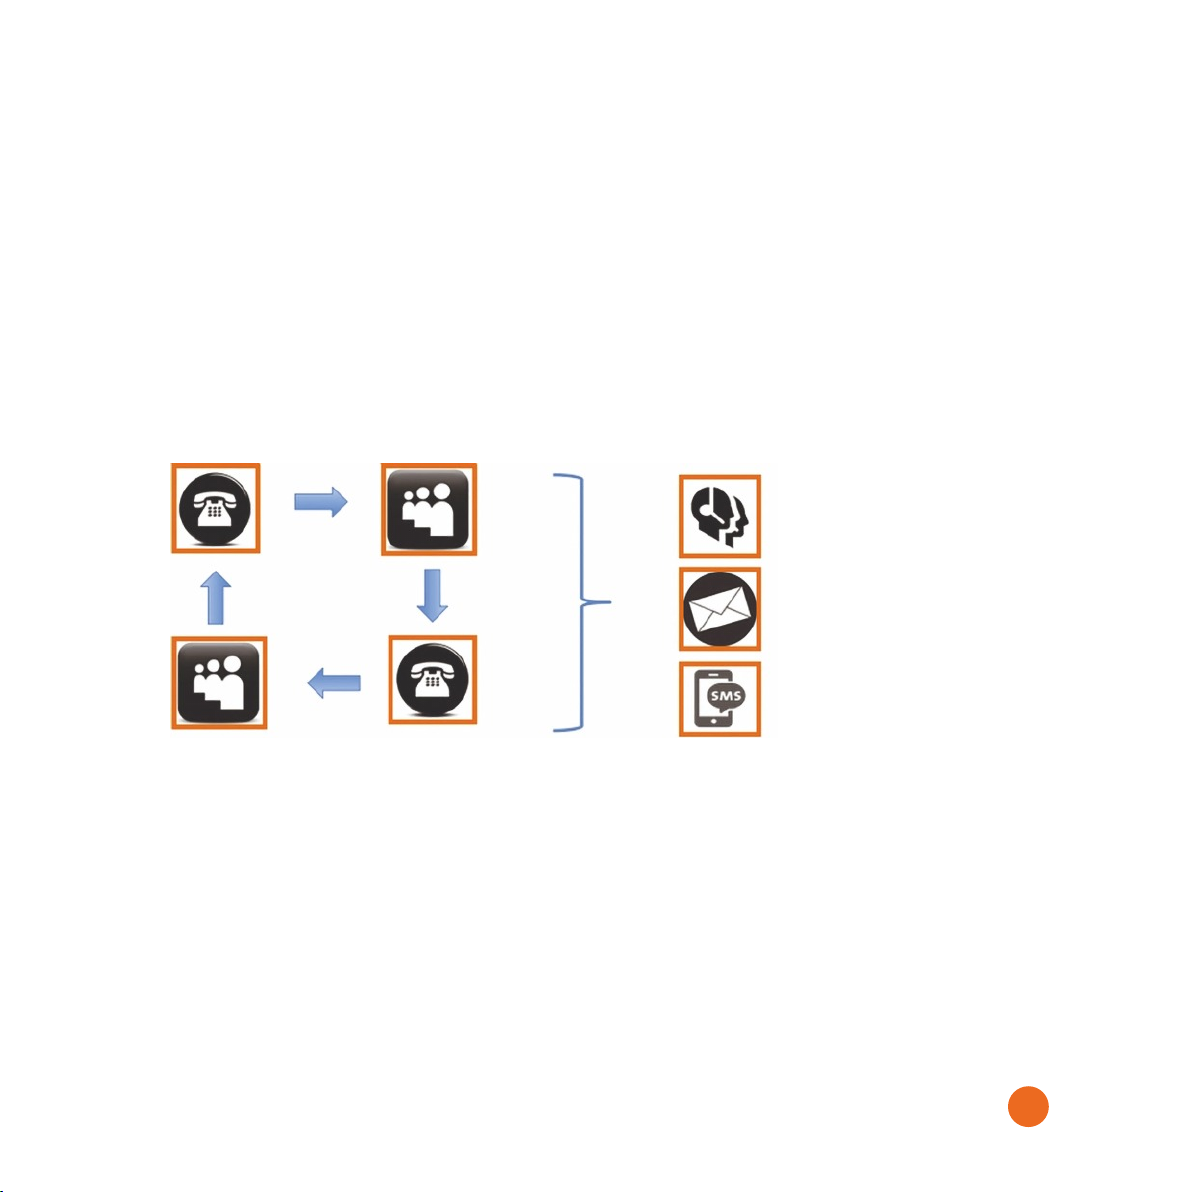
The alert sequence
Once an alert has been triggered and the pre-alert checks have gone
unanswered the Acticheck system starts to call your responders. Responders are
the people whose contact details have been entered into the system and who
have agreed to accept calls (and potentially emails) for you. Often they will be
family, friends and neighbours but it could also be a professional carers if you
have arranged it with them. The system must not be configured to call
emergency services (e.g. 999).
The system automatically calls responders, in a configurable order, until one of
them answers.
Each call which is answered will receive an automated message telling them you
may need help and asking them to press ‘1’ on their telephone keypad, or say
‘yes’, if they are willing to take responsibility. We will cycle through your
responder list twice to try and get a positive response. If you are unsure that
there will always be cover you could subscribe to our ‘fallback response’ service
(see page 18).
Once someone accepts responsibility, the system will read them your address,
access instructions and ‘in case of emergency’ information. We will also text and
email this information to them.
The alert sequence can be cancelled at any time by pressing a single button on
the wristband.
11
Spoken
E Mailed
Texted

Setting up your system
The Acticheck uses a combination of email messages and phone voice &
text messages to connect to users. This requires validation of both the email
address and telephone number.
The person who wears the wristband is referred to as a WEARER and people who
are contacted when help is required are called RESPONDERs. They will all need to
be registered on the system.
If you are a wearer who has an email address, or someone who has access to the
wearer’s email account, use that email to register your system and follow option 1
(below). Otherwise follow option 2 (next page) to set up the system as a
responder. You should use option 2 if the wearer does not have an email address.
Option 1: Setting up using a wearer’s email address
Go to my.acticheck.com and select ‘Register’, then enter the email address of the
wearer. Wait for the email to arrive and follow its instructions. For security, the
link will not work if the procedure is not started within an hour
Select the ‘WEARER’ link in the email and you will then be asked the following
information:
●Wearer’s name: the name that will be announced to the responders so use
a name that they will recognise.
●Username: a unique name, often the wearer's real name (without spaces),
that can be used instead of the email address to log in.
●Password: you will need this password to log in.
●Phone number: This is the wearer’s primary number, ideally a landline at
the same location as the base but could be a mobile phone number.
Additional phone numbers can be added after the account is registered.
To simplify the installation process we also recommend you enter the following
information.
●Base Registration Code: This is printed on labels on the base and box.
●Address and postcode: This is announced to your responders and so must
be where the base is located. Please include the postcode.
12
Option 2: Setting up using a responder’s email address
Go to my.acticheck.com and select ‘Register’, then enter your email address.
Wait for the email to arrive and follow its instructions.
For security, the link will not work if the procedure is not started within an hour.
Select the ‘RESPONDER’ link in the email.
You will then be asked for the following information about you as a responder:
●Your name: this is the name that will appear to your wearer(s).
●Username: a unique name, often the responder's real name (without
spaces), that can be used instead of the email address to log in.
●Password: enter a password for you to use when you log in.
●Phone number: your responder number to be called when an alert is raised.
●Postcode: this helps us locate responders.
You have set up your account and now need to set up an account for your WEARER.
1. Log in using either your username or email address - the password will
work for either,
2. Select NEW WEARER (left hand menu),
Complete all the details for the new WEARER.
4. To manage the wearer’s settings go to MY WEARERS and select ‘View
Wearer Panel’: ensure you can see their name (top left).
5. You can now add additional RESPONDERs by selecting MY RESPONDERS
(left hand menu) and then ‘Add responder’ (top right).
You can now set fall monitoring and checks for the wearer (see page 20).
To return to your own account, where you can manage your own availability (in
MY WEARERS) and profile settings, select the ‘click to exit’ button (top right)
13

Step 2: Verifying your phone number
IMPORTANT: Your phone numbers must be verified by answering and responding
to an automated phone call. The system will not work without verifying the
number. You should verify your own number by selecting SETTINGS > ’Phone
Numbers’ and following the instructions in the number verification screen.
1. Please double check the number. If it is not correct edit the number and
click on 'Save changes'. All international numbers should start with a +
followed by the country code. If it is not correct edit the number and click
on 'Save changes'.
2. When you are content with the phone number click on
3. Follow the spoken instructions
The uses automated calls that may need the receiver’s permission to get
through call blocking security. If you have a call blocker visit our support page at
www.acticheck.com/callscreening for details on how to whitelist our number.
Step 3: Positioning your base
Your base comes with two 1.8m cables. One is a blue RJ45 internet network
connection cable: one end plugs into your broadband/internet router and the
other into the back of your base: this is not essential for a cellular system.
The other is a power/charging (mini-USB) cable. Try to plug this in to a wall
socket using the Power Supply Unit (provided) but if there is not one available
use a spare USB socket on your internet router instead.
You should find a position in which both cables can be easily connected and
where the base is at least 30cm away from the router.
The base is designed to be used either upright or flat.
Step 4: Connecting your base
ETHERNET / BROADBAND ONLY SYSTEM: When you have connected your base to
your router and power, wait until the internet light comes on. If you entered
the base code during registration the base should automatically connect and
make a bing-bong sound.
14
Now return to the myacticheck page. If you did not enter the 12 character
registration code (printed on the label on the base) when you created your
account you should be prompted to add your base (if not click on SETUP A BASE)
then enter the code in the box on your screen. Now wait until the internet light
on the base comes on. This may take a few minutes.
CELLULAR SYSTEM: Connect your base to the power (using the black
cable and either plugging in to a USB port on your broadband router or into the
supplied Power Supply Unit).
The base has a cellular ('mobile phone') modem and will work without a
broadband connection, but we recommend that you connect the base to your
broadband router, if available, using the provided blue cable. Proceed with
registering the base as described above.
The cellular base has a battery backup that provides 20 hour operation if
the power fails. Once the base has registered remove the rear panel and extract
the battery isolation tab.
Step 5: Adding a base location
If you entered the wearer’s address and postcode during registration your base
location will already be configured and you can skip this step. If not, go to MY
BASE, click on and enter the address and access instructions. This is
the information that will be announced when there is an alert.
15
Step 6: Connecting your wristband
You should now be prompted on the screen to setup your wristband.
Pairing to a base for the first time
When a base is first registered it will listen for a wristband to be paired with it.
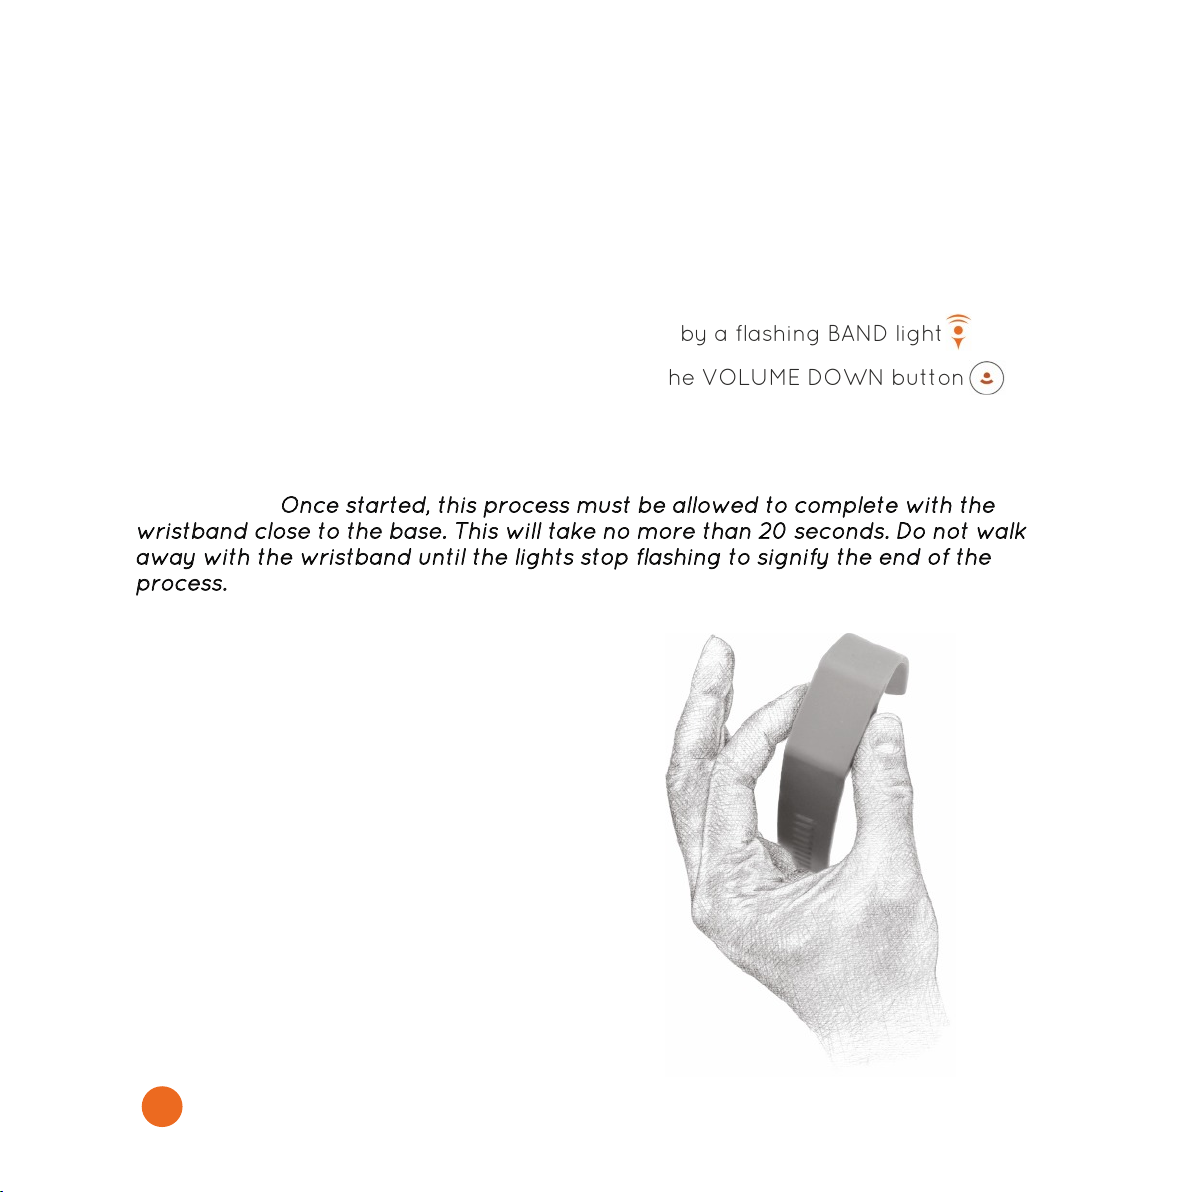
The base should be in pairing mode as indicated by a flashing BAND light .
(If the BAND light is not flashing press and hold the VOLUME DOWN button
on your base until the BAND light starts to flash.)
Pairing your wristband
IMPORTANT:
16
You should hold your wristband loosely,
rather than wearing it, when pairing to
the base.
Press either or both buttons while you
are close to the base (within 2m).
Within 20 seconds the INTERNET and
BAND lights will show solidly confirming
the connections.
The on screen installation process will
also confirm the pairing.
Now put the wristband on (see page 22).
Squeeze both buttons to start an alert. After a short delay of up to 3 seconds you
should feel the wristband vibrate and hear the base pre-alert sound.
Now press either button (without pressing the other) within around 8 seconds to
cancel the alert sequence: the base will make a cancellation sound in a few
seconds.
To test the coverage walk around your house and garden and repeat the process
above.
Squeeze both buttons but this time do not press a button to cancel. After 10-15
seconds you will hear the base change to an alert sound and soon your phone will
ring.
Answer it and listen to the message and follow the instructions to cancel the alert.
This should be straightforward but if you already have a responder linked you
might like to warn them that you are testing they system.
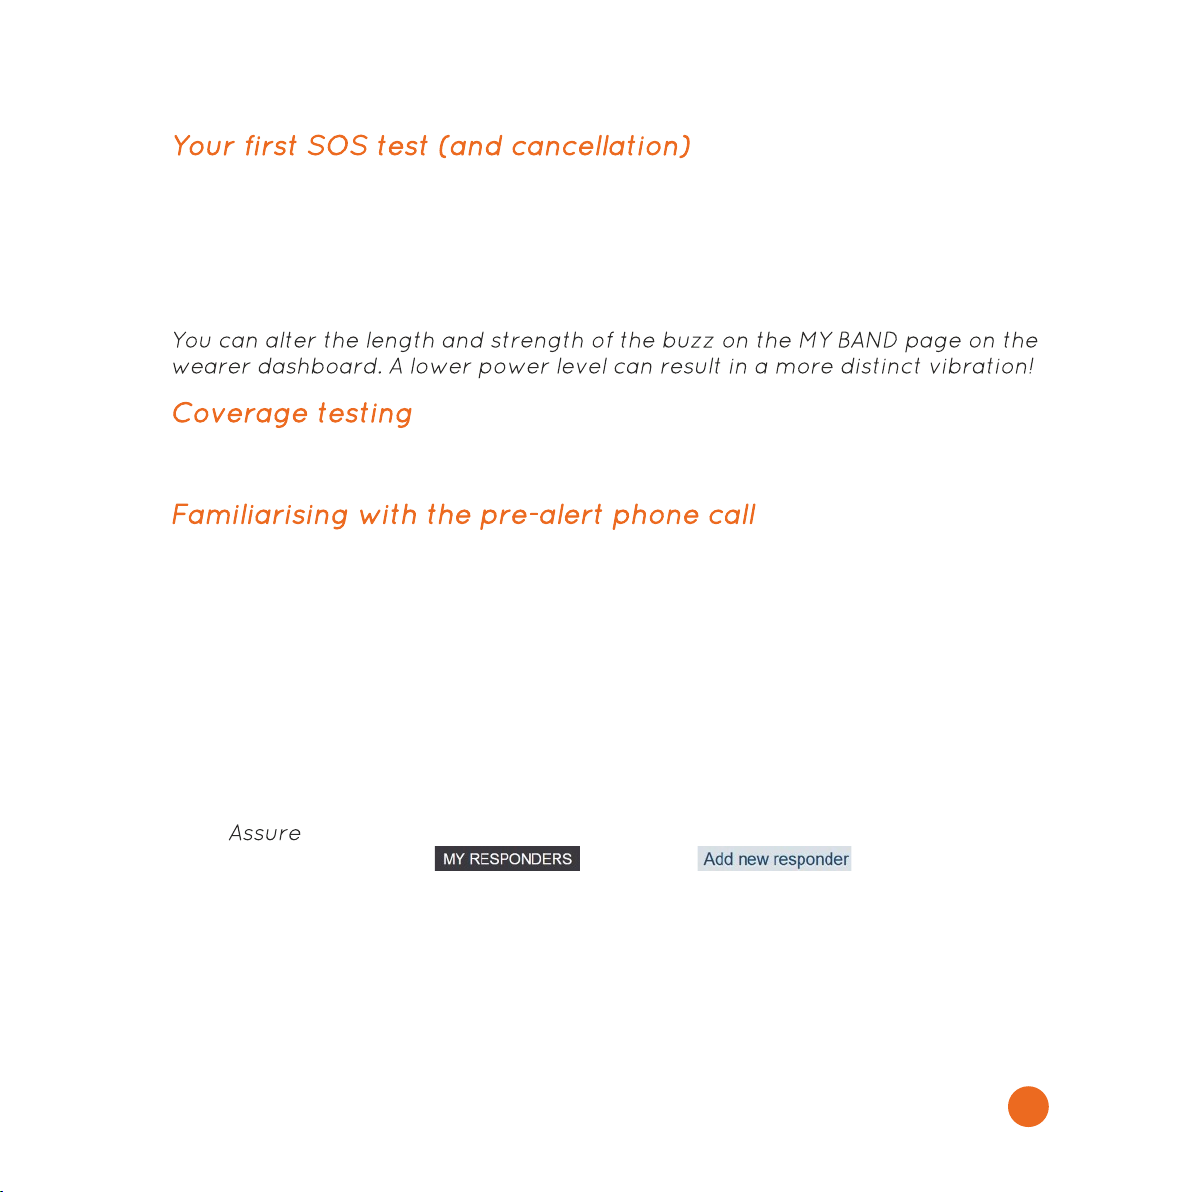
Step 7: Your network of responders
Your system is now set up to raise alerts but needs to know who to call if
you need help. Click on and then . Every responder
must have a verified telephone number where they can be contacted. We also
recommend providing their email address which will let them create their own
account and have more control over when they will be available to help.
17

Adding responders
We advise that you contact responders directly before entering their details so
they know to expect an automated phone message and email.
If you have entered an email for your responder they will receive instructions on
how to set up their own account. If they have been added without an email
address they will immediately receive an automated call to verify the phone
number and that they are willing to take alert calls. If they miss the call you can
try again by clicking on ‘Call for confirmation now’; alternatively if they have been
added to the system they can confirm their phone number by calling 0161 850
4480 from their contact number and following the spoken instructions.
Availability times
Responders are by default available at all times; those with an email account can
limit the times they can be called by setting ‘availability’ times in MY WEARERS.
Designating ‘Administrators’
When a responder with an email address is created they can be designated as an
Administrator for that wearer.
Administrators can check & change the wearer’s settings and see whether the
wearer is active, out, or at home but not active (and maybe needing help).
Administrator status can also be enabled/disabled after they have registered by
ticking the box in their panel in ‘MY RESPONDERS’ and pressing ‘Save changes’.
Fallback Response Centre
Acticheck users can subscribe to our Telecare Services Association accredited
response centre who, if none of your responders is able to accept the alert, will
assess the situation and call the the emergency services if needed.
If you have already taken the service it will be shown at the bottom of your ‘My
Responders’ list. If you would like to add it then visit the MY RESPONDERS tab and
click on ‘Add Response Centre’ (top right) and follow the onscreen instructions.
IMPORTANT: If the response centre needs to contact the emergency services they
will benefit from knowing your property Access Instructions ('MY BASE' then
'Edit'), Public Profile and In Case of Emergency information (see below).
18

Fall Detection
The arrives with the fall detection turned off. It is important you
understand how the system works and set it to your needs. The wristband has a
movement sensor that can detect movement patterns that could be a severe fall.
Every fall is different and the will never detect 100% of falls.
To limit false alarms, when the fall monitor detects a potential fall, it will check if
the wearer carries on moving. If movement is detected the alert is not raised.
If the wearer is moving, but does need help, after a fall they should call an SOS by
squeezing the wristband, otherwise keeping still for the inactivity period (60
seconds unless configured differently) will raise an alert automatically.
Slump falls, when the wearer gently slides to the floor and is unable to get up, do
not have a shock and will not be detected by the . However, in the majority
of circumstances, the wearer should be able to manually raise an SOS alert.
Fall detection is activated on the MY BAND tab where you should choose between:
●Off – all fall detection disabled (default setting)
●Sensitive – Small jolts will trigger the inactivity monitor which will start an
alert if there is no movement in the next minute
●Normal – The jolt triggers are set to default values with a one minute wait
for movement
●Active – The jolt triggers are set to low sensitivity and a five minute wait for
movement
Before an alert is raised the wristband will vibrate and the wearer can cancel the
alert by either pressing a single button on the wristband or by answering the
confirmation phone call and pressing ‘1’.
Day/Night Mode
During sleep most people naturally change position then remain still. This can be
interpreted as a fall resulting in an unwelcome false alert in the middle of the
night. Day/Night mode extends the inactivity period to 4 hours during the night.
You can select the period this mode is active. Generally you should choose from
the earliest the wearer is likely to sleep until the latest they are likely to rise.
When you have changed your settings click on to save your changes.

Testing fall detection
Enable fall detection to ‘Normal’ as described above. If the wristband is new and
has not been used, put the band on your wrist and continue with normal activity
for 30 minutes. This calibrates the detector that determines if the band is being
worn. Now simulate a shock (for example by raising your arm then letting it drop
firmly into your lap or onto the arm of a chair) then keep the band still for 60
seconds. An alert should then be raised. To cancel the alert press a single button
on the band.
Managing your system
You are unique, and so is your network of relationships. At Acticheck we have
designed the so you can have it fit your circumstances, and your
dashboard is where you can customise the system to your needs.
Reviewing your settings
To get to the ‘settings’ menu click on the ‘cog’ in the top left corner of the screen.
From here you can review and change your In Case of Emergency Information
(e.g. medications) and Public Profile (e.g. Date of Birth and other information
helpful to emergency services). You can also log out of the dashboard here.
Remember to click on to save your changes.
Finding your way around the dashboard
●Personal and address information is accessible by clicking on the ‘cog’ (top
left).
●Timing of checks, fall monitoring sensitivity and buzz strengths are
available in MY BAND.
●Base location & access instructions, base sounds and Comfort Zone /
settings are in MY BASE.
If you are viewing the dashboard on a small screen or mobile click on the menu
‘hamburger’ icon to access the menus.
Help to complete specific tasks is available at www.acticheck.com/support
20
Other manuals for THE ASSURE
3
Table of contents
Other ACTICHECK Personal Care Product manuals

Popular Personal Care Product manuals by other brands

Sinbo
Sinbo SS 4036 instruction manual

Panasonic
Panasonic The Cleansing Brush Micro-foam 3-in-1 operating instructions

König Electronic
König Electronic HC-FS10 manual

Panasonic
Panasonic EH2511 operating instructions

FAB GLASS AND MIRROR
FAB GLASS AND MIRROR MRec18x40BE6MM installation manual

Impacto
Impacto MetGuard Manufacturers User Manual


