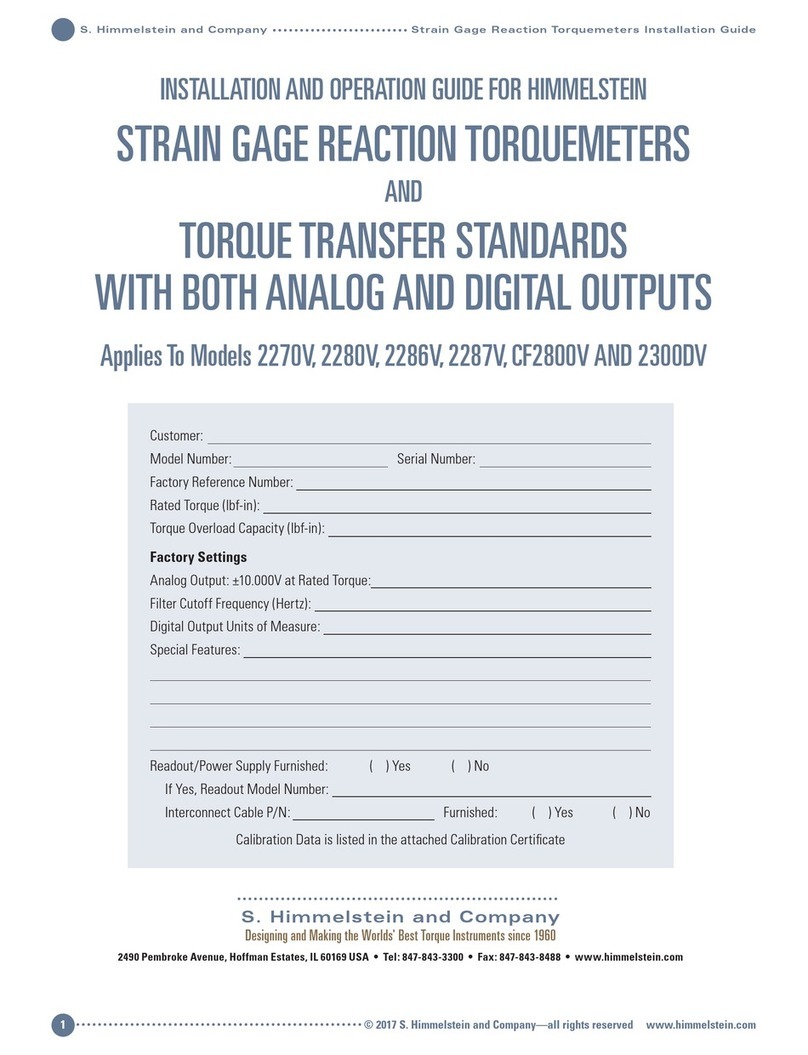
Himmelstein MCRT 48200V User manual

1
© 2022 S. Himmelstein and Company—all rights reserved. www.himmelstein.com
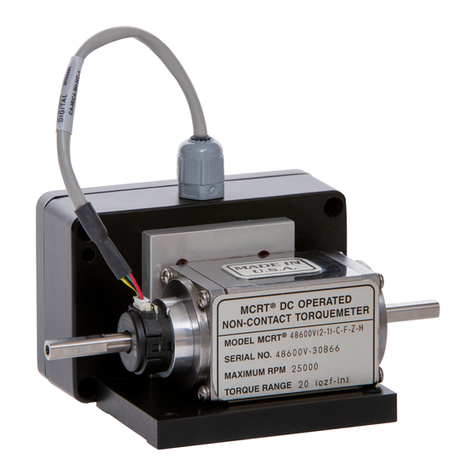
MCRT®48200V NON-CONTACT DIGITAL TORQUEMETER
INSTALLATION, OPERATION,AND TROUBLESHOOTING GUIDE
MCRT®48200V NON-CONTACT DIGITAL TORQUEMETER
INSTALLATION, OPERATION,AND TROUBLESHOOTING GUIDE
& COMPANY
2490 Pembroke Avenue, Hoffman Estates, IL 60169 • 847-843-3300
www.himmelstein.com
Revision C • August 2021
CDTM

MCRT®48200V Non-Contact Digital Torquemeter
Installation, Operation, and Troubleshooting Guide
Customer:
Model Number:
Serial Number:
Factory Reference Number:
Rated Torque (lbf-in):
Torque Overload
Capacity (lbf-in):
Maximum Speed (rpm):
Performance Coade:
Special Features:
Speed Pickup Supplied: ❑None ❑Coda A ❑Code Z
Installed Scaling, Analog Output, Unit of Measure, and Filter Cutoff Frequency
Torque Range:
Torque Unit of Measure:
Analog Output Voltage:
Filter Cutoff Frequency:
Password Protection: ❑On ❑Off
Note: Unless specied differently when ordered, default values are as follows:
Sensor Full Scale ...................±10 Volts
Torque Unit of Measure ..............lbf-in
Filter Cutoff Frequency...............10 Hz
Password Protection ................Off
These selections can be changed with the included software.
The attached Calibration Certicate lists actual calibration data. The calibration was done in Himmelstein’s NVLAP Accredited
Laboratory (NVLAP Lab Code 200487-0). For details, visit www.himmelstein.com or the ‘laboratory accreditation’ link @
www.nist.gov. Cal values are loaded on power up. Calibration data can be accessed using a PC and the supplied software.
& COMPANY
2490 Pembroke Avenue, Hoffman Estates, IL 60169 • 847-843-3300
www.himmelstein.com

3
© 2022 S. Himmelstein and Company—all rights reserved. www.himmelstein.com
Contents
I. Introduction ....................... 4
A. Mechanical Installation ............. 5
A.1 Applicability................................. 5
A.2 Coupling Selection ........................... 5
A.3 Coupling Installation.......................... 5
A.4 End-to-End Orientation........................ 5
B. Electrical Installation ............... 6
B.1 Applicability ................................. 6
B.2 Stator Connectors ............................ 6
B.2.1 Earth Ground Connection .................. 6
B.2.2 Power Input; 2 Pin Connector............... 6
B.2.3 Analog Outputs, Cal Enable,Torque Zeroing;
4 Pin Connector .......................... 6
B.2.4 Speed Signal Connector ................... 7
B.2.5 Com Port Connector; 3 Pins ................ 7
C. DT482 PC Interface Software ........ 9
C.1 DT482 PC Software Overview .................. 9
C.2 Change Sensor/Test Setup ..................... 9
C.3 DisplayTorque Data........................... 9
C.4Test Control ................................. 9
C.5 Perform Dead Weight Calibration ............... 9
C.6 Calibration Intervals .......................... 9
D. Operating & Safety Considerations ... 10
D.1 Applicability................................ 10
D.2 AllowableTorque Loads ...................... 10
D.2.1 Overload Considerations ................. 10
D.2.2 Fatigue Considerations ................... 10
D.2.3 Starting High Inertias with Electric Motors ... 10
D.3 Allowable Bearing Loads ......................11
D.4 Allowable Extraneous Loads ...................11
D.4.1 Allowable Bending Loads ..................11
D.4.2 AllowableThrust Loads....................11
D.5 Operating Speeds ........................... 12
D.6 Contaminants .............................. 12
E. Troubleshooting................... 12
E.1 Scope ..................................... 12
E.2 Preliminary Inspection ....................... 12
E.2.1Torquemeter ............................ 12
E.2.2 Cabling and Earth Grounding.............. 12
E.2.3 Readout Instrument/Data Acquisition System/
Controller .............................. 12
E.3Torque Subsystem ........................... 12
E.3.1 No Output When Torque is Present ......... 12
E.3.2 Constant Output Regardless of ShaftTorque . 13
E.3.3 Apparent Zero Drift ...................... 13
E.3.4 Signal Instability ........................ 13
E.3.5 System Will Not Zero..................... 13
E.4 Speed Pickup Replacement ................... 13
E.4.1 Removing A Defective Pickup .............. 13
E.4.2 Installing A Replacement Pickup ........... 13
E.4.3 Replacement Part Numbers ............... 13
Appendix I: MCRT® 48200V
Torquemeter Specication ............ 14
Appendix II: Belt and Chain Drive
Considerations ..................... 15
Appendix III: Mating Stator Connector
Part Numbers ...................... 15
Appendix IV: Serial Communications
for the MCRT®Compact Digital
Torquemeter ....................... 16
General Conventions Used InThis Document........ 16
General information ............................ 16

4© 2022 S. Himmelstein and Company—all rights reserved. www.himmelstein.com
MCRT®48200V TORQUEMETERS measure and output
shaft torque and speed; speed is an option. Manual adjust-
ments and noisy pots are eliminated. Null, scaling and
unit of measure are stored in non-volatile memory. Ten
common units of torque are supported. Bessel response
signal lters avoid delay distortion and overshoot and
assure optimal measurement response. You may choose
from eleven (11) lter cutoff frequencies; 0.1 to 200 Hertz
in 1-2-5 steps. Input power is a single, unregulated dc
supply.The torquemeter has reverse polarity protection.
If you re-calibrate, previous calibration values are
archived. Pin strapping and serial commands enable
traceable* torque calibrations, and remote zeroing. Pass-
word protection may be invoked if needed.
* NIST traceable calibration performed in our accredited Cal Lab
(NVLAP LAB Code 200487-0). For details visit www.himmelstein.com or
www.nist.gov.
Torque is sensed by one or more metal foil strain gage
bridges. The rotating bridges are excited, amplied and
converted by proprietary circuitry which produces coded
data unaffected by amplitude variations.That data is then
transmitted to the stator as infrared (IR) energy where it
is detected and output in industry standard analog and
digital formats.
The IR transmission is inherently tolerant of electrical
and magnetic noise. Because MCRT®48200Vs are fully
enclosed, they are immune to sunlight and virtually all
airborne contaminants. Power is transferred to the rotor
inductively, without contact. Elimination of slip rings,
brushes, radio transmitters and other limited-life, noise-
generating and noise susceptible elements provides long
life and high data reliability.
I. Introduction
DETAILS ABOUT INCLUDED SOFTWARE
Included standard software operates on Windows-based PCs. Use it to:
• Display CurrentTorque with Unit of Measure on the PC screen
• Display PeakTorque with Unit of Measure on the PC screen
• DisplayTorque Minimum with Unit of Measure on the PC screen
• DisplayTorque Spread with Unit of Measure on the PC screen
• Select ±5 Volt or ±10 Volt analog output
• Select lter cutoff frequency
• Select from ten Units of Measure without recalibration
• Remotely invoke a CW or a CCW Cal Check
• Remotely Zero theTorque Signal
• Turn Password Protection On and Off
• Re-dead weight calibrate the torquemeter
• Torque vs time screen plot
• Set High and Low torque limits with on screen status indicator
• Save data to disk
• StoreTest setup parameters

5
© 2022 S. Himmelstein and Company—all rights reserved. www.himmelstein.com
A. Mechanical Installation
A.1 Applicability
This discussion is applicable to all MCRT®48200V torqueme-
ters, i.e, MCRT®48201V, MCRT®48202V, etc.
A.2 Coupling Selection
Your torquemeter installation method dictates the type of
coupling needed. There are two installation methods, i.e., a
oating shaft and a base (or foot) mount.
In oating shaft installations, a single ex coupling is installed
at each shaft end. It takes out angular misalignment, and the
torquemeter “tilts” to take out parallel misalignment. Use a ex-
ible strap to prevent housing rotation and to strain relieve the
torquemeter electrical cable. Caution: when conduit is required
for electrical connections, the conduit must be exible. If rigid
conduit must be used, then use a foot mounted installation as
described below.
Install a foot mounted Torquemeter between double ex
couplings as shown. The double ex couplings accommodate
both parallel and angular misalignments.
For either installation method, choose couplings that will handle the:
• Expected shaft end oat
• Parallel and angular misalignments
• Maximum expected shaft speed
• Maximum expected shaft torque
• Expected extraneous loading
A.3 Coupling Installation
Use a slight interference t (0.0005 inches per inch of shaft
diameter) and follow the coupling manufacturers’ instructions.
Before installation, lightly coat the torquemeter shaft with an
anti-seizing compound suitable for use at 400 deg. F.
Next, heat the coupling hub, not the torquemeter, to
approximately 400 deg. F. Then, install the coupling.
The heated coupling hub should “slip” on the
torquemeter shaft without signicant resistance.
That is, coupling installation force shouldn’t
exceed a few pounds of axial force. Next, allow the
assembly to cool to room temperature.Then, repeat
the process for the second coupling.
If desired, use forced air to accelerate cooling.
Air cooling avoids contaminating the torque-
meter with anti-seizing compound. If cooling is
speeded with water dampened rags, orient the
torquemeter to prevent entry of water mixed
with anti-seizing compound. Otherwise, internal
damage can occur.
After coupling installation, verify that:
• Clearance exists between the coupling and
the torquemeter stator, and
• The shaft-to-coupling t is snug enough to
prevent vibration induced coupling motion.
To Avoid Damage Or Injury
• Use xturing to support the hot shaft.
• Use insulated gloves when handling hot parts.
• Stop the hub installation if the pressing force
exceeds a few pounds. Remove the coupling.
Cool all parts, and then inspect for burrs on
the coupling bore, shaft, keys and keyways. If
the parts are burr free, check the bore size and
verify the coupling keyway squareness.
• Don’t allow uids to enter the torquemeter.
A.4 End-to-End Orientation
MCRT®torquemeters are bi-directional.Their output
signal polarity reverses when the direction of
transmitted torque reverses. Himmelstein uses the
following convention for dening torque direction.
CWTorque: the shaft turns CW, when viewed
from the driven end
CCWTorque: the shaft turns CCW, when viewed
from the driven end
Reversing a torquemeter end-for-end doesn’t
change the torque direction or magnitude. There-
fore, it will have no effect on the torquemeter output
signal. When in doubt about shaft torque direction,
observe the output signals during normal machine
operation. A positive signal output indicates CW
torque per the above denition. A negative output
signal signies a CCW torque.
LoadDriver
Torquemeter
Single-Flex Coupling Single-Flex Coupling
Flexible Strap
Figure 1. Floating Shaft Installation.
LoadDriver Torquemeter
Double-Flex Coupling Double-Flex Coupling
Figure 2. Foot Mounted Installation.

6© 2022 S. Himmelstein and Company—all rights reserved. www.himmelstein.com
B. Electrical Installation
B.1 Applicability
This section applies to all MCRT®48200VTorquemeters.
B.2 Stator Connectors
Three stator connectors are used, as follows:
• Input Power (2 Pins)
• Analog Output/Cal Enable/Zero (4 Pins)
• Com Port (3 Pins)
If an optional speed pickup is furnished, it will have an
integral 2 pin (Code A) or 3 pin (Code Z) connector. The
Code Z Zero Velocity Pickup is recommended for use
at low operating speed and for electrically noisy envi-
ronments. Mating connectors are supplied except if a
complete cable is furnished for the Com Port.
Before wiring mating connectors, refer to Figure 5 for the
connector pin number identication(s).That Figure shows
the stator connector looking down at the torquemeter.
Mating connector pin sequence is their mirror image.
B.2.1 Earth Ground Connection
Connect theTorquemeter stator directly to earth ground, a
buildings’ structural steel or a oor rod. If neither is avail-
able, drive a six foot copper rod into the oor. Then run
separate ground straps between it, the drive motor frame,
the machine base, the torquemeter housing, the load
device and the data acquisition/computer system ground.
Don’t “daisy chain” the connections. See Figures 3 and 4.
If an IGBT-based variable frequency drive (VFD) is used,
follow its installation manual. Improperly installed VFD’s
can cause premature motor and cable failures, and
reading errors from excessive noise. VFD’s should have
shielded power and motor cables. Belden Types 29500
thru 29507 cable are designed for VFD use. See “Cable
Alternatives for PWM AC Drive Applications” available at
www.belden.com. Himmelstein recommends the connec-
tion in Figure 20. For best results, use a differential input
amplier in these electrically noisy environments.
B.2.2 Power Input; 2 Pin Connector
The power connector has two pins with pinout as follows:
Pin 1 Power Return
Pin 2 + Power In ( 10 to 15 VDC)
Spare mating connectors can be ordered from the factory;
P/N: 320-1285.
Reverse polarity protection is standard. Although any wire
may be used for connections, shielded cable will perform
best in noisy environments and is recommended. Note:
the shield should oat at the Torquemeter end. The other
end should be tied to earth ground; see Figure 5.
Caution: Don’t connect a Torquemeter to a
Power Supply that also drives inductors or
solenoids. Induced switching transients may
cause damage or noise.
B.2.3 Analog Outputs, Cal Enable, Torque
Zeroing; 4 Pin Connector
Shielded cable is recommended for these connections.
The shield should oat at the Torquemeter end and tied
to earth ground at the other end; See Figure 5. Spare
mating connectors can be ordered from the factory; P/N:
320-1287.
B.2.3.1 Analog Outputs
An analog ofTorque is output on the four pin connector.
Pin connections are as follows:
Pin 1 Analog Output
Pin 2 Analog Ground
The analog signal may have full scale values as
follows:
Torque CW = +10V, CCW = -10V, or
CW = +5V, CCW = -5V
The default value is 10 Volts.The user may reas-
sign the output voltage selection with the use of
a PC and supplied software. CW torque causes
the shaft to turn CW when viewed from the
driven end. CCW torque causes the opposite
rotation.
B.2.3.2 Cal Check Enable
Internal Calibration Check Circuitry may be
remotely enabled by pin strapping and/or via
Load Device
DAS/Controller
Machine Base
Drive Motor Torquemeter
Earth Ground
NOTE: Use separate
ground straps.
Figure 3. Correct System Earth Grounding.

7
© 2022 S. Himmelstein and Company—all rights reserved. www.himmelstein.com
the com port using furnished software. Pin strapping is
accomplished by shorting the designated pin on the four
pin connector, to Analog Ground (Pin 2).
CW Cal: Short Pin 3 to Pin 2
CCW Cal: Short Pin 4 to Pin 2
The calibration signal will remain on until the short is
released. For that reason it should be invoked while the
driveline torque is at zero; if locked-in torque is present,
break one of the shaft couplings. When the driveline
torque isn’t zero, the calibration signal will add algebra-
ically with the driveline torque.
Calibration can also be invoked from a remote computer
using the furnished software.
Equivalent calibration values, in engineering unit of
measure, are listed on the Calibration Certicate which
documents NIST traceability. Calibration values were
determined in S. Himmelstein and Company’s accredited*
(NVLAP Lab Code 200487-0) calibration laboratory. They
can also be accessed using the furnished software. The
user may perform a dead weight calibration and store the
results in memory, using furnished software.The original
cal data is archived.
*For details visit www.himmelstein.com or follow the accreditation link at
www.nist.gov.
B.2.3.3 Torque Zeroing
TORQUE ZEROING SHOULD ONLY BE DONE WHEN
THE DRIVELINE TORQUE IS ZERO. If locked-in torque is
present, break one of the shaft couplings to remove it.
The Torquemeter can be remotely zeroed by simultane-
ously strapping the CW and CCW Cal enable lines (Pins
3 & 4) to Pin 2, and holding that condition for ve (5)
seconds. When this is done, any residual system offsets
will be removed.
Torque Zeroing can also be invoked from a remote
computer using the furnished software.
B.2.4 Speed Signal Connector
B.2.4.1 Zero Velocity (Code Z) Pickup
Code Z Zero Velocity Speed Pickups have three pin
connectors. They require external power (6 to 15VDC).
Connections are as follows:
Pin A +Power In (6 to 15VDC)
Pin B Output Signal (60 pulses/rev)
Pin C Common
Zero Velocity Speed Pickups produce 60 pulses/revolu-
tion. The pulse amplitude is independent of speed and is
approximately equal to the external supply voltage. Code
Z pickups are recommended for low speed service and for
electrically noisy environments.
Replacement Code Z Pickups can be ordered from the
factory; P/N: 900-1007. Spare mating connectors can also
be ordered; P/N: 224-5361.
B.2.4.2 Standard (Code A) Pickup
Code A Standard Speed Pickups have two pin connectors.
They are self generating, i.e., they do not require external
power. Connections are as follows:
Pin A Signal
Pin B Signal
Standard Speed Pickups produce 60 pulses/revolution.
The pulse amplitude is approximately proportional to
shaft speed. Therefore, outputs are low at low speeds. If
you must measure speeds below 100 rpm or, if you are in
an electrically noisy environment, you should use a Code
Z Pickup.
Replacement Code A Pickups can be ordered from the
factory; P/N: 900-1001. Spare mating connectors can also
be ordered; P/N: 224-3897.
B.2.5 Com Port Connector; 3 Pins
Torquemeters are shipped with a 20’ Sensor to PC cable.
The cable is made per Figure 5. If required, we can supply
a 50 foot cable. RS232 runs greater than 50 feet require a
repeater.
The Baud rate is xed at 115,200. Eight data bits are used
without parity. Neither handshaking or an ID is employed.
If you wish to write your own software, see Appendix
IV for serial communication commands. Spare mating
connectors can be ordered; P/N: 320-1286. Call the factory
should you need a spare cable assembly.
Load Device
DAS/Controller
Machine Base
Drive Motor Torquemeter
Earth Ground
Load Device
DAS/Controller
Machine Base
Drive Motor Torquemeter
Figure 4. Examples of Incorrect Earth Grounding.

8© 2022 S. Himmelstein and Company—all rights reserved. www.himmelstein.com
Figure 5.Torquemeter Cable Connections.
Torquemeter Stator Housing
Analog
Outputs
Mating Connector
(viewed from side
wires connect to)
Belden 9940
or equivalent.
Belden 8761
or equivalent.
Note: To Zero, connect
pins 3 and 4 to pin 2
for 5 seconds.
Mating Connector
(viewed from side
wires connect to)
Mating Connector
(viewed from side
wires connect to)
Power
In
COM
Port
1
2
34
1
2
1
2
3
Optional Speed Pickup:
Type A: Pin A +Signal
Pin B -Signal
Type Z: Pin A +POWER IN
Pin B Output Signal
Pin C Common
Notes:
1. A dot appears next to Pin 1 on
all connectors.
2. All cables are shielded.
3. Shields Float atTorquemeter end.
4. Shields terminated at Data
Acquisition/Controller end.
5. Shields must be continuous.
Do not cut or splice them.
6. Body ofTorquemeter should be
strapped to earth ground.
See ¶B.2.1.
Pin 1
Pin 2
Pin 3
Pin 4
Analog Output
To Customer
Data
Acquisition
System or
Controller
Earth
Ground
Analog Ground
CW CAL
CCWCAL
{
To
Customer
Furnished
Power
(10-15VDC)
To
Computer
COM
Port
{
Pin 1
Pin 2
Power Return
+Power In
{
Pin 1 TXD
Pin 2 GND
Pin 3 RXD
RED RXD
GRN TXD
WHT GND
BLK
Pin 2
Pin 3
Pin 5

9
© 2022 S. Himmelstein and Company—all rights reserved. www.himmelstein.com
C. DT482 PC Interface Software
C.1 DT482 PC Software Overview
Sensors are shipped with standard Windows-based PC
interface software (Titled: DT482). That software provides
for several valuable functions as follows:
• Change Setup; Units of Measure, etc.
• Display Current MeasuredTorque
• Display PeakTorque
• Display MinimumTorque
• DisplayTorque Spread
• Make Real-timeTorque Plots
• Store Data
• StoreTest Setup
• ControlTest Functions
• Perform dead weight calibration and archive cal data
All PC operated functions are accomplished by selecting
options shown on the screen. The following paragraphs
summarize the functions available. Page 1 lists the
installed setup, when shipped. If desired, a user may
write his own communication software; see Appendix IV
for information on the serial command structure.
C.2 Change Sensor/Test Setup
• Select any of 10 units of measure. Default units are:
lbf-in. See Appendix I for a complete listing.
• Select any of 11 data lter cutoff frequencies; 0.1 to
200 Hz in 1-2-5 steps. Data lters have neither delay
distortion or overshoot errors.
• Select ±5V or ±10V full scale analog output.
• Set High and Low Torque Limits and display their
status on PC screen.
• Save data to disk.
• Store test setup.
• Adjust the value of the analog output voltage. This is
factory set at ±5.000V and ±10.000V and should not be
re-adjusted without accurate measuring equipment.
• Invoke or disable password protection and enter
a new password. Default condition is password
protection disabled. The default password is SHC.
You can change the password to any string but,
record the new one in a secure place.
Setup changes made with the Interface Software don’t
require recalibration. Any change will automatically
recongure dependent parameters. For example, if units
are changed from lbf-in to Nm, torque data and Cal Checks
will be correct without further adjustments.
C.3 Display Torque Data
• Displays Current Torque numeric data with unit of
measure.
• Displays Torque Peak and Valley numeric data with
unit of measure.
• Displays Torque Spread numeric data with unit of
measure.
• Classies status of user set High and Low Torque
Limits.
• Displays real time plots ofTorque.
C.4 Test Control
You can initiate the following actions from a PC:
• Invoke CW and CCW Cal Checks.
• InvokeTorque Zeroing.
• Save current setup parameters.
• Save Data to disk.
C.5 Perform Dead Weight Calibration
Units are shipped with an NIST traceable dead weight
calibration performed in our accredited laboratory; a Cali-
bration Certicate is shipped with the sensor. The results
of that calibration are stored in non-volatile memory and
automatically loaded on power up. Remote, initiated
either via PC (per ¶C.4) or by strapping (per ¶B.2.3.2), Cali-
bration Checks are referenced to it.
The user can perform a dead weight calibration and store
it in memory.The interface program prompts you through
the process. If done, the original factory calibration will
be archived as will subsequent dead weight calibrations.
However, unless you have accurate, accredited calibra-
tion facilities, you should not substitute a eld calibration
for the factory calibration. Rather, you can perform a
eld calibration for use as a rough check of operation. If
an inaccurate or erroneous calibration is inadvertently
stored, the factory calibration(s) may be recovered.
C.6 Calibration Intervals
For continuous or intermittent service, make periodic
Calibration Checks per ¶B.2.3.2 or ¶C.4, above.
In applications requiring high accuracy, perform a dead
weight calibration in a accredited torque calibration labo-
ratory at intervals specied by your QC Procedures. If
you do not have an established QC procedure, then we
recommend an initial one year interval.
If the MCRT®Torquemeter is overloaded or operates
abnormally, then calibrate/inspect it at once.
Himmelstein offers certied dead weight calibration
service, traceable to NIST, for all its products. Its calibra-
tion laboratory is accredited (Laboratory Code 200487-0)
by NVLAP, an arm of the NIST. For further information
visit our website at www.himmelstein.com or, follow the
accreditation link at www.nist.gov

10 © 2022 S. Himmelstein and Company—all rights reserved. www.himmelstein.com
D. Operating &
Safety Considerations
D.1 Applicability
The following paragraphs apply to all MCRT®products.
D.2 Allowable Torque Loads
Operate an MCRT® torquemeter within its’ full scale; see
booklet cover for rating of this device.
D.2.1 Overload Considerations
The overload rating of an MCRT©Compact DigitalTorque-
meter is 2 times full scale.This torquemeters’ overload is
listed on the cover sheet. The torquemeter will not yield
(evidenced by a non-return to zero) or fail if subjected to
an instantaneous peak torque up to its’ overload value.
Both the full scale and overload ratings are based on the
peak stress seen by the transducer.They are independent
of stress duration, except for cyclical (or fatigue) loading
considerations; see ¶D.2.2. Virtually all rotary power
producing and absorbing devices produce pulsating
rather than smooth torque and power.
Thus, in addition to its’ average torque and speed values,
the driveline torque usually includes a fundamental
(driving) frequency and superimposed harmonics.
Torsional vibration magnitudes can be amplied by the
driveline. See Bulletin 705 for further information. The
Figure 6 waveform is typical of what occurs in the real
world.
For these reasons, a conservative design approach
dictates the torquemeters’ overload => twice the probable
peak torque. Reserve the region between the peak instan-
taneous torque and the torquemeters’ overload rating as
a safety margin for unexpected loads. Do not knowingly
operate in the overload region. If you expect torques in
the overload region, then change to a torquemeter with a
higher overload rating.
D.2.2 Fatigue Considerations
If the peak torque seen by an MCRT®torquemeter is less
than half its overload rating, it can handle full torque
reversals with innite fatigue life. When peak torques
are cyclical, and exceed 50% of the overload rating, then
fatigue failure can occur.
D.2.3 Starting High Inertias with Electric Motors
When started across the line, during the start, a motors’
developed torque can be several times its’ rated torque.
Thus, a Digital Torquemeter sized to handle the motors’
rated load torque, can be overloaded during starting.
Drivelines are particularly vulnerable when oversized
motors drive light duty, high inertia loads.
Load
J2
Driver
J1
J1 & J2 ARE ROTATING INERTIAS
Torquemeter
To avoid damage when starting high inertia loads, use
a torquemeter rated for the starting torque or, limit the
starting torque to a safe value.Techniques to limit electric
motor starting torques include:
• Use reduced voltage starting.
• Electronically limit the maximum motor current.
• Add inertia to the input side of the torquemeter.
Before operating, verify the motor can safely start
the increased load inertia.
• Use “shock absorbing” couplings. Careful coupling
selection and thorough analysis is essential. Under
some conditions, such couplings can aggravate
rather than improve the situation.
Figure 6. Reciprocating Machine Torque Prole.
Figure 7. Motor Start Torque Prole.

11
© 2022 S. Himmelstein and Company—all rights reserved. www.himmelstein.com
D.3 Allowable Bearing Loads
MCRT®torquemeter bearing design provides long life,
smooth running, and avoids bearing torque measure-
ment errors. In a oating shaft installation, the stator
must be exibly restrained so total loads, including the
stator restraint and shaft runout, don’t exceed its bearing
rating. A stranded wire or braided cable will provide this
exible restraint and strain relieve the electric cable.
When the stator is foot mounted, the coupling end oat
must be sufcient to take up axial shaft motions and
hold the bearing loads within the limits specied in the
following table.
When using shaft torquemeters in belt/chain drives,
pillow blocks are usually needed to isolate them from
radial bearing and bending loads (see ¶D.4). Consider
pulley or wheel type torque sensors for such service.
Their bearings are isolated from the belt loads, and they
accept large radial and bending loads without damage or
measurement errors.
Model
Bidirectional
Bearing Load (lbs)
Radial Axial
MCRT®48201V 50 20
MCRT®48202V 50 20
MCRT®48203V 75 30
MCRT®48204V 75 30
D.4 Allowable Extraneous Loads
Any moment or force a torquemeter sees, other than the
transmitted torque, is an extraneous load. Depending on
the installation, these could include bending moments and
axial thrust. Crosstalk errors from such loads, expressed
in pound-inches, are typically 1% of the applied pound-
inches of bending or, 1% of the applied pounds of thrust.
D.4.1 Allowable Bending Loads
When it is applied without thrust, a standard MCRT®
Torquemeter, mounted as a oating shaft, can handle a
shaft bending moment equal to one half its’ torque rating.
Such bending may be applied simultaneously with rated
torque.
The allowable bending input to a foot mounted torque-
meter (Figure 8) is dictated by its’ bearing radial load
ratings (see ¶D.3), and by the need to prevent coupling
“lock-up”. When a coupling locks-up, it no longer provides
one or more needed degrees of freedom and, ultimately
causes a driveline failure.
Caution
Use pillow blocks to isolate a foot mounted
torquemeter from excessive bending and
radial loads. When applying such loads, don’t
exceed a torquemeters’ bearing load ratings;
see Appendix II for explicit details.
D.4.2 Allowable Thrust Loads
Drive and
Thrust Bearing
THRUST
Torquemeter
When applied without bending, most MCRT®Torque-
meters, when mounted as a oating shaft, can handle a
thrust load (tension or compression) in pounds, applied
to its’ shaft (see Figure 9 ), equal to its’ torque rating in
pound-inches. Some units may have different thrust
capacities; refer to the applicable Specication or Descrip-
tive Bulletin. Such thrust may be applied simultaneously
with rated torque.
Caution
Large thrust loads are only allowable in
oating shaft installations. Bearing axial loads
limit the thrust capacity of foot mounted
torquemeters; see ¶ D.3.
Figure 8.Torquemeter With Bending Load.
Figure 9.Torquemeter With Thrust Load
Driver
Foot Mounted
Torquemeter Blower Wheel
UnderTest
WEIGHT OF
BLOWER WHEEL
APPLIES
BENDING LOAD
Double-Flex
Coupling

12 © 2022 S. Himmelstein and Company—all rights reserved. www.himmelstein.com
D.5 Operating Speeds
Operate MCRT®DigitalTorquemeters within the maximum
speed rating published in the pertinent specication and
appearing on the cover of this booklet. The ratings are
bi-directional. Standard torquemeters do not require
external lubrication.
Caution
If a driveline part fails, dynamic balance is
lost and the resultant forces can cause other
part failures.Therefore, it is an essential safety
requirement that guard covers, substantial
enough to contain any separated mass, be
installed.
D.6 Contaminants
Don’t ood a torquemeter with liquids—they can inter-
fere with IR signals and cause heat buildup from viscous
losses at high speeds.
MCRT®devices are immune to spray from mineral based
oils and natural, hydrocarbon hydraulic uids.When using
synthetic uids, verify they are compatible with plastic,
electronic components, and electrical insulation. Protect
the torquemeter from contact with uids that attack insu-
lation or plastics. Warranties are void for damage caused
by such materials.
Airborne abrasive can cause premature bearing failure.
When they are present, consider using an air purge to
prevent invasion of such materials.
E. Troubleshooting
E.1 Scope
These discussions suggest procedures for identifying a
defective system component.They are an aid for operating
personnel. Special training and adequate inspection, test
and assembly xtures are needed for extensive service.
The installation, the torquemeter, the cabling and the
terminal device are all potential faults.The best procedure
is to isolate the problem part, then correct or replace it.
Otherwise, return the defective part to the factory.
E.2 Preliminary Inspection
E.2.1 Torquemeter
Inspect the sensor for physical damage. If the shaft
is locked or a rub exists, remove the speed pickup, if
present, per instructions contained in ¶E.4.3. If the fault
clears, reinstall the pickup following ¶E.4.3 instructions.
Otherwise return the unit to the factory.
E.2.2 Cabling and Earth Grounding
Make electrical checks for continuity and shorts; see
¶B.2 and Figures 3, 4 and 5 for connections. Verify that
the mating connectors are installed and secured. Erratic
connections, omission of shields and poor grounds can
produce noise. If noise is a problem, then replace the cable
with one that is shielded and provide a good earth ground
to the motor, machine base and torquemeter housing per
¶B.2.1. Examine all cables for damage. Replace damaged
cables. Clean connectors with an approved contact
cleaner.
E.2.3 Readout Instrument/Data Acquisition
System/Controller
Examine for physical damage, blown fuses and/or loose
parts. Correct any defects; refer to the manufacturers’
manual, as necessary.
E.3 Torque Subsystem
E.3.1 No Output When Torque is Present
Verify input power is present, its’ polarity is correct, and
the cable is intact, i.e., between 10 and 15 VDC appears
at the torquemeter terminals. Finally, verify the power
supply is properly sized. That is rated for 10 to 15 VDC
output and will handle at least 250 mA and preferably 500
mA.
Operate the Cal Check. If the analog output has the correct
Cal Signal but the PC does not, then check the PC cable
connections and verify the port is set per ¶B.2.5. If all
checks are negative, the problem is in the sensor. Return
it for factory service.

13
© 2022 S. Himmelstein and Company—all rights reserved. www.himmelstein.com
E.3.2 Constant Output Regardless of Shaft
Torque
If the ¶E.3.1 above Cal Checks are performed and found
normal, then the problem is the sensor. Return it for
factory service.
E.3.3 Apparent Zero Drift
• Check the Cabling. See ¶E.2.2.
• Check for Driveline Torque Offsets. Torquemeters
installed in a drive which has hysteresis or friction
torques, may appear to have long term drift when
there is none. For example, when installed between
a pump and a gear drive, the torque reading may not
return to zero after a test because of locked-in fric-
tion torque.The sensor sees and reads that locked-in
torque. Always zero the torquemeter with no torque
on the driveline—in the case cited, with a coupling
disassembled. At the end of the test, the shaft should
be mechanically “shaken” or a coupling broken, to
return to zero torque. Otherwise, the sensor will
read locked-in torque. A rub between any rotating
and stationary part is a common cause of friction.
Verify the shaft couplings and other rotating parts
have adequate clearance.
E.3.4 Signal Instability
• Check the Cabling. See ¶E.2.2 above.
• Check For Driveline Torque Variations. The driveline
may have a low frequency oscillation which the
sensor reads (seeTech Memo 8150). Use theTorque-
meters’ low frequency lter to suppress signals
above 1 Hertz. If the readings become steady, then
you may wish to identify the physical cause of the
shaft torque variation or, remove it with mechanical
ltering techniques. Oscillographic signal analysis
is often helpful under these conditions. Use the 200
Hertz lter for this analysis. If very large, high inertia
machines are used, or large machines are used in a
control loop, torque and speed oscillations can be
present below 1 hertz.
E.3.5 System Will Not Zero
• Check the Cabling. See ¶E.2.2 above.
• Verify the Torque Input is Zero. If the sensor is
installed in a driveline, break or remove one of the
couplings. If the system still can’t be zeroed, then
the problem is either the cable, system grounding
or theTorquemeter. Verify cable integrity, congura-
tion and connections and check theTorquemeter per
¶E.2.1.
• Verify A Good Earth Ground, per ¶B.2.1, is present.
E.4 Speed Pickup Replacement
Speed pickups are threaded into the sensor stator housing
and locked with a jam nut.
E.4.1 Removing A Defective Pickup
• Disconnect the mating cable.
• With shaft motion stopped, loosen the jam nut.
• Back out the defective speed pickup.
E.4.2 Installing A Replacement Pickup
• With shaft motion stopped, screw in the new pickup
until it makes contact with the rotor assembly.
• Back off the pickup one quarter of a turn.
• Tighten the jam nut.
• Slowly rotate the shaft to verify no rub occurs. It you
detect a rub, re-adjust the pickup.
• Reconnect the mating cable.
E.4.3 Replacement Part Numbers
• Standard (Code A) Speed Pickup P/N: 900-1001
• Zero Velocity (Code Z) Speed Pickup P/N: 900-1007

14 © 2022 S. Himmelstein and Company—all rights reserved. www.himmelstein.com
Appendix I
MCRT®48200V Torquemeter Specication
General Specications Code N Performance Code C Performance
Accuracy (combined nonlinearity, hysteresis and nonrepeatability, % of Range) <= ±0.20 <= ±0.10
Remote Calibration Accuracy* (% of Range @ 75 °F/23.9 °C, traceable to NIST) <= ±0.10 <= ±0.05
Temperature Effects
Zero Drift (% of Range/°F)/(% of Range/°C) <= ±0.004/<= ±0.007 <= ±0.0017/<= ±0.003
Span Drift (% of Reading/°F)/(% of Range/°C) <= ±0.004/<= ±0.007 <= ±0.0017/<= ±0.003
Compensated Range (°F)/(°C) +75 to +150/+23.9 to +66
Useable Range (°F)/(°C) +32 to +175/0 to 79.4
Analog Output
(Resolution: 0.02% on ±10V
& 0.04% on ±5V output)
(Source Impedance: < 1Ω)
CW/CCW Output at Full Scale +10V/-10V or +5V/-5V, user selectable. Default is +10V/-10V.
Bandwidth (Hz.); has Bessel Response Data Filter(s) DC to 0.1 thru 200 in 1-2-5 steps
Noise and Ripple (rms, % of Range) <= 0.1
Overrange (% of Full Range) 30
Maximum Allowable Resistive and Capacitive Loads 10kΩ Minimum and 0.05uF Maximum
Rotational Effect on Zero (% of Range) <= ±0.05 <= ±0.025
RS232C Port (115,200 Baud) Outputs Torque in Engineering Units. Inputs units of measure, scaling, signal lter selection, zero, span, cal data and commands.
Supply Voltage 10 to 15 VDC @ 200 mA, nominal. Has reverse polarity and 25 Volt overvoltage protection.
Available Options
Enhanced Performance - Code C, Code N is standard performance.
60 PPR Speed Pickup Options: Code A is standard type, Code Z is Zero Velocity type, Code N denotes no pickup.
A Type Z pickup is recommended for low speeds and/or operation in electrically noisy environments.
Supported Units of Measure lbf-in, lbf-ft, ozf-in, ozf-ft, N-m, kN-m, N-cm, kgf-m, kgf-cm, gf-cm
MCRT®
MODEL TORQUE RANGE TORQUE OVERLOAD SPEED RATING* (RPM)
SHAFT
STIFFNESS**
ROTATING
INERTIA
MAX
WT.
[lbf-in] [n–m] [lbf-in] [n–m] Code N Code C [lbf-in/rad] [ozf-in s2] [lbs]
48201V(25-0) 25 2.82 50 5.65 0 to ±8,000 0 to ±15,000 1,800 0.031 10
48201V(5-1) 50 5.65 100 11.3 0 to ±8,000 0 to ±15,000 5,000 0.031 10
48201V(1-2) 100 11.3 200 22.6 0 to ±8,000 0 to ±15,000 12,000 0.031 10
48201V(2-2) 200 22.6 400 45.2 0 to ±8,000 0 to ±15,000 26,000 0.031 10
48202V(5-2) 500 56.5 1,000 113 0 to ±7,000 0 to ±12,000 66,000 0.032 10
48202V(1-3) 1,000 113 2,000 226 0 to ±7,000 0 to ±12,000 85,000 0.032 10
48203V(2-3) 2,000 226 4,000 452 0 to ±6,500 0 to ±8,500 288,000 0.080 10
48204V(5-3) 5,000 565 10,000 1,130 0 to ±6,000 0 to ±8,500 545,000 0.100 11
48204V(1-4) 10,000 1,130 20,000 2,260 0 to ±6,000 0 to ±8,500 684,000 0.100 12
*Ratings are for continuous operation without external lubrication. **Stiffness is conservatively rated and includes the torsion section and shaft ends.

15
© 2022 S. Himmelstein and Company—all rights reserved. www.himmelstein.com
Appendix II
Belt and Chain Drive Considerations
Appendix III
Mating Stator Connector Part Numbers
Function Number of Pins Part Number
Power Connector 2 320-1285
Analog Output/Cal
Enable/Zero
4 320-1287
Com Port Connector 3 320-1286
Type A Speed Pickup 2 224-3897
Type Z Speed Pickup 3 224-5361
MCRT®48200V Torquemeters are furnished with mating connectors and cable. Mating
Connectors are supplied for Power (2 Pins) and for Analog Outputs and Cal Enable (4
Pins). Additionally, a Com Port-to-PC cable is also provided.That cable has connectors
at each end. When a speed pickup option is ordered, the appropriate mating connector
is supplied; 2 pins for aType A pickup and 3 pins for aType Z pickup.
To order spare connectors, use the following part numbers (P/N).
When the bearing load ratings don’t meet the above criteria, use pillow blocks and a
jack shaft to isolate the pulley/belt loads; see Figure 10 example. Alternatively, consider
a pulley or wheel type torquemeter.Their bearings are isolated from the belt loads, and
they can accept large radial and bending loads without damage or measurement errors.
Caution. Don’t install a pulley or
sprocket on the torquemeter shaft
unless the torquemeters’ radial
bearing load rating, from ¶D.3, is :
≥[Torque Rating] / [4*L]
and,
≥[T1+T2]*[1 + L/H]
These criteria assure safe torque-
meter bending and bearing loads.
To simplify your analysis, assume
T2= 0 and calculate T1= [Torque
Rating*2/D]. Then, make [T1+ T2] =
1.1 times the calculated value ofT1.TORQUE = (T1 -T2) * (D/2)
T1 +T2 T1
H
T2
D
L
JACKSHAFT
PILLOW BLOCKS
FLEXIBLE COUPLINGS
TORQUEMETER
PULLEY
OR
GEAR

16 © 2022 S. Himmelstein and Company—all rights reserved. www.himmelstein.com
Appendix IV
Serial Communications for
the MCRT®Compact Digital Torquemeter
This specication of the serial communications for the MCRT®48200V is
subject to change at any time without notice.
• Lines that end in “ =a.b” apply only to version a.b
• Lines that end in “ >c.d” apply only to versions >c.d
• Lines that end in “ <e.f” apply only to versions <e.f
General Conventions Used In This Document
<OK> stands for the string “OK”
<index> is an alphanumeric character (A-Z or 0-9)
<CR> is a carriage return (^M / 13 decimal / 0D hexadecimal / 15 octal)
<LF> is a line feed (^J / 10 decimal / 0A hexadecimal / 12 octal)
<int> is a integer (e.g. “1234”)
<oat> is a oating point number string (e.g. “1234.57”)
<string> is a string (e.g. “LB-IN”)
<hex> is a hexadecimal *string* (e.g. hex could be “8FC4”)
<base64> is a base-64 *string* with “0-9A-Za-z@_”
<Bool> is either a ‘0’ which means false, or ‘1’ which means true.
<HF> is an 8 character hexadecimal string that represents a IEEE-oat. (A 1-bit
sign, 8-bit exponent biased by 126, and a 23-bit mantissa with an implied
MSB of 1)
• 0x80000000 : Sign (0 = positive, 1 = negative)
• 0x7F800000 : Exponent
• 0x007FFFFF : Mantissa
o if (sign = 0) then value = (2 ^ (Exponent - 24)) * (Mantissa + 0x800000)
o else value = -(2 ^ (Exponent - 24)) * (Mantissa + 0x800000)
General information
• All messages to and from the
MCRT48200V are terminated
with a <CR> or <LF>.
o The default termination
character is <CR>.
• To set a value on the
MCRT48200V, nd the mes-
sage that retrieves the data
you want to change. Then
append to that message the
desired value of the parame-
ter. The MCRT48200V should
respond with “OK”.
• All hexadecimal/binary data
from the MCRT48200V is in
big-endian (MSB rst) format.
In response to any command, the MCRT48200V returns one of the following:
• “string” where string is the data requested.
• “OK” operation was successful.
• “!Command:xx” command “xx” is not recognized.
• “!Channel” command is inappropriate for the given channel.
• “!Arg” parameter is malformed.
• “!Index” an index <index> is bad (see “CC” for example)
• “!Invalid” there is some other error.
• “!Unknown Error” an unknown error occurred.
• “!SignalToo Small” calibration signal is too small in magnitude.
• “!SignalToo Large” calibration signal is too large in magnitude.
• “!Signal has wrong sign” calibration signal is of the wrong sign for the requested calibration.

17
© 2022 S. Himmelstein and Company—all rights reserved. www.himmelstein.com
Examples:
Remember *ALL* messages to and from the MCRT48200V series end with a <CR> or a <LF>.
• Retrieve data:
Send “DC” to the MCRT48200V.The “DC” is the data current command.The return message should look
something like “1234.56”.
• Retrieve the lter:
Send “FL” to the MCRT48200V. The return message should be something like “07” which implies (refer-
ring to the appropriate list under the “FL” message) the lter setting is 5 Hz.
• Set the lter to 100 Hz:
Refer to the list under the “FL” (lter) command to nd that a 100 Hz lter corresponds to the value 02.
Therefore, send “FL02” to the MCRT48200V.The MCRT48200V should respond with “OK” if the operation
was successful.
• Retrieve the version number of the MCRT48200V:
Send “VR” to the MCRT48200V.The return message should be something like “Model MCRT48200V v1.2”.
Informational Only Messages
• These messages can only retrieve information from the MCRT48200V—they can not change any data on the
MCRT48200V.
• The time returned is the number of 10kHz clock ticks since the MCRT48200V was powered on.
MESSAGE REPLY MEANING
DC oat Current engineering data for the torque.
XC hex Current hexadecimal data for the torque.
YC hex, hex Time and Current hexadecimal data for torque.
64 base64 Current base-64 data for the given channel.
65 hex, base64 Hexadecimal time and Current base-64 data for the given channel.
MX int, int The max and min of the torque. Multiply by the scaling constants (SC command) to get lbf-in.
SN string Serial number of the MCRT48200V.
SP string Scratch pad of the MCRT48200V.
MD string Model number of the MCRT48200V.
PP Bool
Is ash password protected?
See the “PC” command to change the protection password, and the “PS” command to set/unset the
protection.
VR string Version number of rmware.
AD int, int, int
A/D readings
o1st number: temperature sensor
o2nd number: F-coil voltage
o3rd number: Input voltage
SC hexoat, hexoat Positive/Negative Scaling Constants, lbf-in / counts

18 © 2022 S. Himmelstein and Company—all rights reserved. www.himmelstein.com
Analog Output Messages
MESSAGE REPLY MEANING
AA int
o 5V vs 10V analog output
o 0: 10 V analog output
o 1: 5 V analog output
AI index OK
Analog output user tweak values
o index:
• A: DAC value to give +10V analog output
• B: DAC value to give +5V analog output
• C: DAC value to give 0V analog output
• D: DAC value to give -5V analog output
• E: DAC value to give -10V analog output
Miscellaneous Messages
MESSAGE REPLY MEANING
@@ OK Write data in RAM to non-volatile ash
PS
index
string
OK
Change Flash password protection
o string must match the current ash password
o index:
• A: Disable ash password protection.
• B: Enable ash password protection, but still allow taring of the torque.
• C: Enable ash password protection.
PC
string:
string:
string
OK
Change ash protection password.
o If the rst string equals the current password, and the second and third strings are equal, then
change the ash protection password to the second string.

19
© 2022 S. Himmelstein and Company—all rights reserved. www.himmelstein.com
Torque Specic Messages
MESSAGE REPLY MEANING
UN string Unit name of torque
TV int
Current Tare Value (16 bits)
o Chars 1- 4: Current Tare Value In raw counts
TT OK Tare Torque
SC HF HF
Positive and Negative Scaling Constants in lbf-in / raw counts
o Chars 1- 8: Positive scaling constant (IEEE-oat)
o Chars 9-16: Negative scaling constant (IEEE-oat)
DS HF
Display Scaling in eng units / lbf-in
o 0xFFFFFFFF : Display Scaling (IEEE-oat)
• The native units (lbf-in) for the channel’s data are multiplied by this number before being sent to
the user.
• Only data from the DC command is subject to this scaling.
FL int
FiLter (0-10) (4 bits)
o 2: 200 Hz
o 3: 100 Hz
o 4: 50 Hz
o 5: 20 Hz
o 6: 10 Hz
o 7: 5 Hz
o 8: 2 Hz
o 9: 1 Hz
o 10: 0.5 Hz
o 11: 0.2 Hz
o 12: 0.1 Hz
MXO OK Reset the max and min data to the current torque data
AS
index OK
Apply a Cal Check signal to the Torque data
o index:
• A: no-shunt applied
• B: Apply Positive Cal Check Signal (add full Scale to the reading)
• C: Apply Negative Cal Check Signal (subtract Full Scale from the reading)
CC
index HF
Calibration Constants
o index
• A: Full Scale
• B: Zero value -- LEAVE AT ZERO
• C: Positive Load value
• D: Negative Load value
CL
index long
Do a calibration. This message takes approximately 1.25 seconds to nish!
o index
• A: Do a Zero Calibration
• B: Do a Positive Load Calibration
• C: Do a Negative Load Calibration

& COMPANY
2490 Pembroke Avenue, Hoffman Estates, IL 60169 • 847-843-3300
www.himmelstein.com
CDTM
Table of contents
Other Himmelstein Measuring Instrument manuals
Popular Measuring Instrument manuals by other brands
Beta
Beta 1651DGT user manual
Master Meter
Master Meter Madness PD Assembly instructions

Keysight Technologies
Keysight Technologies U1084A Startup guide
AGICO
AGICO PUMA user manual
Endress+Hauser
Endress+Hauser Teqwave F operating instructions
Wavetronix
Wavetronix smartsensor advance INSTALLER QUICK-REFERENCE GUIDE
