Hitachi L44 User manual

L44 Probe
INSTRUCTION MANUAL
Tokyo , Japan
Q1E-EP1370-5
© Hitachi, Ltd. 2013,2017. All rights reserved.
Notes for operators and responsible maintenance personnel
★ Please read through this Instruction Manual carefully prior to use.
★ Keep this Instruction Manual together with the system with care to
make it available anytime.
0123

( 1 ) Q1E-EP1370
Manufacturer: Hitachi, Ltd.
2-16-1, Higashi-Ueno, Taito-ku, Tokyo,110-0015,
Japan
+81-3-6284-3668
http://www.hitachi.com/businesses/healthcare/
index.html
European
Representative: Hitachi Medical Systems GmbH
Otto-von-Guericke-Ring 3 D-65205 Wiesbaden,
Germany
EU Importer: Hitachi Medical Systems Europe Holding AG
Address: Sumpfstrasse 13 CH-6300 Zug, Switzerland
Local Distributor:

( 2 ) Q1E-EP1370
About this manual
This instruction manual shall provide instructions for using, cleaning,
and disinfecting and/or sterilizing the HITACHI ultrasound probes.
It also describes safety considerations, maintenance.
For instructions for operating the ultrasound diagnostic scanner,
refer to the operation manual for it.
Before using the probe, thoroughly read this manual and keep this book
for future reference.
If you have any questions concerning the manual, please contact a
service support.
The following conventions are used throughout the manual to denote
information of special emphasis.
WARNING: “Warning” is used to indicate the presence of a hazard
which can cause severe personal injury, death, or
substantial property damage if the warning is ignored.
CAUTION: “Caution” is used to indicate the presence of a hazard
which will or can cause minor personal injury or property
damage if the caution is ignored.
NOTICE: “Notice” is used to notify people of installation,
operation, or maintenance information which is important,
but not hazard related.

( 3 ) Q1E-EP1370
Graphical Symbols for Use in Labeling of Hitachi Ultrasound Probes
Some graphical symbols that are used in labeling of Hitachi Ultrasound Probes are
compliant with EN980:2008 standard. Refer to the following table about the meanings
of them.
Explanation of Symbol Symbol Descriptive Content
Manufacturer Company
Name and Address
Hitachi, Ltd.
2-16-1, Higashi-Ueno, Taito-ku,
Tokyo, 110-0015, Japan
+81-3-6284-3668
http://www.hitachi.com/businesses/
healthcare/index.html
Authorized
Representative
in The European
Community
Hitachi Medical Systems GmbH
Otto-von-Guericke-Ring 3 D-65205
Wiesbaden, Germany
Keep away
from Sunlight
Store the probe in a cool, dry and dark place
and keep away from high temperature, high
humidity and direct sunlight.

( 4 ) Q1E-EP1370
Definition of symbol
The following symbol is also used for HITACHI Ultrasound Probes.
Location Symbol Definition
Probe connector
This instrument complies with
Directive 93/42/EEC relating to
Medical Device and Directive
2011/65/EU relating to RoHS
Probe connector IPX7 IPX7 mark
See section 1.6.
Probe connector Type BF APPLIED PART
Probe connector General warning sign
Probe connector Warning; dangerous voltage
Probe connector Caution; Biohazard
Probe connector
Follow the instruction manual to
operate this instrument. If not
avoided, may result in injury, property
damage, or the equipment trouble.
Probe connector
STERRAD sterilization compatibility
mark
Probe connector Do not waste the instrument as general
waste. Comply with a local regulation.
Probe connector Rx Only
By prescription only. U.S. Federal Law
restricts this device to sale on order
of a physician only.

( 5 ) Q1E-EP1370
CONTENTS
Page
1. Introduction .................................................1
1.1 General .......................................................... 1
1.2 Principles of operation .......................................... 1
1.3 Intended Use ..................................................... 2
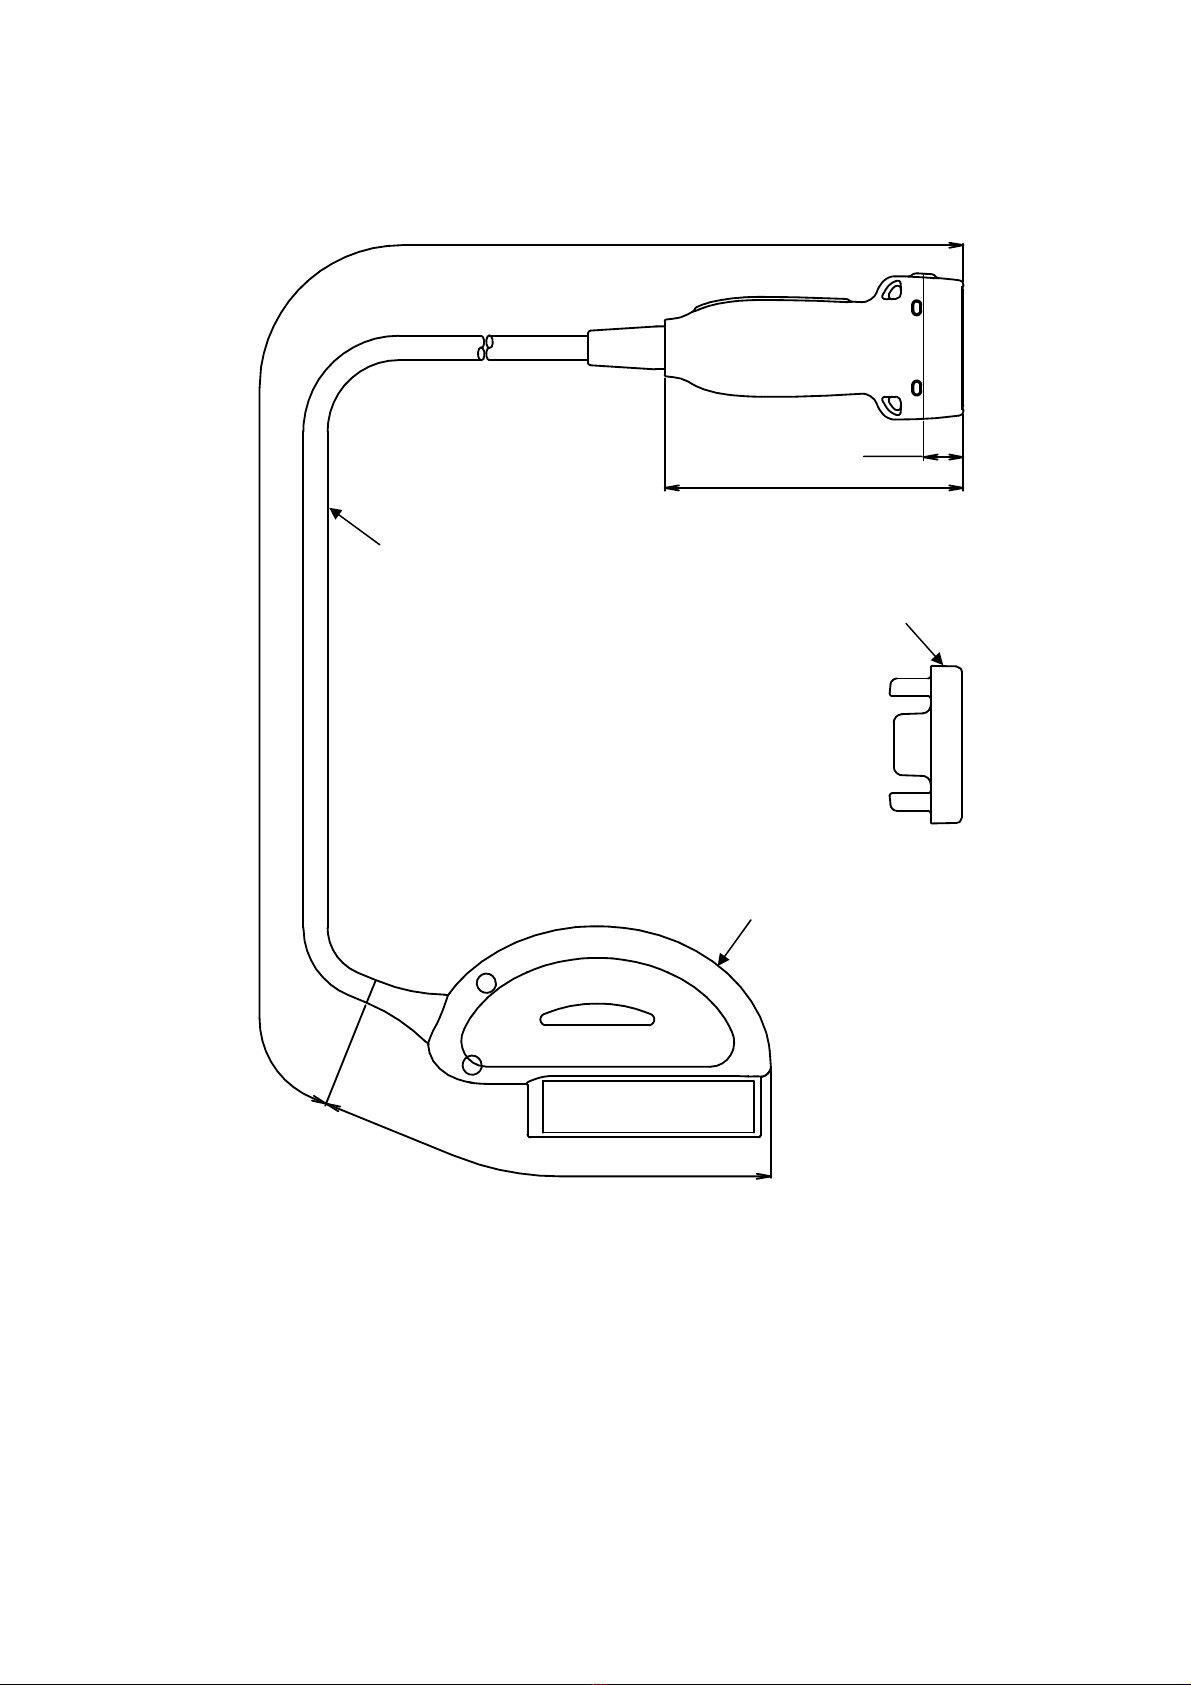
1.4 Components ....................................................... 2
1.5 Option ........................................................... 3
1.6 External View .................................................... 4
2. Inspection before Use ........................................5
2.1 Inspection of appropriate connection ............................. 5
2.2 Inspection of material surface ................................... 5
3. Operation Procedure ..........................................6
4. Option of L44 Probe ..........................................8
4.1 Elasto Coupler ................................................... 8
5. Reprocessing Procedure .......................................9
5.1 Point of use (Pre-cleaning) ..................................... 12
5.2 Containment and transportation .................................. 12
5.3 Manual Cleaning and disinfection ................................ 12
5.4 Drying .......................................................... 16
5.5 Inspection ...................................................... 16
5.6 Packaging ....................................................... 16
5.7 Sterilization ................................................... 16
5.8 Storage ......................................................... 18
6. Maintenance and Safety Inspection ...........................19
7. Safety Precautions ..........................................20
8. Specifications ..............................................21
8.1 Probe ........................................................... 21
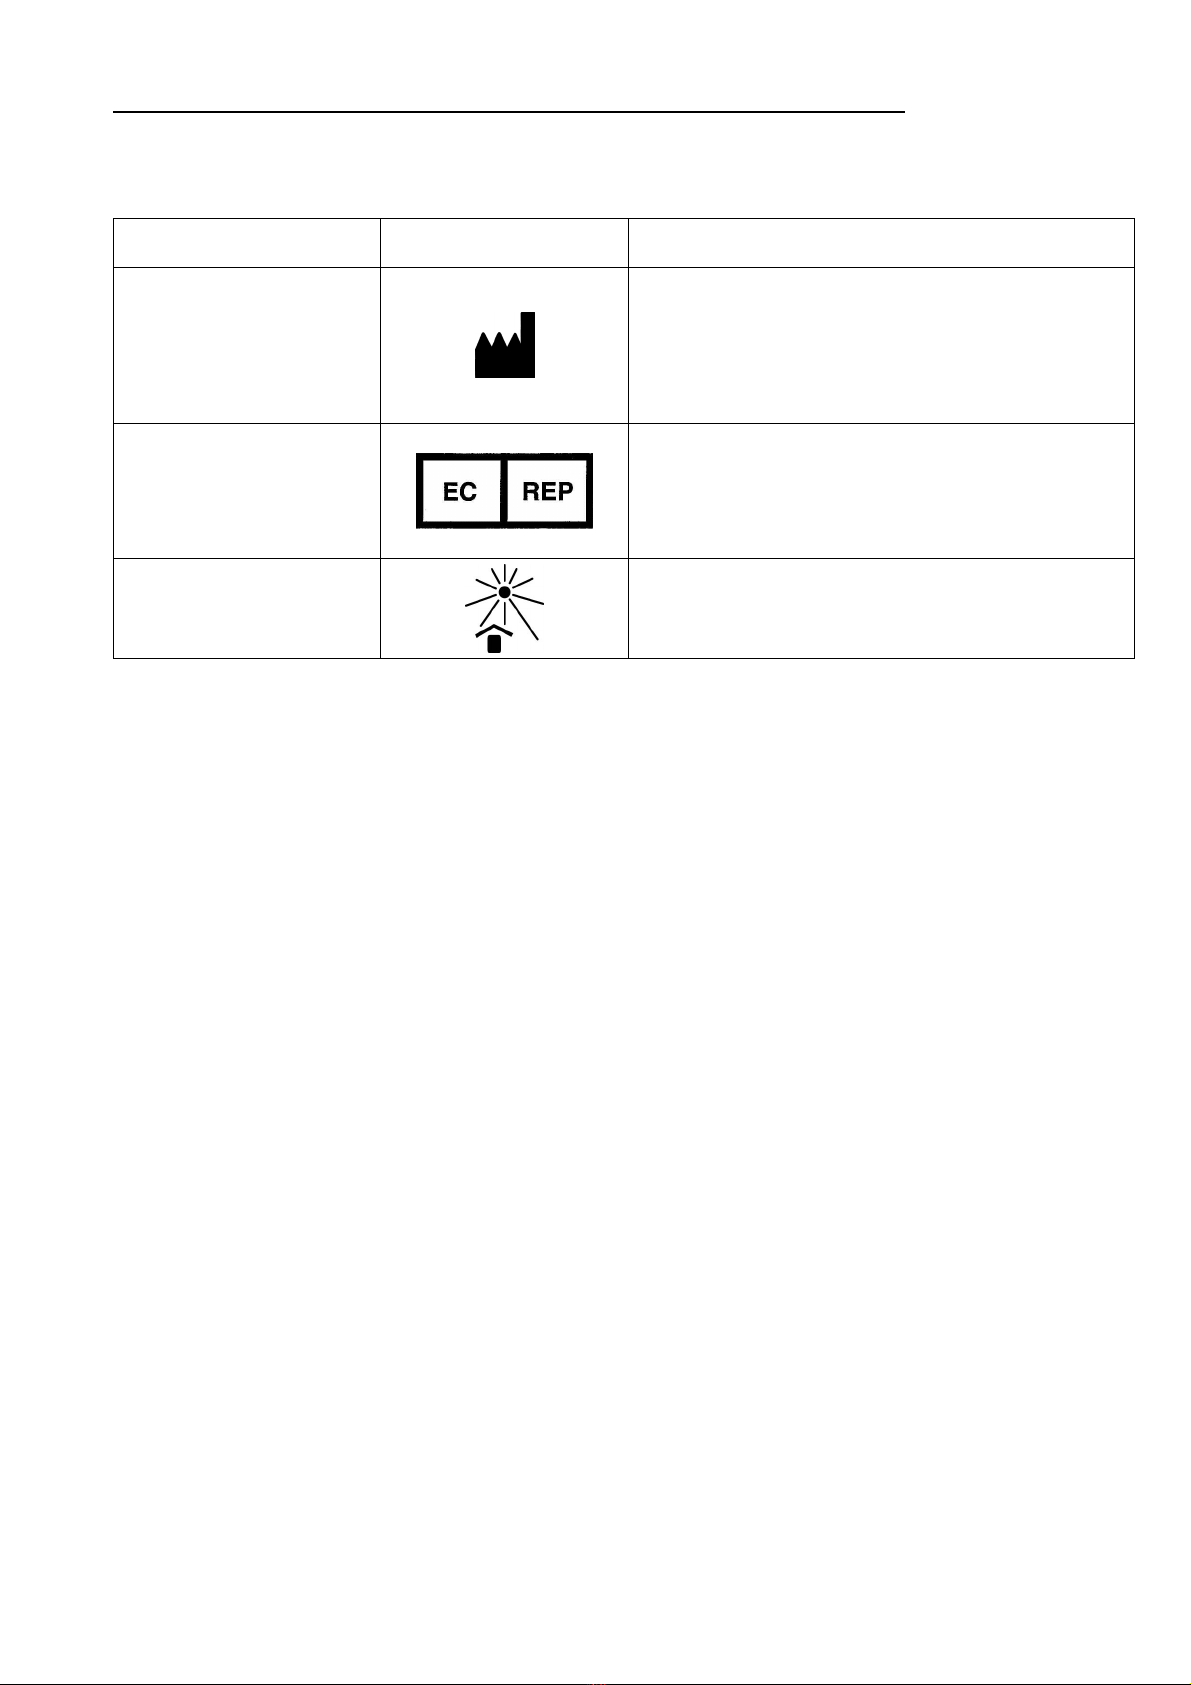
8.2 Suppliers List .................................................. 22
9. Disposal of the probe .......................................22

( 1 ) Q1E-EP1370
1. Introduction
1.1 General
L44 Probe is a linear array probe.
The acoustic output of L44 Probe was measured according to the
IEC60601-2-37 standard and the measurement was conducted by
operating with the Hitachi ultrasound diagnostic scanner. The
measured acoustic output is listed in the instruction manual of
the Hitachi ultrasound diagnostic scanner.
L44 Probe is categorized in class IIa according to
Directive 93/42/EEC and classified as type BF according to IEC
60601-1.
1.2 Principles of operation
This probe and the ultrasound diagnostic scanner enable image
diagnosis using ultrasonic waves. This system operates under the
principles described below.
1) When an electric pulse signal is applied from the transmitter
to the transducer of the probe, the transducer converts
electric signals into mechanical vibration energy for emitting
pulse-shaped ultrasonic waves into the body part, liquid or
other medium contacting the transducer.
2) The emitted ultrasonic waves are reflected by boundaries with
different acoustic characteristics (acoustic impedance)
within the body.
3) The transducer is also used to receive reflected ultrasonic
waves. The transducer vibrates mechanically due to the received
ultrasonic waves and converts mechanical vibrations into
electric energy. Electric signals are converted to shades of
brightness by brightness modulation to obtain an image.

( 2 ) Q1E-EP1370
1.3 Intended Use
L44 Probe is designed for observation and diagnosis mainly of the
following regions by connecting with the Hitachi ultrasound
diagnostic scanner.
Superficial region
Cervical region
Mammary gland
Biopsy (with Coupler Attachment)
Never use the probe for following applications.
Direct contact to the heart.
Biopsy to the heart.
Direct contact to the eye
1.4 Components
The components of L44 Probe are given below:
1) Probe................................. 1 piece
2) Instruction manual.................... 1 copy
Sterilization has not been made to the probe, shipped from the
factory. Prior to use the probe, be sure to clean, disinfect and
sterilize the probe.
WARNING
CAUTION

( 3 ) Q1E-EP1370
1.5 Option
1.4.1 Elasto coupler (Part number: 7225446A)
1.4.2 Coupler Attachment EZU-PA7L1
1) Coupler attachment ········ 2 pieces
2) Needle Guide (18G) ········ 2 pieces
The needle of 20 to 22 gauge fits in the Needle guide (18G).
The diameter of a needle and its corresponding gauge size
is different for manufactures. Therefore some needle of 20
to 22 gauge may not fit in the Needle guide (18G).
3) Brush ····················· 5 pieces
4) Instruction manual ········ 1 copy
Please refer to the instruction manual of EZU-PA7L1 about the
method of handling, cleaning and sterilizing the EZU-PA7L1.
Sterilization has not been made to the elasto coupler and the
EZU-PA7L1 shipped from the factory. Prior to use of them, be sure
to clean, disinfect and sterilize them.
A biopsy should be performed only by a well-trained physician.
Use only the authorized coupler attachment for performing a
biopsy.
CAUTION
CAUTION

( 4 ) Q1E-EP1370
1.6 External View
The external view of L44 Probe is shown in Fig. 1.
Immersible part: This part can be immersed in disinfectant solution
and also can be cleaned by water.
Un-immersible part: This part should not be immersed in disinfectant
solution and also can not be cleaned by water.
Fig. 1 External view
Head
I
mmersible part (IPX7)
Un-immersible part
Cable
C
onnector
Elasto coupler (Option)
Applied part

( 5 ) Q1E-EP1370
2. Inspection before Use
Prior to use, the probe must be carefully inspected that it is
appropriate for use.
2.1 Inspection of appropriate connection
2.1.1 Confirm that the system is correctly operating.
Refer to the instruction manual for the ultrasound diagnostic
scanner.
2.1.2 Do not attach or connect unauthorized devices or instruments
on the probe, such as unauthorized biopsy attachments.
2.2 Inspection of material surface
2.2.1 Visually inspect that the surface of the probe and head,
housing, the cable and the connector for any crack, scratch
or denaturalization. If you find any damage, do not use the
probe and contact a service support immediately.
2.2.2 Visually inspect the elasto coupler for any crack,
deformation or denaturalization. If you find any damage, do
not use the elasto coupler. If you find any damage, do not
use the elasto coupler and contact a service support
immediately.

( 6 ) Q1E-EP1370
3. Operation Procedure
1) Confirm that the probe and the elasto coupler are cleaned and
disinfected or sterilized.
2) Connect the probe to the ultrasound diagnostic scanner, operate
the scanner, and adjust the image, all according to the
instructions given in the operation manual for the ultrasound
diagnostic scanner with which the probe is used as connected.
3) Confirm the direction of the probe. The relationship between the
direction of the probe and image is shown in Fig. 2. The
Right-left orientation mark on the image indicates the direction
of the index mark of the probe.
Right-left orientation mark
Index mark
Fig. 2 Relationship between the direction of the probe
and the Right-left orientation mark

( 7 ) Q1E-EP1370
4) Using a sterile probe cover to protect the probe is recommended.
The probe cover should be allergy free material to avoid allergic
reaction. Between the probe and the probe cover, acoustic coupling
gel is required as a couplant.
5) Place the probe on the examination site and adjust the probe’s
position for a clear view of the desired image.
6) After using the probe and the elasto coupler perform the
reprocessing procedure in accordance with the procedure stated
in “5. Reprocessing procedure” every time immediately after
completing the ultrasound examination.
7) Store the probe and the elasto coupler in the environment
indicated in “6. Maintenance and Safety Inspection”.

( 8 ) Q1E-EP1370
4. Option of L44 Probe
4.1 Elasto Coupler
4.1.1 How to attach the Elasto Coupler
To use elastography, attach the elasto coupler as shown below.
Attach the elasto coupler on the probe as straight as possible
as shown in Fig. 3.
4.1.2 How to release the Elasto Coupler
Release the Elasto coupler from the probe as shown in Fig. 4.
Elasto coupler
Fig. 3 How to attach the Elasto coupler
Elasto coupler
Fig. 4 How to release the Elasto coupler

( 9 ) Q1E-EP1370
5. Reprocessing Procedure
The probe must be reprocessed after each use. Refer to the
reprocessing instruction in this chapter. For reprocessing of the
coupler attachment EZU-PA7L1 and needle guide refer to the
instruction manual of EZU-PA7L1.
WARNINGS
‐The probe is delivered unsterile. Prior to the fir
s
t
use, reprocess the probe.
‐Temperature should not exceed 60°C during
reprocessing.
‐Probe connector is not water resistant.
Limitations on
reprocessing
The probe is not completely submersible. The
immersible part is shown in Fig.1. The un-immersible
part should be disinfected by wipe disinfection.
Transportation
before using
The probe should be packed in a sterile pouch or
container to transport from Central Sterile Supply
D
epartment (CSSD) to an operating room. Be careful not
to damage the sterile pouch or container during
transportation.

( 10 ) Q1E-EP1370
Levels of reprocessing requirements:
Depending on the application of the product and with regard to risk
evaluation, the user has to classify the medical device according to the
current Medical Device Directive for processing of medical devices as
uncritical, semi-critical or critical. Supporting information
concerning this topic is listed in the table below. The user is responsible
for correct classification of the medical device.
Classification Definition Processing
uncritical Application part only contacts
intact and uninjured skin
Cleaning
Disinfection
semicritical
Application part contacts
mucosa (intracavitary
application)
Cleaning
Disinfection
(Disinfectant with
virucidal effect)
critical
Application part contacts
intracorporeal tissue
directly (operative
application)
Cleaning
Disinfection
(Disinfectant with
virucidal effect -
minimum)
Sterilization

( 11 ) Q1E-EP1370
The flowchart of the reprocessing process of this probe is as follows.
Point of use (Pre-cleaning)
Manual Cleaning
Rinsing after manual
cleaning
Manual Disinfection
Drying
Manual cleaning and
disinfection
Rinsing after manual
disinfection
Packing
Sterilization
Containment and
transportation

( 12 ) Q1E-EP1370
5.1 Point of use (Pre-cleaning)
Pre-cleaning should be done immediately after each use.
The procedure is as follows:
A) L44 probe
1) Remove the probe cover and any accessories from the probe.
2) Clean the probe of all patient’s blood or fluid with running tap water
until the surface of the probe looks visually clean.
3) Wipe the whole surface of the probe with gauze pad and remove
superficial visible impurities.
B) Elasto coupler
1) Remove the elasto coupler from the probe.
2) Immerse the elasto coupler in sufficient amount of high quality tap
water. Scrub it using soft cloth to remove all visible soil and from
its surface.
5.2 Containment and transportation
Putting the contaminated equipment into exclusive
shock and damage proof container for transportation
is recommended. It is recommended that instruments are
reprocessed as soon as possible and not later than 4 hours after usage.
5.3 Manual Cleaning and disinfection
Prepare following items before manual cleaning
and disinfection:
a) Detergent: Cidezyme® (Johnson & Johnson,
#2258) or another cleaning agent with
approved material compatibility for this
medical device.
b) Disinfectant: Cidex® OPA (Johnson &
Johnson, # 20391) or another disinfectant
with approved material compatibility for
this medical device.
c) Two tanks, one for cleaning and one for
disinfection - optional:
1 additional tank for rinsing with
deionized/tap water (sufficient size for
immersion of the submergible part of the
probe at full length)
d) Soft, fluff free cloth or single use towel
e) Personal protective equipment (gloves, water repellent protective
skirt, face protection mask or protective glasses, see also
instructions of the manufacturer for the detergent and the
disinfectant)
Containment and
transportation
Manual Cleaning
R
insing after manual
cleaning
Manual Disinfection
R
insing after manual
disinfection
M
anual cleaning and
disinfection
Point of use
(Pre-cleaning)

( 13 ) Q1E-EP1370
Manual Cleaning:
Prepare the detergent solution in a tank with cold water (please follow
the instructions of the detergent manufacturer regarding application,
dilution and contact time).
A) L44 probe
1) The temperature of the detergent solution should be between 15-30 °C,
concentration is 1.6%. Please note the minimum contact time of the
detergent in the manufacturer’s instruction. If a differing detergent
is used, please also note the approved material compatibility for
the medical device.
2) Immerse the immersible part of the probe without connector into the
diluted detergent solution (see Fig. 5). Wipe the immersible part
of the probe under the surface of the detergent solution with a soft
cloth to remove all visible soil. Be sure that all grooves of the
probe are implemented during the cleaning process.
3) The immersible part of the probe should be left in the detergent
solution according to the specified contact time of the detergent
manufacturer.
4) Wipe the un-immergible parts of the probe with a soft cloth dipped
with the detergent solution.
5) Rinse the probe with running tap water for 1 minute. (alternatively:
immerse the immersible part of the probe in a tray filled with
deionized water/tap water (see Fig. 5) for 5 min.)
6) Visually check the outer surface of the probe for cleanness. If
necessary, use magnifying glass for visually check. If there is still
soil visible, repeat all above steps.
B) Elasto coupler
1) The temperature of the detergent solution should be between 15-30 °C,
concentration is 1.6%. Please note the minimum contact time of the
detergent in the manufacturer’s instruction. If a differing detergent
is used, please also note the approved material compatibility for
the medical device.
2) Immerse the elasto coupler into the diluted detergent solution. Wipe
it under the surface of the detergent solution with a soft cloth to
remove all visible soil. Be sure that all grooves of the elasto coupler
are implemented during the cleaning process.
3) The elasto coupler should be left in the detergent solution according
to the specified contact time of the detergent manufacturer.
4) Rinse the elasto coupler with running tap water for 1 minute.
(alternatively: immerse it in a tray filled with deionized water/tap
water (see Fig. 5) for 5 min.)
5) Visually check the outer surface of the elasto coupler for cleanness.
If necessary, use magnifying glass for visually check. If there is
still soil visible, repeat all above steps.

( 14 ) Q1E-EP1370
Manual disinfection:
A) L44 probe
1) Prepare the disinfectant solution in a tank with cold water (please
follow the instructions of the disinfectant manufacturer regarding
application, concentration, microbiological efficiency, service
life and contact time).
2) Confirm the concentration of the disinfectant before immersing the
probe. Although Cidex® OPA does not need to be diluted, it is
recommended to use test strips to verify the concentration. The test
strips can indicate whether or not the concentration is above the
Minimum Effective Concentration (MEC). Please also note the
expiration date of the test stripes. Temperature of disinfectant
solution should be minimum 20 °C. The minimum contact time is 5 minutes.
If a different disinfectant is used, follow the manufacturer’s
instructions. Please also consider the material compatibility for
the medical device.
3) Immerse the immersible part of the probe into the disinfectant (see
Fig. 5). Set a clock to insure the recommended contact time which
is 5 minutes.
4) Rinse the immersible part of the probe with deionized water for 1
minute. (alternatively: immerse the immersible part of the probe in
a tray filled with deionized water (see Fig. 5) for 5 min.)
5) Visually check the outer surface of the probe for leavings of the
disinfectant. If necessary, repeat the rinsing.
B) Elasto coupler
1) Prepare the disinfectant solution as stated in the procedure for the
probe.
2) Immerse the elasto coupler into the disinfectant (see Fig. 5). Set
a clock to insure the recommended contact time which is 5 minutes.
3) Rinse the elasto coupler with deionized water for 1 minute.
(alternatively: immerse it in a tray filled with deionized water (see
Fig. 5) for 5 min.)
4) Visually check the outer surface of the elasto coupler for leavings
of the disinfectant. If necessary, repeat the rinsing.
Table of contents
Other Hitachi Diagnostic Equipment manuals