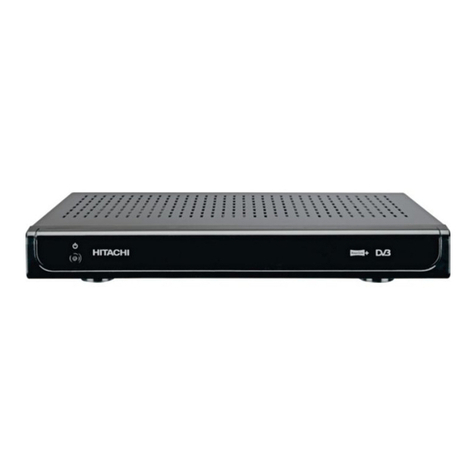
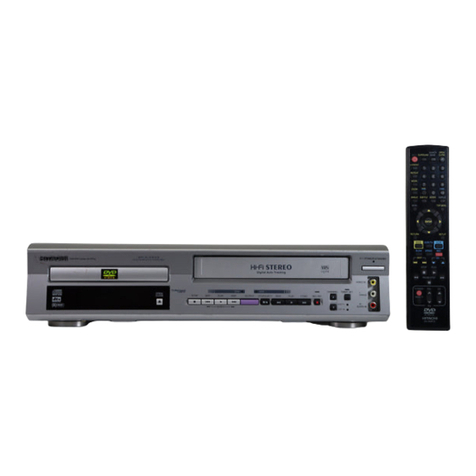
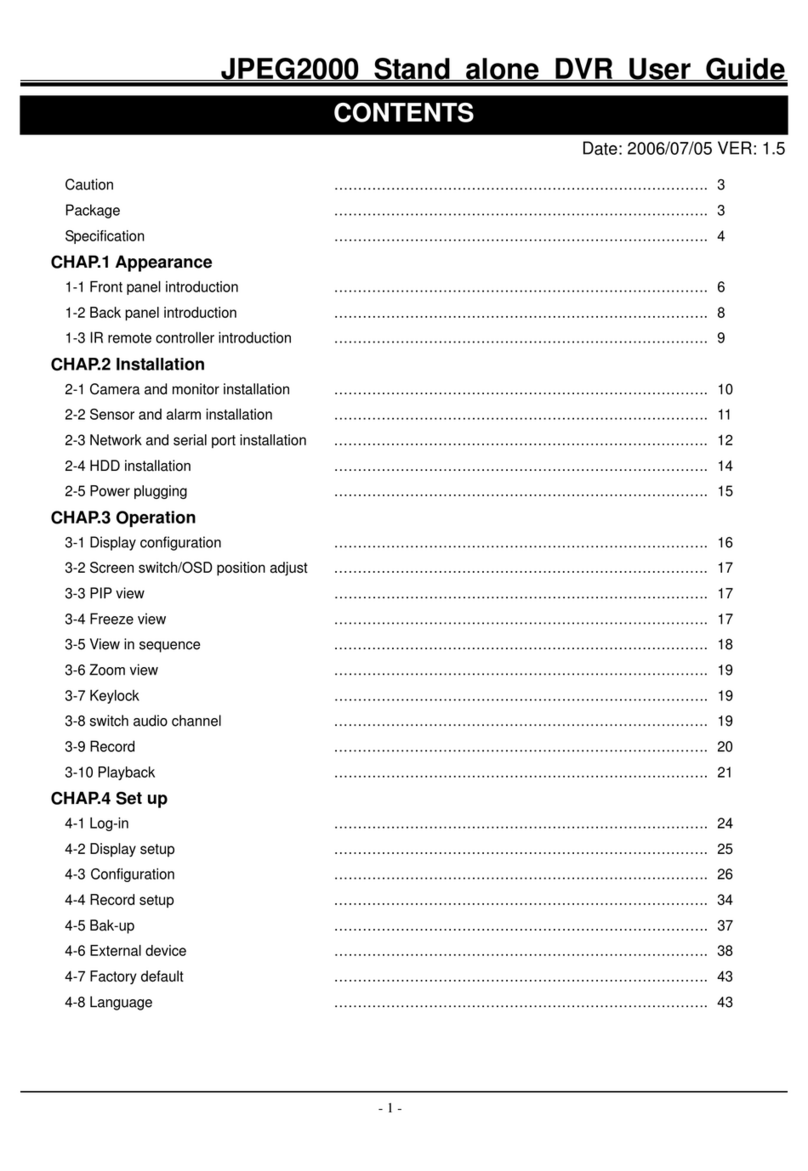
Hitachi HDR163 ARGOS User manual

Model
HDR163
Digital TV Recorder
Instruction manual
To obtain the best performance and ensure years of
trouble-free use. please read this instruction manual
completely.
DIGITAL TV RECORDER HDR163

1
INDEX
IMPORTANT SAFEGUARDS..................................................................................................................................................................................2
SOMEDOS ANDDON'TSON THESAFEUSEOFEQUIPMENT...........................................................................................................................6
POWERCORD(MAINSLEAD)...............................................................................................................................................................................7
SAFETYPRECAUTIONS........................................................................................................................................................................................7
FUNCTIONS............................................................................................................................................................................................................8
INTRODUCTION.....................................................................................................................................................................................................9
REMOTECONTROL.............................................................................................................................................................................................10
GETTINGSTARTED.............................................................................................................................................................................................10
FRONT AND BACKPANEL...................................................................................................................................................................................11
CONNECTION DIAGRAMS...................................................................................................................................................................................12
REMOTECONTROL &FUNCTIONS....................................................................................................................................................................13
MENU INTERFACE...............................................................................................................................................................................................15
FIRST TIMEINSTALLATION.................................................................................................................................................................................15
MAINMENU..........................................................................................................................................................................................................15
1.CHANNELLIST.................................................................................................................................................................................................16
1.1. NAVIGATINGCHANNELLIST.......................................................................................................................................................................16
1.2. DELETINGCHANNEL....................................................................................................................................................................................16
1.3.EDITCHANNELS...........................................................................................................................................................................................16
1.4.ADDINGLOCKS TOCHANNELS...................................................................................................................................................................16
1.5.SETTINGFAVOURITELIST...........................................................................................................................................................................17
2.PROGRAMMEGUIDE(7 DAYSEPG)...............................................................................................................................................................17
2.1.PROGRAMMEOPTIONS...............................................................................................................................................................................18
2.1.1.SELECTCHANNEL.....................................................................................................................................................................................18
2.1.2.RECORD / DELETETIMER.........................................................................................................................................................................18
2.1.3.RECORD SERIES/ DELETESERIESTIMER.............................................................................................................................................18
2.1.4.CHECKCONFLICTS...................................................................................................................................................................................19
2.1.5.SETREMINDER / DELETEREMINDER......................................................................................................................................................19
2.1.6.SPLITRECORD..........................................................................................................................................................................................19
2.1.7.MULTIPLE/ALTERNATIVE TIMERRECORD............................................................................................................................................20
3.TIMERS.............................................................................................................................................................................................................21
4.RECORDINGSLIBRARY..................................................................................................................................................................................22
4.1.PLAYOPTIONS.............................................................................................................................................................................................22
4.1.1.PLAYFROMSTART....................................................................................................................................................................................22
4.1.2.RESUME.....................................................................................................................................................................................................22
4.1.3.PLAYFROMOFFSET.................................................................................................................................................................................23
4.1.4.MANAGE CHAPTERS.................................................................................................................................................................................23
4.1.5.CREATEARCHIVE(ARCHIVEMANAGEMENT).........................................................................................................................................23
EDITRECORDINGS.............................................................................................................................................................................................23
MAINTITLE...........................................................................................................................................................................................................24
RECORDINGTITLE..............................................................................................................................................................................................24
4.2. CHAPTER OPTIONS......................................................................................................................................................................................25
4.2.1.CREATENEWCHAPTERMARK................................................................................................................................................................25
4.2.2.FORWARDSTONEXTCHAPTER..............................................................................................................................................................25
4.2.3.BACKTOSTART OFCHAPTER.................................................................................................................................................................25
4.2.4.BACKTOPREVIOUSCHAPTER................................................................................................................................................................25
5.COMMONINTERFACE(forPayServiceChannels)..........................................................................................................................................25
6.SETUP..............................................................................................................................................................................................................26
6.1. RECORDINGS...............................................................................................................................................................................................26
6.1.1.MAXTIMESHIFT.........................................................................................................................................................................................26
6.1.2.AUTODISCARD..........................................................................................................................................................................................26
6.1.3.FORMATDISK............................................................................................................................................................................................27
6.1.4.HARD DISK INFO........................................................................................................................................................................................27
RecordingFormat..................................................................................................................................................................................................28
UnrecordableMaterial............................................................................................................................................................................................28
HardDiskOperation(Recording /Playback / TimeShiftRecording)......................................................................................................................28
6.2. CONFIGURATION..........................................................................................................................................................................................29
6.2.1.TVTYPE......................................................................................................................................................................................................29
6.2.2.TVOUT.......................................................................................................................................................................................................29
6.2.3.VCROUT....................................................................................................................................................................................................29
6.2.4.HDMI RESOLUTION....................................................................................................................................................................................29
6.2.5.LOWPOWER OPTION................................................................................................................................................................................29
6.2.6.FAVOURITEMODE.....................................................................................................................................................................................29
6.2.7.CHANNELLIST...........................................................................................................................................................................................30
6.2.8.SCAN ENCRYPTEDCHANNELS................................................................................................................................................................30
6.2.9.RECEIVERUPGRADE-OAD.....................................................................................................................................................................30
6.2.10.PARENTAL LOCKING...............................................................................................................................................................................30
6.2.10.i. MENULOCK............................................................................................................................................................................................30
6.2.10.ii.SETPIN..................................................................................................................................................................................................31
6.3.LANGUAGE....................................................................................................................................................................................................31
6.4.INSTALLATION..............................................................................................................................................................................................31
6.4.1.AUTOMATICCHANNELSCAN...................................................................................................................................................................31
6.4.2.MANUAL CHANNELSCAN.........................................................................................................................................................................32
6.4.3.FIRSTTIMEINSTALLATION.......................................................................................................................................................................32
7.MESSAGES......................................................................................................................................................................................................32
8.SPECIFICFUNCTIONSOFREMOTECONTROL.............................................................................................................................................33
TIMESHIFTING(PAUSELIVERECORDING)......................................................................................................................................................34
9.TROUBLE SHOOTINGGUIDE..........................................................................................................................................................................36
10.TECHNICALSPECIFICATIONS......................................................................................................................................................................37
11.UKGUARANTEE.............................................................................................................................................................................................39
12.IMPORTANT NOTICE:....................................................................................................................................................................................40

DIGITAL SWITCHOVERAND YOUR TVEQUIPMENT.........................................................................................................................................40


2
IMPORTANT SAFEGUARDS
CAUTION: Pleaseread all of these instructions beforeyou operatethis product and savethese
instructions for later use.
Electricalenergycan performmanyuseful functions.Thisproducthasbeenengineered and
manufactured to assureyour personalsafety.BUTIMPROPER USE CAN RESULTIN POTENTIAL
ELECTRICAL SHOCKOR FIRE HAZARDS.In order not todefeatthe safeguardsincorporatedinthis
product, observe the following basicrulesfor itsinstallation, use and servicing.
1. Power Supply
The receiver should be pluggedintoa 220- 240VAC50Hzsupplyonly.
2. Leads
Ensure thepowersupplylead,and all otherleadsarepositioned so theyarenot likelytobe walkedon
orpinched byobjectsplaced onor against them.Payparticular attention tothe power lead,whereit
entersthemains plugandwhereiscomes out of the receiver. Do notconnectoradjustleads when
thereceiverisplugged in.
3. Battery Disposal
Please ensurethatexhausted batteriesfromthe remotecontrol handset are disposed of safelyin
accordancewithlocal government rules.
4. Read Instructions
Allthe safetyandoperating instructions should
bereadbefore the productisoperated.
5. Retain Instructions
The safetyand operating instructionsshould be retainedforfuturereference.
6. HeedWarnings
All warningson the product andin theoperatinginstructionsshouldbeadhered to.
7. FollowInstructions
Alloperating anduse instructionsshould be
followed.
8. Cleaning
Unplug thisproduct fromthewalloutletbeforecleaning.Do notuseliquidcleanersor aerosol
cleaners.Use a dampcloth forcleaning.
9. Attachments
Donot use attachmentsnotrecommendedbytheproduct manufacturer astheymaycause hazards.
10. Water,Moisture and Temperature
Donot use thisproductnear water, for example: near abathtub, wash bowl, kitchen sink, or laundry
tub, ina wet basement, orneara swimmingandthelike.
Donot leave or usethe receiver in ahot, cold orhumidarea. Donotallowthe receiver to getwet -
fromdrips orsplashes- asthismaybedangerous.Donotplace water filled objectssuchas flower
vaseson the top of thereceiver.
11.Accessories
Donot place thisproducton anunstable cart, stand,tripod,bracket,or table. Theproductmayfall,
causingseriousinjurytoachildoradult, andseriousdamagetothe product.Useonlywithacart,
stand, tripod, bracket, ortable recommendedbythemanufacturer, or sold withtheproduct. Any
mounting oftheproductshouldfollowthemanufacturer’sinstructions,and shoulduseamounting
accessoryrecommended bythe manufacturer.
12. Transportation
A product andcart combinationshouldbemovedwith care. Quickstops, excessive force,
and unevensurfaces maycausetheproduct and cart combinationtooverturn.

3
13. Ventilation
Slotsandopeningsinthe cabinet areprovidedfor ventilation to ensure reliable operationof the
productandto protectitfromoverheating,andtheseopeningsmustnotbeblocked or covered. The
openingsshouldneverbe blockedbyplacingtheproducton abed, sofa,rug,orothersimilar surface.
Thisproductshould not beplacedinabuilt-in installationsuchasabookcaseorrackunless proper
ventilationis provided or the manufacturer’sinstructionshave beenadheredto.
14. PowerSources
Thisproductshould beoperated onlyfromthe type ofpowersource indicated on the markinglabel. If
you are not sure of thetypeofpowersupplyto your home, consult yourproductdealerorlocalpower
company. For productsintended to operatefrombatterypower,or othersources, refer to the operating
instructions.
15. Groundingor Polarization
Thisproductisprovidedwithoneofthe following types of plugs.If theplug should failtofitinto the
poweroutlet, please contactyour electrician. Do notdefeat the safetypurpose of theplug.
a. Two-wire type (mains)plug.
b. Three-wiregroundingtype (mains)plug withagroundingterminal. Thisplug will onlyfitintoa
groundingtype poweroutlet.
16. Power-Cord Protection
Power-supplycordsshould berouted sothat theyarenot likelytobewalkedonorpinched byitems
placed uponor againstthem,payingparticularattention to cords at plugs,conveniencereceptacles,
and thepoint wheretheyexit fromthe product.
17. Lightning
Foradded protectionfor thisproductduring alightning storm,orwhen itisleft unattended andunused
for longperiodsof time,unplug it fromthewalloutletanddisconnectthecable system.This will
prevent damage tothe productdue to lightning and power-line surges.
18. Overloading
Donot overloadwall outlets,extensioncords,orintegralconvenience receptaclesasthiscan
result in arisk of fireor electricshock.
19. Objectand LiquidEntry
Neverpushobjectsofanykindintothisproductthroughopeningsastheymaytouchdangerous
voltage pointsorshort-out partsthatcouldresultinafire orelectricshock.Neverspill liquidofany
kind on the product.
20. Servicing
Ensure theperson who servicesyourreceiver isqualified to doso.Donot remove the cover yourself
asyou couldgetan electricshock.We are proudto offer a high-qualityproduct. To keepthislevelof
quality,yourreceiver shouldbeserviced at an authorised service centre.
21. Damage Requiring Service
Unplug this productfromthewall outlet and refer servicing to qualified servicepersonnel underthe
following conditions:
a. Whenthe power-supplycord or plug isdamaged.
b. Ifliquid hasbeen spilled, or objectshave fallen into theproduct.
c. If the producthas been exposedto rain orwater.
d. Iftheproduct doesnotoperatenormallybyfollowingtheoperating instructions. Adjustonly
thosecontrolsthat arecovered bythe operating instructions,asan improper adjustmentofother
controlsmayresult in damage andwilloften requireextensiveworkbyaqualifiedtechnician to restore
theproduct tonormaloperation.
e. Iftheproduct hasbeendropped or damaged
in anyway.
f. Whentheproduct exhibitsa distinctchangeinperformance, thisindicatesa need for service.
•Microsoft®andWindows®areregisteredrademarksof Microsoft Corporationin theUnitedStates
and/orothercountries.

4
•PC/AT isaregisteredtrademarkof International Business MachinesCorporationin theUnited
States.
•Macintosh®isaregistered trademarkof Apple Computer, Inc.in the UnitedStates and/or other
countries.
•All other companyorproductnamesaretrademarksor registered trademarks of their respective
companies.
•SomeIC chipsinthis productincludeconfidential and/or trade secret propertybelongingtoTexas
Instruments.Thereforeyou maynot copy,modify,adapt, translate,distribute,reverseengineer,
reverse assemble or discompile the contentsthereof.
22. ReplacementParts
When replacement partsarerequired,besure the service technicianhasused replacementparts
specifiedbythemanufacturer or have the
samecharacteristics asthe original part.Unauthorized substitutionsmayresult infire, electricshock,
orother hazards.
23. SafetyCheck
Upon completion ofanyservice orrepairs to thisproduct,ask the servicetechnicianto performsafety
checksto determinethattheproductisinproper operatingcondition.
24. WallorCeilingMounting
Thisproduct should be mountedto awall orceilingonlyas recommended bythe manufacturer.
25. Heatand Flames
The receiver should not be placed neartonaked flames or sourcesof intense heat, suchasan electric
fire.Ensure that nonaked flames sources, such aslighted candlesare placed on topofthereceiver.

5
ThemarkisincompliancewiththeWaste ElectricalandElectronic
EquipmentDirective2002/96/EC(WEEE).
ThemarkindicatestherequirementNOTtodisposethe equipment including
anyspent ordiscardedbatteriesasunsortedmunicipalwaste,butusethe
returnand collection systemsavailable. If the batteries oraccumulatorsincluded
withthis equipment, displaythe chemicalsymbolHg,Cd, orPb,thenitmeans
that thebatteryhasaheavy metalcontent of morethan0.0005%Mercury, or
morethan 0.002%Cadmiumormorethan, 0.004%Lead.
WARNING

6
SOME DOS AND DON'TS ON THE SAFE USE OF EQUIPMENT
Thisequipmenthas beendesigned andmanufactured tomeetinternational safetystandardsbut, like
anyelectricalequipment,care mustbe taken if youareto obtain thebest resultsand safetyisto be
assured. **************
DO read the operatinginstructions before you attempt to use the equipment.
DO ensure thatallelectrical connections(includingthemainsplug, extension leadsand inter-
connections between the pieces ofequipment) are properlymadeand in accordancewiththe
manufacturer'sinstructions.Switchoff andwithdrawthemainsplugbefore making orchanging
connections.
DO consult yourdealer if youare everin doubtaboutthe installation, operationor safetyofyour
equipment.
DO be careful with glass panelsordoorsonequipment.
DO routethe mainsleadso that it isnot likelyto bewalkedon, crushed, chafed, orsubjected to
excessive wearand tear orheat.
**************
DON'T remove anyfixed cover asthismayexpose dangerousvoltages.
DON'T obstructthe ventilation openingsof the equipmentwith itemssuchasnewspapers,tablecloths,
curtains, etc.Overheating will cause damage and shorten the lifeoftheequipment.
DON'T allowelectricalequipment tobe exposedto drippingor splashing,orobjectsfilled with liquids,
such asvases,tobe placedon the equipment.
DON'Tplacehot objectsornaked flamesources suchaslighted candles ornightlightson, orcloseto
equipment.Hightemperaturescan meltplasticandlead to fires.
DON'T use makeshiftstandsand NEVER fixlegs with wood screws -toensure
completesafetyalwaysfitthemanufacturer'sapprovedstand or legs with the fixings
providedaccording tothe instructions.
DON'T useequipment such aspersonal stereosor radiosso thatyou aredistracted from
therequirementsoftrafficsafety.Itisillegal to watchtelevision whilstdriving.
DON'T listen to headphones athighvolume,assuch use can permanentlydamage your
hearing.
DON'T leave equipment switched on when it isunattended unlessitisspecifically stated
that itisdesigned forunattended operationor hasastand-bymode. Switch off using the
switch ontheequipment and make sure that yourfamilyknowhowto do this. Special
arrangementsmayneedto be made forinfirmorhandicapped people.
DON'T continue tooperate theequipment ifyou are in anydoubt aboutit working
normally,orifit isdamaged inanyway-switch off, withdrawthemainsplug and consult
yourdealer.
ABOVE ALL
---NEVERlet anyoneespecially childrenpush anything into holes,slotsor anyotheropening
in thecase - thiscould resultin afatal electricalshock;
---NEVER guessor take chanceswith electricalequipment of any kind
--- Itis bettertobesafe than sorry!

7
POWER CORD (MAINS LEAD)
Donot placetheproductwhereapiece offurniture orotherheavyobjectcould trap thepowercord
(mainslead). Handlethepowercord bytheplug.Do not pull out the plug bytuggingthe cord and
never touchthe power cord whenyourhands arewet as thiscould causeashort circuitor electric
shock.Never makeaknot in the cord or tieit withothercords.The powercordsshould berouted in
suchawaythat theyare not likelyto bestepped on. A damaged powercord can cause fire or giveyou
anelectrical shock.Check the power cord periodicallyto see if it isdamaged.Ifit isdamaged, please
ask an approved service agent toreplaceit.
For your ownsafetyread following instructions carefullybefore attempting to connect this device to the
mains.
Thisunit is designed tooperateona220V-240V AC -50Hz supplyonly.Connectingit to other power
sourcesmaydamageit.Ensurethatthesupplycorresponds tothe information ontheratinglabelon
thebottom of theunit.
Thisdigitalterrestrial receiverissupplied with amoulded mains plug.Thisplugmustnotbecut off as
it maycontain aspecialradiointerference filter, theremoval ofwhichcould leadto impairedper-
formance.If youwishtoextendthelead,obtain an appropriatesafetyapproved extension leador
consultyourdealer.
Observe themanufacturersinstructionswhenconnectingextensionleadstotheset. Checkthefuse
rating on the newplug, thisshouldbefitted with a 5Ampfusewhich conformsto eitherASTA or BSI
The mainsplug isthedisconnectdevice andtherefore mustremain readilyoperable.
(BS1362) approvals, these are easilyidentifiablebyeither the or
symbols.Ifyou are inanydoubt aboutthe installationofanextensionlead,please consult a
competent electrician.
Thissymbolmeans that thisunit isdoubleinsulated. An earthconnectionisnot required.
CAUTION
To prevent electricshock, do notremovethe cover. No user servicablepartsinside. Refer servicing to
qualifiedservice personnel. Disconnectfromthemains supplybefore cleaning.
SAFETY PRECAUTIONS
Power Source.
Thisunit should onlybeconnected toa220-240V AC50-60Hzpowersupply.Do not connecttoany
other supply.
Power Lead.
Donotplacethe leadwhere itmaybestepped on or trippedover. Donotplace heavyobjectsonthe
lead.If the leadbecomescutordamaged, please disconnect the unitfromthemains supply.
The mainsplugor theappliancecouplerisusedas thedisconnect device,the disconnectdeviceshall
remain readilyoperable.
Location.
Place on asolid base such asashelf or in aTVcabinet or similar.Donot placenearheatsources
such asradiators, fires or similar.
Donot blockventilation holesor place in alocationthatdoes notallowa freeairflow.
Donot placethe unit near wateror in high humidityareas.Avoid splashing.If the unitdoesgetwet
please call an approved service agent.
Apparatusshallnotbe exposedto drippingorsplashing and noobjectsfilledwithliquids,suchasvases,
shallbe placed on theapparatus.

8
• To prevent electric shock, donot remove anycover.
• If anything goeswrong,don'ttryand fix it yourself, getaqualifiedservice agent to lookatit.
•Do not exposethis equipmentto dripping or splashing or place anyobjectsfilledwith liquids,
such as vases, onthe equipment.
• Never put a nakedflame source onor near the equipment.
• Smallparts.Do notletyoungchildren play with theequipment.
• Do not moveyour devicefor 20 secondsafter removing thepower to ensure that the actuator
is completely locked.This helpsprevent themedia and the heads from accidental damage due
to vibration,moving or shipping.
• Do notswitch thepower ON or OFF, during HDD initialization.
FUNCTIONS
1. Menu Language: English
2. Channellock,Menulock
3. Channellist sorted byD-booklogical channel numbers.
4. Channellist nameeditingoption.
5. BBC UKCompliantOver AirDownload.
6. PIP(Pictureinpicture)
7. Timeshift–pause live TV.
8. Onebutton record(Instantrecording of channels).
9. Dual recordingsatthe sametime.
10. Split and series recordingssupport.
11. Abilitytorecord one channelwhilewatchinganotherchannel.
12. X1/4, X1/2, X1,X2,X4, X8, X16, X32 forwardand backward playoptions.
13. Playlist showsavailablerecordings(Eventname,Start time, Duration,delete/playback
permission)
14. Timerslist showsscheduled recordings(Event name, Start time, Duration,change/delete/playback
permission)
15. Recordtimervia 7dayEPG
16. RecordsDVB subtitles(If anyare broadcasted bythe broadcaster).
17. Automatic/Manualchannel search.
18. Guided firsttimeinstallation.
19. 200channels.
20. Favourite channel lists.
21. Automaticdaylight saving time updating.
22. MHEG-5 Engine
23. FreeviewPlayback 2 support.
24. HDMI output(576p, 720p,1080i).
25. Conditional access.
26. LowPowermode support.

9
INTRODUCTION
Thank youfor purchasing this product.It will giveyou goodserviceifyoutakenoteofall safetynotices
and recommendations.
Contents supplied :
Remotecontroller
RC1101 Batteries
2xAAA
DIGITAL TVRECORDER
163HD INSTRUCTIONBOOK QUICKSETUPGUIDE
SCART CABLE
1X
RF CABLE
1X

10
REMOTE CONTROL
1. Press the markonthe cover andslideit in the direction of thearrow.
2. Insert the batteriesmaking sure thepolaritiescorrectlymatch the + and -marksinside the battery
compartment.
3. Attach the coverand slideituntilit clicksintoplace.
Incorrectuse ofthebatteries maycause themtoleakor explode.Pleasefollowtheprecautionsbelow.
•Danger of explosionif batteryisincorrectlyreplaced.
Replace onlywiththe same or equivalent type.
• Insert the batteriesmakingsure thepolaritiescorrectlymatch the+ and-marks insidethe battery
compartment.
• Batteriesof different typeshave differentproperties, thereforedo notmixbatteriesofdifferenttypes.
• Donotmixnewandoldbatteries.
Thismayshortenthelifeofnewbatteries or maycause old batteriesto leak.
• Remove the batteries fromtheremote control once theyhave run out, asleaving themin can cause
themtoleak.
Batteryfluid fromleaked batteriesisharmfultoskin,thereforeensurethat you wipe themfirst and then
remove themusingacloth.
• Remove the batteries fromtheremote control if you will notbe using the remotecontrol for a long
time.
• Complywith the rules accordance of each local governmentwhendisposingof worn-outbatteries.
Replacementbatteriesforthisunitare1.5Volt (R03/AAA).
GETTINGSTARTED
Beforeconnecting, ensure that thepowercord of theunit isunpluggedfromthe AC outletandturnoff
the devicestobeconnected. Aftermaking allconnections(Diagramson page12),turnon theunitfirst
and thenthe other devices.
"NOTE" -When the unitisfirstpoweredup,pleasewait ashort whilebeforeactivatingthereceiver as
theunit'ssoftware needs to be initialised and the harddisk ischecked.
You can turn onyour unitbypressing the Standbybutton on the remote control.Duringstarting, ablue
lightisviewableonthe front panel.
The unitisequippedwithoutputterminalsthatsupport RGB,S-video andCVBS videosignals.The
image qualityishighest intheorderof the RGB signal,theS-videosignalandtheCVBS video signal.

11
FRONT AND BACK PANEL
FRONT PANEL
ON/OFF
MENURECORD
PLAY/PAUSE OK
MEN
UP
U
/PROG MENULEFT
VOLDOWN
MENU
/PROG
DOWN
MENURIGHT
VOLUP
BACK PANEL
RS232
OPTICALOUT
AC IN
CVBS
LEFT
RIGHT
TVSCART
HDMIOUT
AUXSCART
35022373
ANTENNA2
OUT
ANTENNA2
IN
ANTENNA1
OUT
ANTENNA 1
IN
1
2
3
4
DONOT REMOVE
5
6
7
8
9
10
11
12
1.
AERIAL2IN : Loop through
2.
AERIAL2OUT : Towatch analogue channelsonthe TV
3.
AERIAL1OUT : Loop through
4.
AERIAL1IN : Aerialinput
5.
HDMI OUT : HDMIvideo output
6.
TV SCART : TV Scart connection
7.
AUX SCART : Output for other equipment such as DVD, VCR...etc.
8.
ANALOGUEAUDIO LEFT/RIGHT : Analogue Audiooutput
9.
CVBS : Video Output
10.
OPTICAL AUDIO : Optical Digital AudioOutput
11.
RS232: SoftwareUpgrade (service use only)
12.
POWER SUPPLY: 220-240VAC, 50Hz

12
CONNECTION DIAGRAMS
LOOPTHROUGH
VCR/ DVDRECORDER
DONOTREMOVE
TVAerial
Aux
HI-FI
Aux
HI-FI
RS232
OPTICAL OUT
AC IN
CVBS
LEFT
RIGHT
TVSCART
HDMI OUT
AUX SCART
35022373
ANTENNA2
OUT
ANTENNA2
IN
ANTENNA1
OUT
ANTENNA1
IN
AC3DIGITAL
AMPLIFIER
TV
NOTE:
Ifyouusethe HDMI connection, you donot need toconnect the scartlead aswell.

13
REMOTE CONTROL & FUNCTIONS
OK
TEXT BACK
MENU
INFO
PR
VOL
2 3
5 6
78 9
0
ABC DEF
GHI JKL MNO
LIB.
PP
SUBT.
1
4
PQRSTUVWXYZ
FAV. WIDE
GUIDE
PIP PIP- SWAPPIP+
TIMERS
AUX
1
2
3
4
5
6
7
8
9
10
11
12
13
14
15
16
17
18
19
20
21
22
23
24
25
26
27
28
29
30
31
32
USING THE CONTROLSON THE FRONT PANEL
You can enterthe main menubypressing themenu button onthefront ofthe unit. Thennavigate
through themenus with thefourarrowbuttonsonthefront ofthe unit and makeaselectionwiththe
OK button.

14
BUTTON FUNCTION
1.StandbyON / Standby
2. 8Search Forward
3.LIB. Libraryof recordings
4.Timers TimerSetup
5. Record key
6.Info Information-Bar
7.Direction buttons/ OK Navigation/ Skip 2 minutes(left/right)
8.Back/ Exit Exit
9.P+/ P- ChannelUp / Down
10. YellowYellowTeletext function key
11. Blue BlueTeletext function key
12. Numberkeys Numericalkeys
13. P3P Swap channels (with lastviewedchannel)
14. Wide TV aspect ratio mode
15. Subt. Show /Hide Subtitles
16. Swap Swap thechannels shown on the PIPwindow and
normalscreen / ChangesHDMI resolutions,while
watchingmode
17. PIP + PIP Window ChannelUp
18. Mute Mute
19. 4Play
20. 7Search backward
21. <Stop
22. ;Pause/Timeshift
23. Guide ElectronicProgram Guide
24. Text DisplayTeletext
25. V+/ V -Volume UP / DOWN
26. Green GreenTeletextfunction key
27. Red RedTeletextfunction key
28. Aux Toggle between TV andthe inputfrom anyequipment
connectedtotheAUX scart
29. Menu Enter menu / Exit menu
30. Fav Favourite list
31. PIP Show /Hide PIP window
32. PIP- Previouschannelin PIP window

15
MENU INTERFACE
FIRST TIME INSTALLATION
When theboxisswitched on fromstand-bymodeandif thereis no channel storedinthedatabase,
FirstTimeInstallation Menu windowisdisplayed onthescreen.Inthiswindow,settheTV type(For
more information,look at section6.2.1. TVTYPE) with “3/4”keys and pressOK to continue.
The nextmenu will ask you to choosethe HDMIresolution.If you intendjustusing the Scart output
thenjust press OK and continue the scanning process.
Using the[LEFT]or [RIGHT]keysonthe remotecontrol, youcanselectbetween 576p, 720pand
1080i.PleasechecktheHDMIresolutionssupportedbyyour TV set andselectthemostappropriate
one fromthismenu.The next menu willask you,ifyou wantto begin withthe automaticchannel scan.
MAIN MENU
Mainmenu isaccessedbypressingtheMENU keyonthe remote
control. Navigate with“5/6”keysamongthemenusandpress OK to
activate menus.In somesub-menus,press theBACK button toreturn to
the previous menu, otherwise,use it to exitfromthemenu.In all menus
thereisanInfo banneratthe bottomofthescreen. These are functions
that can be usedin the current menu.

16
1. CHANNELLIST
Channellististhe placewherethe
channelsaremanaged. Thefollowing
operationscan be performedinthis
menu:
1. Navigatingchannel list
2. Deletingchannels
3. Renaming channels
4. Adding locksto channels
5. Setting favourite list
1.1. NAVIGATINGCHANNEL LIST
In thechannel table “5/6” movesthe selection tothe previousornext.Toexitmenu andwatch a
specificchannelhighlight itusing,“5/6”then press OKkey whilethe"SELECT"option atthebottom
of the screen ishighlighted.If theselected channelispasswordprotectedthen apopupmenu is
displayed.If the correctcodeisentered,theselectedchannel can be watched. You can nowselect
another channel in thelist. Thescroll Bar in middle of the screenshowsrelativepositionofthe
currentlyvisible channelswith respecttothe wholelist.
1.2. DELETINGCHANNEL
Todelete achannel highlight it using “5/6”, then highlight the“Delete”buttonusing “3/4”and press
OK. Amessage isdisplayed toconfirmyourdecision, ifyou stillwant to deleteselect“YES”,withthe
< >buttonsor theoperationwill be cancelledifyou select “NO”.
1.3. EDITCHANNELS
Torenameaspecificchannel, highlight"Edit Name"button after the channelisselected and press
OK. Aboxappearson thescreen. “3/4”movestothe previous/nextcharacter. “5/6”togglesthe
current character, i.e.,‘b’ characterbecomes‘a’ on“6”and ‘c’ on“5”. Pressing the numericbuttons
‘0...9’ replacesthe highlightedcharacter withthecharactersprintedabove thebutton onebyone as
thebuttonis pressed.PressingBACK cancelsthe editing andOKsavesthe newname.
1.4. ADDINGLOCKSTOCHANNELS
ChannelLocking providesapassword-protectedaccess tochannelsselectedbyparents.In orderto
lockachannel youshouldknowtheparentalLock password (set to 0000 in thefactoryandcan only
bechangedfromtheConfiguration Menu),fromthe channel listmenu highlightthechannel tobe
locked andselectthe“Lock”button withthe<>keys,whenOK ispressed apasswordboxis
displayed.Enter the parentalLock code, pressOK andthe Lockicon will bedisplayed in front of the
selected channel. Repeatthe sameoperation to cancel theLock.

17
1.5. SETTINGFAVOURITE LIST
Favourite listsprovide aneasywayto
group programsin acustomizable way.
Five favourite listsareavailableonthis
productnamedasList1, List2, List3,
List4 andList5.
ØFromthe channellistusethe
“3/4”buttons tohighlight
“Favourites”andpressOK to
enterthe“Favourite Lists” menu.
ØPress the“3/4”buttonsto
selectyourpreferredfavourite
list(List1/List2/List3/List4 or
List5).
ØPress OK to addthehighlighted programmeto yourlistand continuetoaddtheprogrammes
you wanttoinclude inyourfavourites byhighlighting the channel and pressingOK.
ØRepeat theabove steps to remove the channelsfromthelist. Once completepressMENU to
saveyoursettings.
ØYou can stepthrough yourfavourite listswiththeFAV buttononthe remote.Eachpresswill
advanceto thenextlist. ThePR+andPR- buttonswillcyclethroughthechannelsyou put in
thecurrentlyselected favouriteslist.
2. PROGRAMME GUIDE(7DAYSEPG)
ElectronicProgramGuide appearson
the screen. ItisabletogetInformation
of thechannel -programsweeklyby
meansof 7-DAY–EPG.Allprogramsof
channelsare displayed.The current
programishighlightedand thereisbrief
informationabout the programsof the
channel, suchas:name, short/extended
event description,start &endtime. By
pressing“3/4”keyscontinuouslythe
timescalecanbe changed.If thereis
anyeventinformation data available
onlyprogramnames and datesare
displayed.Across thebottom of the
screenthereisan infobarshowing all
the availablecommandswhichare listed
below.
RED BUTTON (SHRINK) : make theinfoboxessmaller.
GREEN BUTTON(EXPAND): make theinfoboxeslarger.
YELLOW BUTTON(PREV DAY) : displays theprograms of previousday.
BLUE BUTTON (NEXT DAY) : displays theprograms of next day.
INFO (DETAILS) : displays theshort extended programsin detail.
OK (OPTIONS): showsthe programme optionsinclude “SelectChannel,
“Record / DeleteTimer”,“SeriesRecord / Series Delete
Timer”, “Check Conflicts”and “Set Reminder /Delete
Reminder”.
NUMERIC BUTTONS (JUMP) : gotopreferred channeldirectlyvianumericbuttons.
(RECORD) : theunit will recordtheselected progamme.
7(PAGELEFT) : movesthe pageto left.

18
8(PAGERIGHT) : movesthe pageto right.
TEXT (SEARCH) : activates“Search”window.
4(NOW) : showsthe current programme.
2.1. PROGRAMME OPTIONS
In EPG menu, press the OK button toenter the“ProgrammeOptions” menu.
2.1.1. SELECT CHANNEL
In EPG menu, using thisoption,you canswitch to channel of the programmewhich isselected.
2.1.2. RECORD /DELETE TIMER
In EPG menu, after you haveselected aprogramme,press the OK buttonand selectthe“Record”
option in themenuwhichappears and press the OKbutton again.So arecordingis setto the selected
programme. Thisoption operateslike the RECORDbutton.
Tocancel analreadysetrecording, highlight thatprogrammeandpress the OK button andselect the
option“DeleteTimer”. The recordingwill becancelled.
2.1.3. RECORD SERIES / DELETE SERIES TIMER
In EPG menu, afteryou haveselected aprogramme, pressthe OK buttonandselectthe “Record
Series”option inthemenuwhichappearsandpresstheOK buttonagain.So aseriesrecording isset
to the selected programme. With thisfeature, youcan recordaprogrammeandallofit’sfollowing
partswithin 7days.Theinformation belongingtotheselected programmewill besaved fromthe
software and followingpartsof the selected programmewhichare not included in the period of 7days,
willbe automaticallyaddeddaybyday. The letter“s” denotes thatthese recordingsareseriesrecords.
Tocancel analreadysetseriesrecording,highlight thatprogrammeandpressthe OK buttonand
select the option “Delete SeriesTimer”. The recordingswillbe cancelled.
Note: Seriesprogrammeinformationsshould bebroadcasted bythe broadcaster.

19
2.1.4. CHECKCONFLICTS
Aconflictiscaused, if more thantwoprogrammes areset forrecordinginthesametimeintervalorif
tworemindershave thesamestarting time.In the EPG menu,presstheOKbutton.In thefollowing
window,selecttheoption“Check Conflicts”and pressagainthe OKbutton. Youwillenter the“Too
ManyTimers”window.
2.1.5. SET REMINDER /DELETE REMINDER
In EPG menu, afteryou haveselected aprogramme, presstheOKbuttonandselectthe“Set
Reminder”option inthemenuwhichappearsandpresstheOK buttonagain.You can setareminder
for future programs.
Tocancel analreadyset reminder, highlightthatprogrammeandpress the OK button and selectthe
option“DeleteReminder”. The reminderwill be cancelled.
2.1.6. SPLIT RECORD
If you selectaprogrammetoberecorded, withthisfeature, if thereisanother part of theprogramme
available,itwillalsobe set automaticallytoberecorded. For examplein thefollowingpicture you see
the programmewithared underline, which following episodeisalsounderlined. Todothis,youhave
to press onlytheRECORD button once.The restwill be done automatically.
Note: Split programme informationsshould be broadcastedbythebroadcaster.
Table of contents
Other Hitachi DVR manuals

Hitachi
Hitachi HDR082 User manual

Hitachi
Hitachi HDR081 User manual

Hitachi
Hitachi HDR5T01 User manual

Hitachi
Hitachi HDR253 User manual

Hitachi
Hitachi DV-PF2U User manual

Hitachi
Hitachi HDR165 User manual

Hitachi
Hitachi HDR162 User manual

Hitachi
Hitachi HDR161 User manual

Hitachi
Hitachi JPEG2000 User manual

Hitachi
Hitachi HDR255 User manual
Popular DVR manuals by other brands

Lampa
Lampa BLACK BOX Ultra 38661 instruction manual

EOS Australia PTY LTD
EOS Australia PTY LTD SRN-1670D Configuration manual

Sony
Sony Walkman GV-8 operating instructions

Eclipse Security
Eclipse Security Nubix HD Series user manual

Intellix
Intellix AVR-4005 user manual

OYN-X
OYN-X Nitro Q-HDA-4 user manual