1
ขอควรระวังเพื่อการใชงานอยางปลอดภัย
กอนการใชงานเครื่องทํานํ้าอุน กรุณาอานและทําความเขาใจ “ขอควรระวังเพื่อการใชงานอยางปลอดภัย”
ใหดีกอน เพื่อการใชงานที่ถูกตอง
Before operating the machine, please read the precautions carefully for proper operation.
คําเตือน
Warning
ระวัง
Caution
ความหมายในชองนี้คือ “อาจจะกอใหเกิดอาการบาดเจ็บหรือเสียชีวิตได”
This means there is a risk of injury or death.
ความหมายในชองนี้คือ “อาจจะกอใหเกิดการบาดเจ็บหรือเสียหายตอทรัพยสินได”
This means there is a risk of injury or damage.
หมายถึง “การเตือนหรือขอควรระวัง”
This means warning or precaution.
หมายถึง “สิ่งที่ไมควรกระทําหรือหามทํา”
This means something that cannot or must not be done.
หมายถึง “สิ่งที่ควรปฏิบัติตาม”
This means something that must be done.
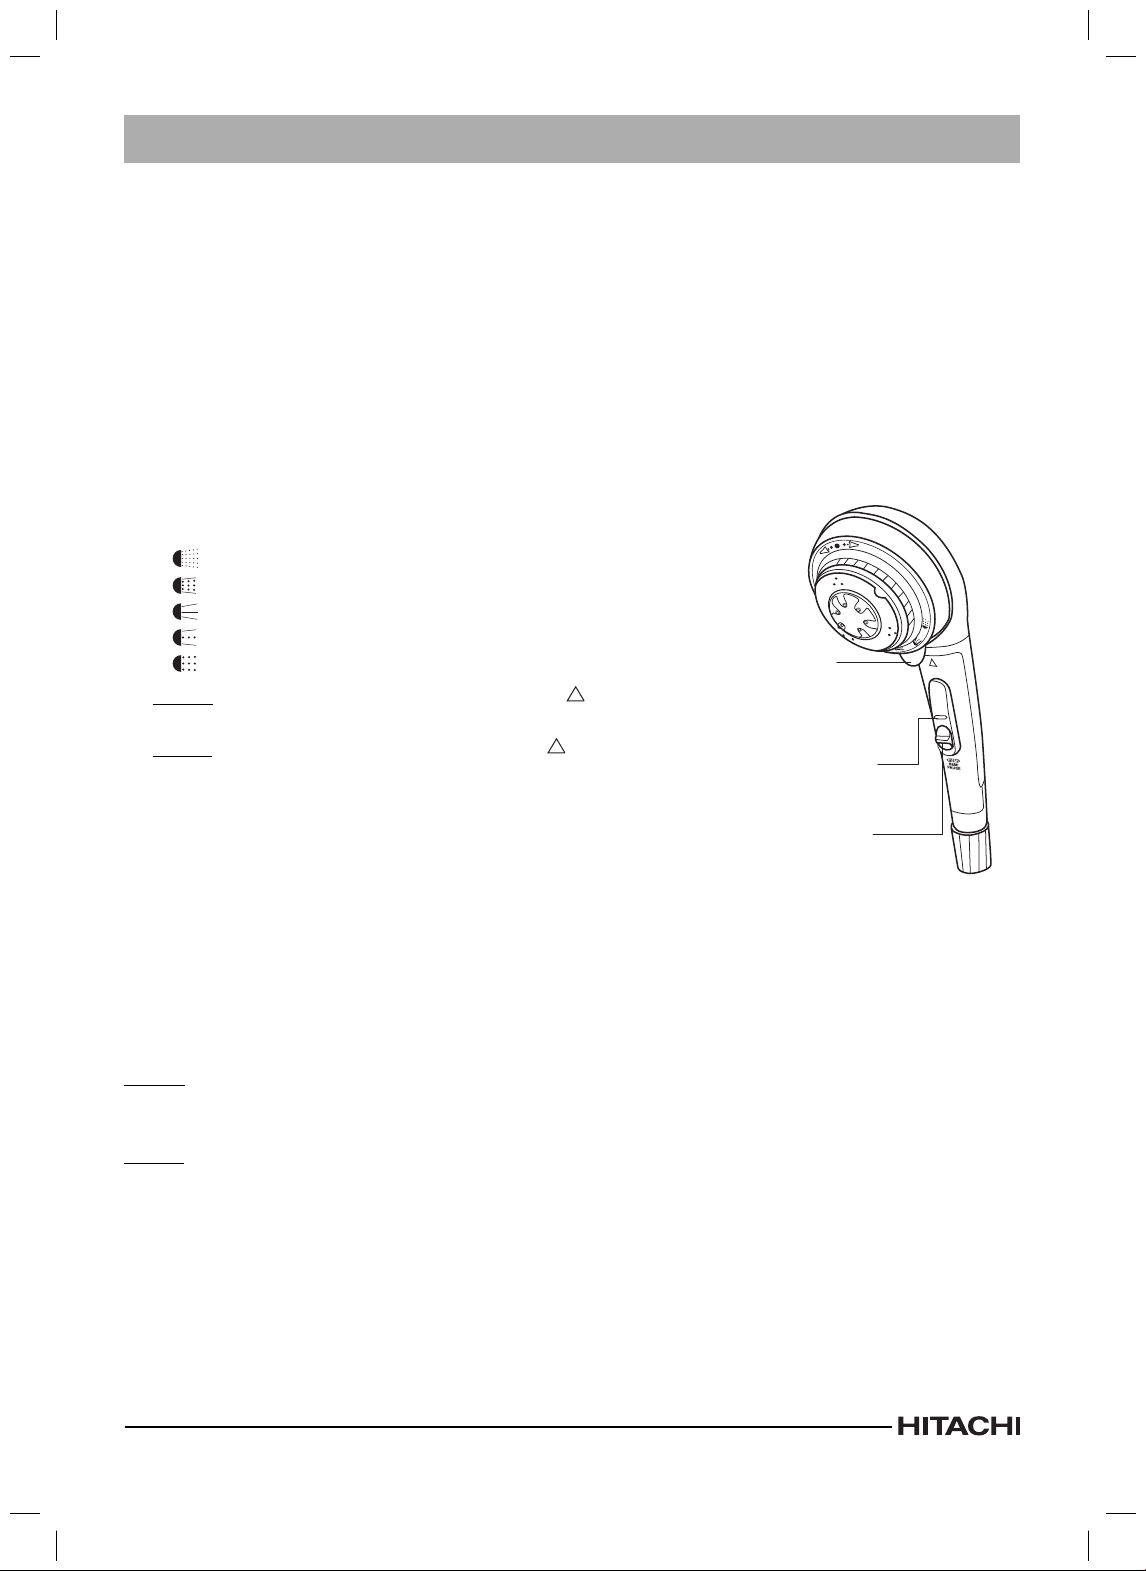
ตัวอยางภาพที่ใชในการแสดง
Examples of pictures
คําเตือน
Warning
• เครื่องทํานํ้าอุนไฟฟาประจําบานจะตองติดตั้ง
สายดินดวย การติดตั้งสายดินอยางไมถูกตอง
สามารถทําใหเกิดไฟฟาช็อตได
The Electric Shower Heater unit must be
earthed.
Improper grounding could cause electric
shock.
• อยาติดตั้งหรือเคลื่อนยายเพื่อติดตั้งใหมดวยตนเอง
การติดตั้งไมถูกตองจะกอใหเกิดการรั่วซึม ไฟช็อต
หรือไฟไหมได โปรดจางผูเชี่ยวชาญที่ไดรับอนุญาต
ใหทําการติดตั้งเครื่องได
Do not install, remove and reinstall the unit
by yourself. Improper installation will cause
leakage, electric shock or fire. Please engage
an authorized dealer or specialist for the
installation work.
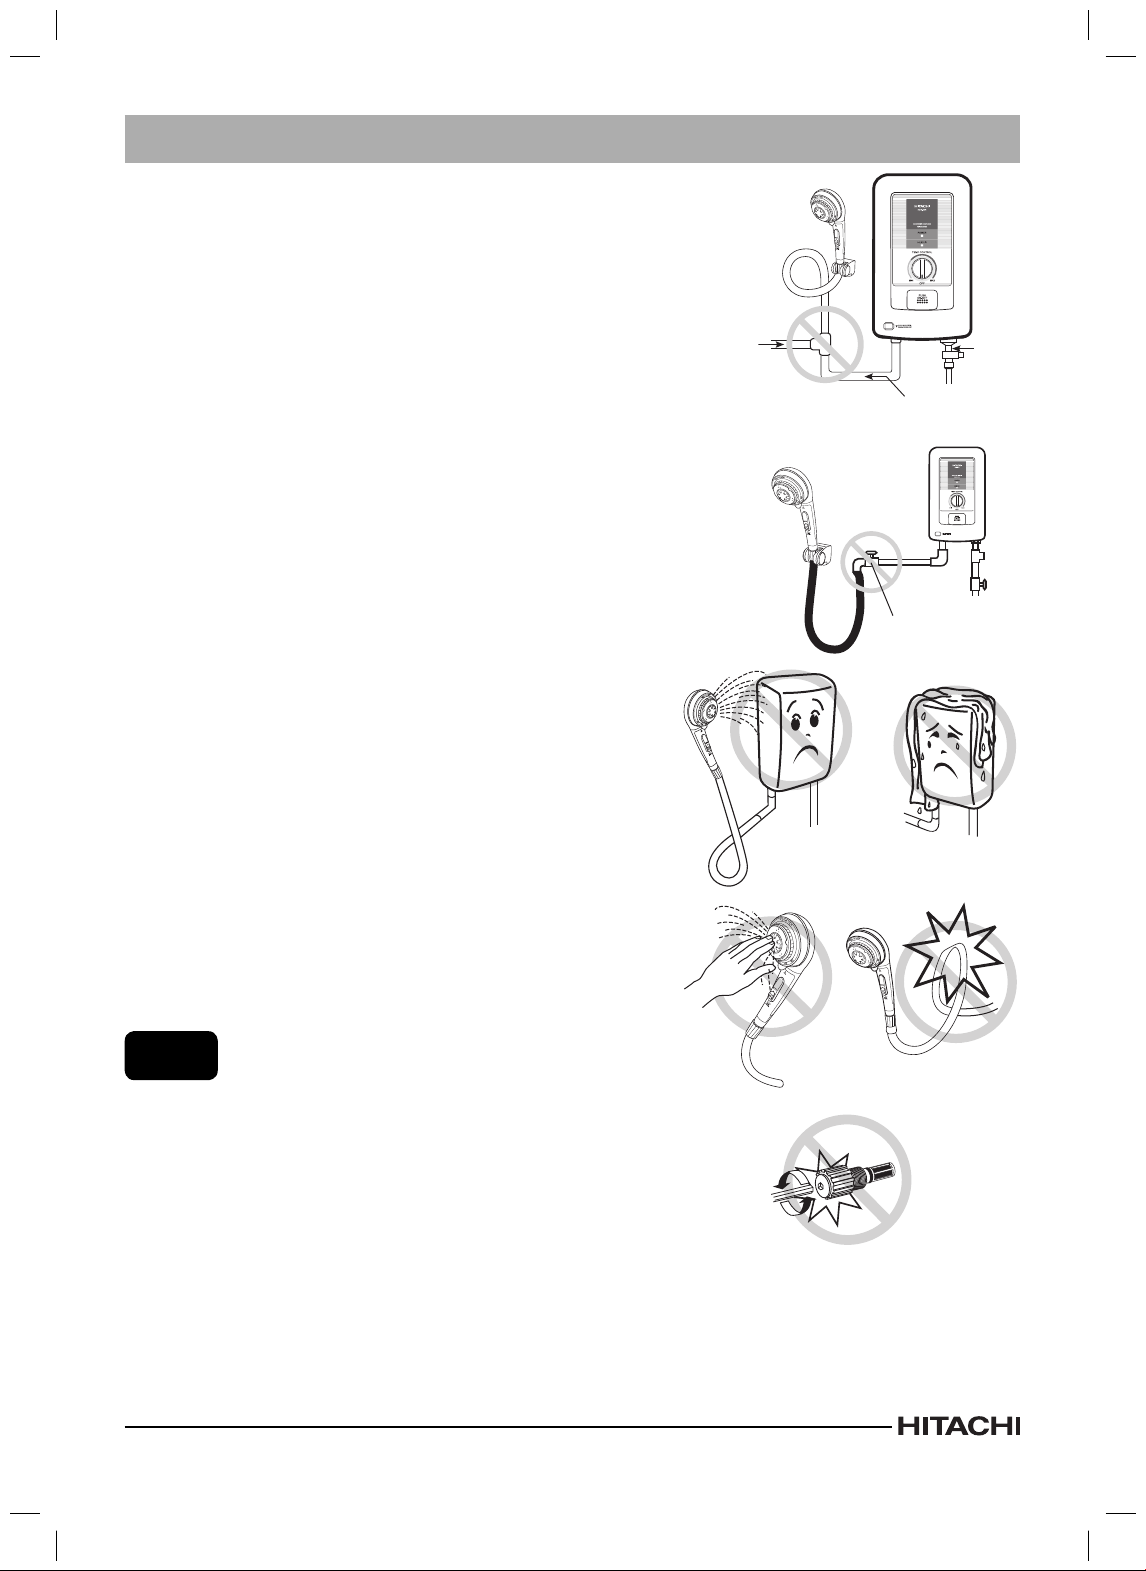
• อยาใชทอนํ้าเขาของเครื่องทํานํ้าอุนรวมกับทอนํ้า
ออกอื่นๆ แรงดันนํ้าอาจลดลงเนื่องจากมีนํ้าไหล
ออกจากจุดอื่นอุณหภูมิของนํ้าฝกบัวอาจรอนมาก
Do not share the inlet pipe of Electric Shower
Heater unit with other outlets. The pressure
may drop due to water being drawn off at
other point. The shower water temperature
may become very hot.
• อยาติดตั้งวาลวเปด-ปดนํ้าบริเวณทางนํ้าออก
Do not install any stop valve in the outlet
pipe line.
• อยาเปลี่ยนหัวฝกบัว สายยางฝกบัว หรือชิ้นสวน
อื่นๆ ของเครื่องที่ไมใชอะไหลแทจากฮิตาชิ
Do not replace the Shower Head, Shower
Hose or any other parts of the unit with the
spare parts other than HITACHI genuine parts.
• หลังจากติดตั้งเครื่องทํานํ้าอุน ใหอุดพลาสติกเหนียว
เพื่อปองกันนํ้ารั่วซึมจากภายนอกเขาสูตัวเครื่อง
กรณีที่ไมอุดพลาสติกเหนียวอาจทําใหนํ้ารั่วซึม
เขาสูภายในตัวเครื่อง ซึ่งเปนสาเหตุใหไฟฟา
ลัดวงจรหรือเกิดไฟไหมได
After setting the Electric Shower Heater unit,
it must be seal by Plaseal to protect water
leakage from outside into the unit. In case unseal
by Plaseal, water leakage may be into the unit. It may
cause electric shock, short circuit or fire hazards.
3RPL061592.indd Sec1:13RPL061592.indd Sec1:1 06/23/12 11:48 AM06/23/12 11:48 AM