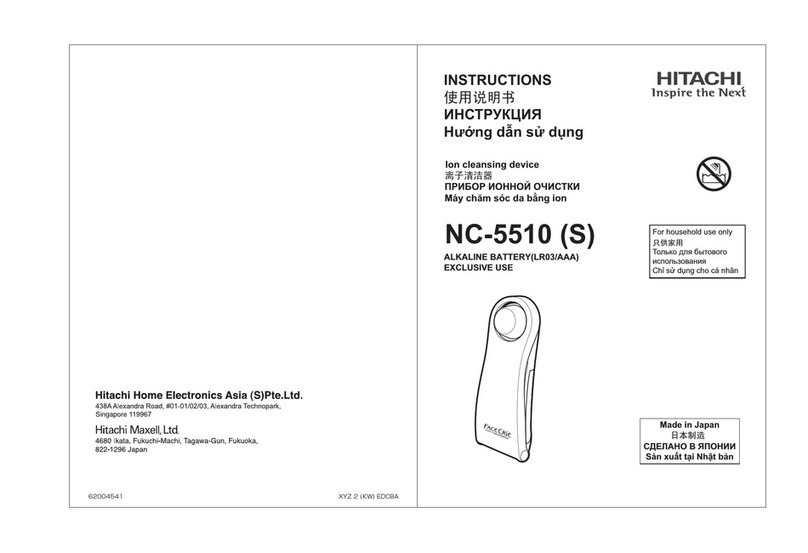
Hitachi HadaCrie CM-N58000BF User manual

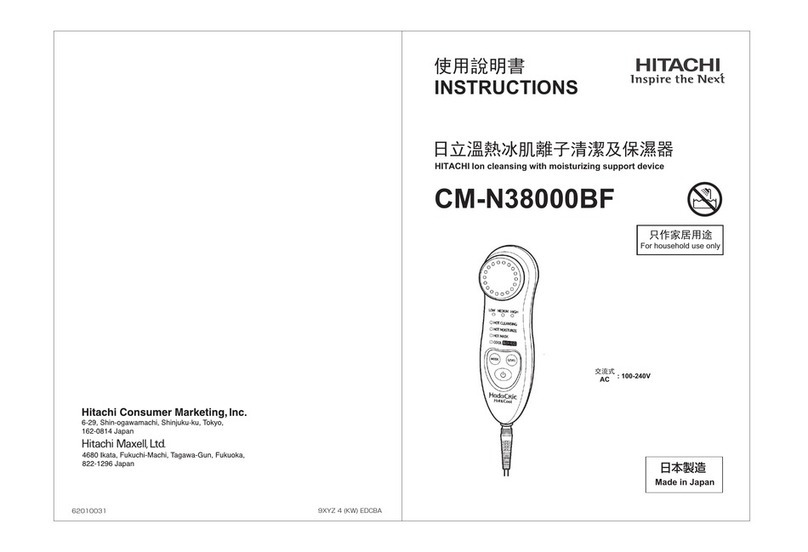
CM-N58000BF
Made in Japan
HITACHIIon cleansing with moisturizing support device
ֵ⭞䃠᱄ᴮ
INSTRUCTIONS
ᰛⓡ⟧ߦ㛂䴘ᆆ▊ؓ☋ಞ
֒ᇬቻ⭞䙊
For household use only
日本製造RECHARGEABLE
ݻ䴱ᕅ
100-240V AC FREE VOLTAGE

English Page 1~18
19~34
ѣᮽ

▼
▼▼1234567
▼

▼▼
89101112131415161718

-1-Safety Precautions
Precautions described here are intended for safe and correct use of this product and are
to prevent injury and damage to you and others before they occur.
Precautions are classified as follows.
Make sure to observe the precautions because they are all important in relation to safety.
●●
<Examples of Pictorial Indication>
The symbol indicates "Compulsory" (Make sure to do this).
"Disassembly prohibited""Use prohibited in wet areas"
"Use with wet hands prohibited"
"General action" "Unplug"
English
Indicates a dangerous situation in which improper handling
could result in death or serious injury to a user.
Indicates a dangerous situation in which improper handling
could result in slight injury to a user or damage to property
(house, household effects, etc.).
Indicates an imminently dangerous situation in which improper
handling may result in death or serious injury to a user.
The symbol indicates "Prohibited" (Do not do this).
Persons who use the following medical electronic devices should not use this
product.
(This product may cause the medical electronic devices to malfunction.)
- Self-contained medical electronic devices such as a pacemaker
- Wearable medical electronic devices such as an electrocardiograph
Prohibited
Do not use this product by other methods which are not described in this
instruction manual. (Cause of accident, trouble, or failure)
Prohibited
Use this product only for face and neck. (Cause of an accident or trouble)
The following persons should be avoid to use this product.
(Cause of an accident or trouble)
- Persons with heart disease - Persons with an acute (pain) illness
- Persons with fever - Persons with a blood pressure disorder
- Persons with an infectious disease - Persons with a tubercular disease
- Persons with a malignant tumor - Persons with facial neuralgia
- Persons who are pregnant - Persons who are menstruating
- Persons with atopic dermatitis - Persons with an allergic predisposition
- Persons with particularly sensitive skin - Persons with hemophilia
- Persons under dental care
- Persons whose blood vessels have expanded due to long time use of steroid
hormones or liver function disorder
- Persons who are under the influence of alcohol or medication, or who are very tired

-2-Prohibited
Prohibited
Do not use this product on the following regions. (Cause of accident or trouble)
- Regions where orthopedic treatment was given - Eyeballs and upper eyelids
- Wound sites - Facial melanoderma - Mucosal regions, such as inside the mouth
- Regions irritated due to pimples or skin rash -Lips
- Regions which suffer from sensation of pain or perception disorder
- Regions where metal, plastic or silicone etc., is embedded under skin
- Regions where there is itching, sensation of warmth, or liver spots due to physical stimulus etc.
- Regions where skin irritation is caused by cosmetics
Children should be supervised to ensure that they do not play with the appliance.
When feeling pain or disorder during use of this product, or sensing anything
wrong with your skin after use, stop using this product and consult a
dermatologist. (Cause of skin trouble etc.)
Unplug
Make sure
If any abnormality occurs during charge, immediately pull out the power plug
of the power adaptor from the outlet. (Cause of accident or fire)
Use only 100-240V AC for power supply. (Cause of fire or electric shock)
Do not use if the power cord or the power plug is damaged or its insertion to
the outlet is loose. (
If the power cord breaks, a fire or electric shock may occur.)
The power cord cannot be unnecessarily bended, pulled, twisted, bound,
placed a heavy object on it, pinched, processed, or wound around the power
adaptor. (If the power cord damages fire or electric shock may occur.)
Make sure
If any unusual sound or abnormality occurs in the main body, immediately
stop using this product and contact the distributor for repair together with the
power adaptor. (Cause of accident or trouble)
This appliance is not intended for use by persons (including children) with
reduced physical, sensory or mental capabilities, or lack of experience and
knowledge, unless they have been given supervision or instruction
concerning use of the appliance by a person responsible for their safety.
Use the COOL mode at an ambient temperature in the range of 15 to 35℃.(Cause of skin damage as the head is too cold if the device is used at a low
temperature)
Do not use this product near inflammable substances (gasoline, benzene,
thinner, etc.). (Cause of explosion or fire)
Do not use this product beyond the specified operating time.
(Cause of skin trouble)
Use only the original power adaptor. And, do not use any other product
with the original power adaptor. (Possibility of electric shock or ignition)
Follow the description of the instruction manual for the operating time and
operation frequency. (Cause of accidents and trouble)
Persons who use this product for the first time should use it while observing
the condition of their skin. (Cause of skin trouble or poor physical condition)
Keep away from small children. Do not use on the skin of a child.
(Cause of accidents or failure)
Never allow pins or dust to adhere to the power plug and plug for equipment.
(Cause of electric shock, short circuit and ignition)
Do not soak the head in boiling water or dry it with hot air. (Cause of failure)

-3-Unplug
Check the heating dimple head, spot sensor or cooling head for any damage
(scratches, etc.), and if there is any damage, do not use it.
(Cause of damage to skin)
Do not use this product together with other beauty treatment devices at the
same time. (Cause of failure or trouble)
Prohibited
Do not use this product if there is some injury or wound to your skin.
(Cause of skin trouble or pain)
Do not drop this product or give it a strong impact. (Cause of injury or failure)
Do not wipe with benzene, thinner or alcohol, and do not spray insecticide.
(Cause of cracking, electric shock, or ignition)
Make sure
Remove accessories such as earrings and necklaces, and contact lenses
before use. (Cause of accident or trouble)
If there is any severe skin disorder or irregularity on your skin surface, or due
to downy hair, you may feel strong irritation in rare instances. In this case,
avoid using this product on that region. (Cause of accident or trouble)
Do not keep the cotton puff or the head on one part of your skin but always
keep it in motion. (Cause of skin trouble or poor physical condition)
Do not hold the cord to pull out the power plug and device plug.
(Cause of disconnection, electric shock, short circuit, or ignition)
Make sure to pull out the power plug from the outlet while not in use.
(Cause of electric shock or fire by deterioration)
Do not alter disassemble or repair by unauthorized techinician.
(Cause of fire, electric shock, injury, or failure)
Do not leave this product in a place where the temperature becomes high
such as the inside of a vehicle. (Cause of failure)
When there are people around the device, pay attention to any sudden
movement during use. (Cause of injury)
Do not wash or splash water on this product. (Cause of failure or short circuit)
Do not use or keep this product in places easily splashed with water or in
damp places, such as in a bathroom. (Cause of failure or short circuit)
Disassembly
prohibited
Use prohibited
in wet areas
This mark means that this appliance should not be used near water
contained in bath-tubs, basins or other vessels. When carrying in a bag or the like, place the product into a separate pouch.
(Cause of damage to the main body or failure)
Do not insert or remove the power plug in/from the outlet with wet hands.
(Cause of failure or short circuit)
Use with wet
hands prohibited

-4-Level Indicator Lamp
[ L ] LOW (green): [ M ] MEDIUM (green):
[ H ] HIGH (red)
When the power switch is switched to
“On,” the lamp indicating “HIGH,”
“MEDIUM,” or “LOW” is turned on.
Level Switch Button
Every time the button is pressed, "the
strength" of the electrical potential will
change. There will be no change in
vibration strength.
Body Socket
Instrument Plug
Cord Accessories
Rings (two) : Rings for attaching cotton.
Names of Parts and Their Functions (Fig. 1)
Body
Heating Dimple Head (titanium material)
The device vibrates while being used in
modes other than “Cool.”
Mode Indicator Lamp
Mode Switch Button
Every time the button is pressed, the
mode for use will be switched.
Power Switch (" ")
Turn on the power switch, and it will turn
"On." Press it again, and it will turn "Off."
An automatic shutoff function is equipped,
so if the device is not used for around 3
minutes, it will automatically turn "Off."
Buzzer (Switching sound/ready
sound/warning sound/abnormality
detection sound/finish sound/indicating timer sound)
Every time the switch or button is
pressed, the switching sound will beep.
When the preparation is completed in
“Cool” mode, the ready sound will beep.
The warning sound will beep to indicate
the continuous use of “Cool” mode.
In the event of a failure, an abnormality
detection sound will beep. When each
mode is finished, the finish sound will
beep.
Power Adaptor
Model: KH-155B
Power Plug
Cooling Head (aluminum material)
Apply this head to your skin in “Cool”
mode.
Back Plate (titanium material)
Touch this part and apply the heating
head to your skin in modes other than
“Cool,” and the device will start to
operate.It will not vibrate if you remove
your hand from this plate.
Mode
During preparation
Orange lamp
flashing
Orange lamp
lights
HOT MASK
COOL
Blue lamp flashing
During use
Blue lamp lights
HOT CLEANSING
HOT MOISTURIZE
Preparation Before Use
●●How to Charge
1. Turn off the switch, and connect the power adaptor to the main body and electric outlet.
(Fig. 2)
Since this is not fully initially charged, charge before first use.
Make sure to use only 100-240V and use the included power adaptor.
Do not insert and remove the power plug from an electric outlet with
wet hands. (Cause of electric shocks and short-circuits)
Do not use in places splashed with water, such as in a bath,
or in damp places. (Cause of failures or short-circuits)
Charge indicator lamp
During charge : The lamp turns on. (Red)
After charging is completed : The lamp turns off.
Charge Indicator Lamp
Lights in red when charging and turns
off after charging is completed. Flashing in
red is a signal requesting a charge.
Battery (built-in)
Lithiumion battery 1 pc.
Protective Cap
Spot Sensor
The sensor senses a spot and indicates
it by the vibration strength (Low, High).
It does not sense a spot when cotton is
attached.
Never use the device when you have a wound or an inflammation on
your skin. (Cause of problems with or damage to your skin.)
Remove accessories or contact lenses.
(Cause of problems with your skin or physical discomfort.)
1. About Mode Switching
Mode
Steps
Materials needed
HOT CLEANSING (cleans fine
residue remaining in pores)
HOT MASK (enhances the effect
of milky lotion or sheet mask)
Use your regular milky lotion or a sheet mask by
applying to skin. Do not use cotton.
Use new cotton saturated with your regular
toner.
HOT MOISTURIZE
(performs
moisturizing care by allowing
moisturizing ingredients to penetrate
into skin)
COOL (tightens the pores of your
skin by cooling effect)
Apply the cooling head directly to your skin.
Do not use cotton and toner.
2 Clean skin by washing your face so that makeup and dirt will wash off.
Wipe off makeup with a cleansing product.
-5-The main body and the power adaptor become slightly hot, however, this is not
unusual.
2. After the standard charging time (1.5 hours) has elapsed, pull out the power adaptor from
the electric outlet and the main body. (Fig. 3)
This device is for rechargeable use only.
It cannot be powered on with the power adaptor connected.
●●If the charge indicator lamp flashes when the power switch is “On,” it indicates that a charge
is required. Charge as soon as possible.
Time to Charge
The standard charging time is 1.5 hours.
The device can be used approximately 7 times on a single charge.
(1 time means that all modes are being used once at “High” level.)
Depending on the operating conditions such as the ambient temperature,
operating times may decrease.
In order to make full use of battery performance, observe the following.
1. If you have not used this product for three months or longer, charge before use.
2. Do not charge every time after you use this product.
3. The recommended charging temperature is in the range of 10 - 35°C.
The battery may take longer to charge or may not charge at all at temperatures
outside of the recommended temperature range.
4. Do not charge at an out-of-home power source, such as in a car or on board a ship.
5.
If any noise occurs while the device is charging or change to another outlet.
Before Use
Pull out holding the plug portion.
Check the heating dimple head or cooling head for any damage or
deformation before use. (Cause of damage to skin)
When using cotton
Use new cotton saturated with your regular skin
lotion.
When not using cotton
You can also apply skin lotion directly to your skin
without using cotton.
1
2
3
4

-6-●●(
HOT CLEANSING
)
(HOT
MOISTURIZE
)
Automatic shutoff
Automatic shutoff
Approximate 3 minutes
3 Attach cotton to the Heating Dimple Head of the device. (Fig.4)
(1) Remove the protection seal from the heating dimple head.
(2) Place cotton over the head and attach it with the included ring while pressing its two
projections.
Use cotton. However, small cotton or thick cotton may not work in some cases.
The ring has an orientation with a clear direction. Attach it from straight above with the
wider part of the inner circumference placed toward the heating dimple head. When
attachment is difficult, please tightly attach it while pressing the right and left ends
(two projections) of the ring horizontally. (Fig.5)
Basic mode
Step 1
Step 2
Step 4
Step 3
●●(2) Use the device on bare skin after removing makeup.
(3) Do not use the device on the same area of skin for more than 10 seconds.
(4) Switch between high and low by pressing the level switch button according to the
condition of your skin.
Do not attach the ring in the reverse direction. Please be careful not to squeeze it,
otherwise, it cannot be removed.
The narrower side of the ring should be upward. Cotton
4 How to remove the ring. (Fig.6)
Remove the ring by pulling it straight up while holding down the lower part.
5 Please observe the following so as not to damage your skin when you use the device.
(1) The maximum amount of time allowed for skin care with use of this device
is 8 minutes a day per person in basic mode.
(
HOT MASK
)(
COOL
)Approximate 3 minutes
(Preparation for cooling:approximate 10 seconds)
(Time for use: approximate 1 minute and 50 seconds)
Automatic shutoff
Automatic shutoff
You can choose “H,” “M,” and “L” as you like.
If your skin tingles, use the device on "L."
If you feel something unusual with your skin, stop using the device and consult a
skin care specialist.
Limit use of the device to no more than 11 minutes per day including use of
“
HOT MASK
.”
It is recommended that you use “
HOT MASK
” once a day for milky lotion or once
or twice a week for sheet mask.
●●The device is equipped with a memory function to memorize the levels of “H,”
“M,” and “L” that you usually use. For details, please see “About memory function” .
●●●Please do not use the device for over 3 minutes per day in each step
(Step 1, 2 and 3).
Please do not continuously use the device in Step 4.
Projection

-7-Example for Use
Step 2
"HOT
MOISTURIZE
"
When you do not have much time in the morning or when you need to go out suddenly,
you can just use “HOT
MOISTURIZE
.” It only takes approximate three minutes to
moisturize your skin thoroughly. Press the mode switch button to set to
“HOT
MOISTURIZE
.”
●●●●Quick Treatment (Required time: approximate 3 minutes)
Press the mode switch button and set the mode of your preferred treatment.
Quick tighten-up Treatment (Required time: approximate 2 minutes)
Step 4 “COOL”
When you want to tighten your skin or cool down your skin before applying makeup, you
can just use “Cool.”
After 10-second preparation for cooling, it only takes one minute and 50 seconds to
tighten your skin. Press the mode switch button to set it to “Cool.”
Tighten-up Treatment (Required time: approximate 5 minutes)
Step 1 “HOT CLEANSING”
Step 4 “COOL”
When you want to remove fine residue remaining in pores and tighten your skin, use
“Cool” after using “Hot Cleanse.” This treatment tightens your skin.
After the “
HOT CLEANSING
” mode is finished, press the mode switch button to set to
“
COOL
.”
Step 1
"HOT
CLEANSING
"
Step 2
"HOT
MOISTURIZE
"
Step 4 “COOL”
Standard daily treatment. After using “Hot Cleanse,” support moisture of clean skin in
“Hot Moisturize” and tighten your skin by cooling effect in “Cool.”
After the “HOT
MOISTURIZE
” mode is finished, press the mode switch button to set to
“COOL.”
●●●Daily Treatment
(Basic mode) (Required time: approximate 8 minutes)
Step 1
"HOT
CLEANSING
"
Step 2
"HOT
MOISTURIZE
"
Before you go out or when you have more time, use “HOT
MOISTURIZE
” after using
“HOT
CLEANSING
.” This treatment moisturizes the clean skin thoroughly.
●●Moisturize Treatment (Required time: approximate 6 minutes)
Daily Full Course (Required time: approximate 11 minutes)
Step 1 "HOT
CLEANSING
"
Step 2 "HOT
MOISTURIZE
"
Step 3 “HOT MASK” (use of milky lotion)
Step 4
“COOL”
Care for your skin using all modes.
Fine vibrations in “Hot mask (use of milky lotion)” mode and gentle switching of the
electrode will condition the skin. Tighten your skin by cooling effect in “Cool.”
●●●●When using “Hot Moisturize” without cotton, the spot sensor senses a spot.

-8-●●●●
How to Use
●●Use after removing the protective cap.
After the power switch is switched to “On,” the heating dimple head warms slowly.
2 Press the power switch.
(Fig. 7)
3 Choose "the strength" of electrical potential with the level switch button.
Switch the "strength" with the level switch button according to the condition of your skin.
●●The level indicator lamp will be turned on, and “HOT CLEANSING” on the mode
indicator lamp will start flashing. If a lamp in another mode is flashing, press the mode
switch button to switch to “HOT CLEANSING.”
Every time the level indicator button is pressed, the “L”,”M” and “H” of the electrical
potential will be switched. There will be no change in vibration strength.
●Make sure to hold the body with your hand touching the back plate.
●●●5 Apply cotton to the skin and move the device slowly.
(Fig. 9)
The mode indicator lamp will turn on and the device will start to vibrate.
The time for use is within approximate 3 minutes.
4 Hold the device with your hand touching the back plate of the body.
(Fig. 8)
Step 1
"HOT
CLEANSING
"
This mode removes fine residue remaining in pores which cannot be removed by simple
washing.
1 Saturate cotton attached to the body with toner after washing your face.
Please use your regular toner or rubbing-off toner with an exfoliating effect.
(Do not use milky lotion or a gel-like or thick toner.)
Saturate the cotton with toner to the extent that toner permeates the back of the
cotton.
●Do not use the product around eyes and ears.
(Cause of accidents or bad physical condition)
If you feel something is unusual with your skin or body while using the
device, stop using it immediately and consult a skin care specialist.
(Cause of accident or poor health)
Some toner (just with mineral spring or water) may be difficult to bring out a
good effect.
It is recommended that when using the device for the first time or if you feel some
discomfort, use the device in "L."
Weekly Full Course (Required time: approximate 11 minutes)
Step 1 "HOT
CLEANSING
"
Step 2 "HOT
MOISTURIZE
"
Step 3 “HOT MASK” (use of sheet mask)
Step 4
“COOL”
Care for your skin once or twice a week by using all modes.
Fine vibrations in “Hot Mask (use of sheet mask)” mode and gentle switching of the
electrode will condition the skin.Tighten your skin by cooling effect in “Cool.”
This device will not operate with the power adaptor plugged into an outlet.
Remove the power plug of the power adaptor from the outlet to use.
The memory function memorizes the "strength" when the power has been turned off.

-9-●Apply cotton gently to the face and slowly move the device by sliding it from the
center of the face to the outer side.
Unless you apply the cotton to your skin while touching the back plate, the device
will not vibrate. (skin sensing function)
If the heating dimple head is not vibrating, the device is not working.
If you leave the device as it is for about 3 minutes without vibration, the device will
automatically switch "Off." (Automatic shutoff function)
●●●
CAUTION
7 Remove the ring and the cotton.
6 After 3 minutes have elapsed, the device will automatically shut off.
(Auto shutoff function)
The finish sound will inform you.
●●Wipe off the surface of the heating dimple head with a tissue.
Do not use the cotton again once it is used. It might cause problems with your skin.
●●1 Attach new cotton to the body with the attachment ring.
Step 2 "
HOT MOISTURIZE
"
●●Do not use milky lotion or a gel-like or thick toner.
Saturate the cotton with lotion to the extent that lotion permeates the back of the
cotton.
2 Saturate the cotton with your regular toner.
3 Press the power switch.
(Fig. 10)
●Add more toner when there is no moisture in the cotton or when the device is
difficult to slide.
Do not apply the device on the same area of skin for more than 10 seconds.
If you feel your skin tingling by micro current while using the device, press the level
switch button and switch to "L."
If you still feel your skin tingling, use the device by adding more toner.
When the "HOT
CLEANSING
" mode is finished, press the power switch and the
"
HOT MOISTURIZE
" mode will automatically be set.
This mode cares for skin by allowing moisturizing ingredients of toner permeate into
the skin.
When using cotton
For attaching a cotton puff, see "Preparation before use."
Skin care time is indicated by the buzzer beeping about every 45 seconds as a guide.
[Example of skin care sequence]
(Fig. 9)
Divide the area from your face to décolletage into four zones as shown in the
illustration. By moving the heating dimple head in the order of ①②%RWKFKHHNVĺ
③7]RQHĺ④décolletage, the whole area can be efficiently and uniformly cared for.
Indicating Timer Function
Do not keep the cotton on the same area of skin, it is necessary to
move it around.
(Cause of problems with your skin or physical discomfort.)
The level indicator lamp will be turned on, and “HOT MOISTURIZE” on the mode
indicator lamp will start flashing. If a lamp in another mode is flashing, press the mode
switch button to switch to “HOT MOISTURIZE.”
※The spot sensor cannot senses the spot.

-10-Every time the level indicator button is pressed, the “L”,”M” and “H” of the electrical
potential will be switched. There will be no change in vibration strength.
●4 Choose "the strength" of electrical potential with the Level switch button. Switch the
"strength" with the Level switch button according to the condition of your skin.
It is recommended that when using the device for the first time or if you feel some
discomfort, use the device in "L."
5 Hold the device with your hand touching the back plate of the body.
(Fig. 8)
●Make sure to hold the body with your hand touching the back plate.
●7 After 3 minutes have elapsed, the device will automatically shut off. (Auto shutoff function)
The finish sound will inform you.
Unless you apply cotton puff to your skin while touching the back plate, the device
will not vibrate. (Skin sensing function)
If the heating dimple head is not vibrating, the device is not working.
If you leave the device as it is for about 3 minutes without vibration, the device will
automatically switch "Off." (Automatic shutoff function)
CAUTION
Apply the cotton gently to the face and slowly move the device by sliding it from the
center of the face to the outer side.
Do not keep the cotton on the same area of skin, it is necessary to
move it around.
(Cause of problems with your skin or physical discomfort.)
Add more toner when there is no moisture in the cotton or when the device is
difficult to slide.
Do not apply the device on the same area of skin for more than 10 seconds.
If you feel your skin tingling by micro current while using the device, press the Level
switch button and switch to "L."
If you still feel your skin tingling, use the device by adding more toner.
●●●●8 Remove the ring and the cotton.
Wipe off the surface of the head with a tissue.
Do not use the cotton again once it is used. It might cause problems with your skin.
●●When not using cotton
Also you can use the device without cotton in “Hot Moisturize.”
●6 Apply cotton to the skin and move the device slowly.
(Fig. 9)
The mode indicator lamp will turn on and the device will start to vibrate.
The time for use is within 3 minutes.
●Skin care time is indicated by the buzzer beeping about every 45 seconds as a guide.
[Example of skin care sequence]
(Fig. 9)
Divide the area from your face to décolletage into four zones as shown in the
illustration. By moving the heating dimple head in the order of ①②%RWKFKHHNVĺ
③7]RQHĺ④décolletage, the whole area can be efficiently and uniformly cared for.
Indicating Timer Function
●The memory function memorizes the "strength" when the power has been shut off.
The vibration may change while using the device. This is because the spot sensor
senses the cotton. This is not a failure.

-11-●3 Choose "the strength" of electrical potential with the level switch button.
Switch the "strength" with the Level switch button according to the condition of your skin.
Every time the level indicator button is pressed, the “L”,”M” and “H” of the electrical
potential will be switched. There will be no change in vibration strength.
●2 Press the power switch. (Fig.10)
When the "
HOT CLEANSING
" mode is finished, press the power switch and the
"
HOT MOISTURIZE
" mode will automatically be set.
The mode indicator lamp will switch and turn on, and the device will start to vibrate.
The time for use is within 3 minutes.
●●●●Add more toner or moisturizing product when the heating dimple head does not
easily slide.
Apply the heating dimple head gently to the face and slowly move the device by
sliding it from the center of the face to the outer side.
Unless you apply the heating dimple head to your skin while touching the back plate,
the device will not vibrate. (skin sensing function)
If the heating dimple head is not vibrating, the device is not working.
If you leave the device as it is for about 3 minutes without vibration, the device will
automatically switch "Off." (Automatic shutoff function)
5 Apply the heating dimple head to the skin directly and move it slowly.
(Fig. 9)
CAUTION
4 Hold the device with your hand touching the back plate of the body.
(Fig. 8)
●Make sure to hold the body with your hand touching the back plate.
1 Apply a gel-like moisturizing product or thick toner that you would normally use onto the
heating dimple head and smoothen it over the entire head with your fingers.
(Fig. 11)
It is recommended that when using the device for the first time or if you feel some
discomfort, use the device in "L."
Moisturizing product
Do not keep the heating dimple head on the same area of skin, it is
necessary to move it around.
(Cause of problems with your skin or physical discomfort.)
Skin care time is indicated by the buzzer beeping about every 45 seconds as a guide.
[Example of skin care sequence]
(Fig. 9)
Divide the area from your face to décolletage into four zones as shown in the
illustration. By moving the heating dimple head in the order of ①②%RWKFKHHNVĺ
③7]RQHĺ④décolletage, the whole area can be efficiently and uniformly cared for.
Indicating Timer Function
The level indicator lamp will be turned on, and “HOT MOISTURIZE” on the mode
indicator lamp will start flashing. If a lamp in another mode is flashing, press the mode
switch button to switch to “HOT MOISTURIZE.”
●The memory function memorizes the "strength" when the power has been shut off.
Spot
Vibration
Dark
Low High
Light
SPOT SENSOR
It senses a spot and indicates it by the vibration strength (Low, High).
The vibration changes in stages to indicate the spot.
※Also the sensor responds to dark-colored areas
such as moles, shadows and bruises.
Do not directly look at the spot sensor because its light is extremely bright.
The spot sensor senses a spot only when the heating dimple head is working.

-12-7 Wipe off the moisturizing product on the heating dimple head and the body of the device
with a tissue.
6 After 3 minutes have elapsed, the device will automatically shut off. (Auto shutoff function)
The finish sound will inform you.
●3 Choose "the strength" of electrical potential with the level switch button.
Switch the "strength" with the Level switch button according to the condition of your skin.
Every time the level indicator button is pressed, the “L”,”M” and “H” of the electrical
potential will be switched. There will be no change in vibration strength.
●Unless you apply the heating dimple head to your skin while touching the back plate,
the device will not vibrate. (skin sensing function)
If the heating dimple head is not vibrating, the device is not working.
If you leave the device as it is for about 3 minutes without vibration, the device will
automatically switch "Off." (Automatic shutoff function)
CAUTION
It is recommended that when using the device for the first time or if you feel some
discomfort, use the device in "L."
Step 3
“HOT MASK”
(It is recommended that you use “HOT MASK” once a day for milky lotion or once or twice
a week for sheet mask.)
Fine vibrations and gentle switching of the electrode enhance the effect of milky lotion or
sheet mask.
1 Place a sheet mask on your face or spread milky lotion or cream that you would
normally use over your entire face.
Wipe off the
lotion
on your hands.
2 Press the power switch. (Fig.12)
●●When the "
HOT MOISTURIZE
" mode is finished, press the power switch and the
"
HOT MASK
" mode will automatically be set.
Skin care time is indicated by the buzzer beeping about every 45 seconds as a guide.
[Example of skin care sequence]
(Fig. 9)
Divide the area from your face to décolletage into four zones as shown in the
illustration. By moving the heating dimple head in the order of ①②%RWKFKHHNVĺ
③7]RQHĺ④décolletage, the whole area can be efficiently and uniformly cared for.
Indicating Timer Function
The level indicator lamp will be turned on, and “HOT MASK” on the mode
indicator lamp will start flashing. If a lamp in another mode is flashing, press the mode
switch button to switch to “HOT MASK.”
●The mode indicator lamp will switch and turn on, and the device will start to vibrate.
The time for use is within 3 minutes.
●●5 Apply the heating dimple head directly to the skin and move it slowly.
(Fig. 9)
4 Hold the device with your hand touching the back plate of the body.
(Fig. 8)
●Make sure to hold the body with your hand touching the back plate.
The memory function memorizes the "strength" when the power has been shut off.
●Do not apply the device on the same area of skin for more than 10 seconds.
If you feel your skin tingling by micro current while using the device, press the
Level switch button and switch to "L." If you still feel your skin tingling, use the
device by adding more toner or other cosmetics.
The sensor may not sense a spot depending on your toner.
●

-13-●●●7 Wipe off the lotion on the heating dimple head and the body of the device with a tissue.
●Step 4 “COOL”
This mode cools the cooling head surface to about 10℃below the surrounded temperature
by cooling effect to tighten your skin.
1 Press the power switch.
(Fig.13)
The level indicator lamp will turn off,
and “COOL” on the mode indicator lamp starts
flashing. If a lamp in another mode is flashing, press the mode switch button to
switch to “COOL.”
When the " HOT MASK " mode is finished, press the power switch and the " COOL "
mode will automatically be set.
Use this device at surrounded temperature from 15 to 35℃. (If you
use “COOL” mode at low temperature without the suggested range,
the head may be overcooled. It may hurt your skin.)
CAUTION
Continuous use of the “COOL” mode makes it difficult to cool the cooling head.
The warning sound and the flashing “COOL” on the mode indicator lamp will inform you.
The warning sound can be canceled by pressing the power switch, but the “COOL”
mode cannot be used for about one hour after cancellation.
“HOT CLEANSING,” “HOT MOISTURIZE” and “HOT MASK” can still be used.
3 Apply the cooling head gently to your skin and move it slowly just like patting your face.
(Fig.14)
The mode indicator lamp will change to lighting from flashing.
The cooling head does not vibrate.
The time for use is within 1 minute and 50 seconds.
Since you can apply the device to the same area of your skin for only one second,
repeatedly apply the head to your skin on and off towards the face.
There is no indicating timer function in the “COOL” mode.
2 Wait until the cooling head has cooled.
Preparation for cooling takes about 10 seconds. “COOL” on the mode indicator lamp
flashes during preparation.
When the device is ready for use, the ready sound will beep and the mode indicator
lamp will be turned on.
●●●●●●The device does not vibrate in “COOL” mode.
CAUTION
●Apply the heating dimple head gently to the face and slowly move the device by
sliding it from the center of the face to the outer side.
Do not apply the device on the same area of skin for more than 10 seconds.
If you feel your skin tingling by micro current while using the device, press the Level
switch button and switch to "L."
6
After 3 minutes have elapsed, the device will automatically shut off.
(Auto shutoff function)
The finish sound will inform you.
Do not keep the heating dimple head on the same area of skin, it is
necessary to move it around.
(Cause of problems with your skin or physical discomfort.)

-14-Do not slide the cooling head over the skin.
Do not keep the cooling head in the same area of the skin, but move it around.
The cooling effect of the cooling head may be lessened.
CAUTION
●●●●●●Care for Main Body
Do not use alcohol, benzine, or thinner.
(Cause of deformation or discoloration)
How to Preserve
Do not clean the main body with water. Do not soak in water,
and do not pour water on the main body. (Cause of failure)
4 After 1 minute and 50 seconds have elapsed, the device will be automatically shut off.
(Automatic Shutoff Function)
The finish sound will inform you.
When the “COOL” mode is finished, the main body and the cooling head become
slightly hot, however this is not unusual.
If a toner/moisturizing product remaining on the skin attaches to the cooling head or
the main body, please wipe off with a tissue.
●●●
CAUTION
If all of the mode indicator lamp and the level indicator lamp start flashing and the
abnormality detection sound beeps during use, this is a warning of device failure.
About Skin Sensing Function
This device is a product which operates through the human body. Applying the skin to
the back plate and the head will make an electrical circuit start to operate.
Unless you touch the back plate and apply the head to the skin, it will not start to operate.
●About Memory Function
This device is equipped with a memory function to store memory of the electrical
potential "strength" levels of “H,” “M,” or “L”.
In each usage mode (Step 1 to 3), the device stores memory of the "strength" level just
before the automatic shutoff or the power switch is turned "off." If the level switch button
is pressed while the device is being used, the electric potential "strength" can be switched.
Pull out the power adaptor from the electric outlet, and contact the distributor for
repair.
Make sure to turn OFF the switch. (Improperly turning on the switch
may give a tingling sensation or result in short-circuit.)
Attach the included protective cap to the main body and store it in a place with little
humidity and dust after cleaning.
The protective cap can be attached with the ring attached to the main body.(Fig.15)
Fit the hook to the neck. Hook Neck
Wipe off any remaining cosmetic on the heating dimple head, spot sensor, cooling head,
main body and ring with a tissue paper, etc.
When it is difficult to remove dirt, wipe it off with a cotton-tipped swab or a cloth tightly
wrung out after saturating it with water.
Do not soak the head in boiling water or dry it with hot air.
(Cause of failure)
Do not rub the spot sensor with a hard brush such as a scrub brush.
(Cause of scratches and malfunctions of spot sensor)

-15-★Do not leave in an area subject to direct sunlight (For example, inside of a
vehicle in summer) or near heaters. (Cause of deformation or discoloration)
CAUTION
Specifications
Do not leave in a water splashing area or an area with significant
humidity, such as bathroom. (Cause of short-circuits or failure)
Do not wind the power cord around the power adaptor or the main
body. (Cause of damage to cord)
100 - 240V AC, common to 50-60Hz
Rated Voltage
9W(Power Adaptor : KH-155B) Rated Power Input
1.5 hours (Room temperature 10 ~ 35 ℃)Charging Time
Rings (two),
Protective cap
(one)
Accessories
Around 11 minutes at the maximum
(Basic Mode:Approximate 8 minutes)
Rated Time
Main body : Approximate 190g
Power adaptor : Approximate 85g
Weight
Approximate 8W(When it is charged at 100VAC) Power Consumption
Lithium ion battery (3.7V DC 1620mAh 1pc.)
Rated Capacity : 1300mAh (When you charge 1.5 hours)
Battery
This product uses a lithium ion battery.
Lithium ion battery is recyclable, valuable resources. When disposing of the product,
handle the lithium ion battery by following your local regulation.
In addition to the battery, other recyclable parts are included. When disposing of parts
other than the battery, follow your local regulation.
Please note when disposing of the product
With the removed batteries, do not charge and avoid the following.
(Cause of heat generation, ignition, or explosion)
Do not throw batteries into a fire, or overheat them.
Do not puncture with a nail, give an impact, disassemble, or modify them.
Do not bring ( +) and ( −) into contact with metal, etc.
Do not carry or store them together with necklaces, hairpins, etc.
Do not leave batteries in a high-temperature area, such as near a
fire or in a burning sun.
●●●●●●●Keep the removed battery out of the reach of children.
If it is suspected that a child has swallowed a battery, seek for medical
consultation immediately.
If the battery fluid leaks, do not touch it with bare hands but take the
following measures:
If the fluid gets in your eyes, do not rub eyes but immediately wash
them with clean water, and then seek for medical consultation.
If the fluid gets on your body or clothing, thoroughly wash it away with
clean water, and then seek for medical consultation.
Do not disassemble except when disposing of the product.
(Cause of fires, electric shocks or injury)
The battery is to be disposed of safely.
Wear the protection cap to avoid the damage of the spot sensor.
(Cause of scratches and malfunctions of spot sensor)

How to remove the lithium ion battery
Do not allow the
( +) and ( −)
terminals of the removed lithium ion
battery to make contact. (Cause of a short circuit or burns)
1. Hold the power switch and level switch buttons simultaneously for 5 seconds or more, and
all indicator lamps light and then the mode and level indicator lamps light sequentially.
Leave it until they turn off.
2. Remove the three screw concealing pieces and the three screws on the back of the body.
(Fig.16)
3. Insert a flatblade screwdriver etc., into the gap between the body cases (front) and (rear),
and remove the body case (rear). (Fig.17)
4. Disconnect the lithium ion battery connector, and take it out of the battery holder. (Fig.18)
Screw concealing piece Screw
Flatblade screwdriver Body case (rear)
Body case (front) Connector Battery holder
-16-CAUTION
Make sure to pull out the device plug from the main body after charging.
Do not store it when the power adaptor is connected with the main body or the cord is
wound around the main body. (Result in damage of the cord)
Cord
Do not wind the cord around
the main body.
Device plug.
※Make sure to pull out the device plug
from the main body after charging.
(Make sure to holding the plug to pull
out from main body.)
Do not keep the device plug and cord in a state of bending.
Table of contents
Other Hitachi Personal Care Product manuals

Hitachi
Hitachi CM-N28000BF User manual

Hitachi
Hitachi NC-5510 User manual

Hitachi
Hitachi CM-N8100 User manual

Hitachi
Hitachi HR-550 User manual

Hitachi
Hitachi MXS2ESLL1 Probe User manual

Hitachi
Hitachi CM-N8800BF User manual

Hitachi
Hitachi HR-530 User manual

Hitachi
Hitachi CM-N10000 User manual

Hitachi
Hitachi CM-N38000BF User manual