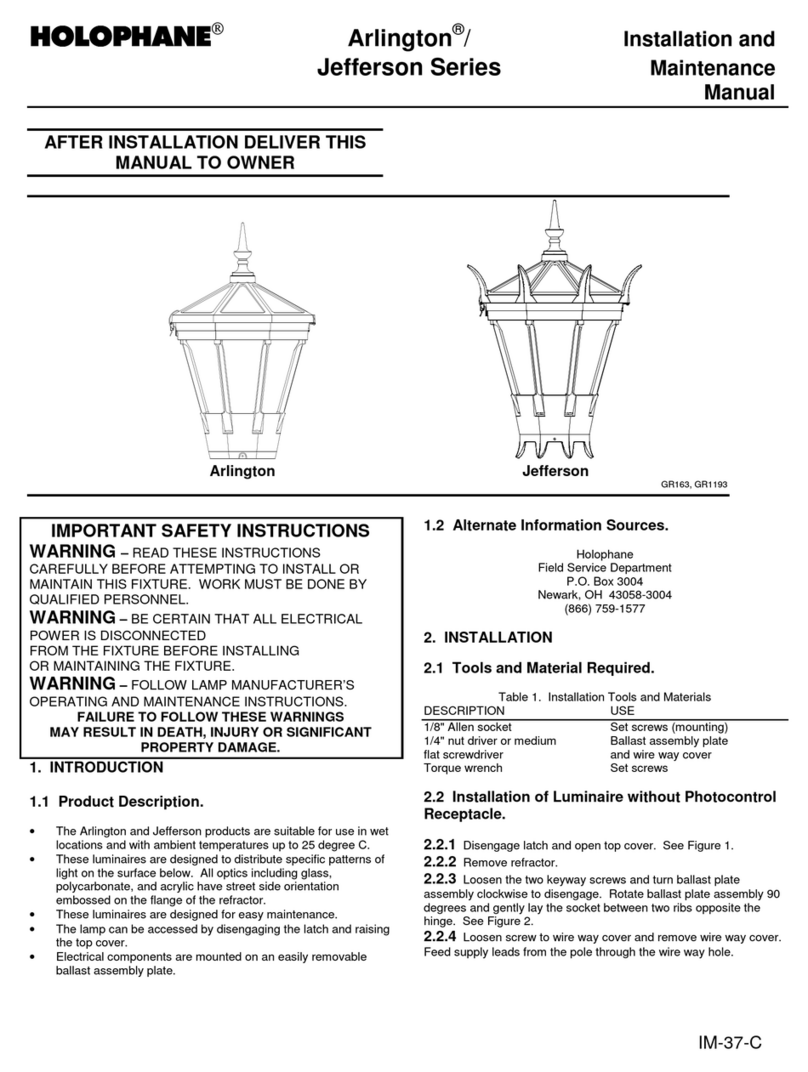
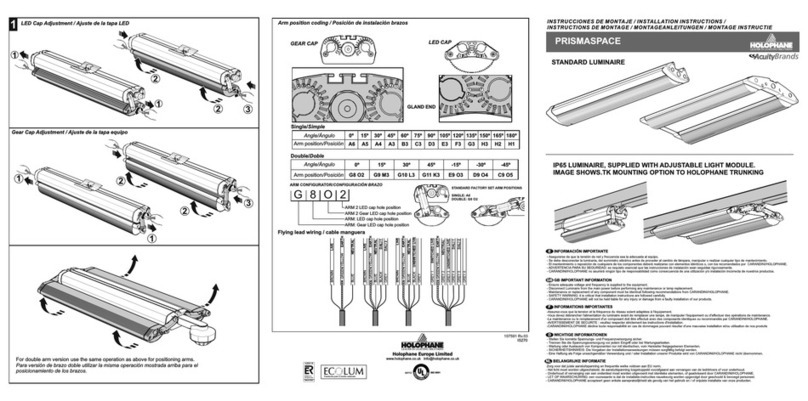
HOLOPHANE Mongoose LED Manual

IM-352-D
LEDIMPORTANTSAFETYINSTRUCTIONS
•Toreducetheriskofdeath,personalinjuryorpropertydamagefromfire,electricshock,fallingparts,cuts/abrasions,and
otherhazardspleasereadallwarningsandinstructionsincludedwithandonthefixtureboxandallfixturelabels.
•Beforeinstalling,servicing,orperformingroutinemaintenanceuponthisequipment,followthesegeneralprecautions.
•Installationandserviceofluminairesshouldbeperformedbyaqualifiedlicensedelectrician.
•Maintenanceoftheluminairesshouldbeperformedbyperson(s)familiarwiththeluminaires’constructionandoperation
andanyhazardsinvolved.Regularfixturemaintenanceprogramsarerecommended.
•Itwilloccasionallybenecessarytocleantheoutsideoftherefractor/lens.Frequencyofcleaningwilldependonambient
dirtlevelandminimumlightoutputwhichisacceptabletouser.Refractor/lensshouldbewashedinasolutionofwarm
waterandanymild,non‐abrasivehouseholddetergent,rinsedwithcleanwaterandwipeddry.Shouldopticalassembly
becomedirtyontheinside,wiperefractor/lensandcleaninabovemanner,replacingdamagedgasketsasnecessary.
•DONOTINSTALLDAMAGEDPRODUCT!Thisluminairehasbeenproperlypackedsothatnopartsshouldhavebeen
damagedduringtransit.Inspecttoconfirm.Anypartdamagedorbrokenduringorafterassemblyshouldbereplaced.
•Recycle:ForinformationonhowtorecycleLEDelectronicproducts,pleasevisitwww.epa.gov.
•Theseinstructionsdonotpurporttocoveralldetailsorvariationsinequipmentnortoprovideeverypossiblecontingency
tomeetinconnectionwithinstallation,operation,ormaintenance.Shouldfurtherinformationbedesiredorshould
particularproblemsarisewhicharenotcoveredsufficientlyforthepurchaser’sorowner’spurposes,thismattershouldbe
referredtoAcuityBrandsLighting,Inc.
READANDFOLLOWALLSAFETYINSTRUCTIONS!
SAVETHESEINSTRUCTIONSANDDELIVERTOOWNERAFTERINSTALLATION
9Disconnectorturnoffpowerbefore
installationorservicing.
9Verifythatsupplyvoltageiscorrectby
comparingitwiththeluminairelabel
information.
9Makeallelectricalandgrounded
connectionsinaccordancewiththeNational
ElectricalCode(NEC)andanyapplicable
localcoderequirements.
9Allwiringconnectionsshouldbecapped
withULapprovedrecognizedwire
connectors.
WARNING
RISKOFELECTRICSHOCK
9Allowlamp/fixturetocoolbeforehandling.
Donottouchenclosureorlightsource.
9Donotexceedmaximumwattagemarkedon
luminairelabel.
9Followallmanufacturer’swarnings,
recommendationsandrestrictionsfor:driver
type,burningposition,mounting
locations/methods,replacementand
recycling.
WARNING
RISKOFBURN
9Wearglovesandsafetyglassesatalltimes
whenremovingluminairefromcarton,
installing,servicingorperforming
maintenance.
9Avoiddirecteyeexposuretothelightsource
whileitison.
CAUTION
RISKOFINJURY
9Keepcombustibleandothermaterialsthat
canburn,awayfromlamp/lens.
9Donotoperateincloseproximitytopersons,
combustiblematerialsorsubstances
affectedbyheatordrying.
CAUTION
RISK OF FIRE

IM-352-D
LEDIMPORTANTSAFETYINSTRUCTIONS
Please see product specific installation instructions for additional warnings or any applicable FCC or other regulatory
statements.
Failure to follow any of these instructions could void product warranties. For a complete listing of product Terms and
Conditions, please visit www.acuitybrands.com.
OurBrandsIndoor/Outdoor IndoorLighting OutdoorLighting Controls
LithoniaLighting Gotham AmericanElectricLightingDARKTOLIGHT
Carandini MarkArchitecturalLightingAntiqueStreetLampsLightingControl&Design
Holophane Peerless Hydrel ROAM
RELOC RenaissanceLightingTersen SensorSwitch
WinonaLightingSynergy
AcuityBrandsLighting,Inc.assumesnoresponsibilityforclaimsarisingoutofimproperorcarelessinstallationorhandlingofitsproducts.
ABLLEDGeneralWarnings,FormNo.503.203
©2011AcuityBrandsLighting,Inc.Allrightsreserved.3/15/11
9Neverconnectcomponentsunderload.
9Donotmountorsupportthesefixturesinamannerthatcancuttheouterjacketordamagewire
insulation.
9Unlessindividualproductspecificationsdeemotherwise:NeverconnectanLEDproductdirectlytoa
dimmerpacks,occupancysensors,timingdevices,orotherrelatedcontroldevices.LEDfixturesmustbe
powereddirectlyoffaswitchedcircuit.
9Unlessindividualproductspecificationsdeemotherwise:Donotrestrictfixtureventilation.Allowfor
somevolumeofairspacearoundfixture.AvoidcoveringLEDfixtureswithinsulation,foam,orother
materialthatwillpreventconvectionorconductioncooling.
9Unlessindividualproductspecificationsdeemotherwise:Donotexceedfixturesmaximumambient
temperature.
9Onlyusefixtureinitsintendedlocation.
9LEDproductsarePolaritySensitive.EnsureproperPolaritybeforeinstallation.
9ElectrostaticDischarge(ESD):ESDcandamageLEDfixtures.Personalgroundingequipmentmustbe
wornduringallinstallationorservicingoftheunit.
9DonottouchindividualelectricalcomponentsasthiscancauseESD,shortenlamplife,oralter
performance.
9Somecomponentsinsidethefixturemaynotbeserviceable.Intheunlikelyeventyourunitmayrequire
service,stopusingtheunitimmediatelyandcontactanABLrepresentativeforassistance.
9Alwaysreadthefixturescompleteinstallationinstructionspriortoinstallationforanyadditionalfixture
specificwarnings.
CAUTION:RISKOFPRODUCTDAMAGE

HOLOPHANE®MONGOOSE LED®Installation and
Maintenance
Manual
IM-352-D
GR2118
1 INTRODUCTION
1.1 ProductDescription
The Mongoose LED luminaire has been listed to applicable U.S. &
Canadian safety standards by Underwriters Laboratories Inc. It is
suitable for use in wet locations and ambient temperatures up to 40°C.
This device complies with Part 15 of the FCC Rules. Operation is
subject to the following two conditions: (1) this device may not cause
harmful interference, and (2) this device must accept any interference
received, including interference that may cause undesired operation.
•The LED driver/door assembly can be detached for repair by un-
latching door latches, one cotter pin, and unplugging electrical
connectors.
1.2 Alternate Information Sources. If additional questions
arise relative to these luminaires that this document or your supplier
cannot answer, please refer them to:
Holophane
Field Service Department
P.O. Box 3004
Newark, OH 43058-3004
(740) 345-9631
2 INSTALLATION
2.1 Tools and Materials Required.
DESCRIPTION USE
Wrench for 9/16” Hex Mounting Bolts
Flat-end screwdriver Terminal Block/Clamp Band
Torque Wrench (ft.-lbs.) Mounting Bolts
Phillips Head Screw Driver Photocontrol Adjustment
2.2 Tenon Mounting
2.2.1 Loosen the screw holding the wire chamber cover to the tenon
fitter and remove the cover.
2.2.2 Being careful not to pinch supply wires, slide the fixture onto
the tenon until the tenon seats against the anchor screw. See Figure 1.
Figure 1
GR2119
2.2.3 Align the fixture as necessary and then adjust the appropriate
set screws until the base of the tenon fitter is level.
2.2.4 Tighten the set screws from 10-12 ft-lbs. do not exceed torque.
2.2.5 Make the appropriate electrical connections. If not using a
terminal block use wire rated for at least 75 degree C.
2.2.6 Supply wire connections may be made either in the tenon fitter
wire area or housing. Tenon is standard.
2.2.7 Secure the supply wires with a wire tie in such a way as to
relieve stress on the wire connections.
2.2.8 Replace the wire chamber cover and tighten the screw.
CAUTION
BE CERTAIN THAT NO WIRING IS PINCHED BETWEEN
THE WIRE CHAMBER COVER AND TENON FITTER.
2.2.9 Electrically energize the unit and check for proper operation.
2.3 Horizontal Arm Mounting
2.3.1 Loosen the screw holding the wire chamber cover in place
and remove the cover.
2.3.2 Being careful not to pinch the supply wires, slide the fixture
onto the mounting arm until the seats against the internal stops.
2.3.3 Align the fixture as necessary and then adjust the
appropriate clamp bolts until the fitter is level. See figure 2.
2.3.4 Tighten the clamp bolts for 15-17 ft-lbs.
2.3.5 Follow steps beginning at 2.2.5

IM-352-D
Figure 2
GR2120
2.4 Architectural Arm Mounting
2.4.1 Loosen the screw holding the wire chamber cover in place
and remove the cover.
2.4.2 Start one of the mounting bolts in the hole that corresponds
to the keyway in the fitter.
2.4.3 Place supplied gasket between arm and pole. See Figure 3.
2.4.4 Line up the keyway with this bolt and use it to hang the
fixture. See Figure 3.
2.4.5 Tighten the bolts from 15-17 ft-lbs.
2.4.6 Follow steps 2.2.5.
Figure 3
GR2119
2.5 Photocontrol Option
Skip to next step if unit does not have a photocontrol receptacle.
2.5.1 Locate the photocontrol receptacle on the top of the unit and
remove protective cover. Loosen the two screws and rotate the
receptacle until it points north. Retighten the screws. Install a twist-on
type photocontrol into the receptacle.
2.6 Tilt Adjustment
2.6.1 Loosen the tilt adjustment bolts until the body of the fixture is
free to rotate on the flange of the fitter.
2.6.2 Using the top of the fitter flange as a guide, rotate the fixture
body to the desired tilt setting. See figure 4.
2.6.3 Tighten the bolts to 20 ft-lbs
Figure 4
GR2121
3 MAINTENANCE
3.1 Cleaning of Luminaire
3.1.1 Wipe off exterior dirt and debris using a soft clean cloth. A mild
detergent and water may be used if necessary.
CAUTION
DO NOT USE ABRASIVE CLEANERS ON OPTICAL
SURFACES. THEIR USE MAY RESULT IN THE LOSS OF
OPTICAL EFFICIENCY.
3.2 Electrical Component Replacement
3.2.1 Disconnect power to the unit prior to opening and performing
any maintenance.
3.2.2 Access to the LED modules should be performed by qualified
personnel experienced with solid state lighting only. Contact factory
for support.
3.2.3 Surge Protector Replacement: See Figure 5. Locate the surge
protector. Disconnect the surge protector via the wiring quick
disconnects. Remove the screws holding the surge protectors in place
and retain. Carefully remove the surge protector and install the new
Holophane approved surge protectors in the same orientation with the
original screws. Re-connect the surge protectors’ quick disconnects.
3.2.4 LED Driver Replacement: Before removing components,
disconnect driver input and output leads nearest the driver via the
quick disconnects. Remove the (4) driver screws to remove the driver
from the electrical door; retain screws for reuse. Install new
Holophane approved driver and tighten screws securely. Reconnect
all driver input and output leads.

IM-352-D
Figure 5
GR2119
4 Limited Warranty and Limitation of Liability
The Holophane limited warranty and limitation of liability is published in
the "Terms and Conditions" section of the current Holophane buyer's
guide, and is available from your local Holophane sales representative.
®
Acuity Lighting Group, Inc.
214 Oakwood Ave., Newark, OH 43055
IM-352-D 9/10 ©2014 Acuity Brands Inc.
Visit our web site at www.holophane.com
Table of contents
Other HOLOPHANE Lantern manuals
Popular Lantern manuals by other brands

Eaton
Eaton Champ VMVL Series Installation & maintenance information

Emos
Emos E704-12SMD+6 manual

ancnoble
ancnoble KLS-001 user manual

SLV Elektronik
SLV Elektronik WETSY LED DISK 300 operating manual

Lighting Technologies
Lighting Technologies RKL LED 13 4000K manual

Gama Sonic
Gama Sonic GS-97A instruction manual