manuals.online logo
Brands
  1. Home
  2. •
  3. Brands
  4. •
  5. HOLYKELL
  6. •
  7. Measuring Instrument
  8. •
  9. HOLYKELL HPT619 User manual

HOLYKELL HPT619 User manual

GPRS/GSM Wireless Temperature & Level
Measurement Terminals
User Manual
(HPT619)
HOLYKELL TECHNOLOGY CO.LTD
V2.4
1.Summarize
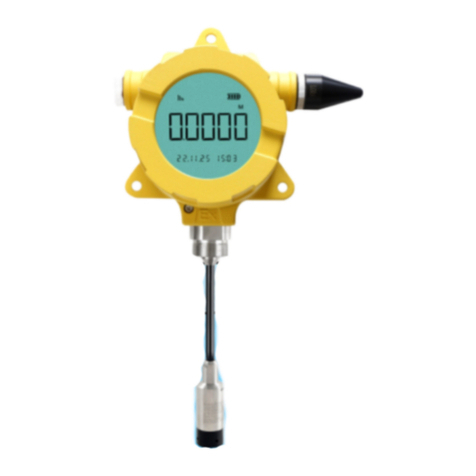
GPRS wireless temperature and level measurement terminals, It can regularly measuring the
temperature and the pressure of the liquid, location latitude and longitude information, It sends measure
value to the LLM server through the GPRS. The terminal will send an SMS message to user's phone number
when GPRS network is disconnected.
The Line is only used for configure the terminal by users; it is connect between the terminal and the
RS232 of computer.
2.Technical Specifications and function description
Pressure Range.:0~3000mmH20 (or by customize)
Accuracy:0.5%F.S (0.25%F.S. by customizes)
Temperature Range:-20℃~80℃(by customize)
Accuracy:±1 ℃
Power Supply:3.6 Li-ion battery or 10VDC~30VDC/24VAC external power supply
IP Rating:IP65
Working Temperature:-25℃~85℃
Storage Temperature:-25℃~85℃
Communication Frequency:
GSM: GSM 850MHz/ EGSM 900MHz/
DCS1800MHz/ PCS1900MHz;
CDMA2000/EVDO: BC0;
WCDMA;TD-SCDMA;LTE-FDD
Timing Work Time:301~65535s (can set)
Append Function: LCD, keys.
Battery life: The battery number is ER34615M, its capacity is 14.5AH and it can continue to work
about 90 days of work once per hour.
Battery model choice: it is recommended to use 1 battery ER34615M, If user want to select battery by
self, please according to the battery standard as following. battery voltage: 3.0VDC~3.6VDC,max
continues output current: More than 0.5A, pulse output current: more than 1A. External power supply
instructions: 1 is anode, 2 is cathode. The power supply range is 10-30 Vdc.
3. Structure Drawing
(1)Positive side structure diagrams, as shown in figure 1.
Figure 1
(2)On the back of the chart, as shown in figure 2.
Figure 2
4. LCD display and keys operating instructions
4.1 LCD display
The LCD will display the current pressure measurement values of liquid when no keys press.
4.2 keys operating instructions
“SET”、“ ” and“ ”buttons are placed on the terminal. User can use these buttons when the
terminal running in Set Mode and don‟t send any data by SMS at the moment.
The menu have Four functions:
1) “AS ”: set Terminal address.
2) “SI”: set Terminal interval time.
3) “GS”: set Terminal work mode '0/1/2' (0---GPRS; 1---GPRS/GSM; 2---GSM)
4) “FS”: set Terminal Decimal point, Display units and Pressure/Level Span(calibrated sensor didn't
adjust this data!).
Buttons have long press and short press.
The users can do the steps following:
Step 1: Long press “SET” key to enter the setting interface, LCD will display “AS”.
Step 2: Short press “ ” key can switch “AS ” , “SI”, “GS” and “FS” menu.
Step 3: Short press “SET” key in the “AS ” menu to enter the Terminal address set interface, address
range is 0~253. Short press “ ” key to add 1 of address, short press “ ” to decrease 1 of address,
Finished , short press “SET” key to save address to return or long press “ ” key to return.
Step 4: Short press “SET” key in the “SI” menu to enter the Terminal interval time set interface,
interval time is 301~65535s. Short press “ ” key to adjust the value of the current position, short press
“ ” to switch the current position, Finished , short press “SET” key to save the result to return or long
press “ ” key to return.
Step 5: Short press “SET” key in the “GS” menu to enter the Terminal work mode set interface, and
Short press “ ” key to change mode and short press “SET” key storage.
Step 6: Short press “SET” key in the “FS” menu to enter the Terminal pressure span, decimal point and
units set interface, then short press “SET” key enter pressure span setting and continue short press “SET”
key enter decimal menu and press “ ” key to change decimal position and the short press “SET” key
storage and at the same time enter Units set menu, the press “ ” key to change unit and short press
“SET” key storage and long press “SET” key to back “FS” menu or continue long press “SET” key to back
pressure/level reading windows.
Step 7: Long press “ ” key in the “AS” to quit setting interface. The LCD will display pressure
value.
Note: Long press “ ” key can make the terminal quit working mode to setting mode.
5.SMS configuration instructions
5.1 SMS example
Send: HPTCONFIG:PHONE=+8613812345678; APN=CMNET; IP=47.88.14.174; PORT=8008;
SMS=1; TIME=350;
Reply: HPTCONFIG:PHONE=+8613812345678; APN=CMNET; IP=47.88.14.174; PORT=8008;
SMS=1; TIME=350;
5.2 SMS configuration notes and matters needing attention
(1) Flag bit
The configuration information must begin with "HPTCONFIG:", as the secret key configuration
identification message;
(2) Telephone number
Configure phone numbers, such as "PHONE=+8613812345678", phone number configuration length
must be less than 16 bit word length, you can bring country region information;
(3) Configure the SIM Card APN
(4) Server IP address
Configure the IP address, such as "IP=47.88.14.174" that supports only the IPV4 format length;
(5) Port number
Configure the IP port number, such as "PORT=8008", whose length is less than or equal to the 5 bit
word length, and the range is "1-65535";
(6) Configure the transmitter data mode
Configure data upload mode:
-- SMS=0: only TCP mode, it doesn‟t SMS notification when link failure, this mode is not
recommended;
--SMS=1: TCP mode, the current server link is not normal; it will notify the standby phone number in
the form of SMS;
-- SMS=2: SMS mode;
(7) Configuration timeout
Data upload interval, the length is less than or equal to 5 bit word length, the range is 300-60000";
SMS configuration function must be in the transmitter from the host software set working mode before
normal work, not in response to the configuration information in the set mode operation; SMS configuration
can be single parameter configuration parameters from a text can be configured.
6. Maintenance Illuminate
(1) Please insert a SIM card with GPRS serve before use the terminal.
(2)If the interruption of communication between terminal and LLM server or other communications
failure, please check the LLM server r computer network connection, LLM server software and SIM card is
normal or not.
(3)Avoid the GSM antenna close to the metal objects or strong magnetic objects.
(4)If the Terminal works fault, and you don‟t resolve the fault, please contact HOLYKELL. We don‟t
allow user take down and repair the Terminals.
Network Building and Software Application:
Before installation software, we need prepare a cloud server or PC with fixed Public IP address.
For example, if use Alibaba-Aliyun ECS Cloud Server platform.
You need buy this products from www.aliyun.com
And select a basic parameter configuration ECS Cloud Server and selection Windows systems to buy.
Then you will get a free Public IP address and your platform/server loading password.
Below is Holykell ECS Cloud Server loading show:
1. Windows system PC or Laptop „Start‟---Windows accessory---Remote desk connection
2. After loading and desk display
3. Open LLM Wireless Pressure/Level/Temperature Monitor Software
4. Setting TCP/IP Listen IP and Port:
(Here IP is your locally pc IP address, such as below 172.16.2.129. not means Server IP! Port must
be the same as SMS configuration into Terminals. Also support database building.)
5. Terminal Setting: Likes Terminal Name/ID/Data transfer mode/interval time and so on.
Alarm setting and Liquid Density setting (if use for different medium measurement).
#Attention: Above setting and configuration must done on ‘configuration mode’.
6. Search historical data record:
7. Search historical alarm data record:

Other HOLYKELL Measuring Instrument manuals

HOLYKELL 4800E User manual

HOLYKELL

HOLYKELL 4800E User manual

HOLYKELL H2600 Series User manual

HOLYKELL

HOLYKELL H2600 Series User manual

HOLYKELL UF2000 Series User manual

HOLYKELL

HOLYKELL UF2000 Series User manual

HOLYKELL HLU-SF User manual

HOLYKELL

HOLYKELL HLU-SF User manual

Popular Measuring Instrument manuals by other brands

RUSTA 775100010101 manual

RUSTA

RUSTA 775100010101 manual

Altana BYK wave scan 3 Short instructions

Altana

Altana BYK wave scan 3 Short instructions

Raytech MC2 instruction manual

Raytech

Raytech MC2 instruction manual

Hanna Instruments edge DO manual

Hanna Instruments

Hanna Instruments edge DO manual

Chauvin Arnoux AEMC 407 user manual

Chauvin Arnoux

Chauvin Arnoux AEMC 407 user manual

Knick PORTAVO 904 PH user manual

Knick

Knick PORTAVO 904 PH user manual

MRC LX-1102 Operation manual

MRC

MRC LX-1102 Operation manual

Lightware SF10 product manual

Lightware

Lightware SF10 product manual

AquaScape 74012 Installation instruction

AquaScape

AquaScape 74012 Installation instruction

Zoom R4 QuickTour

Zoom

Zoom R4 QuickTour

Ametek 120HD user manual

Ametek

Ametek 120HD user manual

Neopost iMeter IM-280 Replacement Part Guide

Neopost

Neopost iMeter IM-280 Replacement Part Guide

WELZ SP-600 user manual

WELZ

WELZ SP-600 user manual

Weidmuller Transclinic 8i+ user guide

Weidmuller

Weidmuller Transclinic 8i+ user guide

geo-FENNEL S-Digit mini user manual

geo-FENNEL

geo-FENNEL S-Digit mini user manual

Altimeters QUATTRO manual

Altimeters

Altimeters QUATTRO manual

Topcon ES-52 instruction manual

Topcon

Topcon ES-52 instruction manual

PCB Piezotronics RH401B04 Installation and operating manual

PCB Piezotronics

PCB Piezotronics RH401B04 Installation and operating manual

manuals.online logo
manuals.online logoBrands
  • About & Mission
  • Contact us
  • Privacy Policy
  • Terms and Conditions

Copyright 2025 Manuals.Online. All Rights Reserved.