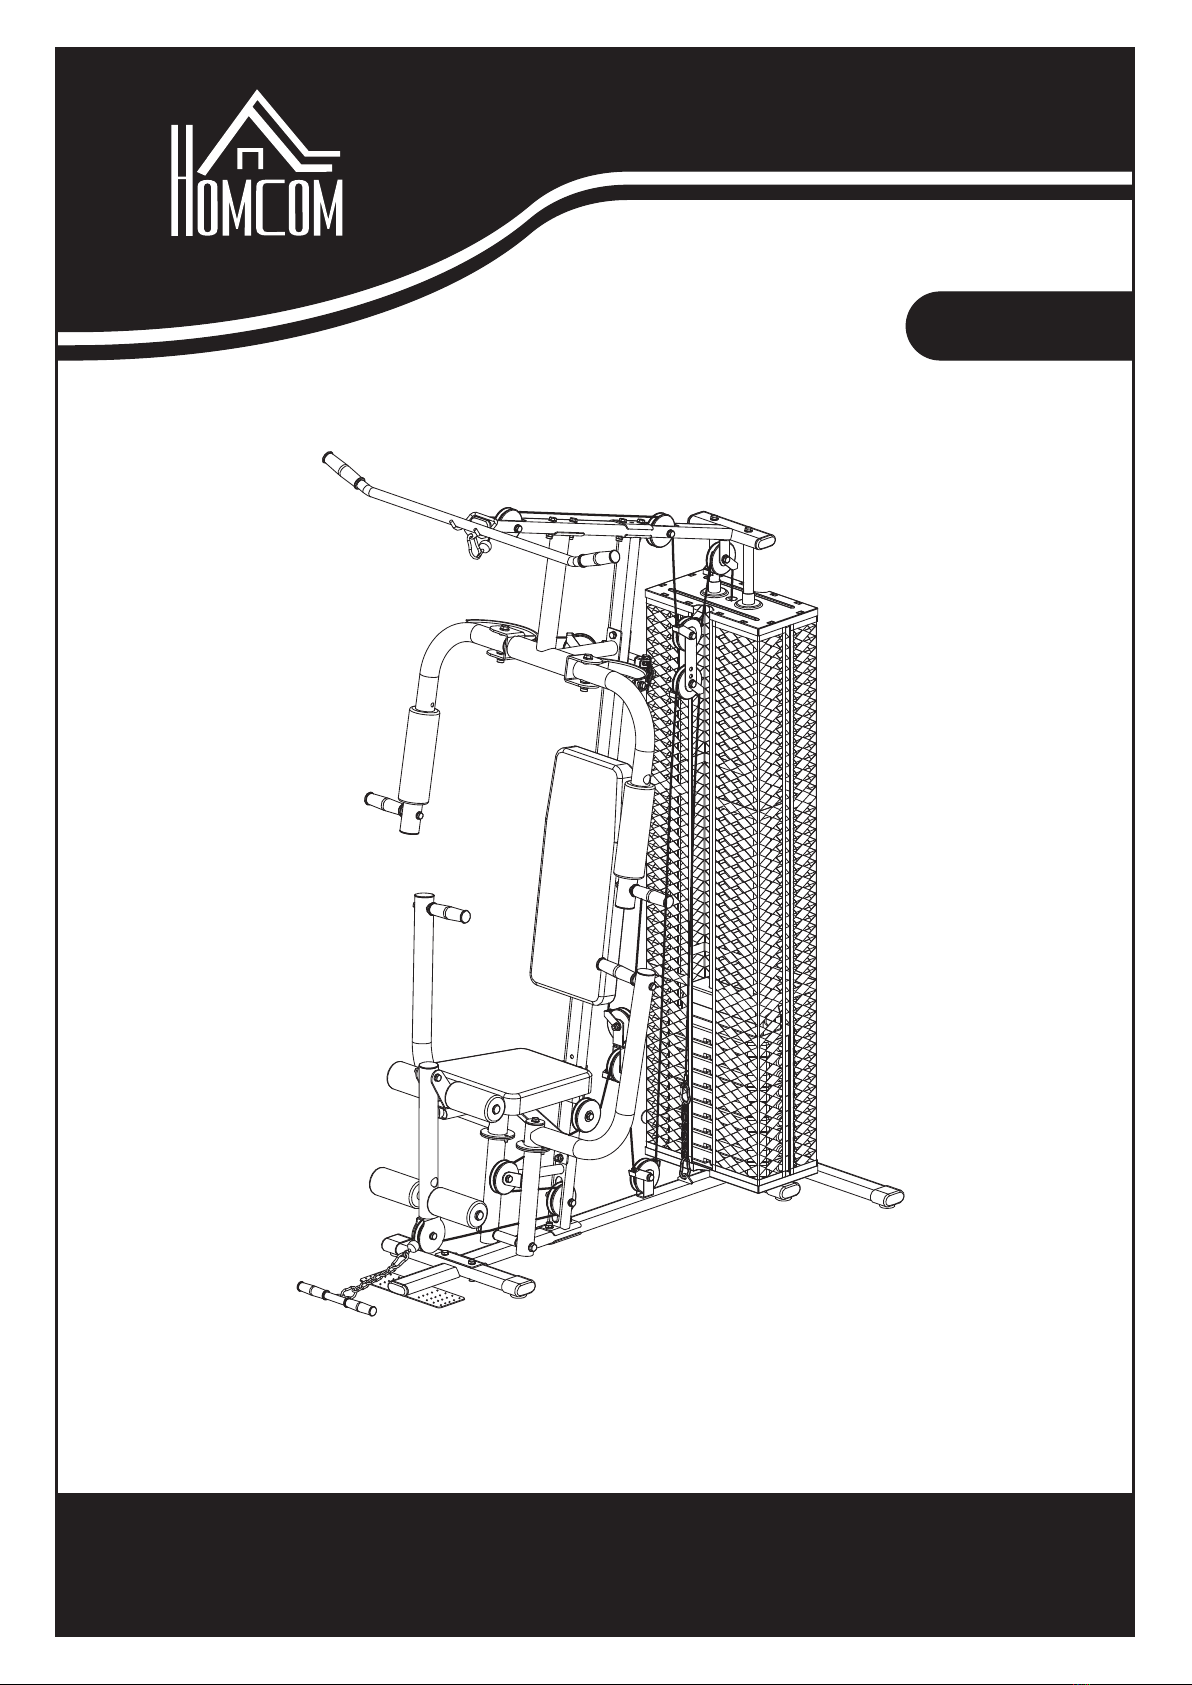
HOMCOM A91-134 User manual

ASSEMBLY INSTRUCTION
INald002V02_UK
A91-134
HOME GYM
IMPORTANT, RETAIN FOR FUTURE REFERENCE: READ CAREFULLY

PACKING DETALS:TOTAL 4 BOXES
BOX-1/4
NO. PARTS QTY NO. PARTS QTY NO. PARTS QTY
1116
224
111
1 14 3
161
252
226
421
1
4
5
20
50
52
54
36
37
38
40
41
42
31
22
23
14
28
27
45
43
46
47
HARDWARE

2
3
6
7
8
9
11
12
32
33
13
10
BOX-2/4
NO. PARTS QTY NO. PARTS QTY NO. PARTS QTY
11
2
34
1
39
1
44
1
21
1
48 3
51 1
35 2
1 1
1
1 1
1 4
1 2
1 2
1 2
1 1
16
17
18
19
30
15

BOX-3/4
BOX-4/4
29
NO. PARTSQTY
5
29
49
NO. PARTSQTY
4
1

TABLE OF CONTENTS
SAFETY INFORMATION ........................................................................................................................1
PRODUCT COMPONENT DETAILS ......................................................................................................3
PARTS LIST............................................................................................................................................4
PARTS LIST 1.........................................................................................................................................5
PARTS LIST 2.........................................................................................................................................6
INSTALLATION.......................................................................................................................................7
CLEANING AND MAINTENANCE........................................................................................................18
DISPOSAL ............................................................................................................................................18

~ 1 ~
SAFETY INFORMATION
IMPORTANT – Please read fully before assembly or use.
This exercise equipment is built for optimum safety. However, certain precautions apply whenever
you operate a piece of exercise equipment. Be sure to read the entire manual before you assemble,
operate, or use this equipment, note the following safety precautions.
Assembly
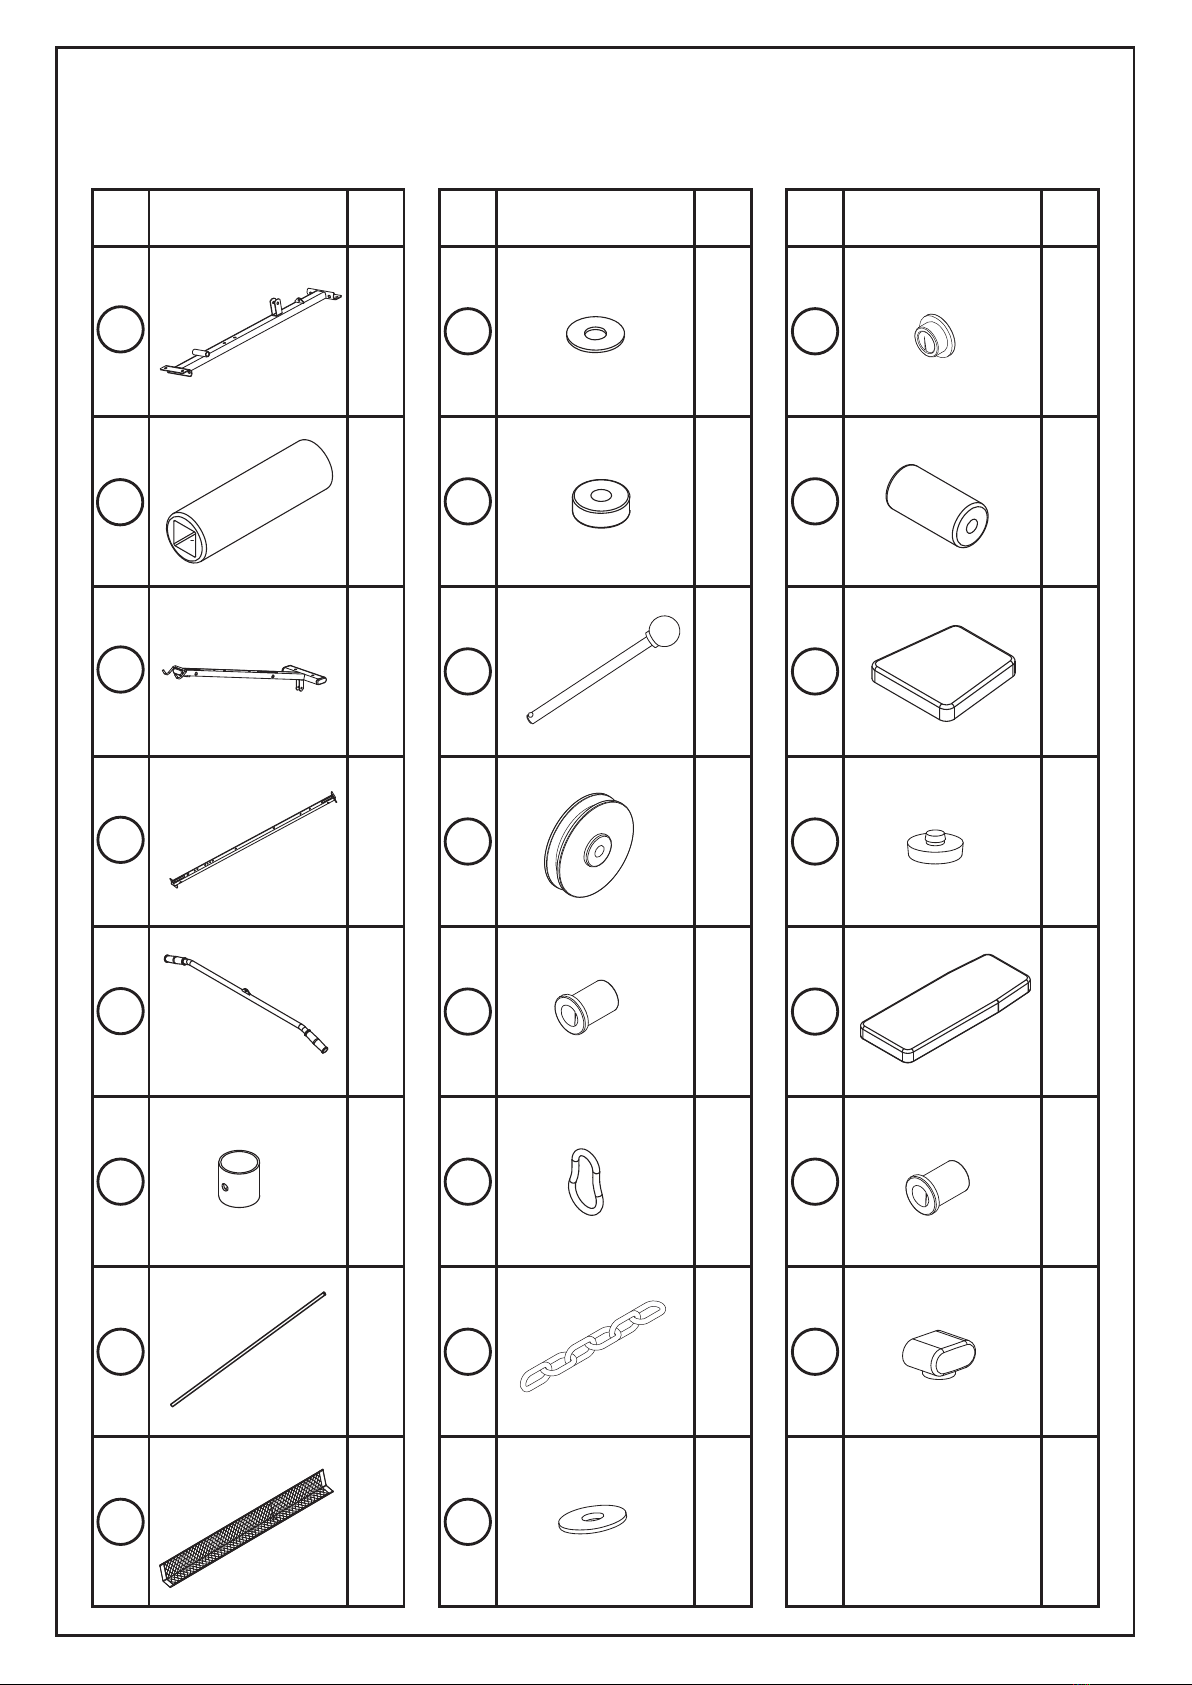
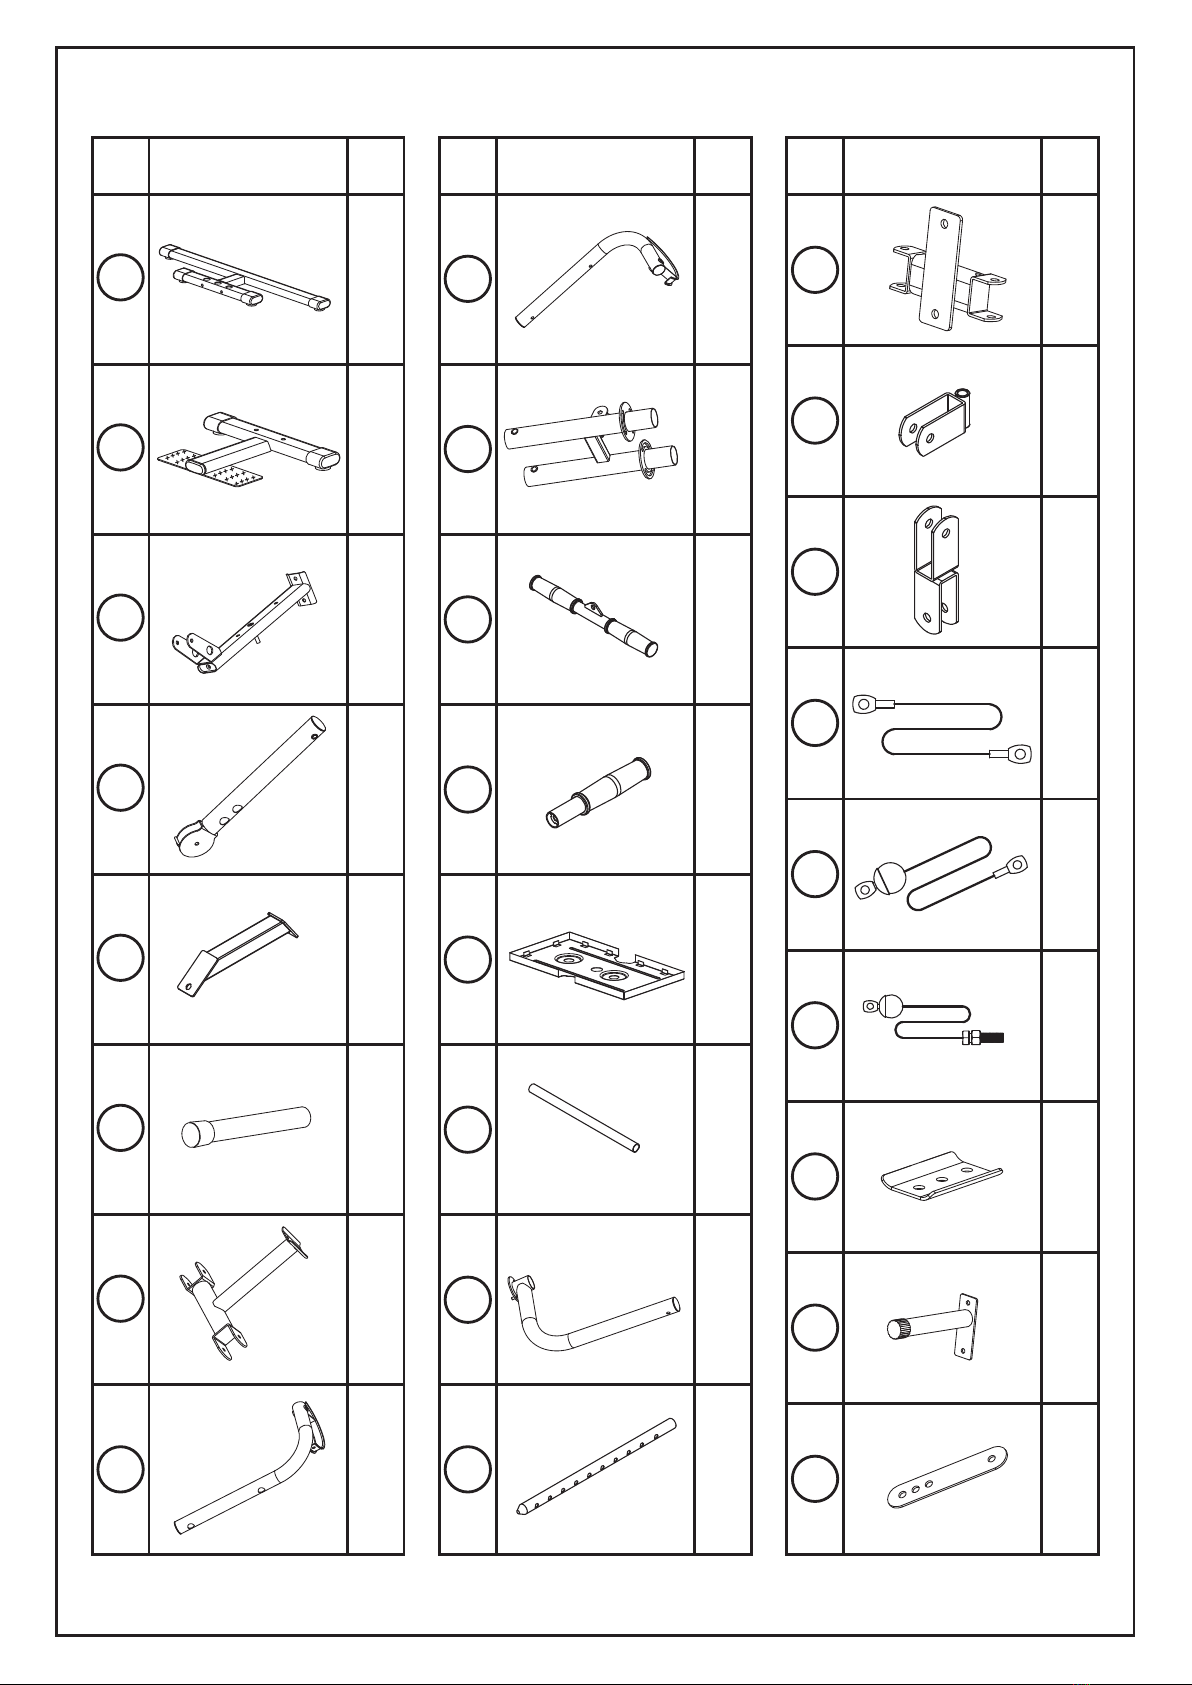
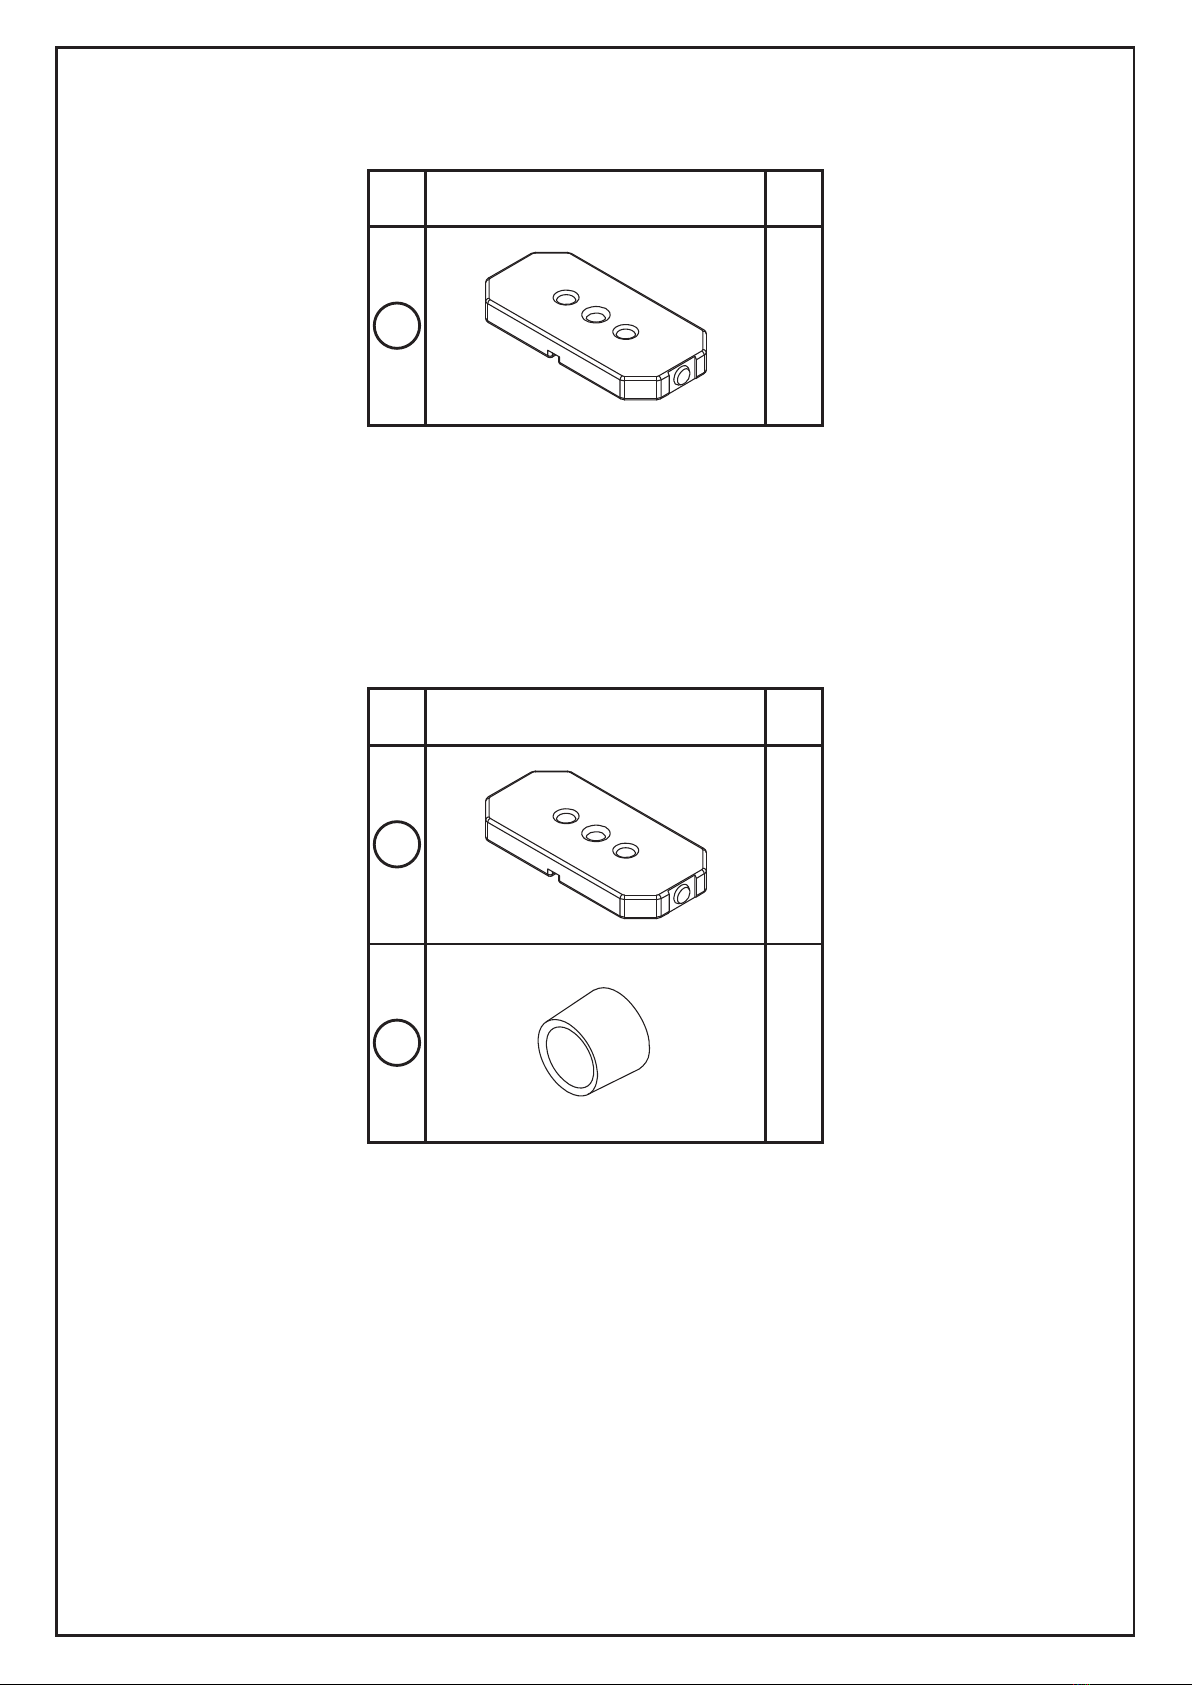
Ensure you have all the parts and tools listed on pages 6-8.
Remove all fittings from the plastic bags and separate them into their groups.
Keep children and animals away from the work areas, small parts can cause a choking
hazard if swallowed.
Ensure you have enough space to layout the parts before starting.
The assembly of this equipment is best carried out by 2 persons.
Assemble the item as close to its final position (in the same room) as possible.
The free-standing equipment shall be installed on a stable and level base.
Dispose of all packaging carefully and responsibly.
Using
This weight station is made for training in private environment. Only use the equipment for its
intended use.
DO NOT make any changes to the equipment which can affect the security of the product.
Warning! Pregnant or physically injured persons should never use the weight station
without prior consultation with a doctor you trust.
Be aware of your body‘s signals. Incorrect or excessive exercise can damage your health.
STOP exercising if you experience any pain, tightness in your chest, irregular heartbeat,
extreme shortness of breath, light headedness, dizziness, or nausea. If you do experience
any of these conditions you should CONSULT YOUR DOCTOR IMMEDIATELY before
continuing with your exercise program.
Always adapt your training style to your personal fitness level and health.
Before every training session, ensure you check the equipment for operation and safety.
Before using, ensure the item is installed correctly and that all safety devices are functional!
Damages or alterations to the product resulting from modification, will invalidate your
warranty. For problems resulting from the modification or other restrictions, the seller is not
responsible.
Any damage must be reported to the seller immediately after delivery, and before use or
installation. Later complaints will not be considered.
Use only suitable tools for assembly.
The installation must ONLY be carried out by adults. Children should not be present in the
immediate environment where the assembly is taking place.
Make sure all connections are securely mounted before releasing the product for use.
Check all connections at regular intervals for damage, loose elements and other factors that
can lead to a loss of sufficient security.
Do not leave children unattended on the weight bench! It is not a toy! Instruct them not to
play with or climb on the appliance.
In case of a fault during day-to-day use, or during maintenance, lock the bike to prevent any
risk of injury.

~ 2 ~
Children or persons with limited physical or mental abilities, or those not familiar with this
device, should not be allowed to use this weight bench!
Please keep in mind that this manual and the safety can only draw your attention to eventual
hazard. Logical conclusions and care should always be practiced when handling this device.
Before using the equipment to exercise, always warm up with stretching exercises.
Before using the equipment, check the nuts and bolts are securely tightened.
The safety level of the equipment can only be maintained if it is regularly examined for
damage and/or wear and tear. If you find any defective components whilst assembling or
checking the equipment, or if you hear any unusual sounds, from the equipment during use,
STOP! Do not use the equipment until the problem has been rectified.
Wear suitable clothing whilst using the equipment. Avoid wearing loose clothing which may
get caught in the equipment or that may restrict or prevent movement.
Before starting any exercise or conditioning program you should consult with your personal
physician to see if you require a complete physical exam. This is especially important if you
are over the age of 35, have never exercised before, are pregnant, or suffer from any illness.
Use the equipment on a solid, flat surface with a protective cover for your floor or carpet.

~ 3 ~
PRODUCT COMPONENT DETAILS

~ 4 ~
PARTS LIST
Parts Description Qty Parts Description Qty
1 Main base tube 1 pc 28 Rubber Cushion 2 pcs
2 Back base tube 1 pc 29 Weight 9 pcs
3 Front base tube 1 pc 30 Pulley shaft 1 pc
4 Upper Support 1 pc 31 Locking pin 10*150 1 pc
5 Vertical Support 1 pc 32 Pulley Seat 2 pcs
6 Seat Support 1 pc 33
Pulley bracke
t 1 pc
7
Leg Extension
1 pc 34 Cable 1 1 pc
8 Reinforced tube 1 pc 35
Adjusting plate
2 pcs
9
Rowing support
1 pc 36
Pulley (Φ90)
14 pcs
10 Chest press 1 pc 37
Pulley bushing
6 pcs
11 Left arm 1 pc 38 Safe hook 5 pcs
12
Right arm
1 pc 39 Cable 2 1 pc
13 "H"-shaped support 1 pc 40 Chain 2 pcs
14 Lat bar 1 pc 41 Big washer (Φ50) 2 pcs
15 Curling bar 1 pcs 42 Steel bushing 6 pcs
16 Handle bar 4 pcs 43 Foam (250mm) 2 pcs
17 Steel plate 2 pcs 44 Cable 3 1 pc
18 Foam Tube (370mm) 2 pcs 45 Foam (160mm) 4 pcs
19
Rowing arm
2 pcs 46 Seat pad 1 pc
20 Round holder 2 pc 47 PVC bumper Φ30*7 4 pcs
21
Weight selector
1 pcs 48
Reinformed place
(100mm)
3 pcs
22
Chrome bars (1820mm)
2 pcs 49 Rubber bumper 1 pc
23 Steel net 4 pc 50 Back cushion 1 pc
24
Upper Weights
1 pc 51 Prop support 1 pc
25
Weight Block Bushing
1 pc 52
Pulley busing (Φ16)
1 pc
26 Pin Φ10 1 pc
27 Big Washer (Φ
6 pcs

~ 5 ~
PARTS LIST 1

~ 6 ~
PARTS LIST 2

~ 7 ~
Step 1
1. Attach main base tube(l) to back base tube(2),chrome bar(22)using Hex
bolts M10x25(64- 2sets), washers and Hex bolts M8x20 (67- 2sets),wash-
ers.
2. Attach main base tube(l) to front base tube(3)using Hex bolts
M10x45(61-2sets), washers, nuts, and Hex bolts M8x20(67-2sets), wash-
ers.
INSTALLATION

~ 8 ~
Step 2
1.Attach weights(24, 29) to chrome bars(22) as shown.

~ 9 ~
Step 3
1. Attach Vertical support(5)to Main base tube(I) using reinforced plate (48)
and Hex bolts MI0 x50 (60-2sets) washers and nuts.
2. Attach Upper support(4)to Vertical support(5) using reinforced plate (48)
and Hex bolts MI0 x50(60-2sets) and insert chrome bars(22) into holes of
upper support(4) using Hex bolts M10 x25(64-2sts).
3. Attach seat support(6), reinforced tube(8) to Vertical support(5) using
reinforced plate(48) and Hex bolts M10x50 (60-2sets),bolts M10x45 (61-1
set) washers and nuts.

Step 4
1. Attach the chest press (10) to upper support 94) using Hex bolts M10 x 45 (61 – 2
sets), washers and nuts
2. Attach the pulley shaft (30), pro support (51) to vertical support (5) using Hex bolts
M10 x 50 (51-2sets), washers and nuts
~ 10 ~

~ 11 ~
Step 5
1. Attach the right arm(12) to chest press(10) using steel bushing (42) and
Hex bolts M12x85 (56), washer and nut.
2. Insert the handle bar(16) into right arm(12) using Hex bolts
M10x25(64),washer.

~ 12 ~
Step 6
1. Attach the H- shaped support (13) to the main base tube (1) using the
steel busing (42) and Hex bolts M12 x 190 (55), washer and nut
2. Insert the rowing support (9) into the holes of the vertical support (5)
using Hex bolts M10 x 25 (64), washer

~ 13 ~
Step 7:
1. Attach leg extension(7) to seat support(6) using Hex bolts M10 x75
(58-Isets) washers and nuts.
2. Insert the rowing arm (19) into the H-shaped support (7) using the big
washer (41) and Hex bolts M10 x25 (64-2 sets) washers.

~ 14 ~
Step 8:
1. Attach back cushion(50) to vertical support(5) using Hex bolts
M8x45(65-2sets) washers .
2. Attach seat pad (46) to seat support (6) using Hex bolts M8x45
(65-2sets) washers

~ 15 ~
Table of contents
Other HOMCOM Home Gym manuals