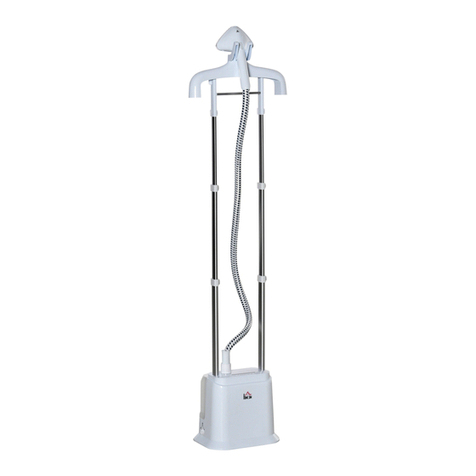
HOMCOM 853-018 Installation guide

ASSEMBLY & INSTRUCTION MANUAL
INcsa004_ES_EN
853-018
IMPORTANT, RETAIN FOR FUTURE REFERENCE: READ CAREFULLY
ES

LEA TODAS LAS INSTRUCCIONES ANTES DE UTILIZAR EL VAPORIZADOR.
DESCONECTE EL VAPORIZADOR DE LA FUENTE DE ALIMENTACIÓN ANTES DE
LIMPIARLO O CUANDO NO ESTÉ EN USO.
Al utilizar los aparatos eléctricos, especialmente cuando hay niños presentes, siempre
debe seguir las precauciones básicas de seguridad, incluidas las siguientes:
Este vaporizador no está destinado a ser utilizado por las personas (incluidos niños) con
capacidades físicas, sensoriales o mentales reducidas, o por las personas que faltan
experiencia o conocimiento, a menos que estén supervisadas por una persona respons-
able de su seguridad o hayan recibido instrucciones previamente sobre el uso correcto del
vaporizador por la persona responsable de su seguridad.
• Los niños deben ser supervisados por adultos para asegurarse de que no jueguen con el
vaporizador.
• La limpieza y el mantenimiento por la parte del usuario no deben ser realizados por los
niños menores de 8 años o los niños sin supervisión de adultos.
• Si tiene que utilizar el vaporizador en un baño, desenchúfelo después del uso.
Utilizar el vaporizador cerca de una fuente de agua puede ser peligroso, aunque si el
vaporizador está apagado. Con el fin de ofrecer una protección adicional, instale un
dispositivo de corriente residual (RCD) con orriente de disparo nominal no superior a 30
mA en su baño. Consulte a un electricista profesional.
• Nunca sumerja el vaporizador en agua ni en ningún otro líquido.
• Si el cable de alimentación está dañado de alguna manera, deje de utilizar el vaporiza-
dor en caso de accidente y póngase en contacto con nuestro centro de servicio posventa
para pedir ayuda.
• No utilice el vaporizador si se ha caído o si parece dañado de alguna manera.
• No deje el vaporizador desatendido cuando esté enchufado o encendido.
• Desenchufe el vaporizador de inmediato si tiene dudas o problemas al utilizarlo.
• No utilice ningún accesorio que no sea el proporcionado por el fabricante.
• Desenchufe el vaporizador después de cada uso y antes de llenarlo o limpiarlo.
• Deje que el vaporizador se enfríe por completo antes de almacenarlo.
• Por motivo de evitar daños en el cable, no lo enrolle alrededor del vaporizador y
asegúrese de que no lo doble ni lo tuerza.
• Cuando el vaporizador rocíe vapor, puede causar quemaduras si se utiliza demasiado
cerca de la piel o los ojos, o si se utiliza de manera incorrecta. Por motivo de reducir el
riesgo de contactar con el agua caliente que sale de las rejillas de ventilación, sostenga el
vaporizador para hacer una prueba para asegurarse de que se puede alejar del cuerpo
durante el uso.
• No vaporice directamente las prendas que se usan en personas.
• Si toca algunas partes metálicas calientes, agua caliente o vapor, lo que puede causar
quemaduras . Tenga mucho cuidado cuando dé la vuelta al vaporizador.
CONSIDERACIONES IMPORTANTES
2

• No utilice el vaporizador si el depósito de agua no se llena de manera correcta. Solo
utilice agua fría y limpia para llenar el depósito de agua. En áreas donde se consume
agua dura, se recomienda utilizar el agua destilada.
• No se recomienda utilizar el cable de extensión. Si es absolutamente necesario un cable
de extensión, debe utilizar un cable de 13 amperios. El cable nominal para menos amper-
aje puede sobrecalentarse. Tenga mucho cuidado de colocar el cable para que no se
pueda tirar de él ni tropezar con él.
• Nunca tire del cable para desconectar el vaporizador de la toma de corriente, en su
lugar, tome el enchufe y tírelo para desconectarlo.
• Utilice el vaporizador con precaución cuando el vaporizador contiene agua caliente.
• Solo utilice agua destilada.
NOTA: Este vaporizador se apagará automáticamente cuando el uso anormal cause alta
temperatura.
Antes de utilizar el vaporizador por primera vez, se recomienda hacer funcionar el vapor-
izador durante aproximadamente 5 minutos, luego desenchúfelo y deje que se enfríe.
Vacíe el depósito de agua y vuelva a llenarlo antes de utilizarlo.
PRECAUCIONES DE SEGURIDAD
ADVERTENCIA: Las bolsas de polietileno envueltas del producto o su embalaje pueden
ser peligrosas.
Mantenga las bolsas alejadas de los bebés y niños.
Nunca las utilice en cunas, camas para niños, carritos de bebé o parques.
La película delgada puede adherirse a la nariz y la boca e impedir la respiración. La bolsa
no es un juguete.
ADVERTENCIA: No utilice el vaporizador cerca de bañeras, duchas, lavabos u otros
recipientes que contengan agua.
GUARDE ESTAS INSTRUCCIONES PARA LAS REFERENCIAS FUTURAS.
3

Este vaporizador está diseñado únicamente para uso doméstico o de viaje, no para uso
profesional.
VAPORIZADOR:
1. LUZ INDICADORA
2. BOTÓN DE ENCENDIDO /
APAGADO DE VAPOR
3. CABLE DE ALIMENTACIÓN
4. DEPÓSITO DE AGUA
5. CABEZAL DE VAPORIZADOR
ACCESORIOS:
a. Cepillo suave
b. Cepillo de tela
c. Placa de calentamiento de
acero inoxidable
d. Clip de línea
ACCESORIOS:
Su vaporizador para prendas de vestir cuenta con 6 accesorios, 4 de ellos sirven para
cuidar mejor toda su ropa:
• Placa de calentamiento de acero inoxidable es apta para planchado general.
• Cepillo suave para planchar los tejidos finos
• Cepillo de tela para quitar el polvo y la suciedad de la ropa
• Clip de línea para dar forma a los bordes del cuello y el puño de la ropa
• Taza medidora para agregar la cantidad adecuada de agua
• Bolsa para facilitar el almacenamiento o el transporte
No intente colocar o quitar los accesorios del vaporizador mientras esté rociando vapor o
caliente. Espere hasta que el vaporizador se enfríe por completo.
1
2
4
5
3
ab c
def
IDENTIFICACIÓN DE PIEZAS
4

Placa de calentamiento de acero inoxidable, cepillo suave y cepillo de tela:
1. Coloque la parte inferior que sobresale del cabezal para rociar vapor en la ranura del
accesorio.
2. Empuje el cabezal del accesorio para que la parte superior que sobresale del cabezal
para rociar vapor también se encaje en la ranura superior del accesorio.
Clip de línea:
1. Coloque la parte inferior que sobresale del cabezal para coricar vapor en la ranura de la
manija del clip de línea.
2. Luego empuje el clip de línea en el cabezal para coricar vapor hacia arriba suavemente
para
PRECAUCIÓN: Siempre deje que el vaporizador se enfríe por completo antes de instalar
o quitar los accesorios.
1. Coloque el vaporizador boca arriba sobre una superficie plana y estable, asegúrese de
que esté desenchufado. (Figura A)
MONTAR LOS ACCESORIOS
INSTRUCCIONES DE LLENADO
A
5

2.Sostenga el vaporizador con una mano, deslice el depósito de agua hacia el cable,
entonces retírelo del cuerpo del vaporizador. (Figura B)
3.Dé la vuelta al depósito de agua, deje la cubierta de goma de entrada descubierta.
(Figura C)
4.Saque la cubierta de entrada, y llene el depósito con agua destilada. (Figura D&E)
5.Cierre la cubierta de entrada, y vuelva a colocar el depósito de agua a su lugar, ase-
gurándose de que esté fijado. (Figura F&G)
B
C
Cubierta de goma
DE
FG
6

1. Cepille su prenda con el cepillo suave antes de rociar vapor. Esto aflojará las fibras y
permitirá que el vapor penetrará mejor.
2. Cuelgue su prenda o tela un lugar adecuado.
3. Llene el depósito de agua según las instrucciones de llenado e instale el accesorio que
usted necesita, inserte el enchufe del vaporizador en una toma de corriente.
4. La luz indicadora se iluminará en color de naranja, lo que significa que el vaporizador
se está calentando.
5. Después de unos 25 segundos, la luz indicadora se apaga, lo que significa que se ha
alcanzado la temperatura del vapor adecuada, luego presione el botón de encendido /
apagado de vapor, la luz indicadora se cambiará a color de verde, y luego se rociará
vapor.
6. Por motivo de evitar lesiones por el vapor a alta temperatura, no oriente el cabezal para
rociar vapor frente a usted ni a otras personas.
7. Si quiere detener rociar el flujo de vapor, simplemente suelte el botón de encendido /
apagado de vapor.
8. Siempre deje que el vaporizador se enfríe por completo antes de desmontarlo, limpiarlo
y almacenarlo.
9. Después de utilizar el vaporizador, desenchúfelo y vacíe el agua restante del depósito
con el fin de evitar fugas o calcificaciones.
CONSEJOS PARA VAPORIZAR:
1. Cuando utilice el vaporizador por primera vez, haga una prueba con un paño viejo para
ver si el vapo funcione bien, ya que pueden haber quedado sedimentos durante el proce-
so de fabricación o del transporte.
2. Oriente los chorros de vapor justamente por encima de la tela donde hay las arrugas.
Es posible que se necesita planchar varias veces para eliminar las arrugas completa-
mente.
3. No toque el terciopelo o la seda con el cabezal para rociar vapor directamente.
4. Cuando cuelgue la prenda en una puerta mientras esté preparando el vapor, tenga
cuidado de evitar que el vapor dañe la puerta.
5. Si la temperatura disminuyó durante el funcionamiento, el vaporizador empezará a
calentarse automáticamente y la luz indicadora se encenderá a color de naranja. Después
de que el vaporizador se calente, la luz indicadora se apagará, lo significa que el vaporiza-
dor está listo nuevamente y puede rociar el vapor.
6. Pruebe la solidez del color de la tela en un punto poco llamativo. Coloque ropa de
cama, toallas, pañuelos y servilletas sobre una barra o en un toallero.
INSTRUCCIONES DE OPERACIÓN
7

Consejos: Siempre limpie el vaporizador y los accesorios después del uso.
1. Suelte el botón de encendido / apagado de vapor y desenchufe el vaporizador, espere
hasta que el vaporizador se enfríe por completo.
2. Limpie los accesorios con un paño húmedo y deje que se sequen por completo.
3. Quite el depósito de agua y vacíe el agua restante, vuelva a colocar el depósito en el
vaporizador correctamente después de limpiarlo.
4. Limpie suavemente la unidad del vaporizador con un paño suave, empáquela con la
bolsa de almacenamiento, y guárdela en un lugar seco y fresco.
PRECAUCIÓN:
• Desenchufe el vaporizador antes de limpiarlo.
• No lo limpie con detergente en polvo corrosivo, detergente o productos duros (por ejem-
plo, cuchillo o bola de acero).
• No sumerja el vaporizador en agua u otros líquidos con el fin de evitar riesgo de descar-
gas eléctricas.
*Si sigue teniendo problema después de probar las soluciones, póngase en contacto con
nuestro Centro de Servicio Posventa para pedir ayuda.
LIMPIEZA Y MANTENIMIENTO
SOLUCIÓN DE PROBLEMAS DEL VAPORIZADOR
PROBLEMA
CAUSA
SOLUCIÓN
No sale vapor. El vaporizador no está encendido. Presione el botón de vapor.
El vaporizador no se
calienta.
El vaporizador no está enchufado
adecuadamente.
Enchufe el vaporizador a una
toma de corriente.
No sale vapor. El nivel del agua en el depósito es
bajo.
Desenchufe el vaporizador y
vuelva a llenar el depósito de
agua.
El rendimiento de
vapor es deficiente.
Hay sedimento en el depósito de
agua.
Limpie el sedimento para el
depósito de agua.
8

Si el vaporizador empieza a rociar vapor más lentamente de lo normal, o deja de rociar
vapor y luego vuelve a empezar a rociar vapor, es posible que deba descalcificar su
vaporizador.
La descalcificación se refiere a eliminar los depósitos de calcio que se forman con el
tiempo en las partes metálicas del vaporizador. Por motivo de obtener el mejor rendimien-
to del vaporizador para prendas de vestir, descalcifique el vaporizador de vez en cuando.
La frecuencia de descalcificación depende de la dureza del agua que se llene en el
depósito y de la frecuencia con la que utilice el vaporizador.
Método:
1. Para realizar la descalcificación, utilice una solución de 1/3 de vinagre blanco y 2/3 de
agua en el depósito de agua.
2. Enchufe el vaporizador en una toma de corriente. Espere hasta que la luz indicadora de
color de naranja se apague, entonces presione el botón de vapor y deje que el vaporiza-
dor funcione hasta que toda la cantidad de agua se haya vaporizado. Suelte el botón de
vapor, desenchufe el vaporizador de la toma de corriente, y deje que el vaporizador se
enfríe durante 30 minutos.
Repita el procedimiento anterior varias veces como sea necesario hasta que el vaporiza-
dor rocíe vapor de manera normal, generalmente 2 a 3 veces. Con cada ciclo repetido,
utilice la solución de vinagre y agua preparada nuevamente.
Una vez completada la descalcificación, haga circular agua fría y fresca a través del
vaporizador, y luego puede utilizarlo para planchar las prendas de vestir nuevamente.
DESCALCIFICACIÓN
Voltaje nominal: 220V-240V
Frecuencia nominal: 50Hz/60Hz
Potencia nominal: 1500W
Dimensión del producto (mm): 160(L) x 90 (W) x 320 (H)
DATOS TÉCNICOS
9

ASSEMBLY & INSTRUCTION MANUAL
IMPORTANT, RETAIN FOR FUTURE REFERENCE: READ CAREFULLY
EN
INcsa004_ES_EN
853-018
10

READ ALL INSTRUCTIONS BEFORE USING THE APPLIANCE. UNPLUG THE APPLI-
ANCE FROM POWER SOURCE BEFORE CLEANING OR WHEN NOT IN USE.
When using electrical appliances, especially when children are present, basic safety
precautions should always be followed, including the following:
This unit is not intended to be used by people (including children) with reduced
physical, sensory or mental capabilities, or by persons who lack experience or
knowledge, unless they are supervised or have been given instructions beforehand
on the use of the unit by a person responsible of their safety.
• Children should be supervised to make sure they do not treat the unit like a toy.
• Cleaning and user maintenance shall not be made by children aged below 8 years or
children without supervision.
• If you are using the unit in a bathroom, unplug it after you have finished using it.
Using the unit close to a source of water can, in fact, be dangerous, even if the unit is
switched off. To ensure additional protection, install a residual current device (RCD) with a
nominal trip current is no higher than 30mA in your bathroom. Ask your electrical fitter for
advice.
• Never immerse the unit into water or any other liquid.
• If the supply cord is damaged, stop using it in case of any accidents and please contact
our after-sales service center for assistance.
• Do not use the unit if it has fallen or if it appears to be damaged.
• Do not leave the unit unattended when it is plugged in or switched on.
• Unplug the unit immediately if you have problems when using it.
• Do not use any accessories other than those provided by manufacturer.
• Unplug the unit after each use and before filling or cleaning it.
• Allow the unit to completely cool off before storing.
• To prevent damage to the cord, do not wrap it around the unit and ensure it is stored
without twisting or folding it.
• When emitting steam, this appliance may cause burns if it is used too close to the skin or
eyes, or if it is used incorrectly. To reduce the risk of contact with hot water emitting from
the steam vents, test appliance before use by holding it away from the body.
• Do not steam garments while a person is wearing it.
• Burns could occur from touching hot metal parts, hot water or steam. Use carefully when
you turn the steam appliance upside down.
• Do not operate steamer without correctly filling the water container. Only use clean cold
water for filling this appliance. In hard water areas, we recommend the use of distilled
water.
IMPORTANT SAFEGUARDS
11

• Use of an extension cord is not recommended. If an extension cord is absolutely neces-
sary, a 13-ampererated cord should be used. Cord rated for less amperage may overheat.
Care should be taken to arrange the cord so that it cannot be pulled or tripped over.
• Never pull cord to disconnect form outlet, instead, grasp plug and pull to disconnect.
• Use with caution when carrying steamer as it contains hot water.
• Use distilled water only.
NOTE: This unit will automatically shut off when causing high temperature by
abnormal using.
Before using the garment steamer for the first time, it is recommended to operate the
steamer for approximately 5 minutes, unplug the unit and allow it to cool. Empty
container and refill before actually using.
SAFETY PRECAUTIONS
WARNING: The polyethylene bags over the product or its packaging may be dangerous.
Keep these bags out of the reach of babies and children.
Never use them in cribs, children’s beds, pushchairs or playpens.
The thin film may cling to nose and mouth and prevent breathing. A bag is not a toy.
WARNING: Do not use this appliance near bathtubs, showers, basins or other vessels
containing water.
KEEP THESE INSTRUCTIONS FOR FUTURE REFERENCE.
12

This device is intended only for domestic or travelling use, not for professional use.
STEAMER:
1. LIGHT INDICATOR
2. STEAM ON/OFF BUTTON
3. POWER CORD
4. WATER TANK
5. STEAM HEAD
ACCESSORIES:
a. Soft brush
b. Fabric brush
c. Stainless steel heating plate
d. Line clip
e. Measuring cup
f. Storage Bag
ACCESSORIES:
Your garment steamer includes 6 attachments, 4 of them for extra grooming and care of
all your clothes:
• Stainless steel heating plate, suitable for general ironing
• Soft brush for fine fabrics
• Fabric brush for removing dust and dirt from clothes
• Line clip for shaping edges of collar and cuff
• Measuring cup for adding suitable amount of water
• Bag for easy storage or carry
Do not attempt to attach or remove the brush attachments while the unit is steaming or
hot. Wait until the unit is completely cooled.
1
2
4
5
3
ab c
def
PARTS IDENTIFICATION
13

Stainless steel heating plate, Soft brush and Fabric brush:
1. Put the bottom protruding part of steam head into the groove of the attachment .
2. Push the head of attachment until the top protruding part of the steam head also clicks
in the top groove of attachment.
Line clip:
1. Put the bottom protruding part of the steam head into the groove of the line clip handle.
2. Then fix the line clip on the steam head by pushing it up gently.
CAUTION:Always let the steamer cool down before assembling or removing the attach-
ments.
1. Place the unit on its back on a flat and stable surface, make sure the unit is unplugged.
(Fig. A)
ASSEMBLE THE ACCESSORIES
FILLING INSTRUCTIONS
A
14

2. While holding the steamer with one hand, slide the water tank up toward the cord and
then take away from the body. (Fig B)
3. Turn the water tank over, revealing the rubber inlet cover. (Fig. C)
4. Pull out the inlet cover and fill the tank with distilled water. (Fig. D&E)
5. Close the inlet cover and return the water tank to its place, making sure that it is secure.
(Fig. F&G)
B
C
Inlet cover
DE
FG
15

1. Please brush your garment with soft brush before steaming. This will loosen the fibers
and allow better steam penetration.
2. Hang your garment or fabric in appropriate position.
3. Fill the water tank according to the filling instructions and assemble the accessory which
you need, insert the plug into a power socket.
4. The light indicator will become orange color that means the machine is heating up.
5. After about 25 seconds, the light indicator goes off, which indicates the steam tempera-
ture has been reached, then press the steam on/off button, the light indicator will become
green color then the steam will spray out.
6. To avoid injury from high temperature steam, do not keep the spray head face yourself
or anybody while steaming.
7. To stop the flow of steam, just release the steam on/off button.
8. Always allow the steamer to cool down completely before disassembling, cleaning and
storage.
9. After use, unplug the steamer and empty any remaining water from the tank to avoid
leakage or calcification.
STEAMING TIPS:
1. When using the device for first time, please test it on an old cloth, as there may be
sediment left from the manufacturing process or transportation.
2. Pass the steam jets just above the fabric where the wrinkles are. It may take a few
passes to remove the wrinkles completely.
3. Do not directly touch velvet or silk with the steam head.
4. When hanging garment on a door while steaming, be careful not to damage the door
with steam.
5. If temperature decreased during working, the machine will start heating automatically
and orange light will be on, after heating up, the light goes off and the steamer is ready
again, you can restart steaming.
6. Test fabric for color fastness in an inconspicuous spot. Drape linens, towels, handker-
chiefs and napkins over a rod or place onto a towel rack.
OPERATION INSTRUCTIONS
16

Tips: Always clean the steamer and accessories after using.
1. Release the steam on/off button and unplug, wait until the machine is totally cooled
down.
2. Clean the accessories with a damp cloth and let them dry completely .
3. Disassemble the water tank and empty any remaining water, put the tank back to
machine after cleaning.
4. Gently wipe the unit with a soft cloth, pack with the storage bag and put in a dry and
cool place.
CAUTION:
• Unplug the unit before cleaning.
• Do not clean with corrosive, scouring powder, detergent or hard goods (eg. Knife or steel
ball) .
• Do not leave the unit in water or other liquids to avoid electric shock.
*If problem exists after trying with the solution, please contact our After-Sales Service
Center for assistance.
CLEANING AND MAINTENANCE
TROUBLESHOOTING THE STEAMER
17

If the appliance begins to produce steam more slowly than usual, or stops producing
steam and then starts again, you may need to decalcify your steamer.
Decalcification refers to removing the calcium deposits that form over time on the metal
parts of the steamer. For best performance from the Garment Steamer, please decalcify
the unit from time to time. The frequency depends upon the hardness of the water being
used and how often you use the steamer.
Method:
1. To decalcify, use a solution of 1/3 white vinegar and 2/3 water in the water tank.
2. Plug the unit into electrical outlet. Wait until the orange light goes off then push the
steam button, and run until all amount has steamed. Release the steam button, unplug
from electrical outlet, and allow to cool for 30 minutes.
Repeat the above procedure as many times as necessary until a normal steam rate
returns, usually 2 to 3 times. With each repeated cycle, use a fresh solution of vinegar and
water.
Run one cycle of fresh, cold water through the unit at the completion of decalcification
before using the unit again to steam garments.
DECALCIFICATION
Rated Voltage: 220V-240V
Rated Frequency: 50Hz/60Hz
Rated Power: 1500W
Product dimension (mm): 160(L) x 90 (W) x 320 (H)
TECHNICAL DATA
18
Table of contents
Languages:
Other HOMCOM Kitchen Appliance manuals

HOMCOM
HOMCOM 800-105 Installation guide

HOMCOM
HOMCOM 800-112V90 Installation guide

HOMCOM
HOMCOM 800-103V90 Installation guide

HOMCOM
HOMCOM 853-026 User manual

HOMCOM
HOMCOM 800-018 Installation guide

HOMCOM
HOMCOM 853-020V90 Installation guide

HOMCOM
HOMCOM 800-112V90 Installation guide

HOMCOM
HOMCOM 03-0026 Quick start guide

HOMCOM
HOMCOM 800-020 Installation guide

HOMCOM
HOMCOM 800-112V70 Installation guide