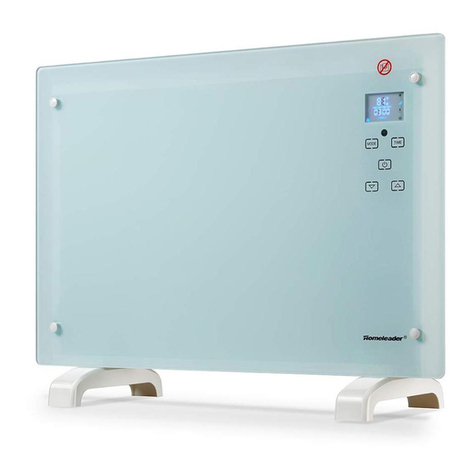
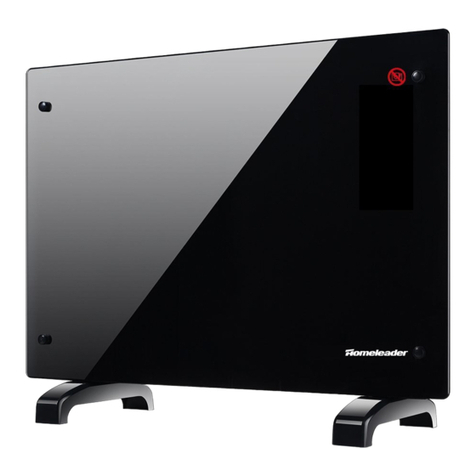
HOMELEADER GH-15A User manual

Model No.
GH-15A
GLASS HEATER
OWNER’S MANUAL

2
PLEASE SAVE THESE INSTRUCTIONS
WARNING: READ THIS OWNER’S MANUAL CAREFULLY BEFORE USE.
Thank you for choosing the Homeleader Digital Quartz Infrared Heater. This owner’s manual will
provide you with valuable information necessary for the proper care and maintenance of your new
product. Please take a few moments to thoroughly read the instructions and familiarize yourself
with all the operational aspects of your new heater.
PACKAGE CONTENTS
•Glass heater (1 pc)
•Feet (2 pcs)
•Self-tapping screws (4 pcs)
•Instruction manual (1 pc)
•fixing brackets, screws and plastic wall plugs (4 pcs)
SAFETY PRECAUTION
•This appliance is not intended for use by person (including children) with reduced physical, sensory
or mental capabilities, or lack of experience and knowledge, unless they have been give supervision to
ensure that they do not play with the appliance.
•Children should be supervised to ensure that they do not play with the appliance.
•This appliance is designed for domestic use only.
•Do not pull on the connection cord, but rather on the plug, to separate the appliance from the mains.
•Do not use outdoor.
•Do not leave the appliance unattended when it is switched on, as this may bfe a source of danger.
•Stand the appliance on a flat surface.
•If the supply cord is damaged, it must be replaced by the manufacturer, its service agent or similarly
qualified persons in order to avoid a hazard.
•WARNING: In order to avoid overheating, do not cover the heater.
•The heater must not be located immediately below a socket-outlet.
•Do not use this heater in the immediate surroundings of a bath, a shower or a swimming pool.
•Do not use the heater unless the feet are correctly attached.
•The heater should not be used if the glass plate is damaged.
•This appliance must be connected to an earthed outlet.
•The appliance should be protected by a residual current device having a rated residual operating
current not exceeding 30 mA.

3
OVERVIEW OF YOUR GLASS HEATER
TECHNICAL SPECIFICATION
Rated Voltage: 120V(60Hz)
Power Consumption: 600/1200W(10 Amps), 4090 BTUs
INSTALLATION AND MAINTENANCE
ASSEMBLY OF THE HEATER
Before using the heater, the feet (supplied in the carton), must be
fitted to the unit. These are to be attached to the base of the heater
using the 4 self-tapping screws provided, taking care to ensure that
they are located correctly in the bottom ends of the heater side
moldings.
WALL MOUNTING
The heater is supplied with 4 fixing brackets, screws and plastic wall plugs to enable it to be
mounted onto a wall if required.
If it is decided to mount the heater on the wall, the feet should not be fitted. The position must
be chosen carefully. It must not be in front of or below a power socket. It must not be below a
shelf, curtains or any other obstruction.
Having decided on the location of the heater, it is necessary to drill 2 fixing holes 8mm
diameter by 43mm deep at 486mm centers on a horizontal line at a minimum height of
400mm from the floor. Allowance must be made for any floor coverings, carpet etc and if
any skirting boards are present, the fixing holes must be a minimum of 400mm above the top
edge of the skirting board. Using the plastic plugs and fixing screws provided, attach 2 of the
fixing brackets to the wall. The other pair of fixing brackets must be attached to the base of
the heater using the feet retaining screws so that the brackets project out at the rear of the
heater and space the bottom edge away from the wall.

4
If required, these brackets may also be secured to the wall using the remaining fixing screws
and plastic wall plugs. If this option is chosen it is suggested that the heater is hung on the
upper brackets and the hole positions for the lower brackets is then marked on the wall, prior
to drilling the holes for attachment purposes.
WARNING: When you install your appliance in fixed position, you may cut the plug and
connect the three conductors of the supply cord to a connection box in respecting the
polarities as following:
- Live: Brown
- Neutral: Blue
- Earth: Yellow/Green
If you are not sure, it’s recommended to ask a qualified electrician to be sure that your
installation is in accordance with the local installation standard.
OPERATION OF THE HEATER
•Choose a suitable location for the heater, taking into account the safety instructions above.
•Insert the plug of the heater into a suitable socket.
•Turn the thermostat knob fully in a clockwise direction to the maximum setting.
•Turn on the heating elements by means of the heater power switches on the side panel.
When the heating elements are on, the switches will illuminate. For maximum heat output,
both switches should be turned on.
•When the desired room temperature has been reached, the thermostat knob should be
turned slowly anti-clockwise until a click off sound is heard at the thermostat and the
heating element is off. After that, the heater will keep the air temperature in the room at
the set temperature by switching on and off automatically.
•In its minimum (fully anti-clockwise) position, the thermostat provides a frost guard
position. In this position (depending on the size of the room) the heater will maintain the
temperature above freezing.
NOTE: When the heater is turned on for the first time or when they are turned on after having
not been used for a long period of time, it may release a slight odor and it is normal. This will
disappear when the heater has been on a short while.
CLEANING THE HEATER
Always un-plug the heater from the wall socket and allow it to cool down before cleaning.
Clean the outside enclosure of the heater by wiping with a soft damp cloth and buff with a dry
cloth. Do not use any detergents or abrasives and do not allow any water to enter the heater.
DISCLAIMER
Updates to hardware components are made regularly. Therefore some of the instruction,
specifications and pictures in this documentation may differ slightly from your particular
situation. All items described in this guide for illustration purposes only and may not apply to
particular situation. No legal right or entitlements may be obtained from the description made
in this manual.

5
SERVICE
If the heater will not operate and will require repair or service you can contact the
following factory authorized service center:
HVACdistribution, LLC
26610 Eckel Rd.
Perrysburg Ohio 43551
Phone: (419) 893-2709
Fax: (419) 893-3742
Required information:
Model Number, Serial Number, Date of Purchase, Invoice, Return Authorization
Number
THANK-YOU
Enjoy the comfort and efficiency of your Homeleader Glass Heater.
Copyright 2012, Manufacturer reserves the right to change, at any time, specifications and designs without notice
and without obligations.
Table of contents
Other HOMELEADER Heater manuals
Popular Heater manuals by other brands

Sunday Living
Sunday Living KPT-1606F-NO2 quick start guide

Gorenje
Gorenje VLG 200 A1-1G Instructions for use

Termozeta
Termozeta TZR28 instruction manual

Smart+ Products
Smart+ Products SPP-WI0035 manual

Suntec Wellness
Suntec Wellness KLIMATRONIC Night Sun manual

Orbegozo
Orbegozo CR 5012 instruction manual