manuals.online logo
Brands
  1. Home
  2. •
  3. Brands
  4. •
  5. Homelegance
  6. •
  7. Indoor Furnishing
  8. •
  9. Homelegance Atwood 2505BK-36 User manual

Homelegance Atwood 2505BK-36 User manual

ITEM: 2505BK-36
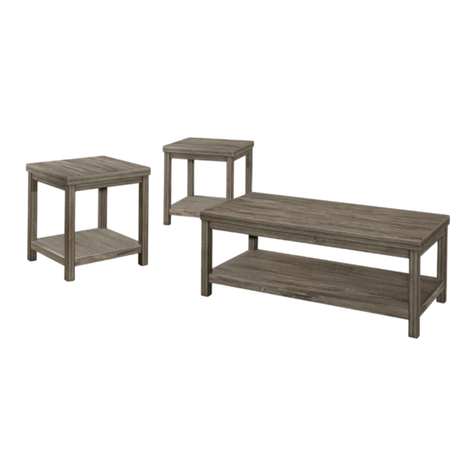
3PC COUNTER HEIGHT TABLE SET
This page lists all the contents included in the box. Please take the time to identify
the hardware as well as the individual components to this product. As you unpack
and prepare for assembly, place the contents on a carpeted or padded area to
protect them from damage.
c l e a n i n g & c a r e
Treat surface with care. Clean surfaces with a dry or
damp soft cloth. Do not use abrasive cleaners. Hardware may loosen over time.
Periodically check that all connections are tight.
1
ASSEMBLY INSTRUCTIONS
A. TABLE TOP B. TABLE LEG
QTY: 2 PCS
C. TABLE LEG
QTY: 2 PCS
D. BOTTOM PANEL
QTY: 1 PC
E. TOP PANEL
QTY: 1 PC
F. SIDE PANEL
QTY: 2 PCS
G. MIDDLE PANEL
QTY: 1 PC QTY: 2 PCS
H. DIVIDER PANEL I. BASE SHELF
QTY: 1 PC
(LEFT FRONT / RIGHT BACK) (RIGHT FRONT / LEFT BACK)
1. BOLT 2. SPRING WASHER
QTY: 8 PCS QTY: 8 PCS
3. FLAT WASHER
QTY: 8 PCS
4. BOLT
QTY: 4 PCS
5. CAM LOCK
QTY: 4 PCS
6. METAL DOWEL SCREW
QTY: 4 PCS
7. "T" NUT
QTY: 4 PCS
5/16" Dia x 2-1/2"L
1/4" Dia x 2"L
QTY: 1 PC
8. WOOD DOWEL
QTY: 8 PCS
9. ALLEN KEY
QTY: 1 PC
TABLE PARTS & HARDWARE LIST
J. CHAIR BACK FRAME
M. CHAIR FRONT LEFT LEG
QTY: 2 PCS
QTY: 2 PCS QTY: 2 PCS
K. SEAT BOARD
QTY: 2 PCS
L. SEAT FRAME
QTY: 2 PCS
O. FRONT CROSSBAR
QTY: 2 PCS
P. SIDE CROSSBAR
QTY: 4 PCS
N. CHAIR FRONT RIGHT LEG
13. WOOD SCREW 14. OPEN END WRENCH
CHAIR PARTS & HARDWARE LIST
10. LONG BOLT
2. SPRING WASHER
QTY: 8 PCS QTY: 22 PCS
3. FLAT WASHER
QTY: 22 PCS
11. SHORT BOLT
QTY: 6 PCS
12. HEX NUT
QTY: 8 PCS
QTY: 24 PCS QTY: 1 PC
1/4" Dia x 3"L
1/4" Dia x 1-3/4"L
H
H
G
Diagram #4
666
6
TABLE ASSEMBLY INSTRUCTIONS
5
5
5
5
E
F
E
F
Diagram #1
Diagram #2
2. Attach the middle panel (G) to the assembled from diagram #3 as
shown.
F
GF
Diagram #3
3. Attach the divider panels (H) into the groove on the middle panel (G)
as shown.
4
REQUIRED HARDWARE IN THIS STEP
1. Screw the 4 metal dowel screw (6) into the pre drilled plastic hole. Attach side
panels (F) to the top panel (E) using 4 cam locks (5) and 4 metal dowel screws
(6) as shown.
NO. DESCRIPTION SKETCH QTY
5
6CAM LOCK
METAL DOWEL SCREW
4
4
44
44
9
REQUIRED HARDWARE IN THIS STEP
NO. DESCRIPTION SKETCH QTY
4
7BOLT 4
4
4. Attach bottom panel (D) to the assembled from diagram #5 using 4
"T" nut (7) and 4 bolts (4) as shown.Tightly fasten the bolts using
Allen key (9).
7
7
7
7
9NUT
ALLEN KEY
D
HH
1
Diagram #5
5
TABLE ASSEMBLY INSTRUCTIONS
REQUIRED HARDWARE IN THIS STEP
6. Attach base panel (I) to table legs (B&C) using 2 spring washers (2),
2 flat washers (3), 2 bolts (1) as shown.Tightly fasten the bolts using
Allen key (9).
REQUIRED HARDWARE IN THIS STEP
NO. DESCRIPTION SKETCH QTY
1
BOLT
2
2
33
2
2
SPRING WASHER
2
3
FLAT WASHER
2
91
ALLEN KEY
Diagram #8
REQUIRED HARDWARE IN THIS STEP
NO. DESCRIPTION SKETCH QTY
8WOOD DOWEL 4
C
B
8
8
8
8
C
B
D
5. Attach bottom panel (D) to the assembled from diagram #7
using wood dowel (8) as shown.
Diagram #6
Diagram #7
NO. DESCRIPTION SKETCH QTY
1
BOLT
2
2
SPRING WASHER
2
3
FLAT WASHER
2
84
WOOD DOWEL
91
ALLEN KEY
BC
8
8
1
2
3123
9
7. Attach table legs (B&C) to base panel (I) and side panel (F) using 4
wood dowel (8), 2 spring washers (2), 2 flat washers (3) and 2 bolts (1)
as shown.Tightly fasten the bolts using Allen key (9).
F
Diagram #9
1
2
3
9
Diagram #11
10. The table is now ready for use.
Diagram #12
6
8. turn the table base upright. Place the table top (A) on the table legs
as shown.
TABLE ASSEMBLY INSTRUCTIONS
Diagram #10
9. secure the table top (A) to the table base using 4 bolts (1), 4 spring
washers (2) and 4 flat washers (3) as shown.Tightly fasten the bolts
using Allen key (9).
REQUIRED HARDWARE IN THIS STEP
NO. DESCRIPTION SKETCH QTY
1
BOLT
2
2
SPRING WASHER
2
3
FLAT WASHER
2
91
ALLEN KEY
3
10
10
2
2
2
11
3
3
J
L
7
Diagram #1
REQUIRED HARDWARE IN THIS STEP
1. Attach seat frame (L) to back frame (J) using 7 spring washers (2), 7 flat washers (3), 3
short bolts (11) and 4 long bolts (10) as shown. Do not tighten at this point.
Note: Use the 3 short bolts (11) in the 3 holes near the center of the back of the seat frame
(L) and the 4 long bolts (10) in the back corners of the seat frame (L).
NO. DESCRIPTION SKETCH QTY
3
2
10 FLAT WASHER
SPRING WASHER
LONG BOLT 7
7
4
11 SHORT BOLT 3
CHAIR ASSEMBLY INSTRUCTIONS
12 23
M
N
O
P
L
J
4. Attach the left and right front legs (M&N) to seat frame (L) using
4 spring washers (2), 4 flat washers (3), and 4 hex nuts (12) as shown.
Do not tighten at this point.
5. Insert the front crossbar (O) into the oval holes of left and right front legs (M&N) as shown.
The small holes on the edge of the crossbar need to face towards the bottom of the leg.
6. Insert side crossbars (P) into the round holes of left and right front legs (M&N) and back
frame (J). The small holes on the bottom of the crossbars must face the bottom of the chair.
Diagram #3
REQUIRED HARDWARE IN THIS STEP
NO. DESCRIPTION SKETCH QTY
3
2
12 FLAT WASHER
SPRING WASHER
HEX NUT 4
4
4
14
OPEN END WRENCH
1
13
L
K
J
Diagram #2
2. Place seat board (K) upside down on a non-abrasive table surface. The rear (tapered end)
of the seat board (K) should be near the table edge.
Hint: Protect the non-abrasive table surface and seat board (K) by laying a towel in-between
the chair seat and table.
3. Place the assembled chair frame on the seat board (K) as shown. Attach with 6 wood
screws (13).
REQUIRED HARDWARE IN THIS STEP
NO. DESCRIPTION SKETCH QTY
13
WOOD SCREW
6
13
13
1313
13 13 13 13
13 13
MN
O
P
L
J
8
Diagram #4
REQUIRED HARDWARE IN THIS STEP
NO. DESCRIPTION SKETCH QTY
13
WOOD SCREW
6
7. Turn the chair upright. Make sure the assembled chair unit is level
and square. Tightly fasten all bolts with the open-end wrench (4).
8. Secure the front and side crossbars (P) to their chair legs with
6 wood screws (13).
Note: Screwing the wood screws (13) to secure the front crossbar (O)
by first. Then make sure the small holes on the bottom of side
crossbars (P) are partial inside, screwing the wood screws (13)
to secure the side crossbars (P).
CHAIR ASSEMBLY INSTRUCTIONS
Diagram #5
9. The Chair is now ready for use.
10. Repeat steps 1 to 8 to assemble the other chair.
Printed in Vietnam

Other Homelegance Indoor Furnishing manuals

Homelegance Niles 1451K-1/-2/-3CK User manual

Homelegance

Homelegance Niles 1451K-1/-2/-3CK User manual

Homelegance 9459GY-RRPW User manual

Homelegance

Homelegance 9459GY-RRPW User manual

Homelegance 5741-94 User manual

Homelegance

Homelegance 5741-94 User manual

Homelegance SH2212-4 User manual

Homelegance

Homelegance SH2212-4 User manual

Homelegance B2013TFDC User manual

Homelegance

Homelegance B2013TFDC User manual

Homelegance 1957-5 User manual

Homelegance

Homelegance 1957-5 User manual

Homelegance 36060NM-63T User manual

Homelegance

Homelegance 36060NM-63T User manual

Homelegance 5162WW-36 User manual

Homelegance

Homelegance 5162WW-36 User manual

Homelegance 2059-T User manual

Homelegance

Homelegance 2059-T User manual

Homelegance California 1662PEK-1CK User manual

Homelegance

Homelegance California 1662PEK-1CK User manual

Homelegance 5801-36 User manual

Homelegance

Homelegance 5801-36 User manual

Homelegance 1647K-1 User manual

Homelegance

Homelegance 1647K-1 User manual

Homelegance 9509MGY/DG-RRPWH User manual

Homelegance

Homelegance 9509MGY/DG-RRPWH User manual

Homelegance 5761-40 User manual

Homelegance

Homelegance 5761-40 User manual

Homelegance 1957-13 User manual

Homelegance

Homelegance 1957-13 User manual

Homelegance 1526 - 64 User manual

Homelegance

Homelegance 1526 - 64 User manual

Homelegance 1711 User manual

Homelegance

Homelegance 1711 User manual

Homelegance B2013RTDC-1 User manual

Homelegance

Homelegance B2013RTDC-1 User manual

Homelegance 1526 User manual

Homelegance

Homelegance 1526 User manual

Homelegance Ameillia 586S User manual

Homelegance

Homelegance Ameillia 586S User manual

Homelegance 9560GY-3CL User manual

Homelegance

Homelegance 9560GY-3CL User manual

Homelegance B2013SBDC User manual

Homelegance

Homelegance B2013SBDC User manual

Homelegance Marrin 1444K-1/K-2/K-3CK User manual

Homelegance

Homelegance Marrin 1444K-1/K-2/K-3CK User manual

Homelegance 1682-108 User manual

Homelegance

Homelegance 1682-108 User manual

Popular Indoor Furnishing manuals by other brands

Tutti Bambini Bears 211334 Assembly instructions

Tutti Bambini

Tutti Bambini Bears 211334 Assembly instructions

Furniture of America CM-BK1037TF Assembly instructions

Furniture of America

Furniture of America CM-BK1037TF Assembly instructions

Rauch M2412 Assembly instructions

Rauch

Rauch M2412 Assembly instructions

TUHOME Furniture MLB 3931 Assembly instructions

TUHOME Furniture

TUHOME Furniture MLB 3931 Assembly instructions

Welltime LKZ 740372 Assembly instructions

Welltime

Welltime LKZ 740372 Assembly instructions

AFi HB-RCM Assembly instructions

AFi

AFi HB-RCM Assembly instructions

FURNITUREBOX NEPAL 2 Assembly instructions

FURNITUREBOX

FURNITUREBOX NEPAL 2 Assembly instructions

TAD SC 910040 Assembly instructions

TAD

TAD SC 910040 Assembly instructions

Coaster 701918 Assembly instructions

Coaster

Coaster 701918 Assembly instructions

Newcastle Systems NB Series 430 Setup and operation manual

Newcastle Systems

Newcastle Systems NB Series 430 Setup and operation manual

Furniture of America FOA-DK5684 Assembly instructions

Furniture of America

Furniture of America FOA-DK5684 Assembly instructions

Coaster 222633 Assembly instructions

Coaster

Coaster 222633 Assembly instructions

TUHOME Furniture MLB5556 Assembly instructions

TUHOME Furniture

TUHOME Furniture MLB5556 Assembly instructions

Grain Montauk MT2211 Assembly instructions

Grain

Grain Montauk MT2211 Assembly instructions

Eagle Group 313035 Assembly instructions

Eagle Group

Eagle Group 313035 Assembly instructions

Donco AI-503-CP Assembly instructions

Donco

Donco AI-503-CP Assembly instructions

Home Decorators Collection WAKEFIELD FZA71024-ST2 Use and care guide

Home Decorators Collection

Home Decorators Collection WAKEFIELD FZA71024-ST2 Use and care guide

SHELF-MADE 0139-BK4 installation instructions

SHELF-MADE

SHELF-MADE 0139-BK4 installation instructions

manuals.online logo
manuals.online logoBrands
  • About & Mission
  • Contact us
  • Privacy Policy
  • Terms and Conditions

Copyright 2025 Manuals.Online. All Rights Reserved.