Placement tips:
- Check that wind can travel freely around the anemometer and is not distorted by nearby buildings,
trees or other structures.
- For better results, place the anemometer at least 3m above local structures and obstacles. The
ground creates a frictional effect to wind ow and will attenuate readings.
- Aim for maximum exposure of the anemometer to the commonest wind directions in your area.
- The ofcial mounting location for anemometers is 10m (33 ft) above ground level in a clear
unobstructed location.
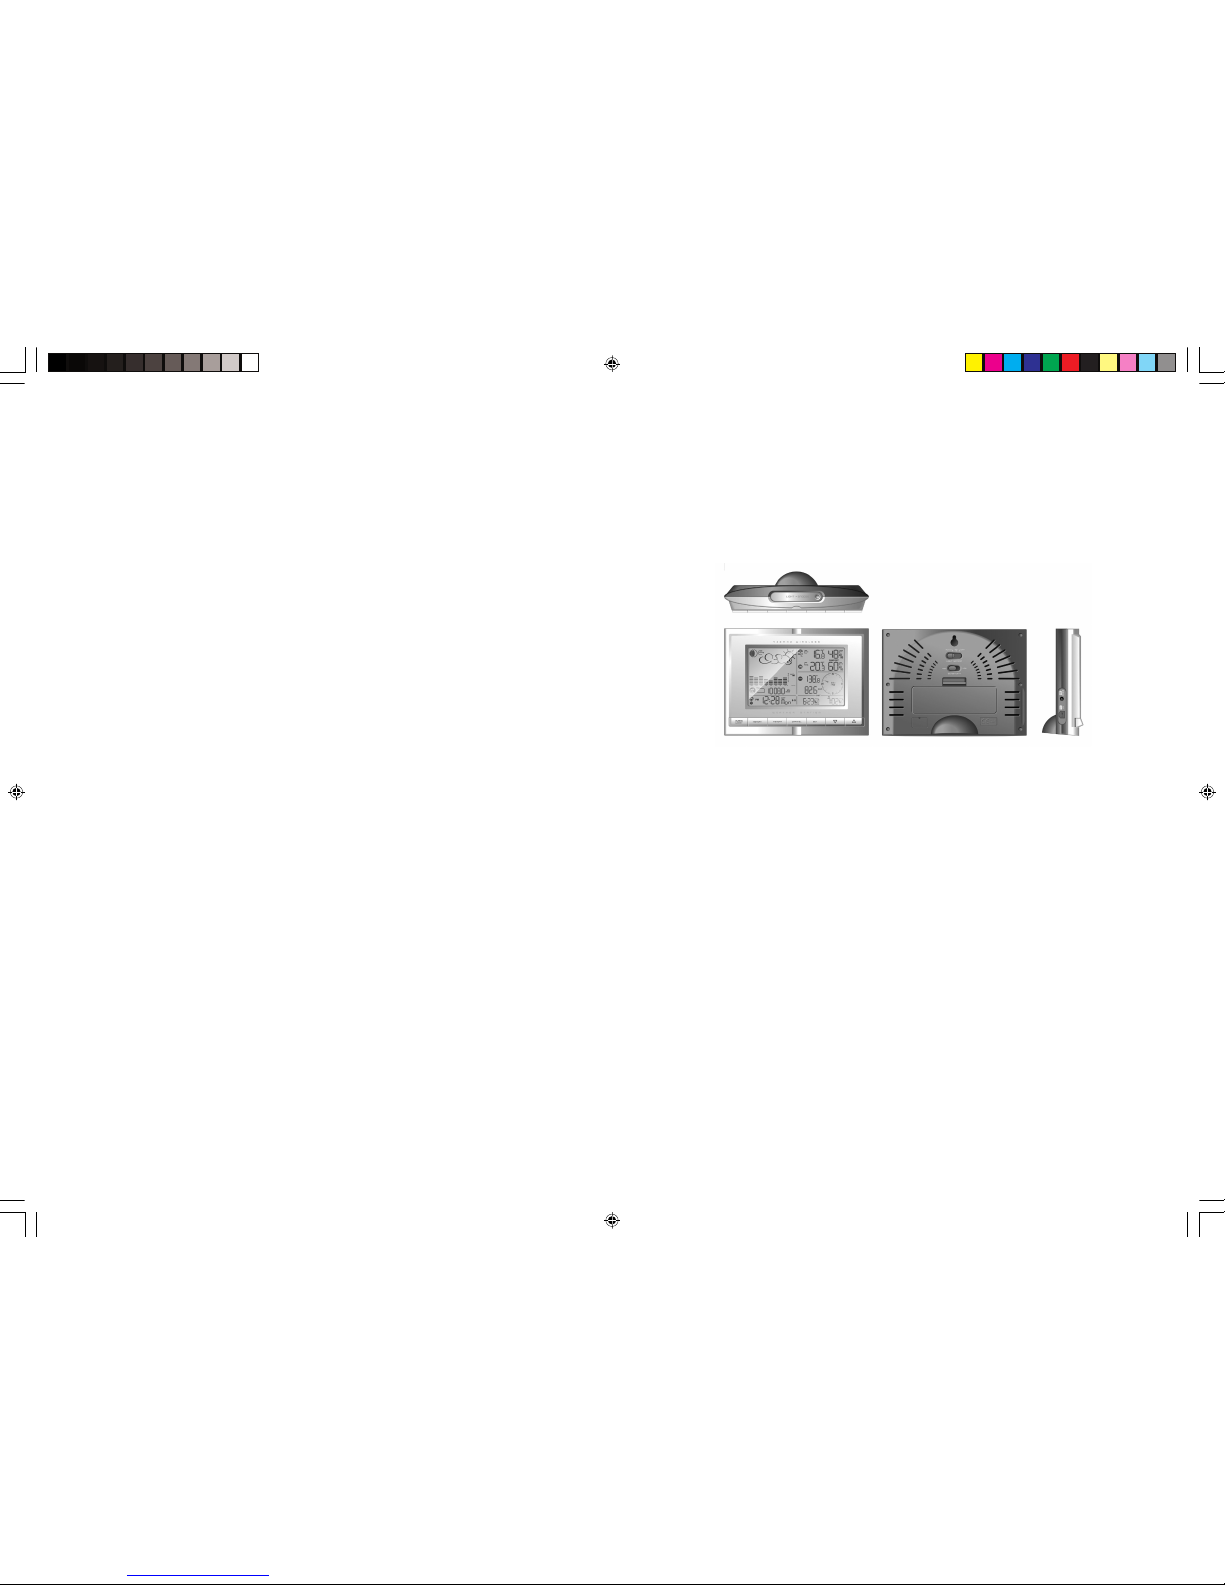
Setting up the Main Console Unit
1. Open the latch at the back of the main console unit.
2. Insert 4 x UM-3 or “AA” size 1.5V batteries according to the polarities shown.
3. Reattach the latch.
4. You are highly recommended to connect the AC/DC adaptor. For the feathure of the automatic
backlight control function, the AC/DC adaptor must be used.
5. If placing the console unit on a table or horizontal surface, fold out the table stand and adjust to
the optimal viewing angle.
6. If mounting the console unit on a wall or vertical surface, fold the table stand back into the unit
and use the tting provided.
Placement tips:
Make sure that the console unit is within receiving range of all remote sensors. Ideally
sensors should be within the line of sight of the console unit. Transmission range may be affected by
trees, metal structures and electronic appliances. Test reception before permanently mounting your
weather station.
The console unit measures indoor temperature, humidity, pressure and receives signals from all
remote sensors and radio-clock broadcasts. Avoid placing the console unit in the following areas:
- Direct sunlight and surfaces which radiate and emit heat.
- Near heating and ventilation devices, such as heating ducts or air conditioners.
- Areas with interference from wireless devices (such as cordless phones, radio headsets, baby
listening devices) and electronic appliances.
Starting up the Main Console Unit
Once the console unit is properly powered, the display will start showing some data and weather
parameters. Wait for a few minutes for the console to nish self-calibration and for the sensor
readings to show up.
If “---” is still displayed for the sensor reading(s), check the wireless transmission path and the bat-
teries for the corresponding sensor.
Placement tips:
- Check that wind can travel freely around the anemometer and is not distorted by nearby buildings,
trees or other structures.
- For better results, place the anemometer at least 3m above local structures and obstacles. The
ground creates a frictional effect to wind ow and will attenuate readings.
- Aim for maximum exposure of the anemometer to the commonest wind directions in your area.
- The ofcial mounting location for anemometers is 10m (33 ft) above ground level in a clear
unobstructed location.
Starting up the Main Console Unit
Once the console unit is properly powered, the display will start showing some data and weather
parameters. Wait for a few minutes for the console to nish self-calibration and for the sensor read-
ings to show up.
If “---” is still displayed for the sensor reading(s), check the wireless transmission path and the bat-
teries for the corresponding sensor.
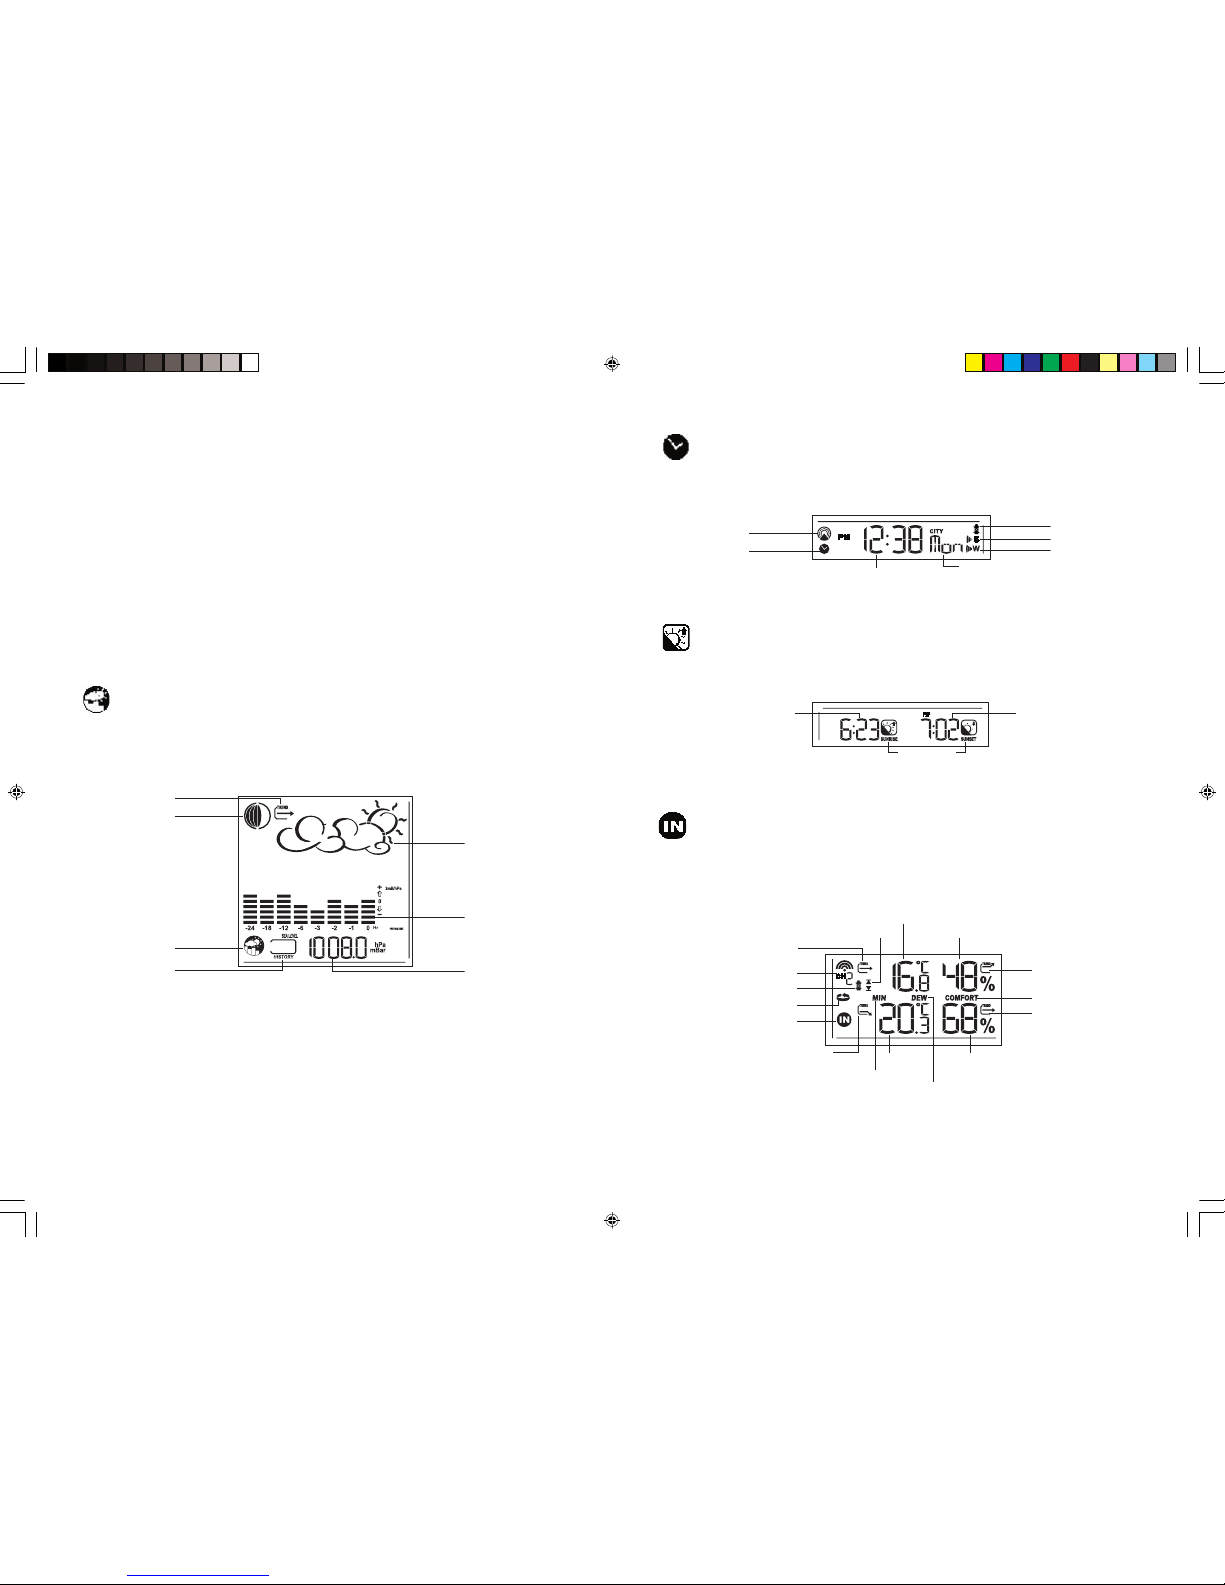
Using your Weather Station
Buttons and Controls
The following controls are available on the main console unit:
UP
DOWN
SET
MEMORY
HISTORY
ALARM/CHART
CHANNEL
LIGHT/SNOOZE
- Switches to next mode in anti-clockwise direction
- Increment for setting parameters
- Switches to next mode in clockwise direction
- Decrement for setting parameters
- Rotates display for current mode
- Press and hold to enter setup or change units
- Conrmation for setting parameters
- Shows records for moon phase, temperature, humidity and wind.
- Shows history for sea-level pressure
- Shows time alarms and alerts for temperature and wind.
- Press and hold to enter alarm/alert setup
- Press and hold in Pressure and Weather Forecast Mode to
view different bar-charts
- Changes temperature and humidity display to selected channel
- Press and hold to enable cycling display of channel tempera
ture and humidity
- Turns on backlight for 5s
- Enters Snooze mode when alarm is activated