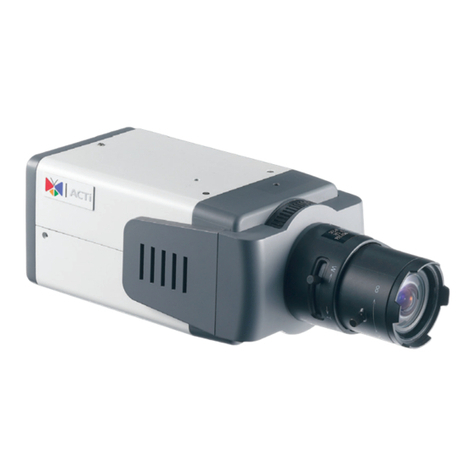
Hootoo HT-IP210F User manual

HooTooWired/Wireless IPCamera
User Manual
Model:HT-IP210F
(HT-IP210FBlack/White)

SecuritySolutionsPartner
2
CONTENTS
1WELCOME....................................................................................................................................................3
1.1 FEATURES................................................................................................................................................................................................3
1.2 PACKING LIST..........................................................................................................................................................................................3
1.3 PRODUCT VIEWS .....................................................................................................................................................................................4
1.4 PC SYSTEM REQUIREMENTS....................................................................................................................................................................5
1.5 HARDWARE INSTRUCTION .......................................................................................................................................................................5
1.6 SOFTWARE INSTALLATION .......................................................................................................................................................................6
2. SOFTWAREOPERATION...........................................................................................................................9
2.1 IP CAMERA TOOL ....................................................................................................................................................................................9
2.2 CAMERA LOGIN.....................................................................................................................................................................................13
2.3 FOR IE BROWSER ..................................................................................................................................................................................15
2.4 FOR SAFARI,FIREFOX,GOOGLE BROWSER............................................................................................................................................17
2.5 FOR MOBILE PHONE..............................................................................................................................................................................18
2.6ACTIVEXMODE (FOR IE BROWSER).....................................................................................................................................................19
2.7 FOR VISITOR..........................................................................................................................................................................................19
2.8 FOR OPERATOR......................................................................................................................................................................................22
2.9 FOR ADMINISTRATOR ............................................................................................................................................................................25
3Settingsas Administrator.........................................................................................................................25
3.1 MULTI-DEVICE SETTINGS......................................................................................................................................................................26
3.2 NETWORK SETTINGS .............................................................................................................................................................................31
3.3 BASIC NETWORK SETTINGS...................................................................................................................................................................31
3.4 WIRELESS LAN SETTINGS......................................................................................................................................................................33
3.5ADSLSETTINGS....................................................................................................................................................................................35
3.6 UPNPSETTINGS ....................................................................................................................................................................................35
3.7 DDNS SERVICE SETTINGS.....................................................................................................................................................................35
3.8 SYSTEM SETTINGS.................................................................................................................................................................................39
3.9ALIAS SETTINGS ....................................................................................................................................................................................40
3.10 DATE &TIME SETTINGS .......................................................................................................................................................................40
3.11 USERS SETTINGS..................................................................................................................................................................................41
3.12 PTZSETTINGS.....................................................................................................................................................................................42
3.13 INDICATOR SETTINGS...........................................................................................................................................................................42
3.14 BACKUP &RESTORE............................................................................................................................................................................42
3.15 OTHER SETTINGS.................................................................................................................................................................................44
3.16 MAIL SERVICE SETTINGS.....................................................................................................................................................................44
3.17 FTPSERVICE SETTINGS.......................................................................................................................................................................46
3.18ALARM SERVICE SETTINGS..................................................................................................................................................................47
3.19 SEND MAILON ALARM........................................................................................................................................................................50
3.20 PATH SETTINGS....................................................................................................................................................................................52
3.21 SERVER PUSH MODE (FOR SAFARI,FIREFOX,GOOGLE BROWSER).....................................................................................................53
3.22 SIGNINMOBILEPHONE........................................................................................................................................................................54
4.APPENDIX.................................................................................................................................................55
4.1 FREQUENTLY ASKED QUESTIONS ..........................................................................................................................................................55
4.2 DEFAULT PARAMETERS..........................................................................................................................................................................57
5. Specifications...........................................................................................................................................58
6. CONTACTING TECHNICALSUPPORT....................................................................................................59

SecuritySolutionsPartner
3
1 WELCOME
Thisisan integrated wireless IPCamera.It combinesahigh qualitydigital Video Camerawithnetwork
featuresand apowerful web server.Youcan access thiscamerafromanywhereon yourlocal network orover
the Internet.
The basicfunction istransmitting remotevideoon yourIPnetwork.The high qualityvideo imagescan be
transmitted with30fpsspeed on the LAN/WANbyusing MJPEG hardwarecompression technology.
It isbased on TCP/IPstandard,built-in WEBserverwhichissupported byInternetExplorer.The management
and maintenanceofyourdeviceissimplyaccessed byusing anetwork toachievethe remoteconfiguration,
start-up and upgradedfirmware.
Youcan usethisIPCameratomonitorlocationssuchasyourhomeand youroffice.Controllingand managing
imagesaresimplydonebyaccessingthe websitethrough the network.
1.1Features
Powerful high-speedvideo protocolprocessor
High-sensitivity1/4 CMOSsensor
Picturetotal 300kpixels
SupportsPTcontrol,Pan 320°,Tilt 120°
Optimized MJPEG video compression fortransmission
Multi-level users management and passwordsdefinition
Embedded Web Serverforusers tovisit byIE
Supportswireless network (WI-FI/802.11/b/g)
SupportsDynamicIP(DDNS) and UPNPLANand Internet (ADSL, Cable Modem)
Notification alarmsformotion detection
Supportsimage snapshots
Supportsmultiple protocols:HTTP/TCP/IP/UDP/SMTP/DDNS/SNTP/DHCP/FTP
SupportsWEP/WPA/WPA2encryption
Supports3G/4G phones, control and surveillancebysmartphones
SupportsFirefox, Safari, Google Chromebrowser.
1.2Packing List
Open the package and check the itemsincluded, the package should contain:
●IPCameraX1
●Wi-FiAntenna X1(onlyavailableforwireless model)
●UserManual X1
●DC PowerSupplyX1
●CD X1
●Network Cable X1
NOTE:Please contactusimmediatelyin case ofanydamaged ormissing contents.

SecuritySolutionsPartner
4
1.3Product Views
1.3.1FrontView
Figure1.1
1.3.2Rear Panel
Figure1.2
Power: DC 5V/2Apowersupply
NetworkIndicators: The green LEDwill be onwhen connected tothe network,the amberLEDwillblinkwhen

SecuritySolutionsPartner
5
dataisbeing transferred
Audio: The connectorisused toplug in external speaker
MIC:The jack isused toplug in anexternal microphone
I/OInterface: Pin 1OutputA, Pin 2Output B,Pin 3Alarminput, Pin 4Input (GND)
ResetButton: Pressand hold the RESETbutton for15s,then the IPCAMwill be resetback tothe default
factorysettings. (Please keep thepower onwhen doingtheRESET)
1.3.3BottomView
Figure1.3
Therearesomestickersat the bottomof IPCAM, suchasMACaddresssticker,QCstickeretc.
Ifyourcameradoesnothavethesestickers,itmaybe afakeone,fakeIPCAMscould notusethe original
firmware.
1.4PC SystemRequirements
System configuration requirements:(Example forviewing fourIPCAM)
CPU: 2.06GHZ orabove
Memory: 256Morabove
Network Card: 10Morabove
DisplayCard: 64Morabovememory
RecommendableOperating system: Windows2000/ XP/ Vista/7
1.5HardwareInstruction
Followthe stepsbelowtosetup yourcamerahardware.Makesuretofolloweachstep carefullytoensurethat
the cameraoperatesproperly.
1. Install the Wi-Fiantenna
2. Plug the poweradaptorintothe camera

SecuritySolutionsPartner
6
3. Plug the network cableintocameraand connect the otherend torouter/switch
4.Ittakesapprox.30 secondstobootup the camera,then you willfindthe IPaddress from “IPCameraTool”
(Figure: 2.1)
5.Whenthe powerand network cableisconnected,the green LEDofthe real panel will turnon,the amber
LEDwillkeep flashing,and the IndicatorLEDin thefrontofthe camerawillflash.(Thisindicatorcan be
controlledbysoftware)
Figure1.4
1.6Software Installation
Note:Forasmootherinstallation process,wesuggest you toturnOFF yourFirewall andAntivirusbefore
install the ActiveX, Don t worry, it issafe.
Install the following software:
1. IPCamera Tool:Open the CD, doubleclick “IPCamSetup.exe”, click next, you will completethe software
installation. (figure1.6/ 1.7/ 1.8)
ForMacusers, pleasefind the searchtool underthe folder “MacOS”, thereisaportable application which
needsno installation andcan be run on Macsimplyafterafewclicks.
2.ActiveX: Doubleclick “Appinstall.exe”—“Next”—“Install”—“Finish”.
Figure1.5
Powerup yourcamera
viathe provided power
adapter
Connectthe RJ45 cable
toyourcameraand the
otherend goestoyour
router

SecuritySolutionsPartner
7
Figure1.6
Figure1.7
Figure1.8
Afterthisdone, the icon “IPCameraTool”willbe displayed on yourdesktop automatically.

SecuritySolutionsPartner
8
CAUTION: Beforeinstalling and usingthe product, pleaseread the following precautionscarefullyand make
suretheyarefullyunderstood.
*Useonlythe poweradaptorincluded withthe product. Using unauthorized poweradapters maycause
damage toyourIPCamera.
*IPCameraterminal shall be installed in an indoorenvironment wherethereisno rain orsnow.
*Do not touchthe lensofthe IPCamera.The optimumfocusrange hasbeen set beforeit isdelivered out of
the factory. Ifyou turnthe lens, itmaycauseincorrectfocusand vagueimages.
*Do not turnthe Pan/Tilt byforce;itmaycausedamage tointernal componentsofthe Pan/Tilt.
*Forfirmwareupgrading, pleasealways contact usat support@hootoo.com first.Failuretodo somayrender
the warrantyvoided.

SecuritySolutionsPartner
9
2. SOFTWAREOPERATION
2.1IPCameraTool
When the camerahasbeen mounted properly,youcan double click theIcon “IPCameraTool”
And adialogboxasFigure1.9will pop up.
Figure1.9
Note: The softwarefindsout cameras IPaddressesautomaticallyoverLAN.
Thereare3scenarios:
1. No IPCamerasfound within LAN.Aftersearching for1minute, the Result Field willshow “notfound IP
Server”andthe programwillshut downautomatically.
2. IPCamerashavebeen installedwithin yourLAN.All the IPCameraswillbe listed andthe total numberis
displayed in the result field asshowninFigure1.9
3.The IPCamerasinstalled within LANdo not sharethe samesubnet withthe monitoring PC.Apromptas
shownin resultfield (prompt: Subnetdoesn tmatch, doubleclick tochange!).Click the left mousebutton to
choosethe promptand click the rightmouse, choose Network Configuration tosetthe staticIPaddress of
the Cameratothe samesubnet asLAN. (Figure2.3)
NOTE: If it shows”Subnetdoesn tmatch,doubleclick to change!”,you can alsochoose ”ObtainIPfrom
DHCPServer”toget adynamicIP. (Figure2.2)
2.1.1SixOptions
Choosethe IPCameralist and right click, therearesixoptions: (Figure2.0)
BasicProperties, Network Configuration, UpgradeFirmware,

SecuritySolutionsPartner
10
Refresh Camera List, FlushArp Buffer, AboutIPCamera Tool.
Figure2.0
2.1.1.1BasicProperties
Thereissomedeviceinformation in the BasicProperties, suchas Device ID, System Firmware Version,
Web UIVersion. Figure2.1)
The Device ID isthe camerasMACID(orMacAddress), whichshouldbe the sameasshowed on the
stickerat the bottomofcamera. Everycamerahasitsunique MACID.
Sometimes, if thereisnoIPaddress shownon the IPCameraTool, itmight be blocked byafirewall.Add the
MACIDtothe router,andgiveitafixed IPoraddthe MACIDasatrusted site.TherearetwoMACAddresses,
one isDeviceMACID, and the otherisWIFIMACID.
WIFI MACID, you canfind it fromthe stickerat the bottomofthe camera, ifthisstickerislost, you can login
yourrouter, check the host status, whichwill showall the WIFIdevicesconnected tothisrouter, you can also
find the IPCAMsWIFIMACIDthere.
Figure2.1
2.1.1.2NetworkConfiguration
Inthispage, you can configurethe Network parameter.

SecuritySolutionsPartner
11
Figure2.2
ObtainIPfromDHCPserver: If checked, the devicewillobtain IPfromDHCPserver. Inotherwords, the
camerawill haveadynamicIP.(MakesuretheRouterwhichthe cameraisconnected tohasDHCPfunction
and DHCPisenabled). (Figure2.2)
Figure2.3
IPaddress: Fill in the IPaddress assigned andmakesureit isin the samesubnet asthe Gateway, andthe
subnet should be the sameasyourcomputerorrouter. (i.e.the firstthreesectionsarethe same)
SubnetMask: The default subnetmask ofthe equipment is: 255.255.255.0.Youcan find the subnetmask
fromyourPCorrouter.
Gateway: Makesureitisin the samesubnet withyourPCsIPaddress.Gatewayisthe LANIPofyourrouter.
DNSServer: IPaddress ofIPSnetwork provider.You can alsoset itsthe sameasthe Gateway.
NOTE:You canfind the SubnetMask, Gateway, DNSServer fromyourrouter, orcheck the local connection
statusofyourcomputertoget all the parameters. NormallytwoDNSservers areoptional.
HttpPort: LANportassignedforthe equipment,defaultis80.You couldsetanotherportnumberlike81,801,
8001 etc.
User: Default administratorusernameis: admin (all lower-case)

SecuritySolutionsPartner
12
Password: Default passwordisblank, no password.
NOTE: When prompt “subnet doesntmatch,double chick tochange!”appears, pleaseset the IPAddress,
SubnetMask, Gateway,DNSServer onceagain, orenable Obtain IPfromDHCPserver.

SecuritySolutionsPartner
13
2.1.1.3UpgradeFirmware
Enterthe correct Usernameand Passwordtoupgrade systemFirmwareand Web UI. If you upgrade the
camera, Please upgradesystem firmware first and then upgradeWeb UI.(Figure2.4)
Figure2.4
Pleasedownload the firmwarepackage beforeupgrade.
Followthe upgrade document in the package carefullytoupgrade. Pleaseread overthe readme.txtfile before
youdo upgrade.
CAUTION: Sometimes,yourcameramaybe damaged ifnotupgradingproperly.
Ifyourcameraworks well withthe current firmware,werecommend that you don t updateit.
NOTE: When upgrading, pleasekeep the poweron, and useadirect connectionwithyournetwork cable.
2.1.1.4RefreshCameraList
Refreshcameralistmanually.
2.1.1.5FlushArpBuffer
When yourcable network and wireless networkof the devicearefixed IPaddresses.Thereisaproblemyou
mayencounterwhensearching forthe cameraIPbut can t open the camerawebpage.Youmaytrytouse
FlushArpBuffer.
2.1.1.6AboutIPCameraTool
Check the IPCameraTool Version andIPCameraActiveXControl Version here.
2.2CameraLogin
Youcan access the camerathrough IPCamera Tool or IE,Firefox,Safari, GoogleChrome orother
browsers.
1. Double click the IPaddress ofthe IPCameralisted (Figure1.9).The default browseryou usewill run
automaticallyand openthe cameralogin interface. (Figure2.6)
DefaultUser:admin
NO password, leaveitblank
Upgrade SystemFirmware
Upgrade WebUI

SecuritySolutionsPartner
14
2.Toaccess the camerabyIEBrowserdirectly,justtype the camerasIPaddress,forexample,ifthe camera s
IPaddress is192.168.1.123:
Figure2.5
Figure2.6
The default usernameis admin, no password
Input the correct usernameand password, the Sign Ininterfacewill pop-up.
Therearethree modestologin (figure2.7).
Figure2.7
(1)ActiveMode (ForIEBrowser): available in IE6.0orabove
(2) “ServerPushMode”: availablein Firefox, Safari,and Google Chromebrowser.
(3) “Sign in mobile phone”: availableforMobile phones
Access thecamera on IE(Recommended)
Access thecameraon Safari, Firefox,
Chrome via ServerPushMode
Access thecamera via VLC Mode
Access thecamera on yourphone

SecuritySolutionsPartner
15
2.3ForIEBrowser
Choose ActiveMode(ForIEBrowser), and sign in.
Figure2.8
The firsttimeyou login tothe camera, you might get the ActiveXpromptasthe pictureabove, pleaseclick the
prompt and choose Run Add-on, refreshand login the cameraagain, then youwill seelivevideo, shownas
below:
Figure2.9

SecuritySolutionsPartner
16
Figure3.0
Note: Ifthereisstill no livevideo afterrunning ActiveX, and ared cross showsinthe centerofthe
screen, orevenjust ablack screen, pleasetrytoenablethe ActiveXoptionsin IEsecuritysettings.
Pleasedo the followsteps:
1. Closethe firewall onyourcomputer.
2.Changethe ActiveXsettings, “IE”browser> “Tool”> “InternetOptions”> “Security”> “CustomLevel”>
“ActiveXcontrol and Plug-ins”,all the ActiveXoptionsset tobe “Enable”:
Also:
Enable:DownloadunsignedActiveXcontrols
Enable:Initializeand scriptActiveXcontrolsnotmarked as safe
Enable:Run ActiveXcontrolsandplu-ins

SecuritySolutionsPartner
17
Figure3.1
Inaddition:you canalsoclick “Start”menu->“InternetExplorer”,choose “Internetattributes “toenter,orvia
“ControlPanel”->“InternetExplorer”, entertoSecuritysetting.
IfActiveXisrunning,butyou still could notsee livevideo,pleasetryusing anotherportnumber.Don tuseport
80, useotherportssuchas128, 1008 etc.
Figure3.2
NOTE: Makesurethat the firewall oranti-virussoftwaredoesn t block the softwareorActiveX. Ifyou couldn t
see livevideo, pleasecloseyourfirewall oranti-virussoftware, and tryagain.
2.4For Safari, Firefox, GoogleBrowser
Choose Server Push Mode(ForSafari, Firefox, GoogleBrowser), and sign in
ServerPushMode doesn tsupportActiveX,sosomefunctionsarenotavailable,suchas Play, Stop, Record,
Audio, Talk etc. ifyou want tousethesefunctions, pleaseuseIEbrowser.
DoNOTuse 80

SecuritySolutionsPartner
18
Figure3.3
2.5For MobilePhone
Choose Sign in mobilephone,and sign in.
Mobile phone doesn t supportActiveX, onlysomebasicfunctionscan be availablein thismode.
It supportsmostsmartphoneswitha3G/4Gconnection.Usually,ifthe mobile phonesupportsnetwork video,
then it can work withourIPCamera.

SecuritySolutionsPartner
19
Figure3.4
2.6ActiveXMode (For IEBrowser)
Loginthe camerain ActiveXmode,the main UserInterfacewill beshownasbelow:
NOTE: Thereare3levelsof users, Visitor,Operator,Administrator, ifyouloginwithdifferent users, the
features/operationsaredifferent. (See 3.11User Settings,Figure8.5)
2.7For Visitor
When logged in asVisitor, you can enterthe IPCameraforvisitor.
Visitoristhe lowest levelwithonlysomeoperationsavailable
Figure3.5
Channels:
OurIEsoftwaresupports9channelstotal. Clicking can get different windows.
: Click thisone, you can viewthe main channel ofthe camera.
: Click thisone; you can view4Channelsofcamerasthatareconnected,fromCH1 toCH4.
:Click thisone; youcanview9Channelsofcamerasthatareconnected,fromCH1 toCH9.
NOTE:Ifyou wantto view4/9channels, you should settheMulti-Device first(See 3.1Multi-Device
Settings)

SecuritySolutionsPartner
20
StatusofChannels:
Thereare9icons at the bottomof the UIwhichshowthestatusofeachchannelofthe camera.
:Greycolor,meansthereisno deviceconnectedtothe main devicefromthischannel.
: Green color,meansthe deviceisconnected fromthischannel, and itworks well.
: Red color,meansthe deviceofthischannel isrecording.
: Yellowcolor,meansset thischannel in multi-devicealready, but itfailstoconnect tothe main device.
OSDSettings:
è è
Figure3.6
OSD: Means “On-ScreenDisplay”, click “Audio video”> “OSD”,set displaydateandtimeon thevideo.
Disabled: Click thisone,meansclearthe OSD.
Color:Can set the OSDtext coloras black,yellow,red, white,blue etc.
Add time stamp on record: Click this, therewill be timeOSDon recordvideo files.
Table of contents
Other Hootoo IP Camera manuals

Hootoo
Hootoo HT-IP009HDP User manual

Hootoo
Hootoo HT-IP211HDP User manual

Hootoo
Hootoo HT-IP210P User manual

Hootoo
Hootoo HT-IP211HDP Assembly instructions

Hootoo
Hootoo HT-IP210P User manual

Hootoo
Hootoo HT-IP212HDP User manual

Hootoo
Hootoo IP Wireless / Wired Camera User manual

Hootoo
Hootoo HT-IP212HDP Assembly instructions

Hootoo
Hootoo HT-IP212HDP Instruction manual

Hootoo
Hootoo HT-IP210P User manual